Chapters
Table of Contents

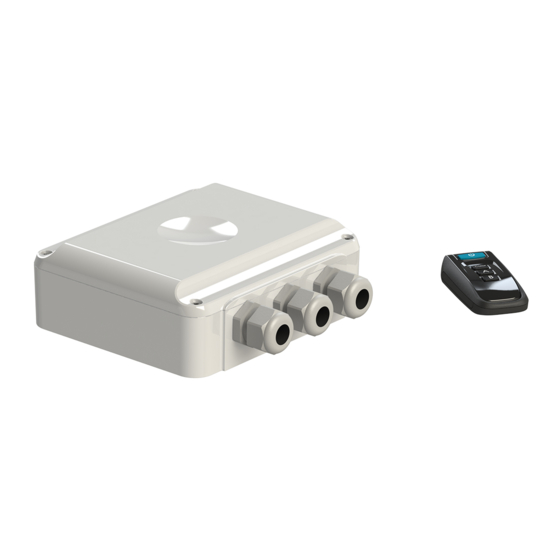
Related Manuals for Duratech PLP-REM


Summary of Contents for Duratech PLP-REM
- Page 1 Manual English....Page 3 PLP-REM Nederlands..Pagina 21 Français....Page 39 Deutsch....Seite 57 Español.....Página 75 20-08-21 LINK Driver...
-
Page 3: Table Of Contents
Table of contents Technical specifications Page 4 General Specifications ............Page 5 Logic board ................Installation Instructions Single PLP-REM unit ............... Page 6 Multiple PLP-REM installation ..........Page 7 Operation modes .................. Page 8 Page 9 DIP switch functionalities .............. -
Page 4: Technical Specifications
Technical specifications General specifications Input Voltage: 12VAC 50Hz ± 10% Max rating “12VAC TO LAMPS” contact 58A / 12VAC Max rating relay contact A &B 16A / 250 VAC Max switching power A & B 4000VA RF band 868 MHz Ambient Air Temperature: 0°C to +40°C Humidity... -
Page 5: Logic Board
To connect to home automation system (see page 14) DMX input/outpout A/B output 12VAC connection The PLP-REM can act For auxiliary circuits terminals as a DMX receiver with Acts as a SPST To connect the pool DMX passthrough (single-pole, single-... -
Page 6: Installation Instructions
Single PLP-REM unit Connect a 12VAC magnetic transformer to the “12VAC FROM TRANSFORMER” terminal of the PLP-REM. Connect the pool lights to the “12VAC TO LAMPS” terminal in the PLP-REM. Install the filter (included in box) to the primary circuit (230VAC side) of the transformer The “12VAC TO LAMPS”... -
Page 7: Multiple Plp-Rem Installation
(CAN L & H) Next, set the DIP switches on the PLP-REM’s to the correct MASTER/SLAVE setting. The first PLP-REM will be the MASTER. All the others will be SLAVE’s. Refer to page 9 for Master/Slave DIP switch info. -
Page 8: Operation Modes
Operation Modes The PLP-REM controller has 2 main operation modes: “ON/OFF control mode” & “PLC control mode”. Each mode has it’s own functionalities: ON/OFF Compatible lamps Switch lamps ON/OFF Change lamp color Operate Relay A & B Dimming lamps DMX control... -
Page 9: Dip Switch Functionalities
DIP switch functionalities The DIP switch on the main circuit board of the PLP-REM allows the user to customise the way the PLP-REM operates. CAUTION: Always switch off the main power supply to the PLP-REM before changing the DIP switches... -
Page 10: Transmitter Functions
Transmitter functions OPERATION MODE: PLC (default mode) Short push (< 1 sec): Toggle all lamps ON or OFF Long push (> 2 sec All lamps & “12VAC TO LAMPS” relay are turned OFF Short push: Go to next color program Long push: Toggle output A ON/OFF Short push:... -
Page 11: Replacing Transmitter Keypad
All handheld transmitters are already paired in the factory and ready to use. In case a problem arises, the pairing process can be done as below: 1) Press the pairing button on the circuit board, inside the PLP-REM ---> The BLUE LED will start to blink 2) Within 25 seconds, push any button on the handheld transmitter. -
Page 12: Dmx 512 Communication
Setting the DMX address of the PLP-REM: Select the desired number on the address dial. The chosen number deter- mines the DMX addresses of the PLP-REM & lamps. Each lamp uses 3 bytes of DMX data (R-G-B), and all lamps receive the same DMX data from the PLP-REM. -
Page 13: Multiple Plp-Rem Installation
Multiple PLP-REM installation 1) Connect the DMX panel to the “DMX IN” port of the first PLP-REM 2) Connect the PLP-REM’s with each other (open loop): DMX OUT --> DMX IN (polarized terminals + -) 3) Set the DMX address for each PLP-REM via the address dial. -
Page 14: Rs-485 Communication
12VAC 230VAC Multiple PLP-REM installation 1) Connect the PLP-REM’s with each other via the CAN bus (see page 7) 2) Make sure DIP switch 1 is switched OFF 3) Make sure the lights are turned ON with the remote first. -
Page 15: Rs-485 Command Set
RS-485 Command set... -
Page 16: Reset Procedure
RESET procedure RESET procedure for the control board Make sure the PLP-REM is powered ON Press and hold the RESET button on the logic board The blue LED will light up Release the RESET button when the blue LED turns off The control board has been RESET. -
Page 17: Troubleshooting
Switch the PLP-REM to ON/OFF mode (DIP switch nr 1) and check if the lamps work Handheld transmitter does not • Buy a new TX868 transmitter that function anymore after firmware has updated firmware update of the PLP-REM for Link- Touch compatibility... -
Page 18: Pool Light Wiring Instructions
Please refer to the manual of your DURAVISION® pool light Manual downloads: www.duratech.be/downloads Not following the instructions for cable cross section and transformer VA ratings may result in lamp malfunctioning and may result in having to rewire the installation. The manufacturer's warranty does not apply in this situation. -
Page 19: Wiring Remark
Wiring remarks 1. Third party equipment such as frequency inverters and electric motors can generate excessive noise on the 230VAC / 400VAC power line. This noise might be injected into the adjacent 12VAC power line and disturb the power line communication towards the DURAVISION lights. Keep 230VAC / 400VAC power line cables at least 50cm separated over their full length from the 12VAC power line towards any RGB lights Do not mix 12VAC and 230VAC / 400VAC power line cables into the same cable... - Page 21 Technische specificaties Pagina 22 Algemene Specificaties ............Pagina 23 Controller board ..............Installatie Instructies Enkele PLP-REM unit .............. Pagina 24 Installatie met meerdere PLP-REM’s ........Pagina 25 Werkingsmodus ..................Pagina 26 Pagina 27 DIP schakelaar functies ................ Afstandsbediening functies Pagina 28 Werkingsmodus: PLC ..............
- Page 22 Technische specificaties Algemene specificaties Ingangsspanning: 12VAC 50Hz ± 10% Max stroom contact “12VAC NAAR LAMPEN” 58A / 12VAC Max stroom relais contact A &B 16A / 250 VAC Max schakel vermogen A & B 4000VA RF band 868 MHz Omgevingstemperatuur: 0°C to +40°C Vochtigheidsgraad: 10% to 90% RH...
- Page 23 Om te verbinden met domotica systemen (zie pagina 32) DMX ingang/uitgang A/B uitgang 12VAC aansluitklemmen De PLP-REM kan werken als DMX Om de zwembadverlichting Voor additionele circuits. ontvanger (met DMX doorgang- op aan te sluiten Gedraagt zich als een SPST...
- Page 24 Installatie instructies Enkele PLP-REM unit Verbind een 12VAC transformator met de “12VAC FROM TRANSFORMER” aansluiting van de PLP-REM. Verbind de zwembadverlichting met de “12VAC TO LAMPS” aansluiting van de PLP-REM. Installeer de capaciteit (meegeleverd in verpakking) met het primaire circuit (230VAC side) van de transformator.
- Page 25 Verbind de PLP-REM’s met elkaar via de CAN bus: Verbind de CAN klemmen van de eerste PLP-REM met de CAN klemmen van de tweede PLP-REM, verbind dan de tweede met de derde, enzovoort... (zie tekening onder)* Respecteer de polariteit van de aansluitklemmen! (CAN L &...
- Page 26 Werkingsmodus De PLP-REM kan gebruikt worden in 2 hoofd werkingsmodi: “AAN/UIT bedieningsmodus” & “PLC bedieningsmodus”. Elke modus heeft een aantal specifieke functies: AAN/UIT Compatibele lampen schakel lampen AAN/UIT Verander kleur van lamp Bedien Relais A & B Dimmen van de lampen...
- Page 27 DIP switch functies De DIP switch op het moederbord van de PLP-REM laat toe om een aantal functies van de PLP-REM aan te passen: WAARSCHUWING: Zorg ervoor dat de voedingsspanning van de PLP-REM uitgeschakeld is, vooraleer de DIP switches te veranderen...
- Page 28 Afstandsbediening functies WERKINGSMODUS: PLC (standaard modus) Kort drukken (< 1 sec): Zet de lampen AAN of UIT Lang drukken (> 2 sec alle lampen & de “12VAC TO LAMPS” relais UIT Kort drukken: Ga naar het volgende kleurprogramma Lang drukken: Zet de uitgang A AAN/UIT Kort drukken: Ga naar het vorige kleurprogramma...
- Page 29 De afstandsbediening is reeds gekoppeld van in de febriek. In probleem- gevallen kan men de afstandsbediening ook manueel koppelen: 1) Druk op de “koppel knop” binnenin de PLP-REM ---> De BLAUWE LED begint te knipperen. 2) Druk op eender welke knop van de afstandsbediening binnen de 25sec.
- Page 30 12VAC 230VAC Adres toewijzer instelling DMX adres van de PLP-REM instellen: Kies een positie van de adres toewijzer. Het gekozen cijfer bepaalt de DMX adressen van de PLP-REM & lampen. Elke lamp gebruikt 3 bytes DMX data (R-G-B) en alle lampen ontvangen de- zelfde DMX data van de PLP-REM.
- Page 31 Installatie met meerdere PLP-REM’s 1) Verbindt het DMX paneel met de “DMX IN” poort van de eerste PLP-REM 2) Verbindt de PLP-REM’s met elkaar zoals op onderstaande foto DMX OUT --> DMX IN (gepolariseerde aansluiting + -) 3) Stel het DMX adres in voor elke PLP-REM via de adres toewijzer.
- Page 32 12VAC 230VAC Installatie met meerdere PLP-REM’s 1) Verbindt de PLP-REM’s met elkaar via de CAN bus (zie pagina 25) 2) Zorg ervoor dat DIP schakelaar 1 is uitgeschakeld 3) Zorg ervoor dat de lampen aan staan via de afstandsbediening 4) Verbindt de eerste PLP-REM met de RS-485 bron zoals hierboven beschreven.
- Page 33 RS-485 Commando’s...
- Page 34 RESET procedure RESET procedure voor het controller bord Zorg ervoor dat de PLP-REM AAN staat. Druk op de RESET knop op het controller board. De blauwe LED gaat branden Laat de RESET knop los van zodra de blauwe LED uitgaat Het controller board is nu ge-RESET.
- Page 35 Voer een RESET procedure uit niet • Verifieer of alle verbindingen ge- maakt zijn zoals op de electrische schema’s • Zet de PLP-REM in AAN/UIT mode (DIP switch nr 1) en controleer of de lampen werken • Koop nieuwe TX868...
- Page 36 Please refer to the manual of your DURAVISION® pool light Manual downloads: www.duratech.be/downloads Not following the instructions for cable cross section and transformer VA ratings may result in lamp malfunctioning and may result in having to rewire the installation. The manufacturer's warranty does not apply in this situation.
- Page 37 Kablering opmerkingen 1. Andere toestellen zoals frequentie inverters of electrische motors kunnen veel ruis veroorzaken op de 230VAC / 400VAC spanningslijn. Het is mogelijk dat dit ruis geïnjecteerd wordt in een nabijgelegen 12VAC kabel, en dusdanig de communicatie naar de zwembadlampen verstoord.
- Page 39 Sommaire Spécifications techniques Page 40 Spécifications générales ............Page 41 Circuit imprimé ................ Instructions d’installation Installation d’un seul appareil PLP-REM ......Page 42 Installation de plusieurs appareils PLP-REM ...... Page 43 Modes de fonctionnement ..............Page 44 Page 45 Fonctions du commutateur DIP ............
-
Page 40: Spécifications Techniques
Spécifications techniques Spécifications générales Tension d’entrée: 12VAC 50Hz ± 10% Valeur max du contact « 12VAC TO LAMPS » 58A / 12VAC Valeurs maximales des contacts de relais A & B 16A / 250 VAC Puissance de commutation maximale A & B 4000VA Bande RF 868 MHz... - Page 41 (voir page 50) Sorties A/B Entrées/sorties DMX Bornes de Pour des circuits auxilia- Le PLP-REM peut servir raccordement 12 ires. Sert de commuta- de récepteur DMX avec teur SPST (single-pole, intermédiaire DMX Pour raccorder les single-throw)
-
Page 42: Instructions D'installation
Installation d’un seul appareil PLP-REM Raccordez un transformateur magnétique de 12 VAC aux bornes “12VAC FROM TRANSFORMER” du PLP-REM. Raccordez les lampes de la piscine aux bornes “12VAC TO LAMPS” dans le PLP-REM. Installez le filtre (inclus dan la boîte) au circuit primaire ( côté 230VAC) du transformateur Les relais de contact “12VAC TO LAMPS”... -
Page 43: Installation De Plusieurs Appareils Plp-Rem
PLP-REM peuvent être raccordés entre eux. Ainsi, une synchroni- sation parfaite de toutes les lampes de la piscine reste garantie Les PLP-REM doivent pouvoir communiquer entre eux, de manière à ce que toutes les lampes soient parfaitement synchronisées. Raccordez les PLP-REM entre eux via le bus CAN. -
Page 44: Modes De Fonctionnement
Modes de fonctionnement Le contrôleur PLP-REM offre 2 modes de fonctionnement principaux : « Mode de fonctionnement ON/OFF » & « Mode de fonctionnement PLC ». Chaque mode offre ses propres fonctions : ON/OFF Lampes compatibles Allumer/éteindre les lampes Changer la couleur de la lampe Contrôler les relais A &... -
Page 45: Fonctions Du Commutateur Dip
Fonctions du commutateur DIP Le commutateur DIP intégré sur le circuit imprimé principal du PLP-REM per- met à l’utilisateur de personnaliser la manière dont le PLP-REM fonctionne. ATTENTION: Toujours couper l’alimentation électrique principale PLP-REM avant de changer les commutateurs DIP... -
Page 46: Fonctions De La Télécommande
Fonctions de la télécommande MODE DE FONCTIONNEMENT: PLC (mode par défaut) Appuyer brièvement (< 1 sec) : Allumer ou éteindre les lampes Appuyer longuement (> 2 sec Toutes les lampes & le relais “12VAC TO LAMPS” sont éteints Appuyer brièvement: Aller au programme de couleur suivant Appuyer longuement: Allumer/éteindre la sortie A... -
Page 47: Remplacer Le Clavier De La Télécommande
PLC Clavier pour mode ON/OFF Appairer la télécommande portable au PLP-REM Toutes les télécommandes portables sont appairées au préalable en usine et prêtes à être util- isées. Si un problème devait survenir, le processus d’appairage peut être réalisé comme suit 1) Appuyez sur le bouton d’appairage sur le petit circuit imprimé... -
Page 48: Avec Un Seul Appareil Plp-Rem
Définir l’adresse DMX du PLP-REM : Sélectionnez le chiffre désiré sur la molette d’adresse. Le chiffre choisi détermine les adresses DMX du PLP-REM et des lampes. Chaque lampe utilise 3 octets de données DMX (R-G-B), et toutes les lampes reçoivent les mêmes données DMX depuis le PLP-REM. -
Page 49: Avec Plusieurs Appareils Plp-Rem
Avec plusieurs appareils PLP-REM 1) Raccordez le panneau DMX au port « DMX IN » du premier PLP-REM 2) Raccordez les PLP-REM entre eux (boucle ouverte) : DMX OUT --> DMX IN (bornes polarisées + -) 3) Définissez l’adresse DMX pour chaque PLP-REM via la molette d’adresse. -
Page 50: Communication Via Rs-485
12VAC 230VAC Avec plusieurs appareils PLP-REM 1) Connectez les PLP-REM entre eux via le bus CAN (voir page 47) 2) Assurez-vous que le commutateur DIP 1 est désactivé 3) Assurez-vous que les lumières sont allumées via la télécommande 4) Connectez le premier PLP-REM à la source RS-485 comme ci-dessus ... -
Page 51: Jeu D'instructions Pour Rs-485
RS-485 Command set... -
Page 52: Procédure De Réinitialisation
Procédure de réinitialisation (RESET) Procédure de réinitialisation du circuit imprimé Assurez-vous que le PLP-REM est sous tension Appuyez et maintenez le bouton RÉINITIALISER sur la carte logique La LED bleue s’allume La LED bleue s’allumera. Relâchez la touche RÉINITIALISER lorsque la LED bleue s’éteint... -
Page 53: Résolution Des Problèmes
Résolution des problèmes PROBLÈME SOLUTION Le PLP-REM ne réagit pas aux • Suivez la procédure de réinitialisa- commandes de la tion télécommande • Vérifiez la pile de la télécommande portable (voir p. 52) • La télécommande n’a pas été appairée correctement avec le PLP-REM. -
Page 54: Instructions De Câblage De La Piscine
Please refer to the manual of your DURAVISION® pool light Manual downloads: www.duratech.be/downloads Not following the instructions for cable cross section and transformer VA ratings may result in lamp malfunctioning and may result in having to rewire the installation. The manufacturer's warranty does not apply in this situation. -
Page 55: Instructions De Câblage - Remarque
Instructions de câblage - remarques 1. Autres équipements comme variateurs de fréquence ou les moteurs électriques peuvent générer un bruit excessif sur la ligne électrique 230 VAC / 400 VAC. Ce bruit pourrait être injecté dans la ligne électrique 12VAC adjacente et perturber la communication des signaux vers les lumières DURAVISION Gardez les câbles de ligne 230 VAC / 400 VAC au moins 50cm séparés sur leur longeur totale de la ligne 12 VAC vers toutes les lumières RGB... - Page 57 Inhalt Technische Angaben Seite 58 Allgemeine Spezifikation ............Seite 59 Logikplatine ................Installationsanweisungen Einzelinstallation der PLP-REM Einheit ......Seite 60 Mehrfachinstallation von PLP-REM ........Seite 61 Betriebsarten ..................Seite 62 Seite 63 Funktionalitäten des DIP-schalters ............ Funktionen des Senders Seite 64 Betriebsmodus: PLC ...............
-
Page 58: Technische Angaben
Technische Angaben Allgemeine Spezifikationen Eingangsspannung: 12VAC 50Hz ± 10% Max Belastbarkeit “12VAC ZU LAMPEN” Kontact 58A / 12VAC Max Bemessungsrelaiskontakt A &B 16A / 250 VAC Max Schaltleistung A & B 4000VA RF-Band 868 MHz Umgebungstemperatur: 0°C bis +40°C Luftfeuchtigkeit 10% bis 90% RH Night kondensierend Schutzklasse:... -
Page 59: Logikplatine
Verbindung Für die Verbindung mit einem Hausautomations- system (siehe Seite DMX eingang/Ausgang 12VAC Anschlussklemmen A/B Ausgang Der PLP-REM kann wie ein um die Für die Hilfschaltungen DMX Empfänger fungieren mit Pool-Beleuchtung zu verbinden Fungiert als SPST-Schal- DMX-Pass-Through ter (Single-ploe, single... -
Page 60: Installationsanweisungen
Installationsanweisungen Einzelinstallation der PLP-REM-Einheit Verbinden Sie einen 12VAC magnetischen Transformator mit dem “12VAC VOM TRANSFORMATOR” Anschluss im PLP-REM. Verbinden Sie die Pool beleuchtung am “12VAC ZU LAMEPN” Anschluss im PLP-REM. Installieren Sie den Filter (im Lieferumfang enthalten) am Primärkreis (230VAC Seite) des Transformators. -
Page 61: Mehrfachinstallation Von Plp-Rem
PLP-REM Einheit (siehe unten). Beachten Sie die Polung der Anschlüsse! (CAN L & H) Stellen Sie als nächstes die DIP-Schalter am PLP-REM auf die richtige MAS- TER / SLAVE-Einstellung. Der erste PLP-REM wird der Master sein. Alle anderen sind Sklaven. Informationen zu den Master / Slave-DIP-Schaltern finden Sie auf Seite 63. -
Page 62: Betriebsarten
Betriebsarten Die PLP-REM-Steuerung hat 2 Hauptbetriebsarten: „der Modus Zweipunktsteuerung“ & „der Modus PLC-Steuerung“. Jeder Mo- dus hat seine eigenen Funktionalitäten: Zweipunktsteuerung PLC Steuerung Kompatible Lampen Lampen ein/ausschalten Lampenfarbe ändern Steuert Relay A & B Dimmt die Lampen NEIN DMX Steuerung... -
Page 63: Funktionalitäten Des Dip-Schalters
DIP-Schalter-Funktionalitäten Die DIP-Schalter auf der Hauptplatine des PLP-REM ermöglicht es den Benu- tzern, selbst festzulegen, wie die PLP-REM funktioniert. VORSICHT: Schalten Sie immer die Netzspannung aus PLP-REM, bevor Sie die DIP-Schalter wechseln Position EIN Position AUS DIP SWITCH Function Einstellung... -
Page 64: Betriebsmodus: Plc
Senderfunktionen BETRIEBSMODUS: PLC (Standardmodus) Kurzes Drücken (<1 Sek.): Schaltet die Lampe zwischen EIN und AUS(1) Langes Drücken (>2 Sek.(2)): Alle Lampen & das „12VAC ZU LAMPEN“ Relay sind -geschaltet Kurzes Drücken: Zum nächsten Farbprogramm wechseln Langes Drücken: Schaltet den Ausgang A AUS/EIN Kurzes Drücken: Zum vorangegangenen Farbprogramm zurückkehren Langes Drücken:... - Page 65 Verwendung. Im Falle, dass ein Problem auftaucht, kann der Kopplungsprozess wie unten beschrieben durchgeführt werden: 1) Drücken Sie die Paarungstaste auf der kleinen Leiterplatte im PLP-REM ---> Die BLAUE LED beginnt zu blinken 2) Innerhalb von 25 Sekunden drücken Sie eine beliebige Taste auf dem Handgerät.
-
Page 66: Dmx 512 Kommunikation
Die Einrichtung der DMX-Adresse des PLP-REM: Wählen Sie die gewünschte Nummer auf der Adresswahl. Die gewählten Nummern bestimmen die DMX-Adressen des PLP-REM & der Lampen. Jede Lampe braucht 3 Bytes der DMX Daten (R-G-B) und alle Lampen empfangen die gleichen DMX-Daten vom PLP-REM. -
Page 67: Mehrfachinstallation Von Plp-Rem
2) Verbinden Sie die PLP-REM Einheiten miteinander (offene Schleife): DMX OUT --> DMX IN (gepolte Anschlüsse + -) 3) richten Sie jeweils eine DMX Adresse für jede PLP-REM Einheit über die Adresswahl ein. - Option 1: Alle PLP-REM Einheiten können auf die gleiche Adresse... -
Page 68: Rs-485 Kommunikation
2) Stellen Sie sicher, dass der DIP-Schalter 1 auf OFF steht 3) Vergewissern Sie sich, dass die Lichter mit der Fernbedienung ein- geschaltet sind. 4) Schließen Sie den ersten PLP-REM wie beschrieben an die RS-485- Quelle an über. Dieser PLP-REM wird der Master sein. 5) Kommunikationseinstellungen und Befehlsliste: siehe oben... - Page 69 RS-485 Command set...
-
Page 70: Rückstell-Prozedur
RÜCKSTELL-Prozedur (RESET) RÜCKSTELL-Prozedur für die Steuertafel Stellen Sie sicher, dass der PLP-REM eingeschaltet ist Halten Sie die RÜCKSTELL-Taste auf der Logikplatine gedrückt Die blaue LED leuchtet auf Lassen Sie die RÜCKSTELL-Taste los, wenn die blaue LED leuchtet Die Steuertafel wurde ZURÜCKGESTELLT und alle Sender sind ungepaart. -
Page 71: Fehlerdiagnose
• Prüfen Sie, ob alle Verbindungen entsprechend dem elektrischen Schema verbunden sind. • Schalten Sie den PLP-REM in den EIN/ AUS-Modus (DIP-Schalter Nr. 1) und prüfen Sie, ob die Lampen funktionieren. • Kaufen Sie einen neuen Der Handsender funktioniert nach... -
Page 72: Anleitung Zur Verkabelung
Please refer to the manual of your DURAVISION® pool light Manual downloads: www.duratech.be/downloads Not following the instructions for cable cross section and transformer VA ratings may result in lamp malfunctioning and may result in having to rewire the installation. The manufacturer's warranty does not apply in this situation. -
Page 73: Verkabelung Bemerkung
Verkabelung Bemerkung 1. Andere Geräte wie Frequenzumrichter und Elektromotoren können übermäßiges Rauschen an der Stromversorgung 230VAC / 400VAC erzeugen. Dieses Rauschen könnte in die angrenzende 12VAC Stromleitung eingespeist werden und stören die Stromleitung Kommunikation zu den DURAVISION Lichter. Halten Sie 230VAC / 400VAC Stromleitung Kabel mindestens 50cm getrennt über ihre volle Länge von der 12VAC Stromleitung zu jedem RGB Lichter Mischen Sie keine 12VAC und 230VAC / 400VAC Netzkabel in das gleiche Kabeltrasse... - Page 75 Índice Especi caciones técnicas Page 76 Especi caciones generales ............ Page 77 Tablero lógico ................Instrucciones de instalación Unidad sencilla PLP-REM ............Page 78 Instalación múltiple PLP-REM ..........Page 79 Modos de operación ................Page 80 Page 81 Funcionalidades del interruptor DIP ..........
-
Page 76: Especi Caciones Técnicas
Especi caciones técnicas Especi caciones generales Voltaje de entrada: 12VAC 50Hz ± 10% Índice máximo de contacto “12 V CA a LÁMPARAS 58A / 12VAC Índice máximo de contacto relé A y B 16A / 250 VAC Potencia máxima de cambio A y B 4000VA Banda RF 868 MHz... -
Page 77: Tablero Lógico
Conexión RS-485 Para conectar al sistema automático local (ver página 86) Entrada/salida DMX Salida A/B Conexión El PLP-REM puede actuar Para circuitos terminales 12VAC como receptor DMX con auxiliares. Actúa Para conectar a luces paso DMX ugh como interruptor de piscina... -
Page 78: Instrucciones De Instalación
Instrucciones de instalación Sola unidad de PLP-REM Conecte un transformador magnético 12 V CA con el terminal “12 V CA DEL TRANSFORMADOR” del PLP-REM. Conecte las luces de la piscina con el terminal “12 V CA a las LÁMPARAS” en el PLP-REM. -
Page 79: Instalación Múltiple Plp-Rem
El PLP-REM necesita comunicarse entre sí para garantizar que todas las lámparas estén en perfecta sincronización. Se prefiere si varios PLP-REM están a una distancia muy larga de cada uno. Conecte los PLP-REM entre sí con el bus CAN... -
Page 80: Modos De Operación
Modos de operación El controlador PLP-REM tiene 2 modos de operación principales: “Modo de control CON./DESC.” y “Modo de control PLC”. Cada modo tiene sus propias funcionalidades: Control CONECTADO/ Control del PLC DESCONECTADO Lámparas compatibles Cambiar lámparas CON./DESC. SÍ SÍ... -
Page 81: Funcionalidades Del Interruptor Dip
Funcionalidades del interruptor DIP El interruptor DIP en la placa de circuito principal del PLP-REM permite que el usuario modi que la manera de actuar del PLP-REM. PRECAUCIÓN: Apague siempre la fuente de alimentación principal al PLP-REM antes de cambiar los interruptores DIP Posición CON. -
Page 82: Funciones Del Transmisor
Funciones del transmisor MODO DE OPERACIÓN: PLC (mode por defecto) Pulsación corta (< 1 segundo): Cambie la lámpara a CONECTADA o DESCONECTADA Pulsación larga (> 2 segundos Todos los relés de las lámparas de 12 V CA se DESCONECTAN Pulsación corta: Vaya al siguiente programa de color. -
Page 83: Substitución Del Teclado Del Transmisor De Mano
CON./DESCON. Emparejamiento del transmisor manual y el controlador PLP-REM Todos los telemandos mandos a distancia ya están emparejados en fábrica y listos para el uso. En caso de que surja un problema, el proceso de emparejamiento se puede hacer como se indica a continuación:... -
Page 84: Comunicación Dmx 512
Determinación de la dirección DMX del PLP-REM: Seleccione el número deseado en el dial de la dirección. El número elegido determina las direcciones DMX del PLP-REM y de las lámparas. Cada lámpara utiliza 3 bytes de datos DMX (R-G-B), y todas las lámparas reciben los mismos datos DMX del PLP-REM. -
Page 85: Instalación Múltiple Plp-Rem
2) Conecte los PLP-REMs uno con uno (lazo abierto): DMX OUT --> DMX IN (terminales polarizados + -) 3) Fije la dirección de DMX para cada PLP-REM a través del dial de la dirección. - Opción 1:Todos los PLP-REM se jan a la misma dirección: Esto implica que todas las lámparas recibirán los mismos... -
Page 86: Comunicación Rs-485
1) Asegúrese de que el interruptor DIP 1 esté APAGADO. 2) Asegúrese de que las luces estén encendidas primero con el control remoto. 3) Conecte la fuente RS-485 con el puerto “485” en el PLP-REM 4) Ajustes de comunicación: 9600, 8, 1, n 5) Lista de comandos: vea la página 87... -
Page 87: Juego De Comandos Rs-485
Juego de comandos RS-485... -
Page 88: Procedimiento De Reinicio
Procedimiento de REINICIO Procedimiento de REINICIO para el tablero de control Asegúrese de que el PLP-REM esté encendido Mantenga presionado el botón REINICIO en la placeta electronica. El LED azul se encenderá Suelte el botón REINICIO cuando el LED azul se apague La tarjeta de control ha sido REINICIADO. -
Page 89: Reparación De Averías De Averías
PLP-REM. Repita el proceso de emparejamiento (véase p. 79) • Reduzca la distancia entre el tele- mandos de mano y el PLP-REM y/o quite los obstáculos • Compruebe la luz de estado gen- eral en el tablero lógico. Si es roja, entonces el voltaje secundario es demasiado alto (>14V CA) o hay un... -
Page 90: Instrucciones De Cableado
Please refer to the manual of your DURAVISION® pool light Manual downloads: www.duratech.be/downloads Not following the instructions for cable cross section and transformer VA ratings may result in lamp malfunctioning and may result in having to rewire the installation. The manufacturer's warranty does not apply in this situation. -
Page 91: Cableado Notas
Cableado notas 1. Otros equipos como los convertidores de frecuencia y los motores eléctricos pueden generar parasitos excesivos en el circuito de alimentación de 230VAC / 400VAC. Estos parasitos pueden penetrar el circuito de alimentación de 12VAC situado en la proximida, y perturbar el circuito de alimentación hacia las lámparas DURAVISION. - Page 92 Declaraction of Conformity Declarations of conformity covering this product are available for download from the House of Duratech website: www.duratech.be...
- Page 95 DURAFLOW DURAVISION DURALINK DURAHEAT DURACOVER Pool Flow Products Pool Light Products Control Products Heat Pump Products Pool Cover Products VISION Moonlight LINK Driver HEAT Hot Splash COVER Wall Duct FLOW Inverter VISION Spectra LINK Touch HEAT Sun Spring COVER Cable Duct VISION Adagio Pro LINK...
- Page 96 Contact details Propulsion Systems bv Dooren 72 1785 Merchtem, Belgium Tel +32 2 461 02 53 www.duratech.be info@propulsionsystems.be We reserve the rights to change all or part of the contents of this document without prior notice...
Need help?
Do you have a question about the PLP-REM and is the answer not in the manual?
Questions and answers