
Related Manuals for careium C500


Summary of Contents for careium C500
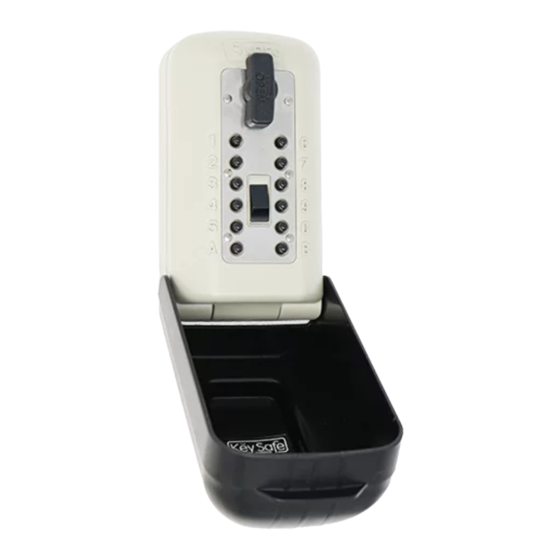
- Page 1 KeySafe™ Consumer 500 How to install a User Guide C500 keysafe Pushbutton combination © February 2015 www.careium.co.uk...
- Page 2 • It may be easier to set or change your key safe code before you install it. For guidance on how to set a code in your C500 KeySafe see below. • If possible, we recommend you install your keysafe out of line of easy sight for passers-by and in a position of good light to make it easier for the user.
- Page 3 About your combination © February 2015 • There is no pre-set combination code in your C500 keysafe © February 2015 © February 2015 • You will need to select your own combination, ideally featuring between 5 and 7 digits (you can use a combination of both numbers and letters).
- Page 4 © February 2015 © February 2015 Without closing the lid, leaving the keysafe open, turn the open © February 2015 © February 2015 dial on the front of the keysafe counter clockwise 180°, back to the locked position. The word OPEN will now be the correct way up.
- Page 5 KeySafe™ Consumer 500 KeySafe™ Consumer 500 Testing your combination User Guide User Guide Pushbutton combination Pushbutton combination With the keysafe still open, making sure the word OPEN is the correct way up on the OPEN dial. If it is not, turn the OPEN dial counter-clockwise until it is the correct way up.
- Page 6 10mm. • There is no override or reset code. Make a note of • Do not mount C500 closer than 6” or 15cm to the your code and store it somewhere safe corner of a masonry surface.
- Page 7 ™ Consumer 500 Opening and Closing your C500 keysafe ™ Consumer 500 onsumer 500 onsumer 500 r Guide r Guide Guide Guide on combination on combination mbination mbination Press down on the CLEAR button. Enter the combination. If you enter an incorrect combination, ©...
- Page 8 • When mounting on a rendered wall, the maximum thickness of the render cannot exceed 10mm. ote of • Do not mount C500 closer than 6” or 15cm to the corner of a masonry surface. • Make sure C500 is mounted flush with the masonry...
Need help?
Do you have a question about the C500 and is the answer not in the manual?
Questions and answers