Advertisement
Quick Links
Advertisement

Related Manuals for Avid CNC MX4660


Summary of Contents for Avid CNC MX4660
- Page 1 MX4660 Spindle / VFD Setup Guide v2022Q1.1...
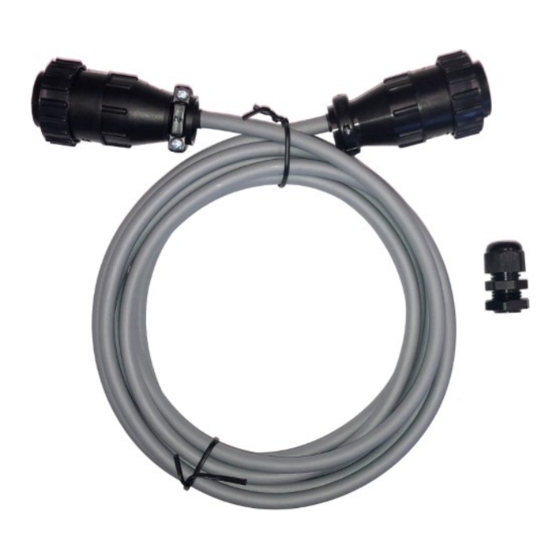
- Page 2 MX4660 Connections The rst step in setting up your Spindle will be to connect your MX4660 Control Unit with your VFD. You should have received a 14-pin SP/THC cable and strain relief tting with the Plug and Play Spindle / VFD System.
- Page 3 If you choose to house your MX4660 in an enclosure, the included strain relief can be used to a x the SP/THC cable to your control unit. Simply install it in any unused hole of appropriate size in your enclosure.
- Page 4 At this point, one end of the SP/THC cable should have the 14-pin connector removed with the wires stripped to bare leads as shown in the photo series below. Clip one end of the SP/THC cable as shown above. Version 2022Q1.1 MX4660 © 2022 Avid CNC Setup Guide All Rights Reserved...
- Page 5 Strip the sheathing on the cable back at least 1.5" (it is easier to work with if you strip 1.5 - 3"). Version 2022Q1.1 MX4660 © 2022 Avid CNC Setup Guide All Rights Reserved...
- Page 6 Once there is a su cient length of cable inside your control box to reach your MX4660, the cable nut can be tightened down onto the strain relief. This will secure the cable to the control unit.
- Page 7 The stripped and ferruled wires from the SP/THC cable can now be connected to your MX4660. Refer to the table below for the correct wire colors to used based on which SP/THC cable you have. Wire Color Wire Color MX4660 Connection...
- Page 8 Spindle Controller Connections 14-Pin SP/THC Cable Connect the 14-pin SP/THC cable to your Spindle Controller. Version 2022Q1.1 MX4660 © 2022 Avid CNC Setup Guide All Rights Reserved...
- Page 9 L6-30 receptacle (200-240VAC single-phase) 8.7 HP Plug and Play Spindle / VFD System L21-30 receptacle (200-240VAC three-phase) If running on single-phase, refer to power requirements for this system. Version 2022Q1.1 MX4660 © 2022 Avid CNC Setup Guide All Rights Reserved...
- Page 10 Spindle Connection 3 Avid HP Spindle Connect the female end of the M23 spindle cable to the spindle, aligning the arrows as in the previous step. Version 2022Q1.1 MX4660 © 2022 Avid CNC Setup Guide All Rights Reserved...
- Page 11 It may be necessary to rotate the M23 cable to allow it to seat properly. During this process you will feel the connector drop into place when the pins and sockets of the connector align. Version 2022Q1.1 MX4660 © 2022 Avid CNC Setup Guide All Rights Reserved...
- Page 12 Mach4 Version Use of the 4 HP Avid CNC spindle requires version 2.2.2 or newer of Mach4 and use of the 8.7 HP Avid CNC spindle requires version 2.1.0 or newer of Mach4. If you need to update your installation of Mach4, please visit the...
- Page 13 If the spindle responds to these speed commands, your VFD and Spindle package is ready for use! If you experience any trouble while following this guide, please feel free to Contact Us. Version 2022Q1.1 MX4660 © 2022 Avid CNC Setup Guide All Rights Reserved...
Need help?
Do you have a question about the MX4660 and is the answer not in the manual?
Questions and answers