Table of Contents

Related Manuals for Titan MNRSPRDRv2


Summary of Contents for Titan MNRSPRDRv2
- Page 1 MANURE SPREADER MNRSPRDRv2 191396 Operator’s Manual Read the Operator’s Manual entirely. When you see this symbol, the subsequent instructions and warnings are serious follow without exception. Your life and the lives of others depend on it!
-
Page 2: General Warnings
GENERAL WARNING GENERAL WARNINGS READ and UNDERSTAND this manual completely before using the Manure Spreader. Operators must read and understand all safety and warning information, operating instructions, maintenance, and storage instructions before operating this equipment. Failure to properly operate and maintain the manure spreader could result in serious injury to the operator or bystanders. -
Page 3: Prop 65 Warning
WARNING The warning, cautions, and instructions outlined in the instruction manual cannot cover all possible conditions or situation that may occur. It must be understood by the operator that common sense and caution are factors which cannot be built into this product and must be supplied by the operator PROP 65 WARNING This product can expose you to chemicals including lead and lead compounds which are... -
Page 4: Controls And Features Identification
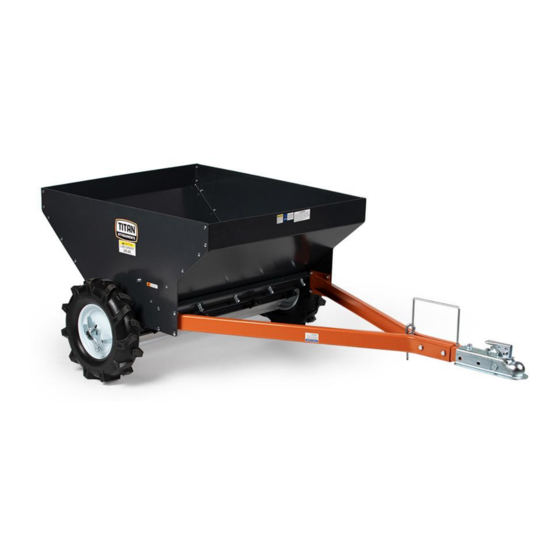
CONTROLS AND FEATURES IDENTIFICATION Read this owner’s manual before operating the equipment. Familiarize yourself with the location and function of all the controls and features. Please save this manual for future reference. Hopper 2” Coupler Spreading Drum Spreading Engagement Lever Agitator Relief Panel CAUTION... -
Page 5: Tools Required
ASSEMBLY INSTRUCTIONS MANURE SPREADER COMPONENT PARTS AND ASSEMBLY Before beginning to assemble the manure spreader, take all parts out of the shipping crate and inspect components to ensure there are no missing pieces. Carefully follow assembly steps 1 through 2. TOOLS REQUIRED •... - Page 6 STEP 2: ATTACH PRESSING PLATE Attach discharge plate (#24) to the hopper assembly using hex bolt M8x20 (#21), lock washer Ø8 (#39) and flat washer Ø8 (#27). STEP 3: ATTACH THE DISCHARGE PLATE Attach discharge plate (#24) to the hopper assembly using hex bolt M8x20 (#21), lock washer Ø8 (#39) and flat washer Ø8 (#27).
- Page 7 STEP 4: ATTACH THE AXLE WELDMENT Put the axle weldment (#53) through the roller assembly (#54), then insert sleeve 14 (#50) and rolling bearing (#51), then tighten the screw in the rolling bearing. STEP 5: ATTACH ROLLER ASSEMBLY Attach roller assembly to the hopper assembly using hex bolt M12x40 (#35), flat washer Ø12 (#4) and nylon lock nut M12 (#5).
-
Page 8: Step 6: Attach Wheels
STEP 6: ATTACH WHEELS Attach sleeve (#50) and wheel (#46) to the wheel axle, then attach clutch assembly to the wheel axle using hex bolt M8x60 (#60), clutch spring (#55), large flat washer Ø8 (#27) and nylon lock nut M8 (#11). Turn the nylon lock nut M8 to adjust the spring tightness to the right position. STEP 7: ADJUST THE DISCHARGE PLATE Adjust the discharge plate assembly by moving it up and down to ensure that the gap between the discharge plate and the roller is between 3-5mm. - Page 9 STEP 8: ATTACH THE AGITATOR ASSEMBLY Attach the agitator assembly to the hopper, place sleeve 5 (#36) on the hopper, then lock it with hex bolt M8x20 (#21) and nylon lock nut M8 (#11). Ensure that the fixed plate can be easily rotated.
- Page 10 STEP 10: ATTACH COUPLER ASSEMBLY Attach coupler assembly to the tow bar using M10x75 Hex Bolt (#12), Ø10 flat washer (#13) and M10 nylon lock nut (#14).
- Page 11 ALTERNATIVE CONNECTION FOR THE TOW BAR Unscrew the M12x70 hex bolt (#3), Ø12 flat washer (#4) and M12 nylon lock nut (#5), then remove coupler (#1) and bushing (#2). Pull out the hitch pin (#8) and the R pin (#10) and insert them into the front hole.
- Page 12 OPERATING INSTRUCTIONS Attach the manure spreader to the vehicle using either the 2” ball coupler or the clevis hitch. Rotate the agitator so that the rubber wheels are resting on the manure spreader drum. Fill the manure spreader with manure. Drive the manure spreader to the desired spreading location.
-
Page 13: Maintenance And Storage
The manure spreader has an adjustment plate which changes the discharge hole sizes in the discharge plate. Adjust the size of the discharge holes by loosening the threaded knobs on the adjustment plate and sliding the plate to the desired opening. MAINTENANCE AND STORAGE WARNING Improper maintenance and storage of the manure spreader may void the warranty. - Page 14 STORAGE Never allow material to remain in the hopper for extended periods of time. • Before storing, make sure the manure spreader is clean and dry. • Store indoors or in a protected area during any severe weather and during winter •...
- Page 15 PARTS DRAWING AND PARTS LIST...
- Page 17 Titan, its insurers, employees, officers, directors, associates, and agents from any and all claims, demands, damages, rights of action, or causes of action, present or future, whether the same be known or unknown, anticipated, or unanticipated, resulting from or arising out of the use of said equipment.
- Page 18 NEED HELP? CONTACT US FIRST. 1-800-605-7595 info@palletworks.com www.palletforks.com © 2021 Titan Brands...
Need help?
Do you have a question about the MNRSPRDRv2 and is the answer not in the manual?
Questions and answers