Table of Contents
Advertisement
Quick Links
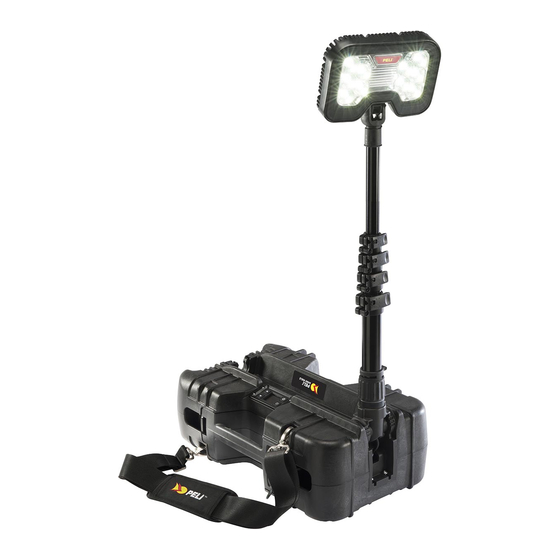
9490 RALS
EN
PELICAN™ 9490 RALS USER MANUAL
Mast Operation
1. Lift the light and pole to
a selected position, then
twist the red locking collar
clockwise to lock the pole
in place.
2. To extend the mast, release
the clamp on each section
and raise. Lock each clamp
until you have reached your
chosen height.
3. To collapse the mast,
reverse the procedure.
Light Operation
Prior to light operation, locate the required fuse.
With a slot screwdriver, screw the fuse into the fuse
receptacle on the side of the power pack. (A)
1. Press power button
on keypad once to switch on.
The default setting is the preset* high mode (as indicated
by the three symbols at the top of the screen). (B) Your
remaining run time is displayed in the center of the
screen and your battery level is shown at the bottom of
the screen.
2. Press the bottom left button
on the keypad to
change between high, medium and low power. Your
remaining run time varies between these settings.
3. Press the up or down buttons on the keypad at any time
to enter the Intelligent Control (IC) mode. The IC mode
allows you to select any run time up to 24 hours. In this
mode, your power level is displayed at the top of the
screen instead of the preset 'sun' symbols. You can go
back to preset mode at any time by pressing the bottom
left button on the keypad.
4. Press the power button on the keypad to switch off.
The 9490 IC features three preset modes which provide recommended lux levels over a
certain distance. Please see table below:
*
SETTING
LUX AT 1M
LUX AT 2M
LUX AT 3M
3 Suns
4000
1,260
620
2 Suns
2180
700
340
1 Sun
670
210
100
The 9490 features the ability to be used while charging. When the charger is connected to
AC power and the product is switched on, the 9490 will automatically select a light level to
allow continuous operation. - automatic mode. (In this mode, the battery level will remain
constant, and the light will be at 50% level.)
In AC mode the display will show the battery level and power level but the time display will be
replaced by --:-- and the hourglass icon will be extinguished.
Manual adjustment of the brightness will still be possible. If the brightness is increased,
then automatic mode will be exited, a new runtime will be computed based upon the new
operating conditions. The battery level and the display will revert to the normal IC mode, (or
preset mode if the bottom left button has been used). If the brightness is decreased, the unit
will remain in continuous mode (and the battery will charge up slowly).
If the charger is removed, the unit will return to normal operation and the run time display will
show the remaining time for the selected setting.
Flash Mode
1. Press and hold the power button for 3 seconds until flashing begins,
then select the required power level.
2. To switch flashing mode off, press the power button again.
Power Pack
The 9490 power pack is removable.
C
This allows for continuous use of the
product by replacing it with another
fully charged power pack when
required.
To remove the power pack simply
release the clips and lift via the
handle. (C, D)
Power Pack Level
The power pack is equipped with a power level monitor which remains permanently
illuminated to tell the user how much power the battery contains. The level monitor will glow
brightly when the product is switched on and dim when not in use.
While the product is switched on, the number of segments illuminated in the level monitor
will gradually reduce over time. The product will switch off soon after a single red flashing
segment is displayed. Once the product has switched itself off, the single red segment in the
level monitor will continue to flash, indicating that a recharge is required.
Power Pack Charging
The power pack can be charged inside or outside of the main 9490 housing.
1. Remove the dust cap from the charging socket and plug in charger.
2. Connect the charger to the mains AC power supply.
Charge Cycle Indication
During charging, the level monitor display will become brighter and continue to cycle until all
segments of the display are shown. Once the display stops cycling and shows all segments,
the battery is fully charged.
Note: The power pack can be left attached to the charger without any harm to the battery.
WARNING: ONLY USE APPROVED POWER SUPPLY AND ENSURE CHARGING IS
CARRIED OUT IN A WELL VENTILATED ROOM.
DO NOT STORE BATTERY PACKS IN A DISCHARGED STATE. WHEN NOT IN USE,
RECHARGE THE BATTERY PACK EVERY 3 MONTHS.
ONCE FULLY CHARGED ALWAYS REMOVE THE POWER SUPPLY.
Battery/Fuse Replacement
Contact your dealer for a replacement battery or fuse.
Environmental
At the end of its technical life, the sealed lead battery should be sent to a suitable recycling
center or returned to the point of purchase.
BATTERY SAFETY
BATTERY SAFETY – YOU MUST READ THESE WARNINGS AND INSTRUCTIONS
BEFORE USING OR CHARGING YOUR BATTERIES!
WARNING: HANDLE AND STORE BATTERIES PROPERLY TO AVOID INJURY OR
DAMAGE
BATTERIES CAN BE DANGEROUS!
IMPROPER HANDLING OF BATTERIES CAN LEAD TO LEAKING, FIRE OR EXPLOSION
WHICH CAN CAUSE SERIOUS INJURY OR PROPERTY DAMAGE.
Cat. # 9490
Rechargeable Batteries
» Hazardous Location Safety Approvals for explosive environments are only valid for the
Pelican battery pack that is supplied with the equipment.
» For replacement battery packs, only use the approved Pelican battery pack for the
model of the product that you are using. The use of other battery packs will reduce
performance, expose the user or others to serious injury, and will invalidate the safety
approval.
» Equipment should only be charged in a non-hazardous location.
» Equipment should only be charged using the Pelican charger base that is supplied.
» Batteries should be charged and operated between the temperatures shown in this
table:
BATTERY TYPE
Lead Acid
Ni-MH
Li-Ion and
LiFePO4
A
» DO NOT charge rechargeable alkaline batteries while they are still in the equipment.
Charging the alkaline batteries while they are still in the equipment can cause internal
gas or heat generation resulting in venting, explosion or possibly fire which could cause
serious injury or property damage.
» Deep discharge* of the rechargeable batteries may cause batteries to vent potentially
dangerous gasses and electrolytes.
» It is strongly recommended to condition* batteries every three months. During storage,
the capacity of the battery decreases due to self-discharging. Leaving the product
B
unused for long periods of time will decrease the battery life. Withdrawal of the charger
from the product prior to a 'READY' indication will result in an inadequate charge.
» If products are stored that contain regchargeable products, it is advisable to do so in a
cool, dry place. If the average temperature exceeds 25°C (77°F) (below 30°C or 86°F),
the frequency of supplementary charging should increase.
» It is advisable to always condition a battery that has been stored before use.
* Deep Discharge: The battery has been allowed to discharge most of its capacity to a point beyond which
irreparable damage has occurred. See battery specifications for the specific levels.
* Condition a Battery: Charge your battery to the fullest capacity and then disconnect from charger. Let the
light run until it completely drains the battery and turns itself off. Place the flashlight back onto its charger
and completely recharge the battery before using it. This conditioning or "cycling" of the battery will help it
retain a fuller charge for a longer period of time.
Warning
» If the charger fails to indicate a full charge after repeated charging attempts, or the
battery exhibits a marked reduction in performance, a battery replacement is required.
» DO NOT use chargers designed for a different battery technology or equipment, or
model. Doing so may damage the product and expose the user to serious injury or
property damage.
» Ni-MH Rechargeable Battery Packs: DO NOT use Ni-MH rechargeable battery packs for
longer than three years or 500 charge/discharge cycles, whichever comes first. Using
Ni-MH rechargeable battery packs for longer than three years or 500 charge/discharge
cycles will reduce the performance of the battery and expose the user to serious injury
or property damage.
» Li-Ion and LiFePO4 Rechargeable Battery Packs: DO NOT use Li-Ion and LiFePO4
rechargeable battery packs for longer than five years. Using for a period longer than five
years will reduce the performance of the battery and expose the user to serious injury or
property damage.
» Lead Acid Battery: DO NOT use lead acid batteries for longer than five years or 400
charge/discharge cycles at 100% DOD ( Depth Of Discharge) * , whichever comes first.
Using lead acid batteries for longer than five years or 400 charge/discharge cycles at
100% DOD will reduce the performance of the battery and expose the user to serious
injury or property damage.
* DOD (Depth Of Discharge) *: is the fraction or percentage of the capacity which has been removed from
the fully charged battery. Depth of Discharge is defined as the total amount of energy that is discharged
from a battery, divided by the battery's nominal capacity. Depth of discharge is normally expressed as a
percentage.
Battery Recycling
ALWAYS dispose of batteries properly at an approved battery recycling center. Failure to
do so may be a crime and can lead to the release of harmful toxic materials. Pelican has
partnered with Call 2 Recycle in the US and Canada to dispose of recyclable batteries.
Please call 1-800-822-8837 to find a battery recycling center near you.
D
ES
MANUAL DE USUARIO DEL SISTEMA
DE ILUMINACIÓN 9490 RALS DE PELICAN™
Funcionamiento Del Mástil
1. Levantar el cabezal del
sistema a la posición
deseada y a continuación
girar la anilla roja para
bloquearlo.
2. Para extender el mástil,
soltar la pestaña de cada
lateral y levantar. Bloquear
las pestañas una vez
ajustada la altura.
3. Para plegar el mástil, seguir
el procedimiento inverso.
Funcionamiento De La Linterna
Antes de ponerla en marcha localizar el fusible. Con
ayuda de un destornillador plano, introducir el fusible en el
receptáculo situado en el lateral de la batería. (A)
1. Pulsar el botón de encendido
una vez para encender la linterna. Por defecto* se
encenderá en modo de alta intensidad (tal como indican
los tres símbolos que aparecen la parte superior de
la pantalla). (B) En el centro de la pantalla aparece el
tiempo de autonomía restante del sistema y en la parte
inferior, el nivel de batería.
2. Pulsar el botón de la parte inferior izquierda
panel para alternar entre alta, media y baja potencia. El
nivel de intensidad afecta a la autonomía de la linterna.
3. Pulsar la flecha hacia arriba o hacia abajo del teclado
para acceder al modo de control inteligente. El modo
de control inteligente permite seleccionar el tiempo de
autonomía (hasta 24 h). Con esta función activada, el
nivel de batería aparece en la parte superior de la pantalla en lugar de los soles que
aparecen de fábrica. Para volver al modo normal en cualquier momento pulsar el botón
de la parte inferior izquierda del panel.
4. Pulsar el botón de encendido del panel de control para apagar la linterna.
El control inteligente del modelo 9490 cuenta con tres ajustes que recomiendan distintos
niveles de intensidad (lux) según la distancia. Consulta la tabla siguiente:
*
AJUSTE
LUX A 1M
3 Soles
4000
2 Soles
2180
1 Sol
670
El modelo 9490 puede usarse mientras se está cargando. Si está enchufada a la corriente
y encendida, el sistema de iluminación seleccionará automáticamente un nivel de bajo
consumo para que no se apague (modo automático). En este modo, el nivel de batería no
variará. La intensidad de la luz estará al 50%.
PART #
009493-3110-000
BLACK
SIDES
PAPER THICKNESS
2 Sided
DESIGN TEAM
MARKETING COPY
Tyler Bennett
Elissa Teitelman
3-25-22
3-1-22
APPROVED FOR PRINT - MUST BE APPROVED BY ALL TEAM MEMBERS
CHARGING
OPERATING
TEMP
TEMP
–15°C to 40°C
–15°C to 50°C
(5°F to 104°F)
(5°F to 122°F)
0°C to 40°C
–20°C to 50°C
(32°F to 104°F)
(–4°F to 122°F)
0°C to 45°C
–20°C to 60°C
(32°F to 113°F)
(–4° F to 140°F)
A
del panel de control
B
del
LUX A 2M
LUX A 3M
1,260
620
700
340
210
100
REV
ECR #
RELEASE DATE
DATE
B
5-37518
MR 22
7-22-21
FLAT SIZE
NUMBER OF FOLDS
16.00"h x 13.00"w
3
TECHNICAL COPY
PRODUCT MGR. TEAM
Jon French
No Changes
En la pantalla veremos el nivel de batería y de potencia, pero el ajuste de la hora pasará a
--:-- y el icono del reloj de arena desaparecerá.
No obstante, el brillo podrá ajustarse manualmente. Al aumentar el brillo, el modo
automático se desactiva, y se calcula un nuevo tiempo de autonomía en función de las
nuevas condiciones de funcionamiento. El nivel de batería y la pantalla volverán al modo
de control inteligente normal (o al modo de fábrica, si se activa el botón de la parte inferior
izquierda). Al bajar el brillo, la linterna seguirá funcionado en modo ininterrumpido (y la
batería se irá cargando lentamente).
Al desconectar el cargador, la linterna volverá al funcionamiento normal y aparecerá la
autonomía prevista para el modo de funcionamiento seleccionado.
Modo Intermitente
1. Mantener pulsado el botón de encendido durante 3 segundos hasta que parpadee.
A continuación seleccionar el nivel de potencia deseado.
2. Para desactivar el modo intermitente, pulsar de nuevo el botón de encendido.
Batería
C
La batería del modelo 9490 es
extraíble. De esta manera se puede
sustituir por otra totalmente cargada
al momento cuando sea necesario.
Para sacar la batería solo hay que
soltar las pestañas y levantarla por
el asa. (C, D)
Nivel De Carga De La Batería
La batería cuenta con un indicador de nivel de carga que permanece encendido para
informar al usuario del estado de la batería. El indicador brilla con más intensidad cuando el
producto está encendido y la luz se atenúa cuando está apagado.
Cuando el producto está encendido, la cantidad de segmentos iluminados en el indicador va
bajando con el tiempo. El producto se apagará poco después de que aparezca un segmento
rojo intermitente. Una vez apagado, el segmento rojo del indicador seguirá parpadeando
para indicar que hay que cargar el producto.
Cargar La Batería
La batería puede cargarse dentro o fuera de la carcasa del modelo 9490.
1. Sacar la cubierta protectora de la toma del cargador y enchufar el cargador.
2. Enchufar el cargador a la corriente.
Indicación Del Ciclo De Carga
Mientras se carga, la luz del indicador se hará más brillante y seguirá en movimiento hasta
que aparezcan todos los segmentos. En ese punto, la batería estará totalmente cargada.
Observación: la batería puede seguir conectada al cargador sin sufrir daños.
ADVERTENCIA: USAR ÚNICAMENTE UNA FUENTE DE ALIMENTACIÓN
HOMOLOGADA Y CARGAR LA BATERÍA EN UNA ZONA BIEN VENTILADA.
NO ALMACENAR BATERÍAS DESCARGADAS. DE NO USAR EL PRODUCTO, CARGAR
LA BATERÍA CADA 3 MESES.
UNA VEZ CARGADA, SACAR LA FUENTE DE ALIMENTACIÓN.
Cambiar La Batería/El Fusible
Ponte en contacto con tu distribuidor para conseguir una batería o un fusible de repuesto.
Reciclado
Al final de su vida técnica, la batería sellada de plomo debe llevarse a un centro de reciclaje
o devolverse al punto de compra.
SEGURIDAD SOBRE BATERÍAS
SEGURIDAD DE LAS BATERÍAS: ¡USTED DEBE LEER ESTAS ADVERTENCIAS E
INSTRUCCIONES ANTES DE USAR O CARGAR SUS BATERÍAS!
ADVERTENCIA: MANEJE Y ALMACENE LAS BATERÍAS ADECUADAMENTE PARA
EVITAR LESIONES O DAÑOS
¡LAS BATERÍAS PUEDEN SER PELIGROSAS!
EL MANEJO INADECUADO DE LAS BATERÍAS PUEDE OCASIONAR FUGAS,
INCENDIOS O EXPLOSIONES, LO QUE PUEDE CAUSAR LESIONES GRAVES O
DAÑOS MATERIALES.
Baterías Recargables
» Las aprobaciones de seguridad para ubicaciones peligrosas en entornos explosivos
sólo son válidas para la batería Pelican suministrada con el equipo.
» Para baterías de reemplazo, use únicamente baterías Pelican aprobadas para el
modelo del producto que esté usando. Usar otras baterías reducirá el rendimiento,
expondrá al usuario, o a otras personas, a lesiones graves e invalidará la aprobación de
seguridad.
» La batería del equipo nunca debe recargarse en un lugar peligroso.
» El equipo sólo debe recargarse usando el cargador Pelican provisto.
» Las baterías deben usarse o recargarse en el rango de temperaturas que se muestran
en esta tabla:
TEMPERATUREA
TIPO DE PILA
DE LA CARGA
–15°C a 40°C
Plomo-Ácido
(5°F a 104°F)
0°C a 40°C
Ni-MH
(32°F a 104°F)
Ion-Litio y
0°C a 45°C
LiFePO4
(32°F a 113°F)
» NO RECARGUE baterías alcalinas recargables mientras todavía estén en el equipo.
Cargar baterías alcalinas mientras están en el equipo puede generar gases o calor
interno, esto puede provocar escape de gases, explosión o hasta un incendio, lo que
podría causar lesiones graves o daños a la propiedad.
» Descargar profundamente* las baterías recargable puede hacer que las baterías dejen
escapar gases y electrolitos potencialmente peligrosos.
» Se recomienda encarecidamente acondicionar* las baterías cada tres meses. Durante
el almacenamiento, la capacidad de la batería disminuye debido a la autodescarga. Si
deja el producto sin usar durante períodos de tiempo extensos, disminuirá la vida útil
de la batería. Si desconecta el cargador del producto antes de la indicación READY
("LISTO"), la batería no se cargará adecuadamente.
» Si se almacenan productos que contienen productos recargables, es recomendable
hacerlo en un lugar fresco y seco. Si la temperatura promedio supera los 25 °C (77
°F) (por debajo de los 30 °C o 86 °F), la frecuencia de la carga complementaria debe
aumentar.
» Se recomienda acondicionar siempre una batería almacenada antes de utilizarla.
* Descarga profunda: Permitir que la batería descargue la mayor parte de su capacidad hasta un punto a
partir del cual se producen daños irreparables. Consulte las especificaciones de la batería para conocer
los niveles específicos.
* Acondicionar una batería: Cargue la batería al máximo y luego desconéctela del cargador. Deje que la
lámpara funcione hasta que la batería se agote por completo y se apague por sí misma. Vuelva a colocar
la lámpara en su cargador y recargue completamente la batería antes de usarla. Este acondicionamiento
o "ciclado" de la batería le ayudará a retener una carga más completa durante un período de tiempo más
largo.
Advertencia
» Si, después de varios intentos, el cargador no indica una carga completa o el
rendimiento de la batería se reduce significativamente, deberá reemplazarla.
» NO USE cargadores diseñados para una tecnología de batería distinta o un equipo/
modelo diferente. Hacerlo puede dañar el producto y exponer al usuario a lesiones
graves o daños a la propiedad.
» Baterías recargables Ni-MH: NO USE baterías recargables Ni-MH por más de tres años
o 500 ciclos de carga/descarga, lo que ocurra primero. Usar baterías recargables Ni-
MH por más de tres años o 500 ciclos de carga/descarga reducirá el rendimiento de la
batería y expondrá al usuario a lesiones graves o daños materiales.
VERSION
1
FOLDED SIZE
4.00"h x 6.50"w
Paulo Quitain
3-2-22
D
TEMPERATUREA DE
FUNCIONAMIENTO
–15°C a 50°C
(5°F a 122°F)
–20°C a 50°C
(–4°F a 122°F)
–20°C a 60°C
(–4° F a 140°F)
Advertisement
Table of Contents

Related Manuals for Pelican 9490 RALS


Summary of Contents for Pelican 9490 RALS
- Page 1 1. Press and hold the power button for 3 seconds until flashing begins, ¡LAS BATERÍAS PUEDEN SER PELIGROSAS! do so may be a crime and can lead to the release of harmful toxic materials. Pelican has then select the required power level.
- Page 2 Contactez votre distributeur pour toute batterie ou fusible de rechange. defective, within the terms of this warranty or the Act, the purchaser may pay Pelican all costs of handling, batería y expondrá al usuario a lesiones graves o daños a la propiedad.
Need help?
Do you have a question about the 9490 RALS and is the answer not in the manual?
Questions and answers