Table of Contents
Advertisement
Advertisement
Table of Contents

Related Manuals for Asus 4G-AX56


Summary of Contents for Asus 4G-AX56
- Page 1 User Guide 4G-AX56 4G-AX56 Dual Band 4G LTE Router...
- Page 2 Product warranty or service will not be extended if: (1) the product is repaired, modified or altered, unless such repair, modification of alteration is authorized in writing by ASUS; or (2) the serial number of the product is defaced or missing.
-
Page 3: Table Of Contents
Welcome! ...................6 Package contents ................6 Your wireless router ...............7 Positioning your router ..............9 Insert a Nano SIM card into 4G-AX56 ........10 Getting started Router setup .................. 11 Quick Internet Setup (QIS) with Auto- detection ..... 14 Configuring the General Settings Using the Network Map ............ - Page 4 Table of contents Configuring the Advanced Settings Wireless.................... 37 4.1.1 General ..................37 4.1.2 WPS ....................39 4.1.3 WDS ....................41 4.1.4 Wireless MAC Filter ...............43 4.1.5 RADIUS Setting ..............44 4.1.6 Professional ................45 LAN ....................48 4.2.1 LAN IP ..................48 4.2.2 DHCP Server ................49 4.2.3 Route ..................51 4.2.4...
- Page 5 Table of contents 4.6.5 IPv6 Firewall ................75 Administration ................76 4.7.1 Operation Mode ..............76 4.7.2 System ..................77 4.7.3 Firmware Upgrade ..............79 4.7.4 Restore/Save/Upload Setting ...........80 System Log ..................81 Ethernet WAN Mobile Broadband Function Support List 82 Utilities Device Discovery ................84 Firmware Restoration ..............
-
Page 6: Getting To Know Your Wireless Router
NOTES: • If any of the items is damaged or missing, contact your retailer or ASUS for technical inquiries and support, Refer to the ASUS Support Hotline list at the back of this user manual. • Keep the original packaging material in case you would need future... -
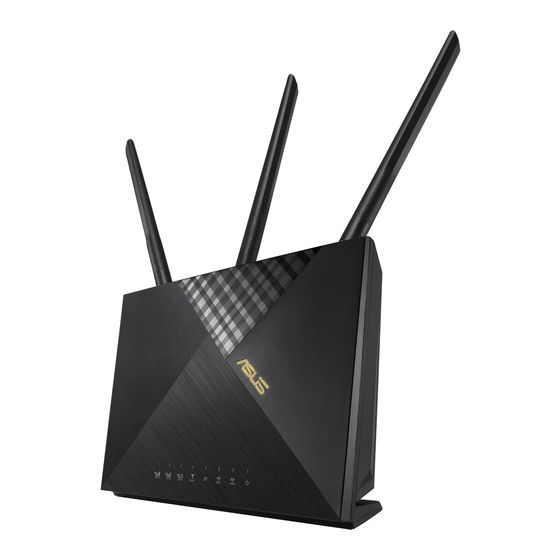
Page 7: Your Wireless Router
1.3 Your wireless router 3G/4G signal strength LED 1 lit LED: Weak signal 2 lit LEDs: Normal signal 3 lit LEDs: Strong signal Mobile Broadband LED White: 4G connection is established. Blue: 3G connection is established. Red: No mobile broadband connection. Off: No SIM card is detected. - Page 8 Reset button This button resets or restores the system to its factory default settings. WPS button Long press the button to launch the WPS Wizard. Power (DCIN) port Insert the bundled AC adapter into this port and connect your router to a power source.
-
Page 9: Positioning Your Router
2.4GHz WiFi. • Always update to the latest firmware. Visit the ASUS website at http://www.asus.com to get the latest firmware updates. • Orient the antennas as shown in the drawing below. -
Page 10: Insert A Nano Sim Card Into 4G-Ax56
1.5 Insert a Nano SIM card into 4G-AX56 1. Open the Nano SIM cover at the bottom of 4G-AX56 to reveal the Nano SIM slot. 2. Pop open the Nano SIM tray by dipping either a paper clip or a SIM eject tool into the hole beside the tray. -
Page 11: Getting Started
1. Insert a Nano SIM card into 4G-AX56. 2. Plug the power adapter into the DCIN port and switch ON 4G-AX56. Wait for a couple of minutes for 4G-AX56 to become ready. 3. Connect to 4G-AX56 via either wired or wireless connection. - Page 12 Once the Mobile broadband LED lights up, open “router.asus. com” with your desirable web browser. You will be redirected to the ASUS Quick Internet Setup Wizard. Follow the onscreen instructions to complete the setup process. 5. For the convenience of router management, you can consider to install the handy ASUS Router app.
- Page 13 Cannot connect to mobile broadband No Nano SIM card detected White Wired broadband is online WAN (Internet) Wired broadband is offline White 4G-AX56 is powered on Power 4G-AX56 is powered off White 5GHz WiFi is enabled 5GHz 5GHz WiFi is disabled White 2.4GHz WiFi is enabled...
-
Page 14: Quick Internet Setup (Qis) With Auto- Detection
Web GUI is “admin”. 4. Assign your router login name and password and click Next. You need this login name and password to log into ASUS router to view or change the router settings. You can take note of your router login name and password for future use. - Page 15 5. If the WAN port is connected, the wireless router’s Quick Internet Setup (QIS) feature automatically detects if your ISP connection type is Dynamic IP, PPPoE, PPTP, L2TP, and Static IP. Please obtain the necessary information from your Internet Service Provider (ISP). If your connection type is Dynamic IP (DHCP), QIS wizard will automatically direct you to the next step.
- Page 16 for Static IP 6. If a 3G/4G network is connected, the wireless router’s Quick Internet Setup (QIS) feature automatically detects and applies the APN setting to connect to the wireless base station. If the QIS wizard failed to automatically apply the APN setting or the SIM card prompts for a PIN code, set up the APN setting manually.
- Page 17 7. The dual WAN connection configuration result is displayed. Click Next to continue. Mobile Broadband Connection is configured successfully Ethernet WAN Connection is configured successfully 8. If both WAN are configured, go to next step to configure the wireless LAN settings.
- Page 18 9. Assign the network name (SSID) and security key for your 2.4GHz wireless connection. Click Apply when done. 10. Your Internet and wireless settings are displayed. Click Next to complete the QIS process. 11. The 3G/4G signal strength LED lights up and is steady after completing the 3G/4G network settings via QIS, indicating a successful Internet connection.
-
Page 19: Configuring The General Settings
Configuring the General Settings Configuring the General Settings 3.1 Using the Network Map Network Map allows you to check the Internet connection status, configure your network’s security settings and manage your network clients. -
Page 20: Setting Up The Wireless Security Settings
3.1.1 Setting up the wireless security settings To protect your wireless network from unauthorized access, you need to configure its security settings. To set up the wireless security settings: 1. From the navigation panel, go to General > Network Map. 2. -
Page 21: System Status
3. On the Network Name (SSID) field, key in a unique name for your wireless network. 4. From the Authentication Method dropdown list, select the authentication method for your wireless network. If you select WPA-Personal or WPA-2 Personal as the authentication method, key in the WPA-PSK key or security passkey. -
Page 22: Managing Your Network Clients
3.1.3 Managing your network clients To manage your network clients: 1. From the navigation panel, go to General > Network Map tab. 2. On the Network Map screen, select the Client Status icon to display your network client’s information. - Page 23 3. On Client status table, click the device icon to show the detailed profile of the device.
-
Page 24: Monitoring The Internet Status
3.1.4 Monitoring the Internet Status To monitor your Internet status: 1. From the navigation panel, go to General > Network Map tab. 2. On the Network Map screen, select the Internet icon to display your Internet configuration. You can also select Mobile Broadband icon to display Mobile Broadband configuration. -
Page 25: Guest Network
3.2 Guest Network The Guest Network provides temporary visitors with Internet connectivity via access to separate SSIDs or networks without providing access to your private network. To create a guest network: 1. From the navigation panel, go to General > Guest Network. 2. - Page 26 10. Select Disable or Enable on Enable MAC Filter item for your guest network. 11. When done, click Apply. NOTES: • Visit https://www.asus.com/support/FAQ/1034977/ to see How to set up Captive Portal. • Visit https://www.asus.com/support/FAQ/1034971/ to see How to set up Free WiFi.
-
Page 27: Aiprotection
3.3 AiProtection AiProtection provides real-time monitoring that detects malware, spyware, and unwanted access. It also filters unwanted websites and apps and allows you to schedule a time that a connected device is able to access the Internet. -
Page 28: Network Protection
3.3.1 Network Protection Network Protection prevents network exploits and secures your network from unwanted access. Configuring Network Protection To configure Network Protection: 1. From the navigation panel, go to General > AiProtection. 2. From the AiProtection main page, click on Network Protection. - Page 29 IMPORTANT! Items marked as Yes on the Router Security Assessment page is considered to be at a safe status. Items marked as No, Weak, or Very Weak is highly recommended to be configured accordingly. 4. (Optional) From the Router Security Assessment page, manually configure the items marked as No, Weak, or Very .
- Page 30 Malicious Sites Blocking This feature restricts access to known malicious websites in the cloud database for an always-up-to-date protection. NOTE: This function is automatically enabled if you run the Router Weakness Scan. To enable Malicious Sites Blocking: 1. From the navigation panel, go to General > AiProtection. 2.
-
Page 31: Setting Up Parental Controls
3.3.2 Setting up Parental Controls Parental Control allows you to control the Internet access time or set the time limit for a client’s network usage. To go to the Parental Controls main page: 1. From the navigation panel, go to General > AiProtection. 2. - Page 32 2. From the Enable Time Scheduling pane, click ON. 3. From the Client Name (MAC Address) column, select or key in the client’s name from the drop down list box. NOTE: You may also key in the client’s MAC address in the Client Name (MAC Address) column.
-
Page 33: Traffic Manager
3.4 Traffic Manager 3.4.1 QoS This feature ensures bandwidth for prioritized tasks and applications. To enable the QoS function: 1. From the navigation panel, go to General > Traffic Manager > QoS tab. 2. From the Enable QoS pane, click ON. 3. -
Page 34: Traffic Monitor
3.4.2 Traffic Monitor The traffic monitor feature allows you to access the bandwidth usage and speed of your Internet, wired, or wireless networks. It allows you to monitor network traffic in real-time or on a daily basis. It also offers an option to display the network traffic within the last 24 hours. -
Page 35: Using Sms
3.5 Using SMS Short Message Service (SMS) is a text messaging service that allows you to send or receive messages from or on your wireless router. 3.5.1 Sending Messages This function allows you to send short messages from your wireless router. To send a new SMS message: 1. -
Page 36: Inbox
3.5.2 Inbox Inbox allows you to view the received short messages saved in your device. Click to view more information, or tick a message and click to delete it. -
Page 37: Configuring The Advanced Settings
Configuring the Advanced Settings Configuring the Advanced Settings 4.1 Wireless 4.1.1 General The General tab allows you to configure the basic wireless settings. To configure the basic wireless settings: 1. From the navigation panel, go to Advanced Settings > Wireless > General tab. 2. - Page 38 5. In the Wireless Mode field, select any of these wireless mode options to determine the types of wireless devices that can connect to your wireless router: • Auto: Select Auto to allow 802.11ac, 802.11n, 802.11g, 802.11b and 802.11a devices to connect to the wireless router.
-
Page 39: Wps
TKIP + AES). If you select this option, you must enter the WPA Pre-Shared Key (network key). • WPA2 Enterprise / WPA Auto-Enterprise: This option provides very strong security. It is with integrated EAP server or an external RADIUS back-end authentication server. - Page 40 To enable WPS on your wireless network: 1. From the navigation panel, go to Advanced Settings > Wireless > WPS tab. 2. In the Enable WPS field, move the slider to ON. 3. WPS uses 2.4GHz and 5GHz radio separately. 4.
-
Page 41: Wds
ASUS wireless router. It can also be considered as a wireless repeater where your ASUS wireless router communicates with another access point and other wireless devices. - Page 42 • Any Access Point added to the list should be on the same Control Channel and the same fixed Channel bandwidth as the local ASUS wireless router. You can modify the Control Channel from Advanced Settings > Wireless > General tab.
-
Page 43: Wireless Mac Filter
4.1.4 Wireless MAC Filter Wireless MAC filter provides control over packets transmitted to a specified MAC (Media Access Control) address on your wireless network. To set up the Wireless MAC filter: 1. From the navigation panel, go to Advanced Settings > Wireless >... -
Page 44: Radius Setting
4.1.5 RADIUS Setting RADIUS (Remote Authentication Dial In User Service) Setting provides an extra layer of security when you choose WPA- Enterprise, WPA2-Enterprise, or Radius with 802.1x as your Authentication Mode. To set up the wireless RADIUS settings: 1. Ensure that the wireless router’s authentication mode is set to WPA-Auto-Enterprise or WPA2-Enterprise. -
Page 45: Professional
4.1.6 Professional The Professional screen provides advanced configuration options. NOTE: We recommend that you use the default values on this page. In the Professional Setting screen, you can configure the following: • Band: Select the frequency band that the professional settings will be applied to. - Page 46 • Date to Enable Radio (weekdays): You can specify which days of the week wireless networking is enabled. • Time of Day to Enable Radio: You can specify a time range when wireless networking is enabled during the week. • Date to Enable Radio (weekend): You can specify which days of the weekend wireless networking is enabled.
- Page 47 • AMPDU RTS: In 802.11n or 802.11ac using a method, A-MPDU, to aggregate short packet into a longer packet for the same MAC address. When a wireless device ready for transmission sends a RTS (Request to Send). After enabling AMPDU RTS, every AMPDU frame send with RTS process. •...
-
Page 48: Lan
4.2 LAN 4.2.1 LAN IP The LAN IP screen allows you to modify the LAN IP settings of your wireless router. NOTE: Any changes to the LAN IP address will be reflected on your DHCP settings. To modify the LAN IP settings: 1. -
Page 49: Dhcp Server
> DHCP Server tab. 2. In the Enable the DHCP Server field, tick Yes. 3. In the 4G-AX56’s Domain Name text box, enter a domain name for the wireless router. 4. In the IP Pool Starting Address field, key in the starting IP address. - Page 50 6. In the Lease time field, specify in seconds when an assigned IP address will expire. Once it reaches this time limit, the DHCP server will then assign a new IP address. NOTES: • We recommend that you use an IP address format of 192.168.1.xxx (where xxx can be any number between 2 and 254) when specifying an IP address range.
-
Page 51: Route
4.2.3 Route If your network makes use of more than one wireless router, you can configure a routing table to share the same Internet service. NOTE: We recommend that you do not change the default route settings unless you have advanced knowledge of routing tables. To configure the LAN Routing table: 1. -
Page 52: Iptv
4.2.4 IPTV The wireless router supports connection to IPTV services through an ISP or a LAN. The IPTV tab provides the configuration settings needed to set up IPTV, VoIP, multicasting, and UDP for your service. Contact your ISP for specific information regarding your service. -
Page 53: Wan
4.3 WAN 4.3.1 Internet Connection The Internet Connection screen allows you to configure the settings of various WAN connection types. 4.3.1.1 WAN To configure the WAN connection settings: 1. From the navigation panel, go to Advanced Settings > WAN > Internet Connection tab. 2. - Page 54 • Contact your ISP and update the MAC address associated with your ISP service. • Clone or change the MAC address of the ASUS wireless router to match the MAC address of the previous networking device recognized by the ISP.
- Page 55 4.3.1.2 Mobile Broadband 4G-AX56 has build in 3G/4G modem that allows you to use a Mobile Broadband connection for Internet access. To set up your Mobile broadband Internet access: 1. From the navigation panel, go to Advanced Settings > WAN >...
- Page 56 4) Roaming : When you travel to another country, you may use original SIM to access the local network if your ISP provider roaming service in the country. Enable this functions to allow you to access the local network. • Click Scan to show all the available mobile networks. •...
- Page 57 once the Data Usage limit for Internet usage is reached. 6. APN Configuration 1) Auto (Default): The system selects Auto APN setting by default. 2) Manual: If the automatic dial-up connection fails, select Manual to configure APN setting manually. A. Location: Select your 3G/4G service provider’s location from the dropdown list.
- Page 58 7. PIN Configuration PIN code: Enter the 3G/4G provider’s PIN code for connection on SIM PIN Management if the SIM card is required. • The default PIN code may vary with different providers. If your ISP has disabled the PIN code verification by default, you can skip the setting.
- Page 59 Mobile Connection Status To find Mobile broadband Information: 1. Click to find the detailed information. 2. The Mobile Connection Status screen displays the detailed Mobile Broadband connection status.
-
Page 60: Ipv6 (Internet Settings)
4.3.2 IPv6 (Internet Settings) This wireless router supports IPv6 addressing, a system that supports more IP addresses. This standard is not yet widely available. Contact your ISP if your Internet service supports IPv6. To set up IPv6: 1. From the navigation panel, go to Advanced Settings > IPv6. 2. -
Page 61: Dual Wan
4.3.3 Dual WAN Your ASUS wireless router provides dual WAN support. You can set the dual WAN feature to any of these two modes: • Fail Over: Select this mode to use the secondary WAN as the backup network access. - Page 62 • Network Monitoring 1) DNS Query: Select this option if you want to periodically resolve target FQDN (Fully Qualified Domain Name). 2) Ping: Select this option if you want to periodically ping test packet domain or IP address. If internet connection issue occurs due to DHCP lease problem such as IP address being expired, you can enable DNS Query or Ping to alleviate the problem.
-
Page 63: Port Trigger
4.3.4 Port Trigger Port range triggering opens a predetermined incoming port for a limited period of time whenever a client on the local area network makes an outgoing connection to a specified port. Port triggering is used in the following scenarios: •... - Page 64 • Trigger Port: Specify a trigger port to open the incoming port. • Protocol: Select the protocol, TCP, or UDP. • Incoming Port: Specify an incoming port to receive inbound data from the Internet. • Protocol: Select the protocol, TCP, or UDP. 5.
-
Page 65: Virtual Server/Port Forwarding
Forwarding on your router allows PCs outside the network to access specific services provided by a PC in your network. NOTE: When port forwarding is enabled, the ASUS router blocks unsolicited inbound traffic from the Internet and only allows replies from outbound requests from the LAN. - Page 66 3. On the Famous Server List field, select the type of service you want to access. 4. On the Famous Game List field, select the popular game that you want to access. This item lists the port required for your selected popular online game to work properly.
- Page 67 • You will need a client outside your LAN but has Internet access (referred to as “Internet client”). This client should not be connected to the ASUS router. • On the Internet client, use the router’s WAN IP to access the server.
-
Page 68: Dmz
4.3.6 DMZ Virtual DMZ exposes one client to the Internet, allowing this client to receive all inbound packets directed to your Local Area Network. Inbound traffic from the Internet is usually discarded and routed to a specific client only if port forwarding or a port trigger has been configured on the network. -
Page 69: Ddns
Server and Host Name: Choose ASUS DDNS or other DDNS. • If you want to use ASUS DDNS, fill in the Host Name in the format of xxx.asuscomm.com (xxx is your host name). If you want to use a different DDNS service, click FREE TRIAL •... -
Page 70: Nat Passthrough
4.3.8 NAT Passthrough NAT Passthrough allows a Virtual Private Network (VPN) connection to pass through the router to the network clients. PPTP Passthrough, L2TP Passthrough, IPsec Passthrough and RTSP Passthrough are enabled by default. To enable / disable the NAT Passthrough settings: 1. -
Page 71: Ipv6
4.4 IPv6 This wireless router supports IPv6 addressing, a system that supports more IP addresses. This standard is not yet widely available. Contact your ISP if your Internet service supports IPv6. To set up IPv6: 1. From the navigation panel, go to Advanced Settings > IPv6. 2. -
Page 72: Vpn Server
4.5 VPN Server VPN (Virtual Private Network) provides a secure communication to a remote computer or remote network using a public network such as the Internet. NOTE: Before setting up a VPN connection, you would need the IP address or domain name of the VPN server you are trying to access. To set up access to a VPN server: 1. -
Page 73: Firewall
4.6 Firewall The wireless router can serve as a hardware firewall for your network. NOTE: The Firewall feature is enabled by default. 4.6.1 General To set up basic Firewall settings: 1. From the navigation panel, go to Advanced Settings > Firewall >... -
Page 74: Keyword Filter
To set up a URL filter: 1. From the navigation panel, go to Advanced Settings > Firewall > URL Filter tab. 2. On the Enable URL Filter field, select Enabled. 3. Enter a URL and click the button. 4. Click Apply. 4.6.3 Keyword filter Keyword filter blocks access to webpages containing specified keywords. -
Page 75: Network Services Filter
Destination IP, Port Range, and Protocol. Click the button. 6. Click Apply. 4.6.5 IPv6 Firewall By default, your ASUS wireless router blocks all unsolicited incoming traffic. The IPv6 Firewall function allows incoming traffic coming from specified services to go through your network. -
Page 76: Administration
4.7 Administration 4.7.1 Operation Mode The Operation Mode page allows you to select the appropriate mode for your network. To set up the operating mode: 1. From the navigation panel, go to Advanced Settings > Administration > Operation Mode tab. 2. -
Page 77: System
4.7.2 System The System page allows you to configure your wireless router settings. - Page 78 To set up the System settings: 1. From the navigation panel, go to Advanced Settings > Administration > System tab. 2. You can configure the following settings: • Change the router login password: You can change the password and login name for the wireless router by entering a new name and password.
-
Page 79: Firmware Upgrade
4.7.3 Firmware Upgrade NOTE: Download the latest firmware from the ASUS website at http://www.asus.com To upgrade the router or 4G modem firmware: 1. From the navigation panel, go to Advanced Settings > Administration > Firmware Upgrade tab. 2. In the New Firmware File or New Modem Firmware field, click Browse to locate the downloaded file. -
Page 80: Restore/Save/Upload Setting
4.7.4 Restore/Save/Upload Setting To restore/save/upload wireless router settings: 1. From the navigation panel, go to Advanced Settings > Administration > Restore/Save/Upload Setting tab. 2. Select the tasks that you want to do: • To restore to the default factory settings, click Restore, and click OK in the confirmation message. -
Page 81: System Log
4.8 System Log System Log contains your recorded network activities. NOTE: System log resets when the router is rebooted or powered off. To view your system log: 1. From the navigation panel, go to Advanced Settings > System Log. 2. You can view your network activities in any of these tabs: •... -
Page 82: Ethernet Wan Mobile Broadband Function Support List
4.9 Ethernet WAN Mobile Broadband Function Support List The wireless router supports wired WAN and Mobile broadband WAN in failover and failback modes. The Mobile broadband WAN is used both as Internet access and WAN backup interface. LAN, WAN, VPN, and Firewall support different functions. See the comparison table below. - Page 83 Applications VPN Server V (2) FTP Server V (2) NOTES: V (1): Mobile WAN has separated configuration on its configuration page V (2): In most of using case, Internet service provide dispatch the mobile broadband a private IP, that will cause the WAN service failed to access from WAN side.
-
Page 84: Utilities
Utilities Utilities NOTE: Download and install the wireless router's utilities from the ASUS website: https://www.asus.com/support/Download-Center/ 5.1 Device Discovery Device Discovery is an ASUS WLAN utility that detects an ASUS wireless router device, and allows you to configure the wireless networking settings. -
Page 85: Firmware Restoration
5.2 Firmware Restoration Firmware Restoration is used on an ASUS Wireless Router that failed during its firmware upgrading process. It uploads the firmware that you specify. The process takes about three to four minutes. Windows: Mac OS: IMPORTANT! Launch the rescue mode on the router before using the... - Page 86 IP address: 192.168.1.x Subnet mask: 255.255.255.0 4. From your computer’s desktop, click Start > All Programs > ASUS Utility > Wireless Router > Firmware Restoration. 5. Specify a firmware file, then click Upload. NOTE: This is not a firmware upgrade utility and cannot be used on a working ASUS Wireless Router.
-
Page 87: Troubleshooting
1. Launch the Web GUI. Go to Advanced Settings > Administration > Firmware Upgrade tab. Click Check to verify if the latest firmware is available. 2. If the latest firmware is available, visit the ASUS global website at http://www.asus.com/support to download the latest firmware. - Page 88 Check if your network settings are correct. • Each client on the network should have a valid IP address. ASUS recommends that you use the wireless router’s DHCP server to assign IP addresses to computers on your network. • Some cable modem service providers require you to use the MAC address of the computer initially registered on the account.
-
Page 89: Frequently Asked Questions (Faqs)
6.2 Frequently Asked Questions (FAQs) I cannot access the router GUI using a web browser • If your computer is wired, check the Ethernet cable connection and LED status as described in the previous section. • Ensure that you are using the correct login information. The default factory login name and password is “admin/admin”. - Page 90 The client cannot establish a wireless connection with the router. NOTE: If you are having issues connecting to 5GHz network, make sure that your wireless device supports 5GHz or features dual band capabilities. • Out of Range: • Move the router closer to the wireless client. •...
- Page 91 Wired Internet is not accessible. • Check if your router can connect to your ISP’s WAN IP address. To do this, launch the web GUI and go to General> Network Map, and check the Internet Status. • If your router cannot connect to your ISP’s WAN IP address, try restarting your network as described in the section Restart your network in following sequence under Basic Troubleshooting.
- Page 92 • Port trigger, port forwarding, DDNS or DMZ service cannot work. Most ISPs provide a private IP address for a mobile broadband device. Hence some services, such as AiCloud, are not accessible. Please contact your ISP for assistance. You forgot the SSID (network name) or network password •...
- Page 93 User Name: admin Password: admin Router’s LAN IP address: 192.168.1.1 / router.asus.com WiFi Settings: SSID: ASUS_XX NOTE: XX refers to the last two digits of 2.4GHz MAC address. You can find it on the label on the back of your router.
- Page 94 Cannot access Web GUI Before configuring your wireless router, do the steps described in this section for your host computer and network clients. Disable the proxy server, if enabled. Windows ® 1. Click Start > Internet Explorer to launch the browser. 2.
- Page 95 MAC OS 1. From your Safari browser, click Safari > Preferences > Advanced > Change Settings... 2. From the Network screen, deselect FTP Proxy and Web Proxy (HTTP). 3. Click Apply Now when done. NOTE: Refer to your browser's help feature for details on disabling the proxy server.
- Page 96 2. Click Properties to display the Ethernet Properties window. 3. Select Internet Protocol Version 4 (TCP/IPv4) or Internet Protocol Version 6 (TCP/IPv6), then click Properties. 4. To obtain the IPv4 IP settings automatically, tick Obtain an IP address automatically. To obtain the IPv6 IP settings automatically, tick Obtain an IPv6 address automatically.
- Page 97 MAC OS 1. Click the Apple icon located on the top left of your screen. 2. Click System Preferences > Network > Configure... 3. From the TCP/IP tab, select Using DHCP in the Configure IPv4 dropdown list. 4. Click Apply Now when done.
-
Page 98: Appendices
Appendices Appendices GNU General Public License Licensing information This product includes copyrighted third-party software licensed under the terms of the GNU General Public License. Please see The GNU General Public License for the exact terms and conditions of this license. We include a copy of the GPL with every CD shipped with our product. - Page 99 pieces of it in new free programs; and that you know you can do these things. To protect your rights, we need to make restrictions that forbid anyone to deny you these rights or to ask you to surrender the rights.
- Page 100 be distributed under the terms of this General Public License. The “Program”, below, refers to any such program or work, and a “work based on the Program” means either the Program or any derivative work under copyright law: that is to say, a work containing the Program or a portion of it, either verbatim or with modifications and/or translated into another language.
- Page 101 c) If the modified program normally reads commands interactively when run, you must cause it, when started running for such interactive use in the most ordinary way, to print or display an announcement including an appropriate copyright notice and a notice that there is no warranty (or else, saying that you provide a warranty) and that users may redistribute the program under these conditions, and telling the user how to view a copy of this License.
- Page 102 b) Accompany it with a written offer, valid for at least three years, to give any third party, for a charge no more than your cost of physically performing source distribution, a complete machine-readable copy of the corresponding source code, to be distributed under the terms of Sections 1 and 2 above on a medium customarily used for software interchange;...
- Page 103 modify or distribute the Program or its derivative works. These actions are prohibited by law if you do not accept this License. Therefore, by modifying or distributing the Program (or any work based on the Program), you indicate your acceptance of this License to do so, and all its terms and conditions for copying, distributing or modifying the Program or works based on it.
- Page 104 range of software distributed through that system in reliance on consistent application of that system; it is up to the author/ donor to decide if he or she is willing to distribute software through any other system and a licensee cannot impose that choice.
- Page 105 NO WARRANTY 11 BECAUSE THE PROGRAM IS LICENSED FREE OF CHARGE, THERE IS NO WARRANTY FOR THE PROGRAM, TO THE EXTENT PERMITTED BY APPLICABLE LAW. EXCEPT WHEN OTHERWISE STATED IN WRITING THE COPYRIGHT HOLDERS AND/OR OTHER PARTIES PROVIDE THE PROGRAM “AS IS” WITHOUT WARRANTY OF ANY KIND, EITHER EXPRESSED OR IMPLIED, INCLUDING, BUT NOT LIMITED TO, THE IMPLIED WARRANTIES OF MERCHANTABILITY AND FITNESS FOR A PARTICULAR...
-
Page 106: Service And Support
Service and Support Visit our multi-language website at https://www.asus.com/support.
Need help?
Do you have a question about the 4G-AX56 and is the answer not in the manual?
Questions and answers