
Related Manuals for Dcybel LONDON

Summary of Contents for Dcybel LONDON
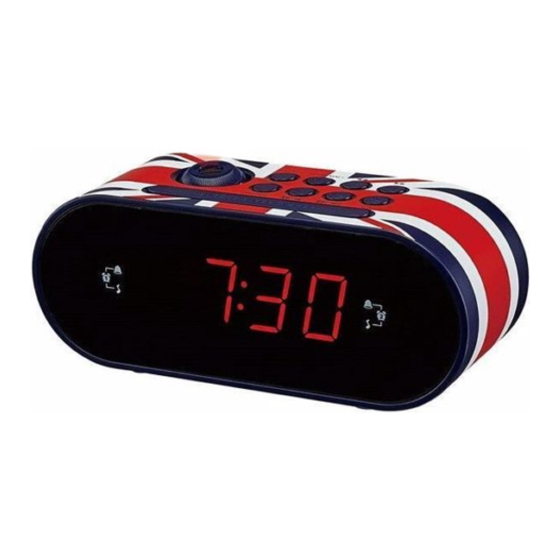
- Page 1 EN INSTRUCTION MANUAL FR MANUEL DÍNSTRUCTIONS NL GEBRUIKSAANWIJZING CLOCK RADIO WITH PROJECTION RADIO RÉVEIL AVEC PROJECTION WEKKERRADIO MET PROJECTIE LONDON...
- Page 2 WARNINGS • This appliance is intended for domestic household use only and should not be used for any other purpose or in any other application, such as for non-domestic use or in a commercial environment. • Prior to cleaning or other maintenance, the appliance must be disconnected from the supply mains.
-
Page 3: Important Safety Instructions
IMPORTANT SAFETY INSTRUCTIONS • This equipment is designed to operate from a 230 Volt, 50Hz AC mains supply. Other power sources may damage it. • The marking plate is located on the bottom of the apparatus. Symbols This equipment is double insulated and This mark is applied to show the an earth connection is not equipment conforms to European... -
Page 4: Location Of Control
LOCATION OF CONTROL 1. Projector 2. PROJECTION 180° FLIP button SET/MEM/M+ Clock setting/Radio station memory setting/ Memory adjusting button Tuning down /Hour setting button Tuning up / Minute setting button 6. SNOOZE/SLEEP/DIMMER button 7. PROJECTION ON/OFF button Volume down / Alarm 1 setting button Volume up / Alarm 2 setting button Power / Alarm off buton 11. -
Page 5: Backup Battery Installation
BACKUP BATTERY INSTALLATION This unit requires one CR2032 lithium battery (not included) to provide a backup power source to keep the clock and radio memory settings during power outages. 1. Unscrew and remove the battery cover on the rear of the unit. 2. -
Page 6: Listening To The Radio
LISTENING TO THE RADIO 1. To turn on the radio, press 2. Tune in to the desired station by repeatedly pressing • The wire aerial located on the rear of the unit is for FM reception. The wire should be fully extended and positioned for optimum reception. -
Page 7: Sleep Timer
Alarm 1 buzzer indicator Alarm 1 radio indicator Setting Alarm 2 1. In clock time state, press and hold for about 2 seconds. • The clock time will flash on the display. 2. While the clock time is flashing, repeatedly press or press & hold respectively to set the alarm time. -
Page 8: Using The Projector
SETTING THE BRIGHTNESS OF THE DISPLAY In the clock time state, repeatedly press SNOOZE/SLEEP/DIMMER to change the brightness of the display (High, Medium, Low and Off) according to your ambient light conditions. USING THE PROJECTOR The projection function allows you to display the clock on a nearby wall or ceiling at a range of 0.9-2.7 metres. - Page 9 DISPOSAL As a responsible retailer we care about the environment. As such we urge you to follow the correct disposal procedure for the product, packaging materials and if applicable, accessories and batteries. This will help conserve natural resources and ensure that the materials are recycled in a manner that protects health and the environment.
- Page 10 AVERTISSEMENTS • Cet appareil est destiné à un usage domestique uniquement. Toute utilisation autre que celle prévue pour cet appareil, ou pour une autre application que celle prévue, par exemple une application commerciale, est interdite. • Qu’avant le nettoyage ou autre entretien, l’appareil doit être déconnecté...
-
Page 11: Instructions Importantes De Sécurité
INSTRUCTIONS IMPORTANTES DE SÉCURITÉ • Cet appareil est conçu pour être alimenté par une prise secteur fournissant un courant alternatif de 230 V 50 Hz. L’utilisation d’une alimentation fournissant un courant dont les spécifications sont différentes peut endommager l’appareil. • La plaque signalétique se trouve sous l’appareil. Symboles Cet appareil est équipé... - Page 12 DESCRIPTION 1. Projecteur 2. Bouton PROJECTION 180° FLIP [Retournement à 180° de la projection] SET/MEM/M+ Bouton Régler l’horloge/Prérégler les stations de radio/Réglage de la mémoire Bouton Baisser la fréquence/Régler les heures Bouton Monter la fréquence/Régler les minutes 6. Bouton SNOOZE/SLEEP/DIM [Rappel d’alarme/Dormir/ Luminosité] 7.
-
Page 13: Régler L'horloge
INSTALLER LES PILES DE SAUVEGARDE Cet appareil nécessite une pile lithium CR2032 (non fournie) pour servir d’alimentation de sauvegarde permettant de conserver les réglages de l’horloge et des stations de radio préréglées en cas de coupure de courant. 1. Dévissez et retirez le couvercle du logement des piles au dos de l’appareil. -
Page 14: Écouter La Radio
ÉCOUTER LA RADIO 1. Appuyez sur pour allumer la radio. 2. Réglez la fréquence de la station de radio désirée en appuyant plusieurs fois sur • L’antenne filaire au dos de l’appareil sert à la réception FM. L’antenne filaire doit être complètement déployée et correctement positionnée pour optimiser la réception. - Page 15 2. Pendant que l’heure clignote, appuyez plusieurs fois ou appuyez longuement respectivement sur pour régler l’heure de l’alarme. 3. Appuyez sur pour confirmer. 4. Appuyez plusieurs fois sur pour régler l’alarme sur le mode radio ou sonnerie. • L’indicateur du mode d’alarme correspondant s’affiche à l’écran.
-
Page 16: Régler La Luminosité De L'écran
ARRÊT AUTOMATIQUE 1. Quand la radio est diffusée, appuyez sur SNOOZE/SLEEP/ DIMMER. • L’écran affiche « 90 ». 2. Appuyez plusieurs fois sur SNOOZE/SLEEP/DIMMER pour régler l’heure d’arrêt automatique entre 10 et 90 minutes par incrément de 10 minutes. 3. La radio s’éteint automatiquement quand le délai sélectionné est écoulé. -
Page 17: Réinitialiser L'appareil
RÉINITIALISER L’APPAREIL Si le système ne répond pas ou si son fonctionnement est erratique ou intermittent, cela peut être dû à une décharge électrostatique (DES) ou une surtension électrique ayant provoqué l’extinction automatique du microcontrôleur interne. Si cela se produit, débranchez le cordon d’alimentation de la prise secteur et retirez la pile de sauvegarde de l’appareil. - Page 18 Hotline Darty France Quels que soient votre panne et le lieu d’achat de votre produit en France, avant de vous déplacer en magasin Darty, appelez le 0 978 970 970 (prix d’un appel local) 7j/7 et 24 h/24. Hotline Vanden Borre Le service après-vente est joignable au +32 2 334 00 00, du lundi au vendredi de 8 h à...
- Page 19 WAARSCHUWINGEN • Dit apparaat is alleen bestemd voor huishoudelijk gebruik en mag niet voor andere doeleinden of toepassingen worden gebruikt, zoals niet-huishoudelijk gebruik of in een commerciële omgeving. • Haal eerst de stekker uit het stopcontact voordat u het apparaat schoonmaakt of onderhoudt.
-
Page 20: Belangrijke Veiligheidsinstructies
BELANGRIJKE VEILIGHEIDSINSTRUCTIES • Dit apparaat is bestemd voor gebruik met een voeding van 230 Volt, 50Hz wisselstroom. Andere stroombronnen kunnen het apparaat beschadigen. • Het typeplaatje bevindt zich aan de achterkant van het apparaat. • Het typeplaatje bevindt zich aan de onderkant van het apparaat. Symbolen Dit apparaat is dubbel geïsoleerd en Deze markering is aangebracht... -
Page 21: Omschrijving Van De Onderdelen
OMSCHRIJVING VAN DE ONDERDELEN 1. Projector 2. PROJECTIE 180° DRAAIEN knop SET/MEM/M+ Instellen van de klok/radiostation geheugeninstelling/geheugen aanpassingsknop Instellen naar beneden/instelknop voor de uren Instellen naar boven/instelknop voor de minuten 6. SNOOZE/SLEEP/DIMMER knop 7. PROJECTIE AAN/UIT knop Volume lager / alarm 1 instelknop Volume hoger / alarm 2 instelknop Power / alarm uit-knop 11. -
Page 22: De Klok Instellen
DE BACK-UPBATTERIJEN INSTALLEREN Dit apparaat werkt op één CR2032 lithiumbatterij (niet inbegrepen) als reserve-stroombron om de klok en de radioinstellingen tijdens een stroomuitval te behouden. 1. Maak de schroef van het batterijdeksel aan de achterkant van het toestel los. 2. Installeer een nieuwe CR2032 lithiumbatterij in het batterijvak met inachtname van de polariteit die op het batterijdeksel wordt getoond. -
Page 23: Naar De Radio Luisteren
NAAR DE RADIO LUISTEREN 1. Om de radio in te schakelen, druk op 2. Stem af op het gewenste station door herhaaldelijk op drukken. • De draadantenne, achteraan het toestel, is bedoeld voor de FM-ontvangst. Rol de draad volledig open en positioneer deze om de beste ontvangst te hebben. •... - Page 24 • De kloktijd knippert op het display. 2. Terwijl de kloktijd knippert, drukt u herhaaldelijk op houdt deze ingedrukt om de wektijd in te stellen. 3. Druk op om te bevestigen. 4. Druk herhaaldelijk op om de wekker met radio of zoemer in te stellen.
-
Page 25: De Projector Gebruiken
INSLAAPTIMER 1. Tijdens het afspelen van de radio, drukt u op SNOOZE/SLEEP/ DIMMER. • Op het display verschijnt “90”. 2. Druk herhaaldelijk op SNOOZE/SLEEP/DIMMER om de gewenste inslaaptijd tussen 10 en 90 minuten in te stellen in stappen van 10 minuten. 3. -
Page 26: Het Apparaat Resetten
HET APPARAAT RESETTEN Als het systeem niet reageert of als er sprake is van een foutieve of storende werking, kan er sprake zijn geweest van een elektrostatische ontlading (ESD) of een stroompiek waardoor de interne microcontroller automatisch uitschakelt. Als dat gebeurt, haalt u de stekker uit het stopcontact en haalt u de reservebatterij uit het apparaat. - Page 27 Hotline Vanden Borre De dienst na verkoop is bereikbaar van maandag tot zaterdag op +32 2 334 00 00 Hulplijn Nederland Hiervoor kunt u contact opnemen met het BCC Service Center: 0900 0555 (lokaal tarief), geopend van maandag t/m vrijdag van 9.00 tot 17.00 uur. We verontschuldigen ons voor enig ongemak veroorzaakt door kleine inconsistenties in deze gebruikershandleiding, die kunnen ontstaan door productverbetering of –ontwikkeling.
Need help?
Do you have a question about the LONDON and is the answer not in the manual?
Questions and answers