Table of Contents
Advertisement
Quick Links
Advertisement
Table of Contents

Related Manuals for Top UCA2

Summary of Contents for Top UCA2
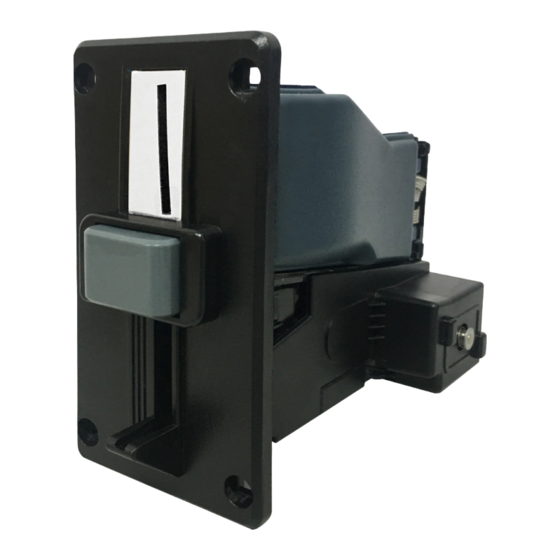
- Page 1 UC A 2 Coin Acceptor User Guide Th ank y ou fo r choo s i ng TOP VME .
-
Page 3: Table Of Contents
Contents 1.Introduction ……………………………………………………………………………………… 1 1-1.Overview ……………………………………………………………………………………………… 1 1-2.Features ……………………………………………………………………………………………… 1 2.Specification ……………………………………………………………………………………… 2 2-1. General ………………………………………………………………………………………………… 2 2-2. Electronic …………………………………………………………………………………………… 2 2-3. Machine ……………………………………………………………………………………………… 2 3.Packing List ……………………………………………………………………………………… 2 4. Dimension ………………………………………………………………………………………… 3 5. Installation ……………………………………………………………………………………… 4 5-1. Harness Application …………………………………………………………………………… 4 5-2. - Page 4 Contents 8-3. Get UCA Version ………………………………………………………………………………… 16 8-4. Accept Setting …………………………………………………………………………………… 16 8-5. Inhibit Setting ……………………………………………………………………………………… 17 8-6. Upgrade Start ……………………………………………………………………………………… 17 8-7. Upgrade Finish …………………………………………………………………………………… 17 8-8. Upgrading …………………………………………………………………………………………… 17 8-9. Upgrade Verify …………………………………………………………………………………… 18 8-10. Read Start ………………………………………………………………………………………… 18 8-11.
-
Page 5: Introduction
Coin Acceptor 1.Introduction 1-1.Overview UCA2 is designed as reliable coin acceptors which are able to work steadily in high temperature for high-security with acceptance rate up to 96% or greater. 1-2.Features • Low power consumption. • Mechanical and electrical anti-string functions. -
Page 6: Specification
Operating Temperature : 0° C~60° C Temperature Storage Temperature : -10° C~80° C Range Humidity : 20%~70%RH (no condensation) 2-3. Machine Weight 350 ±10 g Outline 124 x 72.4 x 147.5 mm Dimension 3.Packing List Main UCA2 Coin Acceptor User Guide Accessories Harness Screw set... -
Page 7: Dimension
Coin Acceptor 4. Dimension Unit : mm [ inch ]... -
Page 8: Installation
UCA2 5. Installation 5-1. Harness Application Interface Voltage Usage Harness NO. Page Power & Data WEL-RMS03 Communication Power & Data WEL-RMS02 Pulse 12V DC Communication (Purchase) CU-R961-1 Extension Cable (Purchase) 12V DC Power WEL-RMS03 RS232 Data +5V TTL WEL-R7U06 Communication... - Page 9 Coin Acceptor WEL-RMS03 PIN NO COLOR PIN DEFINE PIN1 +12V DC PIN2 ORANGE PIN3 GREEN INHIBIT+ PIN4 YELLOW METER PIN5 BLUE CREDIT PIN6...
- Page 10 UCA2 WEL-RMS02 PIN NO COLOR PIN DEFINE PIN NO COLOR PIN DEFINE PIN1 YELLOW METER PIN1 +12V DC PIN2 GREEN INHIBIT+ PIN2 ORANGE PIN5 +12V DC PIN3 GREEN INHIBIT+ PIN7 BLUE CREDIT PIN4 YELLOW METER PIN8 PURPLE PIN5 BLUE CREDIT...
- Page 11 Coin Acceptor CU-R961-1 PIN NO COLOR PIN DEFINE PIN1 YELLOW INHIBIT+ PIN2 GREEN INHIBIT- PIN5 +12V DC PIN7 BLUE METER+ METER- PIN8 PURPLE PIN9 ORANGE...
- Page 12 UCA2 WEL-R7U06 PIN NO COLOR PIN DEFINE PIN1 BLUE PIN NO PIN DEFINE PIN2 PIN6 WHITE PIN3 PIN7 BLACK PIN5 PIN8 PURPLE...
-
Page 13: I/O Circuit
Coin Acceptor 5-2. I/O Circuit • Pulse Interface... - Page 14 UCA2 • RS232 Interface...
-
Page 15: Installation Notes
Coin Acceptor 5-3. Installation Notes Please follow the steps below to install the UCA2 . 1. Use four screws to fix bezel on the machine Mounting Clip 2. Fix main base on bezel by mounting clips. Mounting Clip... - Page 16 UCA2 Installation Precautions : • UCA2 is not supposed to be aslope over 3°。 • To make sure UCA2 work smoothly, install machine farther than 3 cm from metal items is recommended.
-
Page 17: Maintenance
Coin Acceptor 6. Maintenance To make sure UCA2 always works smoothly, please clean the internal sensors regularly: To clean the internal sensors: 1. Remove bezel by releasing mounting clips and pulling it out. 2. Release the clip and remove lower base cover plate and hood. -
Page 18: Troubleshooting
Green Orange Power on sustained Inhibit sustained flicker I/O Test Mode Call TOP or agents for Fast coil set error technical support. Second coil set error Fish sensor error Inspect for foreign objects in Drop sersor error coin path and clean. -
Page 19: Rs232 Protocol
CMD + CS Format-2 with DATA : SYNC + LNG + CMD + DATA + EXT + CS or SYNC + LNG + CMD + DATA + CS 8-1. Enable or Disable VMC to UCA2 Enable UCA Disable UCA UCA2 to VMC... -
Page 20: Request Uca Status
UCA2 8-2. Request UCA status VMC to UCA2 Request status UCA2 to VMC Idling Disable Sensor Problem COIL 1 Sensor Problem COIL 2 Sensor Problem DROP IN 2 Sensor Problem DROP IN 1 Sensor Problem COIL 2 Sensor Problem COIL 2... - Page 21 Coin Acceptor 8-5. Inhibit Setting VMC to UCA2 Inhibit channel 1 Inhibit channel 2 Inhibit channel 8 UCA2 to VMC 8-6. Upgrade Start VMC to UCA2 UCA2 to VMC 8-7. Upgrade Finish VMC to UCA2 UCA2 to VMC 8-8. Upgrading...
- Page 22 UCA2 8-9. Upgrade Verify VMC to UCA2 UCA2 to VMC CRC16 H CRC16 L 8-10. Read Start PC to UCA2 UCA2 to PC 8-11. Read Finish PC to UCA2 UCA2 to PC 8-12. Reading PC to UCA2 BLOCK LINE SIZE...
- Page 23 Taiwan Top Vending Machine Electronics Co., Ltd. NO.11, Anzhong St., Luzhu Dist., Taoyuan City338, Taiwan, (R.O.C.) Phone : +886-3-3115969.Fax : +886-3-3115970 E-mail : sales@topvme.com.tw Website : www.topvme.com...
- Page 24 Top Vending Machine Electronics Co., Ltd. w w w .topv me .co m...
Need help?
Do you have a question about the UCA2 and is the answer not in the manual?
Questions and answers