
Related Manuals for Kohler Torsion


Summary of Contents for Kohler Torsion
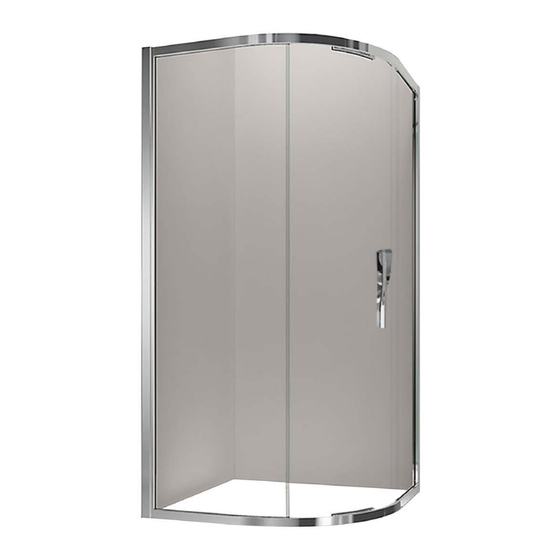
- Page 1 Torsion Hinged Door These instructions must be left with the user Installation Guide 1160104-W2-D...
-
Page 2: General Information
INTRODUCTION Thank you for purchasing a quality KOHLER product. To enjoy the full potential of your new ® product, please take time to read this guide thoroughly, having done so, keep it handy for future reference. The following pages aim to provide comprehensive installation instructions, plus advice on how to care and maintain your product. We recommend that the unit is installed by a qualified plumber or engineer. General Read all of these instructions and retain this guide for later use. Pass on this guide in the event of change of ownership of the installation site. Follow all warnings, cautions and instructions contained in this guide. Remove all protective tape from the enclosure before installation. GENERAL INFORMATION Safety Information Care should be taken when drilling into walls and floors to avoid any hidden pipes or wires. We strongly recommend that all glass panels are moved by a minimum of two people and that any protective packaging along the glass edges is kept in place for as long as possible to prevent damage before installation. During installation we recommend additional help in lifting heavy doors and side panels. Wear protective footwear when lifting panels. Wear safety glasses when drilling. Wall Preparation T h e w a l l c h a n n e l s m u s t... -
Page 3: Tools Required
GUARANTEE For domestic installations, your enclosure has the benefit of our lifetime guarantee which starts from date of purchase. For non-domestic installations, we guarantee the product against any defect in materials or workmanship for a period of one year from the date of purchase. For terms and conditions refer to the back cover of this guide. Recommended Usage Domestic ü Light Commercial ü Heavy Commercial û Healthcare û TOOLS REQUIRED 3.0 mm 6.0 mm 2.0 mm 2.5 mm 5.0 mm 1160104-W2-D... -
Page 4: Pack Contents
PACK CONTENTS Tick the appropriate boxes to familiarise yourself with the part names and to confirm that all of the parts are included. 1 x Lintel Cap 4 x Plastic Covers 2 x Wall Channels 8 x Cover Panel 2 x Cover Strips Clips 1 x Hinged Door 8 x Screws 8 x Fixing Screws 8 x Wall Plugs 1 x 3 mm Drill 1 x 2 mm Hexagonal Wrench 1 x 2.5 mm Hexagonal Wrench... - Page 5 PACK CONTENTS CONTINUED Handle Pack Geometric Handle Pack Twisted 1160104-W2-D...
-
Page 6: Installation
INSTALLATION 20 mm Note! Make sure that the ± 0 mm walls have been tiled down to the tray. Height of Enclosure (mm) 1952 Min/Max Frame Adjustment Enclosure Size Minimum (mm) Maximum (mm) 1000 1000 1200 1160 1200 (a) Install the shower tray in accordance with the manufacturer’s instructions. Caution! Make sure that the shower tray is level and that the walls are vertical and square. Note! Cover the tray waste to prevent the loss of small parts. Note! Protect the tray surface during enclosure installation. 1160104-W2-D... - Page 7 (a) Using a suitable tool, cut and remove the zip tie. Make sure that the door remains closed when moving/positioning the door. (b) Remove the wall channel. 1160104-W2-D...
- Page 8 ± 0 mm 6 mm 20 mm (a) Position the wall channel (handle side) on the wall. Using a spirit level make sure that it is upright. (b) Mark the position of the fixing holes, then remove the wall channel. (c) Drill with a 6 mm masonry bit (not supplied) and plug using the wall plugs (supplied). 1160104-W2-D...
- Page 9 ± 0 mm 6 mm 20 mm (a) Position the second wall channel (hinge side) on the wall. Using a spirit level make sure that it is upright. (b) Mark the position of the fixing holes, then remove the wall channel. (c) Drill with a 6 mm masonry bit (not supplied) and plug using the wall plugs (supplied). (d) Position the wall channel on the wall and install the fixing screws. (e) Fully tighten the fixing screws, making sure that the U-channel is upright. 1160104-W2-D...
- Page 10 (a) Install the first wall channel over the door frame and hold in position. 1160104-W2-D...
- Page 11 (a) Install the door frame into the wall channel that had been secured to the wall earlier. (b) Adjust the door frame so that it is in the correct position. 1160104-W2-D...
- Page 12 (a) Open the door and remove the rubber sealing strip. (b) Install the wall channel fixing screws through the access holes in the door frame. (c) Fully tighten the fixing screws, making sure that the wall channel is upright. (e) Refit the rubber sealing strip. 1160104-W2-D...
- Page 13 ± 0 mm (a) Centralise the door frame within the wall channels, making sure that the door frame is square. 1160104-W2-D...
- Page 14 Make sure these edges are flush 3 mm (a) Drill four 3 mm holes from inside the shower enclosure in the door frame through the pre-drilled holes in the wall channel with the 3 mm HSS drill (supplied). (b) Install the screws. (c) Tighten the screws.
- Page 15 5 10 (a) Install the cover panel clips (4 off). (b) Install the cover panel into the covel panel clips until flush with the wall. 1160104-W2-D...
- Page 16 5 11 (a) Partially remove the door sealing strips as shown above. (b) Apply a small amount of sealant in accordance with the sealant manufacturers instructions as shown above. (c) Fit the door sealing strips back in position. Remove any excess silicone sealant. 1160104-W2-D...
- Page 17 5 12 Handle Pack Geometric 2.0 mm 1160104-W2-D...
- Page 18 5 13 Handle Pack Twisted 2.0 mm 2.0 mm 1160104-W2-D...
- Page 19 5 14 24hrs (a) Apply sealant in accordance with the sealant manufacturers instructions along the outside surfaces of the door frame only. (b) Allow the silicone sealant to cure for 24 hours before use. (c) Fit the plastic covers to the top of the extrusions. (d) Fit the lintel cap 1160104-W2-D...
- Page 20 5 15 (a) If necessary, adjust the door catch as shown above. 5 16 (a) If the door is out of square, adjust as shown above. 1160104-W2-D...
-
Page 21: General Maintenance
MAINTENANCE General Maintenance Providing the shower enclosure has been correctly installed and is operated in accordance with the instructions contained in this guide, difficulties should not arise. If any maintenance is required then it must be carried out by a competent tradesperson to whom the maintenance instructions are provided. Before replacing any parts ensure the underlying cause of the malfunction has been resolved. Cleaning Warning! Many household cleaners contain abrasive and chemical substances and should not be used for cleaning painted, plated or plastic fittings. These finishes should be cleaned with a mild washing up detergent or soap solution and then wiped dry using a soft cloth. Care To preserve the beauty of your shower enclosure for many years, please observe the following care instructions: Rinse glass and frame with clear water after showering. Remove water droplets with a squeegee. Do not rub dry! To clean your shower hygienically and easily, we recommend the use of a biodegradable cleanser. -
Page 22: Spare Parts
SPARE PARTS LH Hinged Door - 700 - 900 Twisted Handle Geometric Handle 1160104-W2-D... - Page 23 LH Hinged Door - 700 - 900 1795.132 Hinged Assembly LH 700 Twisted Spare 1795.134 Hinged Assembly LH 760 Twisted Spare 1795.136 Hinged Assembly LH 800 Twisted Spare 1795.138 Hinged Assembly LH 900 Twisted Spare 1795.140 Hinged Assembly 700 Geometric Spare 1795.141 Hinged Assembly 760 Geometric Spare 1795.142 Hinged Assembly 800 Geometric Spare 1795.143 Hinged Assembly 900 Geometric Spare 1795.129 Door Top Cap Pack 1795.144 Hinge Seal Kit 1795.157 Torsion Door Ball Catch Spare 1795.146 Door Wall Channel Spare 1160104-W2-D...
- Page 24 RH Hinged Door - 700 - 900 Twisted Handle Geometric Handle 1160104-W2-D...
- Page 25 RH Hinged Door - 700 - 900 1795.133 Hinged Assembly RH 700 Twisted Spare 1795.135 Hinged Assembly RH 760 Twisted Spare 1795.137 Hinged Assembly RH 800 Twisted Spare 1795.139 Hinged Assembly RH 900 Twisted Spare 1795.140 Hinged Assembly 700 Geometric Spare 1795.141 Hinged Assembly 760 Geometric Spare 1795.142 Hinged Assembly 800 Geometric Spare 1795.143 Hinged Assembly 900 Geometric Spare 1795.129 Door Top Cap Pack 1795.144 Hinge Seal Kit 1795.157 Torsion Door Ball Catch Spare 1795.146 Door Wall Channel Spare 1160104-W2-D...
- Page 26 LH Hinged Door - 1000 - 1200 Twisted Handle Geometric Handle 1160104-W2-D...
- Page 27 LH Hinged Door - 100 - 1200 1795.136 Hinged Assembly LH 800 Twisted Spare 1795.138 Hinged Assembly LH 900 Twisted Spare 1795.142 Hinged Assembly 800 Geometric Spare 1795.143 Hinged Assembly 900 Geometric Spare 1795.129 Door Top Cap Pack 1795.145 Hinge Seal Kit 1795.157 Torsion Door Ball Catch Spare 1795.146 Door Wall Channel Spare 1160104-W2-D...
- Page 28 RH Hinged Door - 1000 - 1200 Twisted Handle Geometric Handle 1160104-W2-D...
- Page 29 RH Hinged Door - 100 - 1200 1795.137 Hinged Assembly RH 800 Twisted Spare 1795.139 Hinged Assembly RH 900 Twisted Spare 1795.142 Hinged Assembly 800 Geometric Spare 1795.143 Hinged Assembly 900 Geometric Spare 1795.129 Door Top Cap Pack 1795.145 Hinge Seal Kit 1795.157 Torsion Door Ball Catch Spare 1795.146 Door Wall Channel Spare 1160104-W2-D...
- Page 30 To activate this guarantee, you must return your completed registration card with a copy of proof of purchase from an approved Kohler retailer within 30 days of purchase. Fax: 0844 571 7157 This guarantee is in addition to your statutory rights and is subject to conditions (see registration card).
Need help?
Do you have a question about the Torsion and is the answer not in the manual?
Questions and answers