
Related Manuals for Keison KANE3500


Summary of Contents for Keison KANE3500
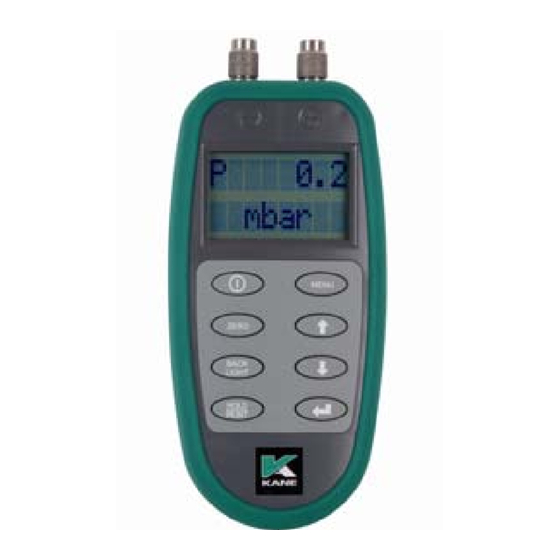
- Page 1 KANE3500 PRESSURE METER Stock No : 18853 January 2010 KANE3500 PRESSURE METER Stock No : 18853 January 2010...
- Page 2 GENERAL OPERATION When the instrument is first switched on using , the top line of the display shows in sequence the date, the time, the model version number, the battery status and the pressure units. The bottom line of the display shows a countdown number that starts at 10 and reduces to zero.
- Page 3 Two lines of 20 characters can be added to the header of printouts. The meters are controlled using 8 buttons The eight buttons are: ON/OFF Press for ON or OFF. The meter counts down from 10 after OFF is pressed Press to cancel OFF .
- Page 4 ZERO Press and hold until there is a beep to ZERO the reading BACKLIGHT Press and hold until there is a beep to toggle the BACKLIGHT HOLD/ PRINT A quick press to HOLD the reading and the display flashes. A longer press to PRINT ZERO Press and hold until there is a beep to ZERO the reading...
- Page 5 UP / DOWN Press either to change the bottom line of the display. ENTER Press to cancel OFF . The buttons with arrows also change settings such as date, time, and other menu items when MENU mode has been selected. UP / DOWN Press either to change the bottom line of the display.
- Page 6 BEFORE USING THE METER FOR THE FIRST TIME: Remove the cover and fit a new battery in the battery compartment. Take great care to ensure that the battery is fitted with the correct battery polarity. Then replace the battery cover. Always check that the meter is working correctly after replacing the battery.
- Page 7 BEFORE USING THE METER EVERY TIME: After switch on, check that date and time are correct and battery power is sufficient and the displayed units are the ones required. SAFETY WARNING Never connect to a pressure source where you are not sure what the maximum pressure might be.
- Page 8 NOTE : Use the input for all single input measurements of pressure or vacuum. Only – use the input when taking a differential measurement. NOTE : Use the input for all single input measurements of pressure or vacuum. Only – use the input when taking a differential measurement.
- Page 9 3. THE MENU FUNCTIONS The MENU structure comprises main menu options. STORE, SETUP and PRESSURE have a sub-menu structure. SERVICE is for use by an approved service organisation only. MENU Press and use the button to select the following function for change: STORE SETUP PRESSURE...
- Page 10 Press to select a main menu function When you have selected the function to change, press to select. Repeat this to scroll through the menu and select (using the key) and change (using the keys) the function. The final, logical returns you to the main menu display.
- Page 11 To exit the MENU function the final logical is pressed. No changes are made if the MENU function is aborted by pressing To exit the MENU function the final logical is pressed. No changes are made if the MENU function is aborted by pressing...
- Page 12 PRESSURE SMOOTH OFF = Normal ON = Readings filtered to damp out fluctuations RESOLVE HIGH = maximum number of decimal places LOW = one less decimal place displayed PS UNITS mBAR, inH2O, hPa, mmHg, PSI, kPa, Pa, mmH2O PRESSURE SMOOTH OFF = Normal ON = Readings filtered to damp out fluctuations...
- Page 13 REPORT TEST Automated Let-By Test, Stabilisation & Tightness Test VIEW Display stored report results (max. 8) DEL ALL Delete all test results SETTING Time 1 – Let-By Test duration, Time 2 – Stabilisation Period, Time 3 – Tightness Test duration Set using NB : Times are in minutes...
- Page 14 SETUP Temperature units - F or AUTO-OFF adjusts the auto power off time. A setting of 00 sets the meter for manual switch off only. Time – Uses “Military” time as standard: 7am = 07:00, 7pm = 19:00 Date user defined format Header –...
- Page 15 Language : English, French, Italian, German, Spanish The display’s contrast. EXIT Language : English, French, Italian, German, Spanish The display’s contrast. EXIT...
- Page 16 STORE VIEW: The test number appears on the top line. to change test number. The bottom line shows the measured value. to exit this mode. LOG : Saves a set of results when pressed. Storage capacity is 255 sets of results STORE VIEW:...
- Page 17 AUTO STO : Automatically stores readings at a preset interval. Press then select YES or NO. If YES set the desired time interval between 2 and 99 seconds and then press to activate and exit. DEL ALL: Clears all the memory when YES and pressed.
- Page 18 BOTTOM Max Pressure LINE OPTIONS Min Pressure Time Date Pressure units Battery Status Instrument Internal Temp BOTTOM Max Pressure LINE Min Pressure OPTIONS Time Date Pressure units Battery Status Instrument Internal Temp...
- Page 19 BOTTOM Max Pressure is displayed as : LINE OPTIONS ¯ Min Pressure is displayed as : BOTTOM Max Pressure is displayed as : LINE OPTIONS ¯ Min Pressure is displayed as :...
- Page 20 MEASURING Make sure you do not exceed the meter’s operating specifications. • Do not exceed the meter’s internal temperature operating range • Do not put the meter on a hot surface When taking critical draft measurements always re-zero the meter in the position you are taking the readings and hold the meter still during the test.
- Page 21 Differential Port Port 1 IR Printer Output Always use the top right hand port (Port 1) for taking single channel measurements (pressure or vacuum). Only use the left hand port for differential measurements Differential Port Port 1 IR Printer Output Always use the top right hand port (Port 1) for taking single channel measurements (pressure or vacuum).
- Page 22 If the pressure being measured exceeds the meter’s design range the display will show for “over-range” When taking draft readings at very low pressure or draft levels, for maximum accuracy, re-zero the meter in the orientation that it is being used. This eliminated gravity effects on the very sensitive pressure transducer.
- Page 23 EXAMPLE PRINTOUTS The standard printout is: The MAX and MIN readings are those observed since last switch on EXAMPLE PRINTOUTS The standard printout is: The MAX and MIN readings are those observed since last switch on...
- Page 24 NOTE: Printouts of stored readings will also include the TEST NO. below the header. NOTE: Printouts of stored readings will also include the TEST NO. below the header.
- Page 25 5. LET-BY and TIGHTNESS TESTING (only applicable for KANE3500- 1/UK and KANE3500-2/UK) To set the duration of each test press select PRESSURE, select REPORT, select SETTINGS. Use to set the times in minutes. TIME 01 = Let-By Test duration TIME 02 = Stabilisation period TIME 03 = Tightness Test duration 5.
- Page 26 LET-BY TEST (only applicable for KANE3500-1/UK and KANE3500-2/UK) Press , select PRESSURE, select REPORT, select TEST. If the let-by test is required, change to YES and press CONNECT 0.00 Connect the meter to the system under test and adjust the pressure accordingly. Once...
- Page 27 The display shows the countdown timer (Time 1 in REPORT SETTINGS) and the measured pressure. Once the countdown has finished the display shows the initial pressure P1 and the final pressure P2. 10.05 10.05 If the system fails the let-by test, press to exit the test sequence.
- Page 28 TIGHTNESS TEST (only applicable for KANE3500-1/UK and KANE3500-2/UK) After completing the let-by test (or after selecting NO), the stabilisation and tightness test can be performed. The display shows : CONNECT 0.00 Connect the meter to the system under test and adjust the pressure accordingly. Once...
- Page 29 The display shows the countdown timer (Time 2 in REPORT SETTINGS) and the measured pressure. Once the countdown has finished P3 is stored and the display changes TIME 19.85 (Where TIME = Time 3 in REPORT SETTINGS) The display shows the countdown timer (Time 2 in REPORT SETTINGS) and the measured pressure.
-
Page 30: Where P3 Is The Pressure At The Start Of The Test Period And P4 Is The Final Pressure At The
At the end of the countdown period the display automatically changes to 19.87 19.84 Where P3 is the pressure at the start of the test period and P4 is the final pressure at the end of the test period. Press to log the result. - Page 31 Press PRINT to print if required. The logged data can always be accessed by VIEW in the report menu. Press to EXIT. Press PRINT to print if required. The logged data can always be accessed by VIEW in the report menu. Press to EXIT.
- Page 32 Let-By Test and Tightness Test Printout NOTE : Printouts of stored readings will also include the LOG NO. Below the header Let-By Test and Tightness Test Printout NOTE : Printouts of stored readings will also include the LOG NO. Below the header...
- Page 33 METER ANNUAL RECALIBRATION AND SERVICE The meter should be re-calibrated and serviced annually by a Kane approved service centre. Local regulations may require more frequent re-calibration. Calibration is performed in firmware and there are no user accessible adjustments or user serviceable parts. METER ANNUAL RECALIBRATION AND SERVICE...
- Page 35 7. SPECIFICATION Model: KANE3500-1 Nominal Pressure Ranges mBar 80.00 800.0 8000 8.000 mmHg 1.000 60.00 80.00 30.00 7. SPECIFICATION Model: KANE3500-1 Nominal Pressure Ranges mBar 80.00 800.0 8000 8.000 mmHg 1.000 60.00 80.00 30.00...
- Page 36 SPECIFICATION Model: KANE3500-2 Nominal Pressure Ranges mBar 160.00 1600.0 16000 16.000 mmHg 2.000 120.00 160.00 60.00 SPECIFICATION Model: KANE3500-2 Nominal Pressure Ranges mBar 160.00 1600.0 16000 16.000 mmHg 2.000 120.00 160.00 60.00...
- Page 37 SPECIFICATION Model: KANE3500-5 Nominal Pressure Ranges mBar 400.0 4000 32000 40.00 mmHg 5.000 300.0 400.0 150.0 SPECIFICATION Model: KANE3500-5 Nominal Pressure Ranges mBar 400.0 4000 32000 40.00 mmHg 5.000 300.0 400.0 150.0...
- Page 38 SPECIFICATION Model: KANE3500-15 Nominal Pressure Ranges mBar 1040.0 100.00 15.00 mmHg 780.0 1040.0 400.0 SPECIFICATION Model: KANE3500-15 Nominal Pressure Ranges mBar 1040.0 100.00 15.00 mmHg 780.0 1040.0 400.0...
- Page 39 SPECIFICATION Model: KANE3500-30 Nominal Pressure Ranges mBar 2070.0 207.00 30.00 mmHg 1560.0 2070.0 800.0 SPECIFICATION Model: KANE3500-30 Nominal Pressure Ranges mBar 2070.0 207.00 30.00 mmHg 1560.0 2070.0 800.0...
- Page 40 Pressure Measurement Model: KANE3500-1 Max. overrange without damage to sensor is 5 times nominal range Range Resolution Accuracy + 20 Pa 0.1 Pa +0.5 Pa + 100 Pa 0.1 Pa + 3 Pa + 2000 Pa 1 Pa + 3% of reading + 80 hPa 0.01 hPa...
- Page 41 Pressure Measurement Model: KANE3500-2 Max. overrange without damage to sensor is 5 times nominal range Range Resolution Accuracy + 20 Pa 0.3 Pa +2 Pa + 2000 Pa 0.3 Pa + 5 Pa + 160 hPa 0.01 hPa + 3% of reading...
- Page 42 Pressure Measurement Model: KANE3500-5 Max. overrange without damage to sensor is 5 times nominal range Range Resolution Accuracy + 32000 Pa 1 Pa + 5 Pa + 300 hPa 0.01 hPa + 0.05 hPa + 400 hPa 0.1 hPa + 3% of reading...
- Page 43 Pressure Measurement Model: KANE3500-15 Max. overrange without damage to sensor is 5 times nominal range Range Resolution Accuracy + 309.99 hPA 0.01 hPa + 10 hPa + 1040.0 hPA 0.1 hPa + 3% of reading Pressure Measurement Model: KANE3500-15 Max. overrange without damage to sensor is...
- Page 44 Pressure Measurement Model: KANE3500-30 Max. overrange without damage to sensor is 5 times nominal range Range Resolution Accuracy + 1076 hPA 0.1 hPa + 10 hPa + 2070.0 hPA 1 hPa + 3% of reading Pressure Measurement Model: KANE3500-30 Max. overrange without damage to sensor is...
- Page 45 Dimensions Weight 295 grams with battery Handset 160mm x 80mm x 40mm (180mm incl. spigots) +0°C to +45°C Ambient 10% to 90% RH non- Operating condensing Range 9 Volt PP3 alkaline battery Power Supply Dimensions Weight 295 grams with battery Handset 160mm x 80mm x 40mm (180mm incl.
- Page 46 ELECTROMAGNETIC COMPATIBILITY European Council Directive 89/336/EEC requires electronic equipment not to generate electromagnetic disturbances exceeding defined levels and have adequate immunity levels for normal operation. Specific standards applicable to this meter are stated below. As there are electrical products in use pre- dating this Directive, they may emit excess electromagnetic radiation levels and, occasionally, it may be appropriate to check...
- Page 47 Use the normal start up sequence in the location where the meter will be used. Switch on all localized electrical equipment capable of causing interference. Check all readings are as expected. A level of disturbance is acceptable. If not acceptable, adjust the meter’s position to minimize interference or switch off, if possible, the offending equipment during your test.
- Page 48 At the time of writing this manual (Jan 2010) Kane International Ltd are not aware of any field based situation where such interference has occurred and this advice is only given to satisfy the requirements of the Directive. At the time of writing this manual (Jan 2010) Kane International Ltd are not aware of any field based situation where such interference has occurred and this advice is only given to...
- Page 49 EN 61000-6-3 :2001 EN 61000-6-1 :2001 and is certified to be compliant Specification EC/EMC/KI/KANE3500 details the specific test configuration, performance and conditions of use. ELECTROMAGNETIC COMPATIBILITY This product has been tested for compliance...
- Page 50 Please Note: Batteries used in this instrument should be disposed of in accordance with current legislation and local guidelines. At the end of its life the meter should be sent to the appropriate recycling centre in accordance with current legislation and local guidelines Please Note: Batteries used in this instrument should be...
- Page 51 APPENDIX 1 – Main Parameters : UNITS : User selectable from : inH2O mBar mmH2O NOTE! Not all units available on all models. Date shown as day, DATE : month and year. The order can be changed using the menu function. Date is recorded when each test is printed.
- Page 52 TIME : The time is shown in hours and minutes, expressed in « Military » time or the 24 hr clock. Time is recorded when each test is stored/printed. NOTE ! When changing the batteries on the instrument the memory will store the date and time for up to one minute, if outside this...
- Page 53 SYMBOLS used on the display. The internal temperature of the meter The pressure reading in the user’s selected units Displays the Battery power available in % When the LO BAT symbol appears this indicates the batteries are less than 10% of charge and should be replaced, readings may be affected if used with low power batteries...
- Page 56 Thank you for reading this data sheet. For pricing or for further information, please contact us at our UK Office, using the details below. UK Office Keison Products, P.O. Box 2124, Chelmsford, Essex, CM1 3UP, England. Tel: +44 (0)330 088 0560 Fax: +44 (0)1245 808399 Email: sales@keison.co.uk...
Need help?
Do you have a question about the KANE3500 and is the answer not in the manual?
Questions and answers