Table of Contents
Advertisement
Quick Links
Advertisement
Table of Contents

Related Manuals for Ackuretta DENTIQ


Summary of Contents for Ackuretta DENTIQ
- Page 1 2015...
-
Page 3: Legal
DENTIQ, the DENTIQ logo, Alpha 3D, the Alpha 3D logo, Ackuretta, and the Ackuretta logo are all trademarks of Ackuretta Technolo- gies Pvt. Ltd. Products or company names mentioned herein besides Ackuretta-branded products are registered trademarks of their owners. -
Page 5: Table Of Contents
Contents Contents Legal....................i About Your Printer............... 1 1.1 Specifications....................1 1.2 Features......................2 1.3 Package contents ..................2 1.4 Printer overview..................3 1.5 Printer interface ..................4 1.6 Web interface ..................... 6 Getting started ................7 2.1 Unboxing your printer................7 2.2 What you need................... - Page 6 Post-processing ................21 4.1 Removing the Build Platform .............21 4.2 Removing the print from the build platform .......22 4.3 Cleaning and drying your print ............22 4.4 Removing the supports ................24 4.5 Curing your print in a UV box ............24 Maintaining your printer............27 5.1 Using the Clean Vat function..............27 5.2 Cleaning the vat..................29 Configuring your printer ............
-
Page 7: About Your Printer
About Your About Your Printer Printer DENTIQ is a highly precise chairside 3D printer designed to pro- vide a premium ownership experience for every type of user. Equipped with auto-calibration and 100+ precalibrated materials, DENTIQ offers a simpler learning curve for beginners while provid- ing the same level of accuracy and consistency that professionals are looking for. -
Page 8: Features
Features • Auto-calibration • 47-micron Pixel Size For Precision & Accuracy • Easy Part Replacement • 100+ Validated Materials • Modern Piano Black Finish • Failsafe Vat Frame • Vat Standoffs Protect Vat Film • Ergonomic Touchscreen • Swivel UV-filter Hood •... -
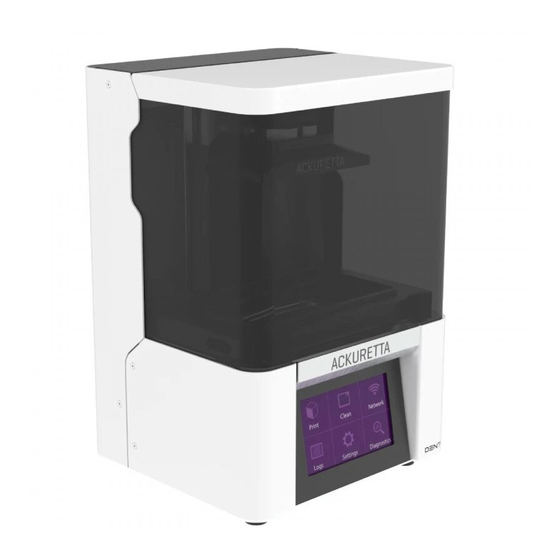
Page 9: Printer Overview
Printer overview... -
Page 10: Printer Interface
Printer interface When you turn on your printer, the machine takes a moment to load and then shows the Home screen. The Home screen allows access to the following functions and information. - Page 11 Table 2: Home Screen Buttons Button Description Print The Print screen is the pri- mary screen for uploading files and starting the print process. For more informa- tion, see “Printing” on page 15. Clean Vat Remove pieces of prints that did not stick to the build plat- form during printing.
-
Page 12: Web Interface
Table 2: Home Screen Buttons Button Description Settings Configure your printer system settings or update your printer firmware and material settings. For more informa- tion, see “Configuring your printer” on page 31. Diagnostics Use the Diagnostics func- tions to determine the source of any printer issue. -
Page 13: Getting Started
Getting started Getting started Unboxing your printer Step 1 Open the printer box. The top of your printer is visi- ble with handles on both sides. There are three smaller accessory boxes packed behind the printer. Step 1 Remove the accessory boxes from the main box. Step 1 Remove the contents of the four accessory boxes and put them in a safe place. -
Page 14: What You Need
1920 × 1080 display resolution • Safety equipment – You should always wear chemical-resistant gloves when using photopolymer resins. Ackuretta also strongly recommends wearing a respirator or face mask when handling resins, and wearing UV-protective glasses when work- ing with the internal components of the printer. You can also wear cut-resistant gloves when removing prints from a build platform, just in case your knife slips. -
Page 15: Setup Environment
405 nm resin. • UV box – Ackuretta resins are all tested with the Ackuretta UV oven. Other resin suppliers usually recommend a different UV ovens for curing. -
Page 16: Temperature: 18° - 25° C
2.3.2 UV-Filtered Lighting The hood on the DENTIQ protects the resin from ambient lighting while it is closed. As you use the printer, the door will be opened many times, and the resin will be exposed to UV light. -
Page 17: Connecting Your Printer To A Network
Connecting your printer to a network Connect your printer to a network so that you can get access to the web console and start the print process from an Internet browser. There are two options for connecting your printer to your network: •... -
Page 18: Adding Resin To The Vat
Adding resin to the vat To add resin to the vat: Step 1 Select a specific resin for the application. Step 2 Shake the bottle for approximately two minutes to thoroughly mix the resin. Step 3 Open the bottle. Step 4 Pour the resin in the vat, starting at one side and moving to the other so that the resin is evenly dis- tributed across the bottom of the vat. - Page 19 Step 3 Turn the knob clockwise to securely attach the build platform to the guideway arm. Result of this task: Your printer is ready for use when the build platform is in place and securely attached to the guideway arm.
-
Page 21: Printing
“The print process” on page 20 Designing the 3D model The most important part of using a 3D printer is having the 3D file for the object you want to print. Ackuretta printers and software work best using 3D models that are in STL format. -
Page 22: 3Rd-Party Software
Ackuretta provides a variety of different software solutions to match your industry or application. Import your STL or other design file into your Ackuretta software, add supports to your print, and use the built-in slicer to make your print file. -
Page 23: Starting The Print Process
Press Material to change your resin settings if your resin profile is incorrect. More info: If you are using an Ackuretta resin pro- file from Alpha 3D, the resin profile is automatically set by the software. If you are using a third-party resin, you may need to make changes to your mate- rial settings. -
Page 24: Printing Via The Web Console
Step 10 Press Print to start the print process. Note: You can remove the USB Result of this task: The build platform moves down and toward flash drive when the vat and the print process begins. the the build plat- form moves down and the print pro- 3.2.2... - Page 25 Step 5 Browse the selected directory for your print file and click Open. More info: All print files are either IBF or SBF format. For more information about software and file types, see “Making your print file” on page 16. •...
-
Page 26: The Print Process
The print process • You can pause or stop the print process at any time via the printer console or the web console. • The printer automatically shows the Printing Process screen when you start a print job. You can always see print informa- tion, such as the duration and time remaining, and activate spe- cific print options. -
Page 27: Post-Processing
Post-processing Post-processing Removing the Build Platform When the print process is complete, the build platform moves to the top of the Z-axis tower. Step 1 Remove the hood from the printer. Turn the knob on the build platform in a counter- clockwise direction. -
Page 28: Removing The Print From The Build Platform
Removing the print from the build platform To remove the print from the build platform. Step 1 Gather the build platform with the print and move to a place where you can work safely and where the print will not be damaged if it falls from the build platform. - Page 29 The goal when cleaning the print is to remove all uncured resin so that it is safe to use. What You Need: • Safety equipment – gloves and a respirator or face mask • Cleaning alcohol–isopropyl alcohol (99% solution) or ethyl alco- hol (95% solution) •...
-
Page 30: Removing The Supports
Removing the supports For prints that have supports or a base attached, you can remove supports any number of ways. The following tips are some ideas and hints on how to easily and effectively remove the supports. Caution Always hold the blade next to the part and then slowly push it through the support. - Page 31 For information about recommended curing times, please refer to Printing Strategies. Ackuretta UV boxes are tested and certified for all Ackuretta branded resins (i.e. Qura and CURO). Other resin suppliers may provide information for using different UV boxes with their materi- als.
-
Page 33: Maintaining Your Printer
Maintaining your Maintaining your printer printer Using the Clean Vat function When a print fails, you can use the Clean Vat function to remove pieces of print that did not securely attach to the build platform during the print process. The Clean Vat function cures a layer of resin at the bottom of the vat. - Page 34 Clean Vat function. You can also use the + and - but- tons to set the time value in seconds. • We strongly recommend setting a time that is three times more than the normal curing time of the resin. •...
-
Page 35: Cleaning The Vat
Cleaning the vat If you want to change resins or check the vat film for damage, it is best to completely clean the vat. Cleaning the vat takes approximately 15 minutes. Tip: We strongly recommend You will need: keeping a differ- ent vat for each •... - Page 36 Step 4 Pour the resin into the bottle using one of the grooves in a corner. • You can use a rubber spatula to push the resin down to preserve more resin. Never use metal tools on the vat film. Step 5 Put the vat down on the table.
-
Page 37: Configuring Your Printer
Configuring your Configuring your printer printer The Printer Settings screen shows system-wide settings and infor- mation. All the same functionality exists in the printer console. To get access to the Printer Settings screen, go to Settings > Printer. Table 1: Printer Settings Setting Description Firmware version... -
Page 38: Updating Settings
The printer stores settings for all Ackuretta materials. You can modify or add materials via the Material Settings screen If you upload a print file using an Ackuretta resin in Alpha 3D or Omega 3D, your printer automatically detects the resin profile and... - Page 39 You must set a material setting on your printer if you use the Resin Test profile in Alpha 3D, The Material Settings screen is available via the Print menu. Go to Print and select the dropdown menu. Select Material to see the Material Settings.
-
Page 40: Connecting To A Network
Table 3: Material Settings Setting Description Save Save the material setting and exit this screen. If the Name and Layer Thickness are the same as a different material, a popup window appears and asks if you want to overwrite a previous setting or add a new resin. -
Page 41: Connecting To A Wireless Network
printer’s IP address is visible on the Network screen and in the top- right corner of the Home screen. Step 1 Connect your printer to either your router or your computer with a network (i.e. Ethernet) cable. Step 2 Open an Internet browser on the computer. Step 3 Key the IP address into the address bar of the browser. -
Page 42: Configuring A Static Ip Address
Step 6 Select the network that you want to use. • You can use the arrows on the right-side of the screen to change the page and see other net- works if there are more than five. • You must key in the password if your wireless network is password-protected. - Page 44 No. 322, Neihu Road Section 1, O U R P A R T N E R I N S P A C E Neihu District, Taipei 11493, Taiwan www.ackuretta.com sales@ackuretta.com...
Need help?
Do you have a question about the DENTIQ and is the answer not in the manual?
Questions and answers