Table of Contents
Advertisement
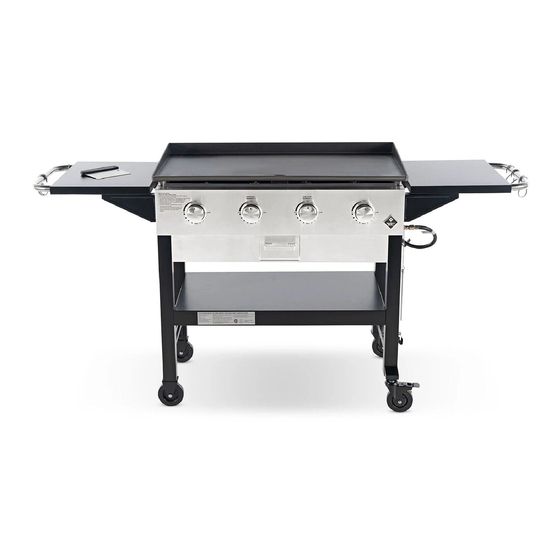
Member's Mark
4 Burner Gas Griddle
Assembly Instructions & User Manual
Model G70201 / G70201-1
STOP
Do not return this product to the store. If you need help or require parts, call the Customer Care Hotline
1-833-454-0864
This manual must remain with the product at all times.
FOR OUTDOOR USE ONLY.
Manual Revision #: 10.13.2021
Advertisement
Table of Contents

Related Manuals for Member's Mark G70201


Summary of Contents for Member's Mark G70201
- Page 1 Member’s Mark 4 Burner Gas Griddle Assembly Instructions & User Manual Model G70201 / G70201-1 STOP Do not return this product to the store. If you need help or require parts, call the Customer Care Hotline 1-833-454-0864 This manual must remain with the product at all times.
- Page 2 IMPORTANT SAFETY WARNINGS CAUTION DANGER Read and follow all safety IF YOU SMELL GAS: statements, assembly instructions, 1. Shut off gas to the appliance. use and care directions before 2. Extinguish any open flame. attempting to assemble and cook. 3. Open lid. 4.
-
Page 3: Table Of Contents
TABLE OF CONTENTS: Installation / Additional warnings Gas Hook-Ups and Warnings LP cylinder requirements LP cylinder removal, transport and storage LP cylinder filling Safety Hose and Regulator Connecting regulator to LP cylinder Regulator flow limiting device (Propane) Resetting the regulator flow limiting feature Leak Testing Operation - Lighting Instructions Leak Testing - Shut Down Procedure... - Page 4 INSTALLATION Installation must conform with local codes or, in the absence of local codes, with either the National Fuel Gas Code, ANSI Z223.1/NFPA 54, Natural Gas and Propane Installation Code, CSA B149.1, or Propane Storage and Handling for Recreational Vehicles, ANSI A 119.2/NFPA 1192, and CSA Z240 RV Series, Recreational Vehicle Code, as applicable.
-
Page 5: Gas Hook-Ups And Warnings
Leveling Your Griddle c. Adjust the griddle top height by turning the leveling nut on the griddle feet, to ensure positive flow of grease to the grease catch. GAS HOOK - UP’S AND WARNINGS (LP) Liquid Petroleum Gas • LP gas is non-toxic, odorless and colorless when produced. for your safety, LP gas has been given an odor (similar to rotten cabbage) so that it can be smelled. -
Page 6: Lp Cylinder Removal, Transport And Storage
WARNING Any attempt to connect a regulator to any connectors other than the mating TYPE -1 connector could result in fires, explosions, injuries, or property damage. Use only LP cylinders equipped with this type of valve. DO NOT connect to a propane cylinder exceeding 9.1 kg capacity or use a cylinder with any other type of cylinder valve connection device. -
Page 7: Lp Cylinder Filling
LP CYLINDER FILLING • Use only licensed and experienced dealers. • Ensure that the dealer checks and tests the tank for leaks after filling. • LP dealer must purge new cylinder before filling. • Dealer should NEVER fill LP cylinder more than 80% of LP cylinder volume. Volume of propane in cylinder will vary by temperature. -
Page 8: Connecting Regulator To Lp Cylinder
SAFETY HOSE AND REGULATOR Connecting Regulator to the LP Cylinder 1. Turn all control knobs to the “OFF” position. Shut off valve 2. Turn LP cylinder “OFF” by turning hand-wheel clockwise to a full stop. 3. Remove the protective cap from LP cylinder valve. Always use cap and strap supplied with valve. -
Page 9: Leak Testing
LEAK TESTING A leak test is used to determine the integrity of a seal. Before using your gas griddle, perform a leak test on the connection between the grill manifold, regulator and the gas cylinder to reduce the risk of serious bodily harm or death from fire or explosion. -
Page 10: Operation - Lighting Instructions
LIGHTING INSTRUCTIONS WARNING Before you light this griddle, turn all control knobs to the “OFF” position and close the LP Cyclinder. Failure to follow proper lighting sequence will activate the regulators “FLOW LIMITING DEVICE” feature, and require a reset (See page 8). Lighting Burners 1. -
Page 11: Leak Testing - Shut Down Procedure
LIGHTING INSTRUCTIONS Match-Lighting — Burners Repeat STEPS 1-2 “Lighting Burners” above. 3. To match light: push in and turn the far right control knob counter clockwise to the “MAX” position. 4. Immediately strike a match or use a butane lighter, and position through the lighting hole on the right side of the firebox. -
Page 12: Prevention
PREVENTION ATTENTION Once lit, confirm that the burner is properly lit and that the flame pattern is as desired. If the flame pattern is other than normal, consult the troubleshooting guide for corrective action. Burner Flame Check The burner flame pattern is the key indicator of proper or improper function within the firebox. - Page 13 PREVENTION Characteristics of A Flash-Back Fire A fire burning between the firebox and control panel, usually accompanied by HOT OR MELTING CONTROL • KNOBS. Burners may burn with LARGE YELLOW FLAMES. • • Burners may not light. Prevent Flash-Back Fire 1.
-
Page 14: Troubleshooting
TROUBLESHOOTING PROBLEM POSSIBLE CAUSES SOLUTION Electrode should be positioned 1/8" to 1/4" Electrode misaligned away from the burner tube. Burner will not light (can ignite with a Electrode ceramic piece is damaged Replace electrode. match) Contact Customer Support 1-833-454-0864 Faulty Ignition Burners are not properly seated over valve Check burners to ensure that they are seated orifices. - Page 15 TROUBLESHOOTING PROBLEM POSSIBLE CAUSES SOLUTION Out of propane. Refill or replace the propane tank. Burner and/or burner tubes are blocked. Clean burners. Decreasing heat, “popping sound” Regulator flow limiting device activated either Reset the pressure regulator. by improper lighting, opening control knobs too quickly, or a poor connection between the griddle and tank.
-
Page 16: Seasoning Your Griddle
SEASONING AND GRIDDLE CARE What is seasoning? Seasoning is the process of applying multiple coatings of oil to the griddle surface, heating to a high temperature, to bake the oil into the griddle top, creating a slick, non-stick surface, that is blackened and protected from rust and oxidization. - Page 17 SEASONING AND GRIDDLE CARE Oil’s For Seasoning a. Vegetable oil b. Vegetable shortening c. Canola oil d. Flax oil e. Olive oil - Not ideal. Burns off at lower temperatures than the other options above. DO NOT USE SOAP on the griddle surface, this will destroy the seasoning. NOTE With continued use of your griddle, the seasoning bond will get better and better.
-
Page 18: Care And Maintenance
CARE AND MAINTENANCE Griddle Cleaning Tools You will need: • PROTECTIVE GLOVES • SCRAPER • CLOTH/ PAPER TOWELS • LONG HANDLE TONGS • OIL BOTTLE • STEEL WOOL/ GRILL STONE • WATER BOTTLE Cleaning Your Griddle At the end of every cook, and before storing your griddle, you should scrape off any remaining debris left over from cooking, before re-seasoning with a coat of oil. - Page 19 CARE AND MAINTENANCE Burners & Firebox Maintenance Although your griddle’s firebox is fully protected from grease and other build-up that can accumulate during cooking, regular checks of the burners and electrodes are still required to ensure proper performance, safety and a longevity of your parts.
-
Page 20: Storing Your Griddle
CARE AND MAINTENANCE Cleaning Exterior Parts Routine cleaning of exterior surfaces is necessary to remove contaminants, rust and avoid permanent damage. DO remove dirt and contamination immediately to avoid permanent damage to stainless-steel and painted • surfaces. DO wipe down all surfaces frequently with a basic vinegar and water solution, or basic warm water and detergent. •... - Page 21 CARE AND MAINTENANCE GENERAL GRIDDLE SAFETY TIPS 1. Keeping outdoor cooking gas appliance area clear and free from combustible materials, gasoline and other flammable vapors and liquids. 2. Not obstructing the flow of combustion and ventilation air. 3. ALWAYS turn control knobs and gas source or tank “OFF” when not in use. 4.
-
Page 22: Start Grilling
START GRILLING WARNING Always observe safe food handling and safe food preparation practices when using this griddle, to prevent food-borne illnesses. WARNING To ensure that it is safe to eat, food must be cooked to the minimum internal temperatures listed in the table below. USDA Safe Minimum Internal Temperatures Fish 145°... - Page 23 WARNING: HOT SURFACES WARNING EXTERIOR SURFACES WILL BECOME VERY HOT. TO PREVENT BURNS, ALWAYS WEAR INSULATED PROTECTIVE GRILLING MITTS WHEN WORKING AT THE GRIDDLE. • KEEP AWAY FROM COMBUSTIBLE MATERIALS • KEEP CHILDREN AND PETS AWAY FROM THIS GAS FIRED APPLIANCE •...
- Page 24 1-833-454-0864...
- Page 25 HARDWARE PACK Description Picture Wrench 1/4"-20UNC x 13 Screw Tapping Screw Φ6.5 Washer NO.10-24UNC x13 Screw TOOLS REQUIRED Screwdriver 2 people (Not Included) 1-833-454-0864...
- Page 26 EXPLODED DIAGRAM FOR G70201 HARDWARE PACK 1-833-454-0864...
- Page 27 PARTS LIST FOR G70201 Qty Description Part No. Qty Description Part No. GRIDDLE TOP G702-1700-C1 MATCH HOLDER G329-0002-C1 HEX NUT, GRIDDLE G329-1101-C1 CASTER, FIXED G702-0203-C1 UPPER CART BRACE, LEFT G702-0207-C1 FIREBOX G702-1100-C1 BURNER, W/GAS COLLECTOR G702-1200-C1 HARDWARE PACK G70201-B001-C1 ELECTRODE SET...
-
Page 28: Assembly Instructions
ASSEMBLY INSTRUCTIONS NOTE: This side up. 1-833-454-0864... - Page 29 ASSEMBLY INSTRUCTIONS NOTE: This side up. Tighten the screws 1-833-454-0864...
- Page 30 ASSEMBLY INSTRUCTIONS 1-833-454-0864...
- Page 31 ASSEMBLY INSTRUCTIONS Attention: Screw (B) is assembled from inside burnerbox. 1-833-454-0864...
- Page 32 ASSEMBLY INSTRUCTIONS 1-833-454-0864...
- Page 33 ASSEMBLY INSTRUCTIONS Call 1-833-454-0864 contact customer support Item # 615265512962 to order replacements 1-833-454-0864...
- Page 34 ASSEMBLY INSTRUCTIONS 1-833-454-0864...
- Page 35 ASSEMBLY INSTRUCTIONS 1-833-454-0864...
- Page 36 ASSEMBLY INSTRUCTIONS Tighten the screws 1-833-454-0864...
- Page 37 ASSEMBLY INSTRUCTIONS D A N G E R HEAVY. LIFT WITH CARE 1-833-454-0864...
- Page 38 ASSEMBLY INSTRUCTIONS 1-833-454-0864...
- Page 39 ASSEMBLY INSTRUCTIONS NOTE: Please perform a leak test before use. 1-833-454-0864...
-
Page 40: Warranty And Service
WARRANTY AND SERVICE This product is covered by the Sam's Club Member Satisfaction Guarantee. Please visit samsclub.com for more information. BEFORE YOU CALL FOR SERVICE, have the following information available: 1. Serial Number: The serial number is located on the front of this manual and on the rating label located inside your grill cart. 2. - Page 41 WARRANTY AND SERVICE 6. Shipping and handling charges are the responsibility of the original consumer-purchaser for all in/out of warranty part orders. 7. This limited warranty will not reimburse for the cost of any consequential losses, including (but not limited to) inconvenience, food, personal injury, expenses for travel, transportation or property damage.
- Page 42 NOTES 1-833-454-0864...
- Page 43 NOTES 1-833-454-0864...
- Page 44 Arkansas 72716-0745 Made In China Winners Products Engineering Ltd 25/F., Cofco Tower, 262 Gloucester Road Causeway Bay, Hong Kong Questions or Comments? We would love to hear about your linktr.ee/member's.mark Member's Mark experience! Visit us at: samsclub.com/membersmarkhelp CONTACT US: 1-833-454-0864...
Need help?
Do you have a question about the G70201 and is the answer not in the manual?
Questions and answers
What kind of oil to season cooktop?
Vegetable oil, vegetable shortening, canola oil, or flax oil should be used to season a Member's Mark G70201 cooktop. Olive oil is not ideal because it burns off at lower temperatures.
This answer is automatically generated
where to find valve replacement for a G70201-1