Advertisement
Quick Links
Advertisement

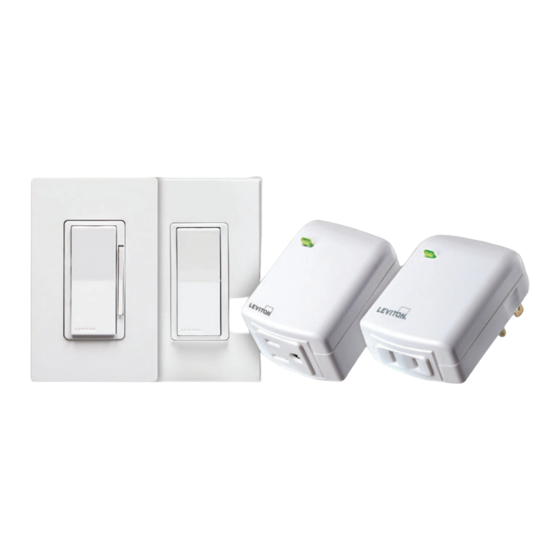
Summary of Contents for Leviton Decora Smart DG6HD
- Page 1 Getting Started Guide DIMMER Cat. No. DG6HD...
- Page 3 Welcome to the Decora Smart™ family of Zigbee enabled devices ® See the complete line of Zigbee enabled dimmers, switches and plug-ins leviton.com/decorasmart...
- Page 4 Add your dimmer to a Zigbee hub to control it with your smartphone or a voice interface. We are here to help CALL CHAT 1-800-824-3005 (USA) leviton.com 1-800-405-5320 (Canada) EMAIL dssupport@leviton.com ONLINE leviton.com/decorasmart...
- Page 5 To ensure proper communication do not use metal wallplates. For LED compatibility recommendations, go to leviton.com/LED. Note: When two or more dimmers are installed next to each other the incandescent load rating becomes 500W for each dimmer.
- Page 6 Features Rocker Manually turn light on. The bottom of the paddle turns the light off. Brightness indicator lights Displays light level when adjusting brightness. Status light Illuminates when load is off. Dim / bright bar Manually adjust light levels. Air gap switch This feature will stop power to the lights to replace a bulb.
-
Page 7: Before You Install
Before you install Things to consider: • If light(s) are controlled from more than one location, you will need a DD00R remote. See the DD00R installation instructions for wiring instructions. • Zigbee is a mesh network. It must be installed within 30 ft of hub or another Zigbee 3.0 compliant device. - Page 8 Identify your wires Check your wall box: WARNING: TO AVOID FIRE, SHOCK OR DEATH, turn off power at the circuit breaker. Remove wallplate and disconnect switch. Ensure disconnected wires are not touching. Restore power. Carefully test wires with voltage tester to find the hot wire.
- Page 9 Wire your dimmer Work on only one connection at a time. Connect wires as shown. Secure wire connections with an electrical connector. Y L / R D If your wall box looks different, consult an electrician.
- Page 10 Test and install Restore power. Status light should flash green indicating your dimmer is ready to join the network. Turn off power at circuit breaker before completing the dimmer installation. Gently push wires into wall box. Screw dimmer to box. Install screwless wallplate base and snap on Decora wallplate.
- Page 11 Operate and program Manually control light levels with rocker or dimmer bar. Program your dimmer. Set your dimmer’s load type for proper operation. Enter programming mode by holding the top of the paddle for 7 seconds. - Status light will turn amber. Tap the top of the paddle 4 times.
- Page 12 Minimum dim level The default dimmer settings work well with most lighting fixtures. If you are not experiencing full rage dimming, please adjust the minimum dim level. Enter programming mode by holding the top of the paddle for 7 seconds. - Status light will turn amber.
-
Page 13: Factory Default
Factory default To reset dimmer to factory settings and place into joining mode: Hold the top of the paddle for a total of 14 seconds. After the first 7 seconds the light turns amber. Continue to hold. After a total of 14 seconds, the status light will quickly flash red/amber. -
Page 14: Safety First
Safety first WARNING: TO AVOID FIRE, PERSONAL INJURY OR DEATH DO NOT USE the dimmer for the control of high power heating appliances such as portable heaters. There can be unexpected consequences if not used with care. For example, an empty coffee pot can be remotely turned on. If that should happen, your coffee pot could be damaged from overheating. -
Page 15: Limited 5 Year Warranty
Copyright and Trademark Information The Leviton logo and Decora Smart are trademarks of Leviton Manufacturing Co., Inc. Zigbee is a U.S. registered trademark of Zigbee Alliance. Use herein of other third party trademarks, service marks, trade names, brand names and/or product names are for informational purposes only, are/may be the trademarks of their respective owners;... - Page 16 EMAIL dssupport@leviton.com Leviton Manufacturing Co., Inc. 201 North Service Road, Melville, NY 11747 Telephone: 1-800-824-3005 Visit Leviton’s website at www.leviton.com © 2020 Leviton Manufacturing Co., Inc. All rights reserved. Specifications subject to change at any time without notice. DI-000-DG6HD-02A...


Need help?
Do you have a question about the Decora Smart DG6HD and is the answer not in the manual?
Questions and answers