Clearaudio nano phono V2 User Manual
Hide thumbs
Also See for nano phono V2:
- User manual (21 pages) ,
- User manual (7 pages) ,
- User manual (3 pages)

Related Manuals for Clearaudio nano phono V2


Summary of Contents for Clearaudio nano phono V2
- Page 1 V2 nano phono headphone V2 User manual Bedienungsanleitung © clearaudio electronic GmbH, 2020-07 Made in Germany...
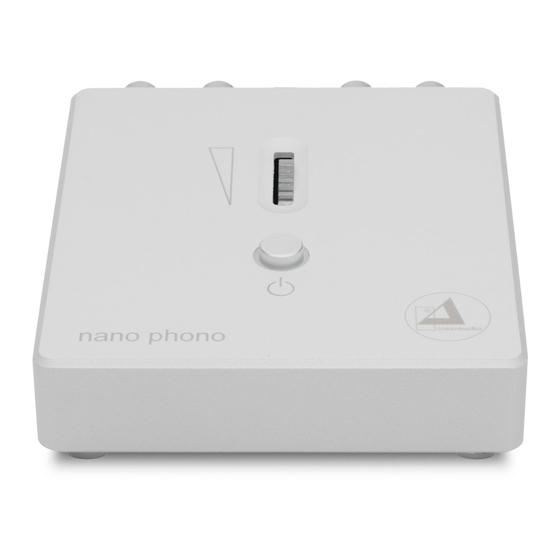
- Page 2 User manual ........2 - 5 Bedienungsanleitung ......6 - 9 Clearaudio Dear customer, nano phono V2 / nano phono headphone V2 congratulations on the purchase of your new MC/ MM phonostage. nano phono V2 / nano phono headphone V2 features a power switch: we recommend that you keep the unit switched on in order to maintain a constant temperature for the electronic parts inside (this uses very little power).
- Page 3 . Make sure that the gain control is set to its lowest volume before connecting nano phono V2 / nano phono headphone V2 to your MC/MM cartridge and preamplifier. Finally, the very last thing to do is to connect the power supply to the mains and press the power button to the “ON”...
- Page 4 User manual / Bedienungsanleitung - Notice - nano phono V2 / nano phono headphone V2 I f you are using the with a two-pin mains plug, you may notice that inserting the plug into the mains socket one way round gives a slightly better sound than the other way.
-
Page 5: Warranty
85mm x 106mm x 25mm Warranty: years Clearaudio * Provided that the warranty card is correctly completed and returned to , or your product is registered online at https:/ / clearaudio.de/ en/ service/ registration.php, within 14 days of purchase. Made in Germany... - Page 6 Um alle Vorteile nutzen zu können, lesen Sie bitte diese Bedienungsanleitung aufmerksam durch. Alle Hinweise dienen dem Ausschöpfen der vollen Klangeigenschaften und bewahren Sie vor Fehlbedienungen. clearaudio nano phono V2 / nano phono Wir wünschen I hnen viel Freude mit I hrem neuen headphone V2 Vorverstärker.
- Page 7 Der Lautstärkeregler auf der Oberseite des Gerätes sollte auf die niedrigste Lautstärke eingestellt sein. Verbinden Sie anschließend die Cinchstecker des nano phono V2 / nano phono headphone V2. Tonarmkabels mit den Cinchbuchsen in der Bitte schließen Sie erst jetzt das Gerät an das Stromnetz an und schalten das Gerät ein! Abb.
- Page 8 Das Gerät sollte daher nicht in der Nähe von Hochfrequenzerzeugenden Geräten wie z.B. Mobiltelefonen oder Modems bzw. an Stromnetzen die für Datenverkehr genutzt werden, betrieben werden. nano phono V2 Produktinformation nano phono V2 verfügt über einen Dual Mono MM und MC Eingang der wahlweise auf der Unterseite des Gerätes für jeden Kanal ( Links –...
-
Page 9: Technische Daten
Abmessungen ( b x t x h ) : 85 mm x 106 mm x 25 mm Garantie: 3 Jahre * clearaudio * Nur bei korrekt ausgefüllter und eingesandter Garantiekarte an oder online registrierter Garantie innerhalb von 14 Tagen. Made in Germany... -
Page 10: Nederlands Garanti E
3 Jahre) in Anspruch nehmen zu können, senden Sie uns bitte die beigelegte Garantiekarte innerhalb von zwei Wochen korrekt und vollständig ausgefüllt zu oder registrieren Sie die Garantie online unter https:/ / clearaudio.de/ de/ service/ registration.php, da sonst nur die gesetzliche Gewährleistung von 2 Jahren berücksichtigt werden kann. - Page 11 ESPAÑOL GARANTI A Clearaudio Para obtener información acerca de la garantia póngase en contacto con su distribuidor GUARDE SU RECI BO DE COMPRA Su recibo de compra es su prueba permanente de haber adquirido un aparato de valor, Este recibo deberá guardarlo...
- Page 12 Technical specifications are subject to change or improvement without prior notice. Product availability is as long as stock lasts. Copies and reprints of this document, including extracts, require written consent from Clearaudio Electronic GmbH, Germany. 2020 © clearaudio electronic GmbH, 2020-07...
Need help?
Do you have a question about the nano phono V2 and is the answer not in the manual?
Questions and answers