
Subscribe to Our Youtube Channel
Related Manuals for Anzzi Envo WH-AZ011-M3


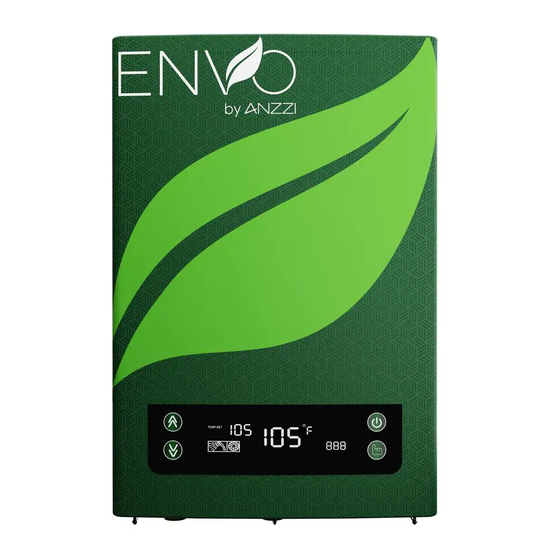
Summary of Contents for Anzzi Envo WH-AZ011-M3
- Page 1 ITEM: WH-AZ011-M3 WH-AZ015-M3 WH-AZ018-M3 WH-AZ021-M3 WH-AZ024-M3 WH-AZ027-M3 ANZZI ELECTRIC INSTANT WATER HEATER INSTALL & OPERATION MANUAL V1.0 next page...
- Page 3 PRODUCT SIZE CHART TOOLS AND MATERIALS Bucket Thank you for purchasing ENVO ELECTRIC INSTANT WATER HEATER. To enjoy your hot water life at its best, please read and follow the installation and operation instructions carefully, to ensure the long life and reliable operation of this appliance.
-
Page 4: Table Of Contents
TABLE OF CONTENTS Safety Precautions ----------------------------------------------------------------------------- PG.1 Electrical Diagram ------------------------------------------------------------------------------ PG.3 Product Inner Structure ---------------------------------------------------------------------- PG.4 Product Specifications ----------------------------------------------------------------------- PG.6 Installation Guideline ------------------------------------------------------------------------- PG.6 Installation ---------------------------------------------------------------------------------------- PG.8 Operation Instructions ------------------------------------------------------------------------ PG.14 Cleaning & Maintenance --------------------------------------------------------------------- PG.14 Trouble-Shooting ------------------------------------------------------------------------------- PG.15 Packing List -------------------------------------------------------------------------------------- PG.15... -
Page 5: Safety Precautions
SAFETY PRECAUTIONS WARNING When using electrical appliances, basic Use stainless steel flexible hoses or copper ● safety precautions should always be tubes of 3/4" (except WH-AZ011-M3 is using followed including the following: 1/2" connections) on the inlet and outlet. DO NOT USE PVC, CPVC or plastic supply The installation must be in compliance with line directly to the heater. - Page 6 SAFETY PRECAUTIONS ATTENTION It is extremely important to FLUSH the Increasing the water temperature setting ● ● pipes to wash away sundries and residue in may improve the cleaning performance of the pipes before connecting the water heater dishwashers. to it. The user can adjust the temperature setting ●...
-
Page 7: Electrical Diagram
ELECTRICAL DIAGRAM MODEL: WH-AZ011-M3 THERMAL CUT-OUT 194°F CONTROL SYSTEM DISPLAY OUTLET TEMP. SENSOR INLET TEMP. SENSOR SCREEN FLOWMETER REMARK: R:HEATING SYSTEM T:TRIAC MODEL: WH-AZ015-M3/ WH-AZ018-M3 THERMAL CUT-OUT 194°F CONTROL SYSTEM DISPLAY OUTLET TEMP. SENSOR INLET TEMP. SENSOR SCREEN FLOWMETER REMARK: R:HEATING SYSTEM T:TRIAC PG.3... -
Page 8: Product Inner Structure
ELECTRICAL DIAGRAM MODEL: WH-AZ021-M3/ WH-AZ024-M3/ WH-AZ027-M3 THERMAL CUT-OUT 194°F CONTROL SYSTEM L1" L2" DISPLAY OUTLET TEMP. SENSOR INLET TEMP. SENSOR SCREEN FLOWMETER REMARK: R:HEATING SYSTEM T:TRIAC PRODUCT INNER STRUCTURE MODEL: WH-AZ011-M3 control board terminal blocks bottom case flowmeter temp. sensor heating chamber Fig 1a PG.4... - Page 9 PRODUCT INNER STRUCTURE MODEL: WH-AZ015-M3/ WH-AZ018-M3 terminal blocks bottom case control board flowmeter temp. sensor heating chamber Fig 1b MODEL: WH-AZ021-M3/ WH-AZ024-M3/ WH-AZ027-M3 bottom case control board terminal blocks flowmeter temp. sensor heating chamber Fig 1c PG.5...
-
Page 10: Product Specifications
PRODUCT SPECIFICATIONS Model WH-AZ011-M3 WH-AZ015-M3 WH-AZ018-M3 WH-AZ021-M3 WH-AZ024-M3 WH-AZ027-M3 Voltage 240V 240V 240V 240V 240V 240V Wattage 11000W 15000W 18000W 21000W 24000W 27000W Rated Current 100A 113A Min. required 2×40A 2×50A 3×40A 3×40A 3×50A circuit breaker Min. wire size (L1, L2, 6 AWG 2×8 AWG 3×8 AWG... - Page 11 INSTALLATION GUIDELINE Install the water heater in a dry, clean area, There must be sufficient clearance between ● ● as close to the target faucet/shower as any object and the top, rear and sides of the practically possible. Avoid installing in rooms water heater in the event service is needed.
-
Page 12: Installation
INSTALLATION GUIDELINE ATTENTION ENVO does not cover any damage or defect caused by installation, attachment ● or use of any type of energy-saving or other unapproved devices (other than those authorized by ENVO) into, onto or in conjunction with the water heater. The use of unauthorized energy-saving devices may shorten the life of the water heater and may endanger life and property. - Page 13 INSTALLATION Step 1: Step 2: Remove the bracket from the appliance 1.Locate installation position for the water by loosing the screw in the middle of the heater. bottom. 2.Place the bracket on wall and use pencil to mark screw hole locations. Make sure the outlet and inlet pointed downward vertically.
- Page 14 INSTALLATION Step 5: Hang the water heater onto the bracket with outlet and inlet pointed downward. Make sure the water heater is secured. Plumbing Connections ● ATTENTION 1. It is recommended that this water heater 5. It is recommended to install a manual shut-off be installed by a licensed and qualified valve(not provided) at the inlet water connection plumber in accordance with all applicable...
- Page 15 INSTALLATION Plumbing Installation ● thread protectors Ensure that water supply is turned Remove the thread protectors and discard. OFF at shut-off valve. Nipple Outlet Inlet Connect the inlet cold water line to the cold 1. Open the shut-off valve to allow water to inlet fitting on water heater.
- Page 16 INSTALLATION Electrical Connections ● Clamp Pull Cable Remove the screws from the bottom of the Loose the screws of the clamp and slide the matching cable through the clamp. Please water heater. Pull up the bottom of the check the product specification sheet on panel a little and slide the panel upwards page 6 for the cable size.
- Page 17 INSTALLATION Circuit Breaker #1 Circuit Breaker #2 Circuit Breaker #3 L2’ L1’ L2’’ L1’’ BLACK BLACK BLACK WH-AZ011-M3(11KW) requires 1 breaker and 1 set of wires. WH-AZ015-M3(15KW), WH-AZ018-M3(18KW) requires 2 sets of breakers and wires. WH-AZ021-M3(21KW), WH-AZ024-M3(24KW), WH-AZ027-M3(27KW) requires 3 sets of breakers and wires.
-
Page 18: Operation Instructions
OPERATION INSTRUCTIONS CAUTION: Wait until water is fully flowing through the heater before turning on the breaker. 1. Allow water to flow through the water heater unit. Allow the water to flow continuously to flush out any debris as well as purge the pipes of any air. 2. -
Page 19: Trouble-Shooting
CLEANING & MANTENANCE Cleaning Steps: Step 1. Shut off power to the water heater before draining water. Step 2. Inspect the inlet and outlet water connections for any signs of damage or failure. Look for any signs of leakage, damage, or cracks in each connection. Step 3.
Need help?
Do you have a question about the Envo WH-AZ011-M3 and is the answer not in the manual?
Questions and answers