Table of Contents
Advertisement
Advertisement
Table of Contents

Related Manuals for Nokia 2110


Summary of Contents for Nokia 2110
- Page 1 Electronic User Manual...
-
Page 2: Quick Guide
Quick Guide Making a call Ending a call Receiving a call Last number redial Clearing the display One touch dialling Locking and unlocking the keypad Speed dialling Memory Functions Storing a phone number with a name (in first avail. Ioc.) Searching for a number Searching for a name Menu Functions... - Page 3 Menu Functions Function Shortcut Menu Recent Calls Menu 2 Messages Menu 3 Call Divert Menu 4 Phone Settings Menu 5 Security Options Menu 6 Duration and Cost Menu 7 Network Selection Memory Menu 8 Functions Menu 9 Personal Reminders Menu 10 InCall Options Menu 11...
- Page 4 Electronic User’s Guide Electronic User Manual...
-
Page 5: Table Of Contents
C o n t e n t s - Tips on using this Electronic User Guide - 1. Important Safety Information ......5 2. - Page 6 6. Menu Functions ..........4 8 Menu Method .
- Page 7 Call Waiting (Menu 4 11) ......68 Restore Factory Settings (Menu 4 12) ... 69 Menu List (Menu 4 13) .
-
Page 8: Important Safety Information
1. Important Safety Information Traffic Safety Do not use a hand-held telephone while driving a vehicle. If using a hand-held phone park the vehicle before conversing. Always secure the phone in its holder; do not place the phone on the passenger seat or where it can break loose in a collision or sudden stop. - Page 9 Important Safety Information depots (fuel storage and distribution areas), chemical plants or where blasting operations are in progress. Do not store or carry flammable liquids, gases or explosive materials in the same compartment as the phone, its parts or accessories. Only qualified personnel should install or service the phone in a vehicle.
- Page 10 Emergency calls can only be made when cellular signal strength is adequate to make calls and may not be possible on all cellular phone networks or when certain network services and/or phone features are in use. Check with your cellular network operator. Remember, to make or receive any calls the phone must be switched on and in a service area with adequate cellular sig- nal strength.
- Page 11 Important Safety Information Using This Guide The phone described in this guide is approved for use in digital cellular networks. A number of features included in this guide are called Net- work Services. They are special services provided by cellular service providers.
-
Page 12: Keys, Display And Connectors
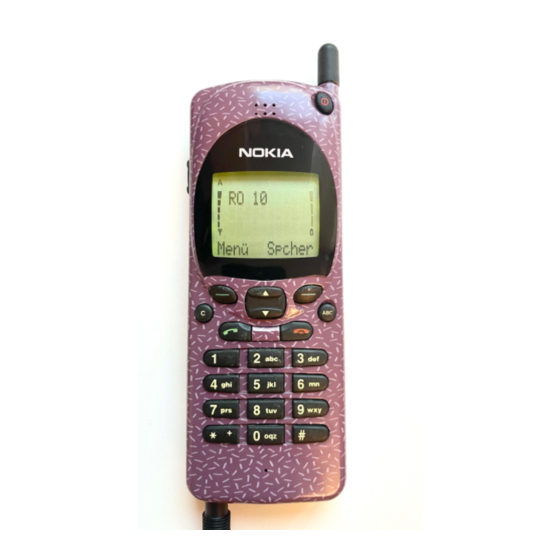
2. Keys, Display and Connectors KEYS To operate this phone, keys are pressed one at a time. Two keys are never to be pressed simultaneously. More detailed information on each key is given later in this guide. Keys, Display and Connectors Switches the phone on and off. -
Page 13: Selection Keys
Keys, Display and Connectors Dials a phone number and answers a call. With the display clear, this key recalls the most recently dialled number. Ends a call. 0 - 9 wxyz Number and alpha keys. Pressing and holding the 1 calls your voice mailbox. - Page 14 For example, the Menu Menu) gains access to the menu functions and the selection key (key under the text Memory) to the memory functions. Assume you want to switch off the phone’s lights. The lights can be adjusted in the Phone Settings - Lights submenu (Menu 4 01 ).
-
Page 15: Display
Keys, Display and Connectors DISPLAY INDICATORS The phone’s display is provided with a series of indicators which inform you about the operation of the phone. Indicates the memory which is selected A or B currently. “A” refers to the SIM card memory and “B” to the phone’s internal memory Indicates that a data call is in progress. -
Page 16: Connectors
Indicates that your phone is in alpha mode ABC. (letters as well as digits can be entered). Steady: You have received a short (SMS) message. Flashing: Message memory is full. Indicates one of the following: memory location, menu, submenu or setting option. This function is not available. -
Page 17: Getting Started
Getting Started 3. Getting Started QUICK START If you have a fully charged battery and a miniature SIM card at hand, to get the phone ready for use quickly do as follows: Remove the battery. (See The SIM Card in this chapter.) Install the SIM card. - Page 18 Press four times. Press the left selection key. Press once. Press the left selection key. Move the pointer ( ) to English with Press the left selection key. Press the C key to exit the function. ~ The phone can be set to show some or all of its menu functions.
-
Page 19: The Sim Card
Getting Started THE SIM CARD The phone can only be used with a valid miniature plug-in SIM card. The card is supplied by your network operator or service provider. Note: The network operator or service provider may prevent the use of the phone with any other but the operator’s or provider’s own SIM cards. - Page 20 Press the catch on the top of the battery (1). Next, pull the battery back (2) and lift it away from the phone (3). Open the cover of the SIM card reader by sliding it back (1). Open the SIM holder by pulling the metal catch in the direction “Open”...
-
Page 21: Charging A New Battery
Getting Started Pull the catch gently in the direction “Lock” (1). When you are sure that the holder is firmly engaged, slide the cover of the SIM card reader back into place (2). Replace the battery: Place the battery onto the rear of the phone (1). -
Page 22: Using The Batteries
~ Connect the charger to an AC wall outlet. Segments of the battery indicator bar on the right-hand side of the dis- play will start scrolling. ~ After the segments stop scrolling and the bar is entirely displayed, the charging is finished and the battery is ready for use. - Page 23 Getting Started accessory available for your phone). Do not attempt to dis- charge the battery by any other means. Temperature extremes will affect the ability of your battery to charge: it may require cooling or warming first. Note: Use the battery only for its intended purpose. Never use any charger or battery which is damaged or worn out.
- Page 24 Battery Charge Indication The vertical bar above the ~ indicator on the right of the phone display shows the charge level of the battery. The higher the bar, the more power left in the battery. Recharging a Battery When the charge is low and only a few minutes of talk time remain, a warning tone will be heard and the message BAT- TERY LOW will be repeated at regular intervals on the dis- play.
- Page 25 Getting Started In some vehicles the ignition must be on in order to charge the phone with the cigarette lighter adapter. Whilst charging, the bar indicating the charge level will scroll. The battery is fully charged when the scrolling stops, the bar appears entirely and the BATTERY FULL message is briefly displayed.
-
Page 26: Signal Strength
SIGNAL STRENGTH Your phone sends and receives radio signals. As with all ra- dio equipment, the quality of radio reception entirely depends on the strength of the radio signal in your area. The strength of the cellular signal is shown by the vertical bar above the ~ indicator on the left-hand side of the display: the higher the bar, the better the signal at your location. - Page 27 Getting Started phone’s memory functions. Keep it, therefore, secret and in a safe place, separate from the phone. If you key in an incorrect security code (CODE ERROR) five times in succession, the phone will not accept new tries for the next five minutes.
- Page 28 PUK CODE (at least 8 digits) The PUK (Personal Unblocking Key) is supplied with the SIM card. The code is required when you want to change a disabled PIN code. If you enter a wrong code ten times in succession, you can- not use the SIM card any more.
-
Page 29: General Functions
General Functions 4. General Functions SWITCHING ON Extend the antenna fully. The phone will not work properly with a partly extended antenna. Slide the antenna in when you are not using the phone. As with any other radio-transmitting device, avoid unneces- sary contact with the antenna when the phone is switched Press and hold the @ key for one second. -
Page 30: Switching Off
Note: You can find the security code in a red envelope in the sales package of your phone. A welcome message will appear, if programmed within Menu 91. If you do not want this message to be dis- played next time, delete it by pressing the tion key. -
Page 31: Making A Call
General Functions MAKING A CALL Key in the area code and the phone number of the per- son you wish to call. If you make a mistake, you can delete the digits one by one by pressing the C key repeatedly or clear the whole display by pressing and holding down the C key. - Page 32 @ Key in the name you stored with the phone number that you want to dial. You don’t need to key in the whole name if there is only one name beginning with the same letter(s). For more information on keying in a name, see Keying in a Name in chapter Memory Operations.
- Page 33 General Functions To put the first call on hold, press and hold the selection key for a second, move the pointer to Hold and press the selection key. Press ~ to dial the phone number. As the call attempt is made (CALLING is shown), you may cancel the new call by pressing the To make the held call active and to put the active call on hold, press _ (with the display clear of characters).
- Page 34 to Join and press the Now all the participants can hear each other. @ If you want to include a new person, make a call to this person in the normal way, press and hold the selection key for a second, move the pointer to Join with and press the Repeat this operation once more if necessary.
-
Page 35: Receiving A Call
General Functions Finally, press and hold the second, move the pointer to Unhold and selection key. @ End the conference call by pressing =. RECEIVING A CALL When somebody is calling you, the phone will give a ringing tone and the indicator light on the top of the phone and the text CALL text on the display will flash. - Page 36 memory with a name, the name will be shown instead. If your network does not allow you to view the caller’s phone number: The text WAITING CALL will be displayed. To answer the incoming call, press ~. Alternatively: press and hold the move the pointer to Swap and press the The old call is automatically put on hold.
-
Page 37: Adjusting The Earpiece Volume
General Functions If you want to include the new caller in the conference call, press and hold the move the pointer to Join and press the To end the conference call, press ADJUSTING THE EARPIECE VOLUME You can alter the volume of the phone’s earpiece by using the keys on the side of the phone, even during a call. -
Page 38: Last Number Redial
LAST NUMBER REDIAL The phone stores every phone number you dial, i.e. call or attempt to call. However, only the last ten phone numbers (and associated names) can be stored in the phone’s memory at a time. To redial the last dialled number If there are any characters on the display, clear the dis- play by pressing and holding the C key. -
Page 39: Keypad Lock (Keyguard)
General Functions For instance, to dial a phone number stored in location 8: 0 Press and hold the 8tuv key for one second. The call is initialized (~, the text CALLING and the dialled phone number will appear on the display). Also see Phone Settings - One Touch Dialling (Menu 4 7) in chapter Menu Functions. - Page 40 General Functions The keypad lock will be automatically turned off when the phone is switched off or when the phone is connected to a car kit. When the phone is removed from the car kit, without being switched off previously, the keypad will be automatically locked again.
-
Page 41: Memory Functions
Memory Functions 5. Memory Functions Your phone provides numerous memory locations for storing phone numbers and corresponding names. STANDARD MEMORY LOCATIONS The phone utilises either the memory locations on the SIM card (indicated by “A” in the upper left corner of the display) or those built in the phone (indicated by “B”). - Page 42 phone number if this can be found in one of the standard memory locations. To delete these phone numbers, see Recent Calls - Erase All Recent Calls (Menu 01 4) in chapter Menu Functions. Last Dialled Numbers (locations L0 to L9) The phone stores the last ten phone numbers that you have dialled in memory locations L0 to L9.
-
Page 43: Notepad Memory Locations
Memory Functions your network and the calling phones provide their phone numbers. Note that you can prevent your phone number from being revealed to the receiver, if your network allows this, within Menu 4 10. If you have missed new calls since you last checked the phone numbers: With the number of new unanswered calls on the display, press the... -
Page 44: Keying In A Name
~ Press the Save selection key. ~ Key in the phone number. @ Press the selection key. Save The message SAVE IN LOCATION and the number of the first empty memory location will appear. @ To store the name and phone number in this suggested notepad location: Press the ## key. - Page 45 Memory Functions If you miss a character, keep pressing the key until it ap- pears again; or first press the C key and then start pressing the key again. If you want a lower case character, press and hold a key until the character appears in lower case.
- Page 46 Press # (for a space). Press 3def three times (for 9 and hold the key until the char- acter appear in upper case (F). Press 6mno three times (for O) and hold the key until the character appears in lower case (o). Press 9wxyz twice (for x).
-
Page 47: Storing A Phone Number With A Name
Memory Functions STORING A PHONE NUMBER WITH A NAME Press the Memory Key in the name (of up to 20 characters) that you want to store with the phone number. For details, see Keying in a Name in this chapter. Note: On some SIM cards the name length is limited to 20 or less characters. -
Page 48: Recalling A Phone Number From Memory
@ Key in the name. @ Press the Memory ~ Press the selection key. Save @ Press the selection key or first key in the desired loca- tion number and then press the Note: A name can be stored only in one location of the se- lected memory (SIM card or phone memory). - Page 49 Memory Functions O Key in the location number, @ Press the # key. ~ Press the ABC key to view the associated name. Alternatively you may scroll the locations: Press If you want the scrolling to start from a particular location, first key in the location number and then press Press the ABC key to view the associated name.
-
Page 50: Erasing The Contents Of A Memory Location
To review the phone number stored with the name, press the ABC key. Note: Both the names stored in the SIM card memory (mem- ory A) and those stored in the phone memory (memory B) will be displayed when the security level is set to None or Phone. The names stored in the phone memory will appear first. -
Page 51: Menu Functions
Menu Functions 6. Menu Functions The phone offers a set of functions which allow you to tailor the phone to your particular use. These menu functions are arranged in menus and submenus which can be accessed through the menu facility. In each menu and submenu, you can check and alter the setting of a particular function. -
Page 52: Shortcut Method
Pressing the C key or pressing and holding the selection key will exit the menu facility. SHORTCUT METHOD All the menus, submenus and settings are numbered. This in- dex number is shown in the upper right corner of the display. To access a menu function by its shortcut: Press the Menu... -
Page 53: Help Texts
Menu Functions HELP TEXTS Most menu functions are provided with a help text which gives a brief description of the displayed function. Press the Menu Scroll the menus with V or A until you reach the desired function. Now you can view the help text of the function in two ways. -
Page 54: Network Services
NETWORK SERVICES Some of the menu functions are network services. These functions can be utilised only if provided by your cellular network. To make use of a network service, you must first subscribe to it. Note that a network service is specific to the SIM card for which you have subscribed it. -
Page 55: Missed Calls (Menu 01 3)
Menu Functions Press 01 2, use or Menu numbers. MISSED CALLS (Menu 01 3) This function allows you to review the ten phone numbers of people who have tried to reach you with no success. Press 01 3 and use Menu phone numbers. -
Page 56: Messages (Menu 2)
MESSAGES (Menu 2) As well as making and receiving voice and data calls, the phone can also be used for recording and listening to mes- sages in voice mailboxes and for sending and receiving short text messages (’SMS messages’). Voice Messages The voice mailbox feature may be either regarded as a net- work setvice or simply as a remote control for your personal answering machine. -
Page 57: Calling Your Voice Mailbox (Menu 2 1)
Menu Functions The maximum length of an SMS message is 160 characters, The phone has space for five SMS messages of full length. The submenus specific to SMS messages are all but Menu 2 1 and Menu 2 4 5 (see Voice Messages above). SMS Message Indicators The ~ indicator at the top of the phone display shows if your phone has received any new messages and if there is... -
Page 58: Viewing And Editing Sms Messages (Menu 2 2)
VIEWING AND EDITING SMS MESSAGES (READ MESSAGES - Menu 2 2) When you receive an SMS message and there is enough space left in the message memory, the text MESSAGE RE- CEIVED and the = indicator will be displayed and a short tone will sound (if the phone’s tones have not been set off within Menu 1 2). - Page 59 Menu Functions phone number in memory) will be displayed at the end of the message. With a message on the display, you may press a num- ber key and then perform any memory or menu func- tions in the normal way, e.g. make a call to the sender of the message.
-
Page 60: Writing And Sending A Message (Menu 2 3)
while viewing the message.) You can dial the number or store it elsewhere in the normal way. E d i t Allows you to make changes in the message move the cursor right and left, respectively, The number of available characters is shown in the upper right-hand corner of the display, You can delete single characters with the C key. - Page 61 Menu Functions key, move the pointer to Erase and press the selection key. To insert a space, press the # key (in alpha mode). To move the cursor left or right, press the To scroll the message quickly, press and hold down either of these keys.
-
Page 62: Message Settings (Menu 2 4)
MESSAGE SETTINGS (Menu 2 4) Under this submenu, a number of message options are available. Setting the SMS Centre Number (Menu 2 4 1) In order to send SMS messages, the phone must know the phone number of your SMS centre. You can either set the phone number within this submenu or enter it when prompted to do so. -
Page 63: Reply Messages At Your Expense (Menu 2 4 3)
Menu Functions connected to the number you provide if you choose the FAX format. Reply Messages At Your Expense (ACCEPT REPLY COST - Menu 2 4 3) This network service allows the recipient of your SMS message to send you a reply message at your expense. The selected option will apply to all messages until you change it. -
Page 64: Call Divert (Menu 3)
~ Press Menu 2 4 5 to enter this function. @ Key in a new phone number or edit the existing one. @ Press the selection key to store the phone number. Note: If your network uses separate phone numbers for lis- tening to and storing messages in the voice mailbox, store here the number reserved for listening to messages. - Page 65 Menu Functions CANCEL ALL DIVERTS (Menu 3 5): Set all divert modes off. Press the Select Note: If you selected CANCEL ALL DIVERTS, the steps which follow will not be available. Press V or A to move the pointer to Activate (set divert mode on), Cancel (set divert mode off) or Status (shows call types which are being diverted).
- Page 66 selection key. If no phone number is displayed, key it in now and press the The phone calls the network operator and asks it to acti- vate the selected divert mode (REQUESTING... ). After receiving a response, the phone will end the call auto- matically, and the message DIVERT ACTIVE will appear.
-
Page 67: Phone Settings (Menu 4)
Menu Functions modified by a manual command string only (see the note below). The activated divert mode and the specified phone number (and with the mode DIVERT WHEN NOT ANSWERED, the delay time) will apply to voice calls and all other call types. If you want to activate some other mode and set a different phone number (and delay time) for a single call type, you need to use manual command strings (see the note below). -
Page 68: Ringing Volume (Menu 42)
When the phone is connected to a handsfree car kit The lights always remain on (On) or extinguish after 15 seconds (Off). Press 401, use Menu RINGING VOLUME (Menu 42) The ringing tone will be heard when you receive a call. There are several volume levels available. -
Page 69: Warning Tones (Menu 45)
Menu Functions WARNING TONES (Menu 45) The phone will sound a warning tone, i.e. error or confirma- tion tone, for example, when the cellular network is currently too busy to allow new calls or the battery charge is too low. When you have set the phone’s tones off within Menu 12, the warning tones will not be heard even if set on. -
Page 70: Cell Info Display (Menu 49)
ignition sense option. The ignition has to be switched on. Note that this function works with voice calls only. Press Menu CELL INFO DISPLAY (Menu 49) When this function is set on, the phone will indicate when it is using a network cell based on Micro Cellular Network (MCN) technology. -
Page 71: Call Waiting (Menu 4 11)
Menu Functions Press 4 1 0 to enter this function. Menu Press to move the pointer to Reset, On (number will be revealed) or Off (number will not be revealed). Preset resets the phone to the preferential setting (On or Off) that you have agreed upon with your network opera- tor. -
Page 72: Restore Factory Settings (Menu 4 12)
mode, key in a command string and press the ~ key to transmit it to the network. For required command strings, contact your network operator. RESTORE FACTORY SETTlNGS (Menu 4 1 2) You can reset the settings of the menu functions to their original values. -
Page 73: Language (Menu 4 14)
Menu Functions When Short is selected, only the major functions are shown and can be accessed. The function numbering is not affected - the hidden functions are simply skipped. Press 4 1 3, use Menu press the selection key. LANGUAGE (Menu 4 1 4) This function allows you to select which language your phone will use for all of its display texts. -
Page 74: Security Level (Menu 5 2)
SECURITY LEVEL (Menu 5 2) The phone is provided with a security system which allows you to prevent unauthorised use of the phone. The system is based on three levels of security: None, Memory and Phone. The selected level determines whether the security code, supplied with the phone, is required to start up the phone and to access certain memory functions, such as selecting the phone memory (memory B). -
Page 75: Call Barring (Menu 5 3)
Menu Functions inserted SIM card is the same as last time, the previously selected memory is taken into use. When the SIM card is not the same as previously, the SIM card memory is auto- matically selected. Memory The security code is not required to start up the phone. In contrast, the code is always required to select the phone memory, even with an owner’s card inserted. - Page 76 OUTGOING CALLS (Menu 5 3 1) Calls cannot be made. INTERNATIONAL CALLS (Menu 5 3 2) Calls cannot be made to foreign countries. INTERNATIONAL EXCEPT TO HOME COUNTRY (Menu 5 3 3) When abroad, calls can be made only within the current country and to your home country, i.e.
-
Page 77: View Fixed Dial List (Menu 5 4)
Menu Functions If you selected Status in step 4, the phone will list the call types (e.g. voice calls, data calls, fax calls) to which call barring applies or can be applied. Press through the list. Note: Instead of using this menu function, you may set on and off different barring modes by using manual command strings. - Page 78 For instance, if you have stored the digits +55 in one of the fixed dialling locations, you can call any phone number begin- ning with these digits, e.g. +556 789345. Note: When the Fixed Dialling is set on or the fixed dialling list is empty, calls may be possible to certain emergency num- bers in some networks (e.g.
-
Page 79: Change Access Codes (Menu 56)
Menu Functions E d i t Allows you to make changes into the name (and the associated phone number) which was on the display when you pressed the Select the desired option with or selection key. Next, do one of the following: If you selected Add, key in the desired name at the prompt Name:. -
Page 80: Closed User Group (Menu 5 7)
o Press the Select selection key. @ Key in the current code and press the @ Key in the new code and press the @ Key in the new code again and press the Note: The access codes may only include characters 0 to 9. To change the PIN code the PIN code request must be turned on in Menu 5 1. -
Page 81: Duration And Cost Of Calls (Menu 6)
Menu Functions Preset Resets the phone to use a preferential user group that the SIM card owner has agreed upon with the network operator. (For setting up the default group, contact your network operator.) Sets the phone to use a particular user group. Calls can be made to or received from the members of the selected group only, Press the... -
Page 82: Call Duration (Menu 6 1)
CALL DURATION (Menu 6 1) Your phone provides two call timers which help you monitor the duration of your calls. You may also reset the timers. Note: The actual invoice for calls by your service provider may vary, depending upon network features, rounding off for billing, and so forth. -
Page 83: Call Costs (Menu 6 2)
Menu Functions CALL COSTS (Menu 6 2) This network service allows you to check the cost of the last, or current, call or the total cost of all calls that you have made or received since the counters were last reset. The costs are shown in charging units or units of the cur- rency that you have set within Menu 6 4. -
Page 84: Call Costs Limit (Menu 6 3)
CALL COSTS LIMIT (Menu 6 3) This function allows you to limit the total costs of outgoing calls to a specified number of charging units or units of the currency that you have set in Menu 6 4. Emergency calls to the number 112 can be made even if there are no charging units left. -
Page 85: Network Selection (Menu 7)
Menu Functions to select Currency (show limits in currency units) or Units (show limits in charging units) and press selection key. If you selected Currency, key in the charging unit price and press the will insert a decimal point. If you selected Units, call cost limits and the number of remaining cost units will be shown in charging units. -
Page 86: Memory Functions (Menu 8)
work (the message PLEASE SELECT NETWORK will appear), you have to select some other network. Press 7 to enter this function. Menu Press to reach Automatic or Manual and then press the Select If you selected Manual, the phone will search for available networks (SEARCH ACTIVE... -
Page 87: Memory Status (Menu 8 2)
Menu Functions currently selected memory is shown in the top left corner of the display. Press 81 to enter this function. Menu If the security level is Memory and you are about to switch from the SIM card memory to the phone memory, the phone will prompt for the security code. -
Page 88: Memory Erasing Options (Menu 84)
If the security level is set to Memory, key in the security code at the prompt Security code: and press the selection key. Press to reach FROM PHONE TO CARD or FROM CARD TO PHONE. Press the selection key. Press to move the pointer to One by one (copy individual locations) or Copy all (copy all locations). - Page 89 Menu Functions To clear individual locations of the selected memory: Press 84 to enter this function. Menu Press to select One by one (only selected loca- tions will be cleared). Press the OK selection key, To select the location(s) that you want to clear, do one of the following: At the prompt Name to be erased:, key in the name which is stored in the location you want to clear.
-
Page 90: Show Own Number (Menu 85)
@ At the prompt ARE YOU SURE?, press the key to clear the locations. Pressing the Quit vious menu level. @ While the phone empties the locations, the message ERASING MEMORY.. is shown. Once the erasing is completed, the message MEMORY ERASED will appear. Note: Once erased, the memory contents are permanently lost. - Page 91 Menu Functions message and you pressed the Keep selection key when you switched the phone on, the old message will appear. Key in a new message or edit the existing one. If you want to include numbers in the message, you may press the ABC key to select the numeric mode and then key in the number(s).
-
Page 92: Countdown Timer (Menu 9 2)
With the message on the display, you may press a number key and then perform any memory or menu operation in the normal way, e.g. make or receive a call. When you delete all characters from the display (by pressing and holding the C key), the message will be shown again. -
Page 93: In-Call Options (Menu 10)
Menu Functions IN-CALL OPTIONS (Menu 10) Your phone provides a number of control functions that you can use during a call. You cannot utilise each of these functions at all times. For example, you must have one call active and another call on hold in order to make use of the Swap function. -
Page 94: Fax Or Data Call (Menu 11)
one party without ending the other call. Instead of using this function,you can press display is clear of characters. Drop call Ends the currently active call. This function is useful when there is an active call as well as a held call. In such a situ- ation, pressing = would terminate both calls. -
Page 95: Ringing Options (Menu 12)
Menu Functions In idle mode, key in the phone number. Menu 11 to Press After the transmission, end the call by pressing ~. During a transmission, the message DATA CALL or FAX CALL and the D indicator are displayed. For more information, refer to any documentation or instruc- tions which may be supplied with your data adapter, data application or fax application RINGING OPTIONS (Menu 12) -
Page 96: Number Editor (Menu 13)
Press to enter this function. Menu 12 @ Press to select the option that you want, @ Press the selection key. When BEEP, VIBRATE or SILENT SERVICE is selected, the text SILENT will be shown on the display in idle mode. Note: When the phone is connected to a handsfree car kit, the indication mode is set individually for this accessory. -
Page 97: Sending Dtmf Tones
Sending DTMF Tones 7. Sending DTMF Tones The Dual Tone Multi Frequency (DTMF) tones allow you to communicate with answering machines, computerised telephony systems, etc, DTMF tones can be transmitted even when the keypad tones are set off. Manual Transmission Make a call to the desired phone number. - Page 98 sequence together, for instance. To link two locations (only in phone memory): Key in or recall from memory the phone number (e.g. 123 456) that you want to link with a DTMF sequence. Press the * key twice quickly. This adds a + character to the end of the phone number.
- Page 99 Sending DTMF Tones Placing p and w characters between DTMF digits You may insert a pause of 2.5 seconds or a wait in front of, or between DTMF digits. For a pause, press the is displayed. All digits following the pause will be sent as DTMF tones.
-
Page 100: Care And Maintenance
8. Care and Maintenance Your phone is a product of superior design and craftsmanship and should be treated with care. The suggestions below will help you to fulfill the warranty obligations and to enjoy this product for many years. Keep the phone and all its parts and accessories out of small children’s reach. -
Page 101: Menu Map
DISPLAY COST MESSAGE NUMBER VALIDITY SENDING SET VOICE CALL MAILBOX WAITING NUMBER RESTORE FACTORY SETTINGS MENU LIST LANGUAGE 2110 MENU MAP SECURITY DURATION NETWORK OPTIONS AND COST SELECTION CALL PIN CODE DURATION REQUEST SECURITY CALL LEVEL COSTS CALL CALL COSTS... - Page 102 NOKIA is a trademark of Nokia Corporation, O 1996 Nokia Mobile Phones. All rights reserved. Nokia Mobile Phones operates a policy of continuous development; therefore we reserve the right to make changes and improvements to any of the products described in this guide without prior notice.
Need help?
Do you have a question about the 2110 and is the answer not in the manual?
Questions and answers