Nokia 2112 User Manual
Hide thumbs
Also See for 2112:
- User manual (86 pages) ,
- Troubleshooting manual (46 pages) ,
- Disassembly/assembly (9 pages)
Table of Contents
Advertisement
Quick Links
Advertisement
Table of Contents

Related Manuals for Nokia 2112


Summary of Contents for Nokia 2112
- Page 1 Nokia 2112 User Guide Copyright © 2004 Nokia...
- Page 2 Copyright © 2004 Nokia...
- Page 3 Includes RSA BSAFE cryptographic or security protocol software from RSA Security. The information contained in this user guide was written for the Nokia 2112 product. Nokia operates a policy of ongoing development. Nokia reserves the right to make changes to any of the products described in this document without prior notice.
- Page 4 Copyright © 2004 Nokia...
-
Page 5: For Your Safety
Use only in the normal position as explained in the product documentation. Don't touch the antenna unnecessarily. QUALIFIED SERVICE Only qualified personnel may install or repair this product. ENHANCEMENTS AND BATTERIES Use only approved enhancements and batteries. Do not connect incompatible products. Copyright © 2004 Nokia... - Page 6 Key in the emergency number, then press the Send key. Give your location. Do not end the call until given permission to do so. Copyright © 2004 Nokia...
-
Page 7: About Your Device
Welcome Welcome Congratulations on your purchase of the Nokia 2112 mobile phone. Your phone provides many functions which are practical for daily use, such as a hands-free loudspeaker, alarm clock, calculator, calendar, and more. To personalize your phone, you can set your favorite ring tones and select an Xpress-on colour cover. -
Page 8: Register Your Phone
Get help Find your phone label If you need help, Nokia Customer Care is available for assistance.Before calling, we recommend that you write down the Electronic serial number (ESN) and have it available. -
Page 9: Accessibility Solutions
Welcome Updates From time to time, Nokia updates this guide to reflect changes. The latest version may be available at www.nokia.com. An interactive tutorial for this product may be available at the web site www.nokiahowto.com. Accessibility solutions Nokia is committed to making mobile phones easy to use for all individuals, including those with disabilities. -
Page 10: Nokia 2112 Phone At A Glance
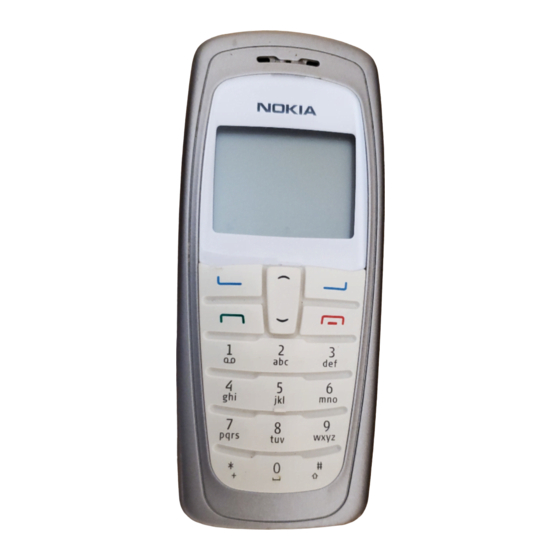
1. Nokia 2112 phone at a glance 1. Power key 7. Microphone 2. Earpiece 8. Charger port 3. Right selection key 9. Scroll up and down key 4. End key 10. Send key 5. Keypad 11. Left selection key 6. Connection port 12. -
Page 11: The Start Screen
Nokia 2112 phone at a glance n The start screen The start screen is home base and indicates your phone is in idle mode. 1. Signal strength—A higher bar indicates a stronger network signal. 2. Battery level—A higher bar indicates more power in the battery. -
Page 12: Get The Most Out Of This Guide
Press the End key to end a call or press and hold to return to the idle screen. n Phone menus Phone features are grouped according to function and are accessed through the main menus. Each main menu contains submenus and lists from which you can select or view Copyright © 2004 Nokia... -
Page 13: The Scroll Method
Nokia 2112 phone at a glance items and customize your phone features. You can access these menus and submenus by using the scroll method or by using a shortcut. The scroll method 1. At the start screen, select Menu, and scroll through the main menu using the up and down scroll key. -
Page 14: Set Up Your Phone
2. Slide the back cover toward the bottom of the phone and remove. Remove the battery After you have removed the back cover, insert your finger into the finger grip and lift the battery from its compartment. Copyright © 2004 Nokia... -
Page 15: Replace The Battery
If the battery is completely discharged, it may take a few minutes before the charging indicator appears on the display or any calls can be made. Copyright © 2004 Nokia... -
Page 16: Turn Your Phone On Or Off
Always store and use the device with the covers attached. Remove the back cover and the battery See Remove the back cover, 14 and see Remove the battery, 14 for instructions on removing the back cover and the battery. Copyright © 2004 Nokia... -
Page 17: Remove The Front Cover
2. Press the front cover and key mat against the phone and snap the front cover into place. Replace the battery and back cover See Replace the battery, 15. See Replace the back cover, 15. Copyright © 2004 Nokia... -
Page 18: Make A Call
Conference calling is a network service that allows you to take part in a conference call with two other participants. 1. Make a call to the first participant. 2. With the first participant on the line, select Options > call, and press Select. Copyright © 2004 Nokia... -
Page 19: Answer Or Silence An Incoming Call
• When adjusting the volume, a bar chart appears in the display indicating the volume level. The loudspeaker You can use your phone as a loudspeaker during a call. Do not hold the phone to your ear during the loudspeaker operation. Copyright © 2004 Nokia... -
Page 20: Options During A Call
Key in the emergency number, and press the Send key. Lock the keypad Select Menu with the Left selection key, and press * within two seconds. Unlock the keypad Select Unlock with the Left selection key, then press the * key within two seconds. Copyright © 2004 Nokia... - Page 21 Press the Scroll up key twice in quick succession. The light stays on until you press the Scroll up key again. You can also use the flashlight to alert you to an incoming call. For more information, see Personalise a profile, 49. Copyright © 2004 Nokia...
-
Page 22: Text Entry
While at any text entry screen, press * to display special characters (press and hold * if predictive text is on). You can navigate through the list of special characters by using the scroll key. Once a character is highlighted, press to insert the character into your message. Copyright © 2004 Nokia... -
Page 23: Predictive Text Input
Text entry The illustration below simulates your display each time a key is pressed. For example, to write Nokia with predictive text on and with the English dictionary selected, press each of the following keys once: the 6 key... - Page 24 Uppercase text: standard mode is On. Lowercase text: standard mode is On Sentence case text: standard mode is On. Sentence case text: predictive text is On. Lowercase text: predictive text is On. Copyright © 2004 Nokia...
-
Page 25: Contacts List
2. Scroll to a name you would like to add information to and press Details. 3. Select Options > detail, and press Select. You can add an E-mail, address, Postal address, or Note to the entry. Copyright © 2004 Nokia... - Page 26 This enables you to identify callers from the group by their unique ringing tone or graphic. Set up a group 1. At the start screen, press the Scroll down key to display a list of entries in your contacts list. Copyright © 2004 Nokia...
-
Page 27: Set Up Speed Dialling
Change speed dial numbers 1. At the start screen, select Contacts > Speed dials, and press Select. 2. Scroll to the speed dialling entry you wish to change, select Options > Change, and press Select. Copyright © 2004 Nokia... -
Page 28: Delete Speed Dialling Numbers
Caller groups—Add the contact to an existing caller group. Custom tone—Add a custom ring tone to the contact. Send bus. card—Send the contact as a business card to another phone. Copyright © 2004 Nokia... -
Page 29: Delete Contacts List Entries
Caller groups—View and edit the properties for any of the caller groups, including Family, VIP, Friends, Business, or Other. 2. Scroll to an item, and press Select to activate the feature or enter its submenu. Copyright © 2004 Nokia... -
Page 30: Search For A Name
Highlight an entry from the contacts list that you wish to send, select Details select Options > Send bus. card, and press Select. To send the business card as a message, select Via text msg. Copyright © 2004 Nokia... - Page 31 (only if contact has more than one phone number) and press Select. 3. Enter the number for your recipient or press Search to retrieve a number from your contacts list. 4. Press OK. The business card is sent. Copyright © 2004 Nokia...
-
Page 32: Messages (Menu 1)
1. At the start screen, select Menu > Messages > Text messages > Create message > Text > Edit message, and press Select. 2. Press Options, and select template. 3. Scroll to one of the available templates, and press Select. Copyright © 2004 Nokia... -
Page 33: Creating A Distribution List
Use the scroll keys (the Scroll up key or the Scroll down key) to view the whole message if necessary. 2. Select Options > Reply, and press Select. 3. Select a Start reply with option; then compose your reply using the keypad. Copyright © 2004 Nokia... - Page 34 Reply—Reply to the message. Create the message and press Options, then Send. The sender’s phone number or e-mail is used as the default number—Choose Save, Add to contact, Send message, or Call. Save—Save the message to a folder. Copyright © 2004 Nokia...
-
Page 35: Change Sending Options
You need to save this number to your phone to use voice mail. When you receive a voice message, your phone lets you know by beeping, displaying a message, or both. If you receive more than one message, your phone shows the number of messages received. Copyright © 2004 Nokia... - Page 36 You can insert special characters called dialling codes into phone numbers such as voice mail, and save the number to a speed dial location. Dialling codes instruct the receiving system to pause, wait, bypass, or accept the numbers that follow them in the dialling string. Copyright © 2004 Nokia...
-
Page 37: Insert Dialling Codes
3. Enter your voice mailbox number, including the area code. 4. Refer to dialling codes and enter any codes as necessary using the information that you wrote down from Set up voice mail with dialling codes, 37. Copyright © 2004 Nokia... -
Page 38: Picture Messages
One picture message is generally equivalent in size to three text messages. If you try and insert a picture into a message that is almost full of text, a beep sounds, and you are prompted to delete some text before proceeding. Copyright © 2004 Nokia... -
Page 39: View A Picture Message
View a picture message When you receive a picture message, the message icon ( ) appears in the display. 1. Press Show to view the picture message, or press Exit to move it to your inbox. Copyright © 2004 Nokia... -
Page 40: Minibrowser Messages
Save message > Sent items, Templates, Archive, or a folder you have created on your own, and press Select. Save the message to another folder 1. While viewing a message, press Options > Save message > Select. Copyright © 2004 Nokia... - Page 41 Add a folder 1. At the start screen, select Menu > Messages > Text messages > My folders > Options > folder, and press Select. 2. Enter a name for the new folder, and press OK. Copyright © 2004 Nokia...
-
Page 42: Rename A Folder
Select. 2. Scroll to the folder containing the message you wish to delete and press Select. 3. Scroll to the message you wish to delete, and press Select. 4. Press Options > Delete > Select. Copyright © 2004 Nokia... -
Page 43: All Messages In A Folder
Note: Only folders created in My folders can be deleted. The Inbox, Sent items, Archive, and Templates folders are protected. When you delete a folder, all messages in the folder are also deleted. Copyright © 2004 Nokia... -
Page 44: Call Register (Menu 2)
1. At the start screen, select Menu > Call register > Missed calls, and press Select. 2. Scroll to a name or number, and press Options. 3. Scroll to an option, and press Select to view or activate the option. Copyright © 2004 Nokia... -
Page 45: View Received Calls
1. At the start screen, select Menu > Call register > Delete recent call lists, and press Select. 2. Scroll to the call type you would like to clear (All, Missed, Received or Dialled), and press Select. Copyright © 2004 Nokia... -
Page 46: Duration Of Calls
Note: Some timers, including the life timer, may be reset during service or software upgrades. Clear timers At the start screen, select Menu > Call register > Call duration > Clear timers enter your security code, and press OK. Copyright © 2004 Nokia... -
Page 47: Duration Of Data/Fax Calls
Last sent browser data—View the size (kB) of the last send browser data. Last received browser data—View the size (kB) of the last received data. All sent browser data—View the size (kB) of all sent browser data. Copyright © 2004 Nokia... - Page 48 (kB) of all received browser data. Last browser session—View the duration time of the last browser session. All browser sessions—View the duration time of all browser sessions. Clear all browser logs—Press > to clear all browser logs. Copyright © 2004 Nokia...
-
Page 49: Profiles (Menu 3)
A timed profile can prevent missed calls by returning your phone to the default profile at a time you specify. Timed profiles can be set up to 24 hours in advance. Copyright © 2004 Nokia... - Page 50 > Profiles, and press Select. 2. Scroll to the profile you wish to activate and set for timed expiration and press Select. 3. Select Timed. 4. Enter the time for the profile to expire, and press OK. Copyright © 2004 Nokia...
-
Page 51: Settings (Menu 4)
1. At the start screen, select Menu > Settings > Call settings > International dialing prefix. 2. Enter the international dialing prefix (for example, 0011) and press OK. Copyright © 2004 Nokia... - Page 52 Your phone can store up to four calling cards. Save information 1. At the start screen, select Menu > Settings > Call settings > Calling card and press Select. 2. Enter your security code and press OK. Copyright © 2004 Nokia...
-
Page 53: Make Calls
See your calling card for instructions. 5. Press and hold the Send key for a few seconds until Card call is displayed. 6. When you hear the tone or system message, press OK. Copyright © 2004 Nokia... -
Page 54: Phone Settings
Do not move the phone by holding it in your hand during a data call. Note: For more information on connectivity, refer to the PC/PDA Connectivity Guide. The PC/PDA Connectivity Guide can be downloaded from the Nokia website at http://www.nokia.com/us. 1. At the start screen, select Menu >... -
Page 55: Automatic Keyguard
You can also specify DTMF tone length when using the Fixed option. At the start screen, select Menu > Settings > Phone settings > DTMF tones > DTMF tone length > Short (0.1 seconds) or Long (0.5 seconds). Copyright © 2004 Nokia... -
Page 56: Welcome Note
> Help text activation > or Off. Display brightness You can change the brightness of your phone display. 1. At the start screen, select Menu > Settings > Phone settings > Display brightness, and press Select. Copyright © 2004 Nokia... -
Page 57: Time And Date Settings
Select. Set the date 1. At the start screen, select Menu > Settings > Time and date settings > Date > Set the date and press Select. 2. Enter the date, and press OK. Copyright © 2004 Nokia... -
Page 58: Change The Date Format
The enhancement settings menu is shown only if the phone is or has been connected to a compatible enhancement. At the start screen, select Menu > Settings > Enhancement settings > Headset, Handsfree, and press Select. Copyright © 2004 Nokia... -
Page 59: Security Settings
If your wireless service providers supports this feature, then you can restrict the calls your phone can make and receive. When calls are restricted, calls still may be possible to the official emergency number programmed into your phone. Copyright © 2004 Nokia... -
Page 60: Access Codes
Important: Call not allowed is displayed if you attempt to place a call while the phone is locked. To answer a call with phone lock on, press Answer or the Send key. Copyright © 2004 Nokia... -
Page 61: Allowed Phone Number When Phone Locked
> and press Select. n Network Network menu allows you to customize the way your phone chooses a network in which to operate while you are within or outside of your primary or home system. Your Copyright © 2004 Nokia... -
Page 62: Store A Feature Code
Contact your wireless provider for more information. 1. At the start screen, select Menu > Settings > Network services > Call divert, and press Select. 2. Select one of the following options: Divert all calls—Diverts all calls to the number you specify. Copyright © 2004 Nokia... -
Page 63: Call Waiting
Menu > Settings > Network services > Send my caller identity > and press Select. Own number selection At the start screen, select Menu > Settings > Network services > Own number selection and press Select. Copyright © 2004 Nokia... -
Page 64: Restore Factory Settings
1. At the start screen, select Menu > Settings > Restore factory settings and press Select. 2. Enter the security code (the default security code is 12345) and press OK. Copyright © 2004 Nokia... -
Page 65: Voice (Menu 5)
If recording is not successful, your phone displays Voice system error. Press Options > Add voice tag, and repeat Step 3. Dial a number 1. Press and hold Contacts. Copyright © 2004 Nokia... -
Page 66: Voice Tags
3. Press Options >Delete > Select. Delete voice tag? appears. 4. Press to erase the voice tag. n Voice commands You can set as many as five voice commands, which allow hands-free operation of certain phone features. Copyright © 2004 Nokia... -
Page 67: Add A Voice Tag
Voice recorder This feature allows you to record speech or sound with your phone and listen to them later. The total available time is 60 seconds if no memos have been stored. The Copyright © 2004 Nokia... -
Page 68: Record Speech Or Sound
• Select Playback to listen to the recording using the earpiece. • Select Delete to erase the recording. • Select Edit title to rename the recording. • Select Add alarm to add an alarm to the recording. Copyright © 2004 Nokia... -
Page 69: Organiser (Menu 6)
If the alarm time is reached while the phone is switched off, the phone switches itself on and starts sounding the alarm tone. If you press Stop, the device asks whether you want to activate the phone for calls. Press to switch off the device or to make Copyright © 2004 Nokia... -
Page 70: Turn An Alarm Off
Select. 3. Select one of the following note types: Meeting—You are prompted to enter a subject, location, and a start and end time. You are then given the option to set an alarm. Copyright © 2004 Nokia... -
Page 71: View Notes (Day View)
Edit—Edit the note. Move—Move the note to another date on your calendar. Repeat—Enable the note to recur on a regular basis (daily, weekly, bi-weekly, monthly, and yearly). Go to date—Jump to another date on your calendar. Copyright © 2004 Nokia... - Page 72 View notes 1. When your phone displays Calendar note received, press Show. 2. Scroll to view the entire message, if necessary. Save notes After viewing the calendar note, select Options > Save and press Select. Copyright © 2004 Nokia...
-
Page 73: Discard Notes
3. Enter the exchange rate (press the # key to insert a decimal) and press OK. You can also edit the exchange rate at any time. Note: When you change base currency, you must key in the new rates because all previously set exchange rates are set to zero. Copyright © 2004 Nokia... -
Page 74: Set The Countdown Timer
1. At the start screen, select Menu > Organiser > Countdown timer > Change time > Select. 2. Enter the new time and press OK. 3. Leave the note as it was, or enter a new note and press OK. Copyright © 2004 Nokia... -
Page 75: Stop The Timer Before The Alarm Sounds
3. Press Stop to end the split timing. Save the split time 1. While the clock is running, press Stop > Options > Save > Select. 2. Enter a name for the measurement, and press OK. Copyright © 2004 Nokia... -
Page 76: Measure Lap Time
To return to the stopwatch screens: 1. At the start screen, select Menu > Organiser > Stopwatch >Continue and press Select. 2. To stop the clock, press Stop. Copyright © 2004 Nokia... -
Page 77: Games (Menu 7)
3. Select one of the following options (if supported by the particular game): game—Launches a new game. High scores—View the high scores for this game (if previously played). Instructions—View instructions for playing the game. Press More for more information. Copyright © 2004 Nokia... -
Page 78: Minibrowser (Menu 8)
The web browser on your phone can display WAP-based content. Your device may have some bookmarks loaded for sites not affiliated with Nokia. Nokia does not warrant or endorse these sites. If you choose to access them, you should take the same precautions, for security and content, as you would with any Internet site. -
Page 79: Phone Keys
3. Enter the emergency number for your present location (for example, 911). Emergency numbers vary by location. 4. Press the Send key. Disconnect To close your mobile internet connection, press and hold the End key. Copyright © 2004 Nokia... - Page 80 • Nokia Connection Manager to select the connection type between the PC and the phone. • Nokia Phone Browser to copy images and tones from your phone to your PC and vice versa. Note: Copyright protection may prevent some images, ring tones, and other content from being copied, modified, transferred or diverted.
- Page 81 This device is intended for use when supplied with power from Nokia ACP-7 charger. Warning: Use only batteries, chargers and enhancements approved by Nokia for use with this particular model. The use of any other types may invalidate any approval or warranty, and may be dangerous. For availability of approved enhancements, please check with your dealer.
- Page 82 Data • Data Cable (DKU-5) • Desk Stand with Sync (DCV-14) • Car Installation Kit (CARK-126) • Headrest Handsfree (BHF-1) • Mobile Holder (MBC-15S) • Full Car Kit (CK-6) Covers • Xpress-on Colour Covers Copyright © 2004 Nokia...
-
Page 83: Reference Information
When the talk and standby times are noticeably shorter than normal, buy a new battery. Use only Nokia approved batteries, and recharge your battery only with Nokia approved chargers designated for this device. -
Page 84: Care And Maintenance
If any device is not working properly, take it to the nearest authorized service facility for service. Note: Before sending your device to a service facility, create a backup of data you want to keep such as contacts and calendar notes. Copyright © 2004 Nokia... -
Page 85: Additional Safety Information
To maintain compliance with radio frequency exposure guidelines only use enhancements approved by Nokia for use with this device. When the device is on and being worn on the body, always use an approved carrying case. -
Page 86: Potentially Explosive Environments
Using your device while flying in aircraft is prohibited. Switch off your device before boarding an aircraft. The use of wireless telephones in an aircraft may be dangerous to the operation of the aircraft, disrupt the wireless telephone network, and may be illegal. Copyright © 2004 Nokia... -
Page 87: Emergency Calls
Although the SAR is determined at the highest certified power level, the actual SAR level of the phone while operating can be well below the maximum value. This is Copyright © 2004 Nokia... - Page 88 SAR values may vary depending on national reporting requirements and the network band. For SAR information in other regions please look under product information at www.nokia.com/us. Copyright © 2004 Nokia...
-
Page 89: Feature Specification
Talk and standby times Operation times are estimates only and depend on signal strength, phone use, network conditions, features used, battery age and condition (including charging habits), temperatures to which the battery is exposed, and many other factors. Copyright © 2004 Nokia... -
Page 90: Patent Information
569948 579675 592981 605526 616703 645968 658077 D42351 570139 580246 599074 607278 620532 646303 658768 496919 570865 582189 599162 607618 625307 646617 544059 573732 585497 600588 607857 629247 648070 544481 575497 585984 600912 608447 633208 648015 Copyright © 2004 Nokia... - Page 91 Additional safety information Manufactured or sold under one or more of the following US patents: Others 4558302 4901307 5056109 5101501 5109390 5265119 RE32580 Copyright © 2004 Nokia...
-
Page 92: (Cellular Telecommunications & Internet Association) To All Users Of Mobile Phones
Appendix A Message from the CTIA (Cellular Telecommunications & Internet Association) to all users of mobile phones © 2001 Cellular Telecommunications & Internet Association. All Rights Reserved.1250 Connecticut Avenue, NW Suite 800, Washington, DC 20036. Phone: (202) 785-0081 Copyright © 2004 Nokia... -
Page 93: A Guide To Safe And Responsible Wireless Phone Use
2. When available, use a hands-free device. A number of hands-free wireless phone accessories are readily available today. Whether you choose an installed mounted device for your wireless phone or a speaker phone accessory, take advantage of these devices if available to you. Copyright © 2004 Nokia... - Page 94 10. Call roadside assistance or a special wireless nonemergency assistance number when necessary. Certain situations you encounter while driving may require attention, but are not urgent enough to merit a call for emergency services. But you Copyright © 2004 Nokia...
- Page 95 And, as we take to the roads, we all have a responsibility to drive safely.The wireless industry reminds you to use your phone safely when driving.For more information, please call 1-888-901-SAFE. For updates: http://www.wow-com.com/consumer/issues/driving/articles.cfm?ID=85 Copyright © 2004 Nokia...
-
Page 96: Message From The Fda
Appendix B Message from the FDA (U.S. Food and Drug Administration) to all users of mobile phones. ©July 18, 2001For updates: http://www.fda.gov/cdrh/phones Copyright © 2004 Nokia... -
Page 97: U.s. Food And Drug Administration
• Design wireless phones in a way that minimizes any RF exposure to the user that is not necessary for device function; and • Cooperate in providing users of wireless phones with the best possible information on possible effects of wireless phone use on human health. Copyright © 2004 Nokia... -
Page 98: What Kinds Of Phones Are The Subject Of This Update
RF exposures far below the FCC safety limits. 4. What are the results of the research done already? The research done thus far has produced conflicting results, and many studies have suffered from flaws in their research methods. Animal experiments investigating the Copyright © 2004 Nokia... - Page 99 RF exposure during day-to-day use of wireless phones. Many factors affect this measurement, such as the angle at which the phone is held, or which model of phone is used. Copyright © 2004 Nokia...
-
Page 100: What Is Fda Doing To Find Out More About The Possible Health Effects Of Wireless Phone Rf
Manufacturers of wireless phones must report the RF exposure level for each model of phone to the FCC. The FCC website (http://www.fcc.gov/oet/rfsafety) gives Copyright © 2004 Nokia... -
Page 101: What Has Fda Done To Measure The Radiofrequency Energy Coming From Wireless Phones
Again, the scientific data do not demonstrate that wireless phones are harmful. But if you are concerned about the RF exposure from these products, you can use measures like those described above to reduce your RF exposure from wireless phone use. Copyright © 2004 Nokia... - Page 102 Should harmful interference be found to occur, FDA will conduct testing to assess the interference and work to resolve the problem. 12.Where can I find additional information? For additional information, please refer to the following resources: Copyright © 2004 Nokia...
- Page 103 • Federal Communications Commission (FCC) RF Safety Program http://www.fcc.gov/oet/rfsafety • International Commission on Non-Ionizing Radiation Protection http://www.icnirp.de • World Health Organization (WHO) International EMF Project http://www.who.int/emf • National Radiological Protection Board (UK) http://www.nrpb.org.uk/ July 18, 2001For updates: http://www.fda.gov/cdrh/phones Copyright © 2004 Nokia...
-
Page 104: Nokia One-Year Limited Warranty
No charge will be made to the Consumer for any such parts. Nokia will also pay for the labor charges incurred by Nokia in repairing or replacing the defective parts. - Page 105 Nokia. 3. Nokia was not advised in writing by the Consumer of the alleged defect or malfunction of the Product within fourteen (14) days after the expiration of the applicable limited warranty period.
- Page 106 Product takes more than ten (10) days. Please contact the Customer Service Center at Nokia at the telephone number listed at the end of this warranty if you need a loaner and the repair of the Product has taken or is estimated to take more than ten (10) days.
- Page 107 13. This is the entire warranty between Nokia and the Consumer, and supersedes all prior and contemporaneous agreements or understandings, oral or written, relating to the Product, and no representation, promise or condition not contained herein shall modify these terms.
- Page 108 Tampa, FL 33614 Telephone: 1-888-NOKIA-2U (1-888-665-4228) Facsimile: (813) 287-6612 TTY/TDD Users Only: 1-800-24-NOKIA (1-800-246-6542) 17. The limited warranty period for Nokia supplied attachments and accessories is specifically defined within their own warranty cards and packaging. Copyright © 2004 Nokia...
Need help?
Do you have a question about the 2112 and is the answer not in the manual?
Questions and answers