
Related Manuals for Supmeter BST106-N59


Summary of Contents for Supmeter BST106-N59
- Page 1 BST106-N59[B] Wheel Loader Weigher Operation Manual V6.2 Changsha Supmeter Technological Co.,Ltd.
- Page 2 Preface Thank you very much for your purchase! This manual covers safety precaution, brief introduction, technical specifications, user interfaces, installation&connection, functions&operation, fault treatments, working specifications and so on. In order to make the product running at its best, please read this manual in advance, and reserve it for the future reading.
-
Page 3: Table Of Contents
Contents 1. SAFETY PRECAUTION........................4 2. BRIEF INTRODUCTION......................... 5 2.1 O ........................... 5 PERATING RINCIPLE 2.2 S ........................5 YSTEM ONFIGURATION 2.3 A .......................5 PPLICABLE HEEL OADERS 3. TECHNICAL SPECIFICATIONS....................6 3.1 S .................... 6 PECIFICATIONS OF EIGHING NDICATOR 3.2 S ....................7 PECIFICATIONS OF OSITION ENSOR... - Page 4 5.3.4 Power Supply Connector (POWER)...................21 6. MENU OPERATION........................22 6.1 M ............................22 6.2 P ........................... 24 ARAMETER ETTING 6.2.1 Weighing Parameters........................24 6.2.2 Calibration Parameters........................ 26 6.2.3 Setpoint Parameters........................27 6.2.4 Alarm Parameters........................27 6.2.5 Communication Parameters......................28 6.2.6 Display Parameters........................29 7.
-
Page 5: Safety Precaution
1. Safety Precaution Lithium Battery Installation A Lithium battery should be equipped in the weighing indicator. If it is not allowed to be transported together with the product because of embargo, please make a purchase according to the model offered by us and install it by yourself. Application environment ... -
Page 6: Brief Introduction
2. Brief Introduction 2.1 Operating Principle Wheel Loader Weigher is a dynamic weighing and auto-totalizing equipment installed on wheel loader without changing the original structure of wheel loader. When the lift-arm of wheel loader lifted to a certain height, the position sensor will trigger the ... -
Page 7: Technical Specifications
3. Technical Specifications 3.1 Specifications of Weighing Indicator Executing Standard CMC GB/T 7724-2008《Electronic Weighing Meter》PRC National Standard. OMIL R76: 2006《Non-automatic Weighing Instruments》International Recommendation. Display 640×480 TFT color display screen for English character display. Weight Display Range of Indicator: -99,999~99,999. ... -
Page 8: Specifications Of Position Sensor
Internal COM3: Connected Thermal Serial Printer, Baud Rate 9600bps, No Parity Check Bit. Report Print 10000 Loading Records can be saved, queried and printed, and each record can contain 50pcs Single-bucket-loading-weight value. Operating Specification Operating Voltage: DC24V±20%. ... -
Page 9: System Accuracy
3.4 System Accuracy Accuracy Grade: III. Verification Accuracy of Weighing Indicator: 0.02%. Accuracy of Single-Bucket-Weight: 0.5%~1.0%. Accuracy of Totalized Loading Weight: 1.0%. -
Page 10: User Interface
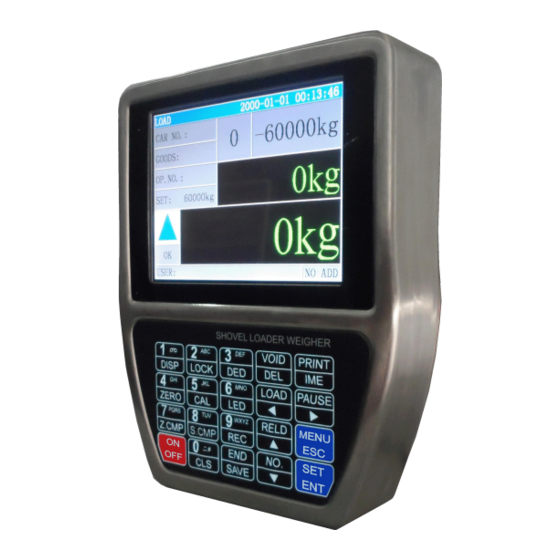
4. User Interface 4.1 Main Dispaly Interface L[11]/R[12] [13] L[5]/R[6] [14] [15] [10] Sign Description [Record No.0000~9999] TRUCK MODE. [Material No.01~20] MIX MODE。 Working Mode: TRUCK MODE / MIX MODE. Working State [LOC/LOCK]: Keypad is locked. [903] Date Format Hour : Minute : Second TRUCK Truck No. - Page 11 Sign Description Weighing Normal. Stall Alarm [The operator has released the accelerator of wheel loader in weighing STALL process]: Acceleration Value < [400] Stall Alarm Point. Lower Limit Alarm of Single-bucket-loading-weight: Loading Weight < [401] Load Lower Limit. Upper Limit Alarm of Single-bucket-loading-weight: HIGH Loading Weight >...
- Page 12 Press key【Disp】to switch the following display interfaces for checking working state: 1. Oil Pressure Sensor Adjustment Interface A R-NET: Real-time Weight Value. LC-UP: Oil Pressure Signal Real-time AD Value from Loadcell Port ‘LC-UP’. LC-DN: Oil Pressure Signal Real-time AD Value from Loadcell Port ‘LC-DN’. ΔAD = AD -AD LC-DN...
-
Page 13: Keypad Operation
4.2 Keypad Operation 4.2.1 Menu Operation Key Name Description Enter Main Menu / Exit. 【Menu】 Enter / Save. 【Ent】 Cursor shifts left. Backspace. 【◄】 Cursor shifts right. 【►】 Cursor shifts up. Display the previous option. 【▲】 Cursor shifts down. Display the next option. 【▼】... -
Page 14: Operation In Loading Process
4.2.4 Operation in Loading Process Key Name Description 6/【Mode】 Options: Truck Mode / Mix Mode. Enter Loading state with blue sign ‘▲’ displaying. 【Load】 Let the bucket of wheel loader stay at the lowest position before pressing【Load】. Truck Mode: Save the current Loading Record and Clear Screen after the truck-loading process finished. -
Page 15: Installation&Connection
5. Installation&Connection 5.1 Installation 5.1.1 Structure of Wheel loader 1: Bucket; 2: Lift-arm; 3: Arm-lifting Oil Cylinder; 4: Oil Connecting Port of Upper Oil Chamber : Oil Connecting Port of Lower Oil Chamber. Related Operation Terms: Arm-up: Lift the lift-arm so that the bucket rises. ... -
Page 16: Installation Of Weighing Indicator
5.1.2 Installation of Weighing Indicator 1: Fastening Nut for Lateral Rotation; 2: Fastening Nut for Vertical Rotation; 3:Locating Plate; 4: Printer Weld the mounting bracket of the weighing indicator firmly on the metal frame of the wheel loader driving cab. The installation position should be convenient for operation. -
Page 17: Installation Of Position Sensor
5.1.3 Installation of Position Sensor Position sensor includes two modules: Proximity Switch Module: Main Mounting Plate with a chute for length adjustment, Sub-mounting Plate with a chute for angle adjustment, Upper Proximity Switch and Lower Proximity Switch [Detecting Distance: 1~8mm]. Magnet Module: Thread Pole , Weld-nut, Tight-nut, Nylon Block, Magnet Block. -
Page 18: Installation Of Oil Pressure Sensor
5.1.4 Installation of Oil Pressure Sensor 1. Intallation Position The upper oil connecting port and lower oil connecting port of arm-lifting oil cylinder are the installation positions of oil pressure sensors. Suggestion: Install the oil pressure sensors on the arm-lifting oil cylinder which is at the same side that the weighing indicator installed on. -
Page 19: Cable Laying
5.1.5 Cable Laying signal calble and position sensor signal cable should be laid in flexible pipe for Oil pressure sensor protection, and fix them with nylon strip. Try to keep signal calbles away from the place with high temperature and possible extrusion, and ... -
Page 20: Connection
5.3 Connection 5.3.1 Oil Pressure Sensor Connector (LC-DN/LC-UP) LC-DN/LC-UP Description SIG- 0~5V & 0~20mV Oil Pressure Signal Input -. 0~5V & 0~20mV Oil Pressure Signal Input +. 4~20mA Oil Pressure Signal Input. SIG+ Weld a 200Ω precision resistance between the plug’s Pin2 and Pin3 for converting 4~20mA to 0.8~4V. -
Page 21: Position Sensor Connector (Position)
5.3.2 Position Sensor Connector (POSITION) POSITION Description Output Voltage + for Position Sensor ( DC12V). SIN-A Position Sensor A Signal Input. SIN-B Position Sensor B Signal Input. Output Voltage - for Position Sensor. 5.3.3 Digital Communication Port Connector (COM1/COM2) COM1: RS232. Internal COM2: Optional wireless serial communication port. -
Page 22: Power Supply Connector (Power)
5.3.4 Power Supply Connector (POWER) Operating Voltage: DC24V±20%. POWER Wire Color Description Black. DC Input -. +24V Red. DC Input +. Note: Reverse polarity protection function available. The power switch of the weighing indicator should be turned off and ensure that the power cables are not charged before DC24V power connection to avoid short circuit fault. -
Page 23: Menu Operation
6. Menu Operation 6.1 Main Menu Main Menu Second Menu Description 1 Weighing Weighing parameters setting. 2 Calibration Calibration parameters setting. 3 Setpoint Setpoint parameters setting. 4 Alarm Alarm parameters setting. F1: SET 5 Communcation Communication parameters setting. [F1 Parameter 6 Display User interface parameters setting. - Page 24 Main Menu Second Menu Description 1 Key-unlocking Unlocking keypad. 2 Key-locking Locking keypad. F4: LOC Exfactory Passwords: [F4 Key-locker] 3 Password Set Operator Password: 000000. Administrator Password: 000001. Special for manufacturer. AD Value of Oil Pressure Signal Linearity Test and Position 1 Hardware Test Signal Test.
-
Page 25: Parameter Setting
6.2 Parameter Setting 6.2.1 Weighing Parameters Range Default Description Load Weight Unit Display Unit of Loading Weight. 0: kg; 1: t [Internal Scale Unit is kg] 2: lb; 3:kp [Internal Scale Unit is lb] TOT Weight Unit Display Unit of Totalized Loading Weight. If Internal Scale Unit is kg, the options are: 0: kg;... - Page 26 Range Default Description Loadcell Channel [Selection] 0: LC-DN [LC-DN to Lower Sensor; LC-UP Unused] 1: LC-UP [LC-UP to Lower Sensor; LC-DN Unused] 2: LC-DN-UP [LC-DN to Lower Sensor; LC-UP to Upper Sensor] Operating Authorization: Administrator. Note: Lower Sensor is the oil pressure sensor installed in the lower oil chamber of arm-lifting oil cylinder.
-
Page 27: Calibration Parameters
6.2.2 Calibration Parameters Range Default Description Zero Value [AD Value] 10000 0~130000 Zero Value at Idle Speed. Only for query. Zero Comp.Coeff. 0.0000 1.0000 Zero Compensation Coefficient at Accelerated Speed. ~99.9999 Only for query. Span Coefficient 1000 1~999999 Span Coefficient at Idle Speed. Only for query. Span Comp.Coeff. -
Page 28: Setpoint Parameters
6.2.3 Setpoint Parameters Range Default Description Truck No. 8 Characters TRUCK1 8 Characters GOODS1 Goods Name 8 Characters OP.1 Operator User Name 20 Characters USER1 0~99999 60000 Setpoint [kg] 6.2.4 Alarm Parameters Range Default Description Stall AlarmPoint [dm/s -1.0000 If ‘Acceleration Value < Stall Alarm Point’, the alarm -0.1000 ~0.0000 message ‘STALL’... -
Page 29: Communication Parameters
6.2.5 Communication Parameters Range Default Description Comm. Address 0~99 Communication Address. COM1 Baud Rate / COM2 Baud Rate 0: 9600bps 1: 19200bp 2 :115200bps COM1 ParityCheck / COM2 ParityCheck 0: None 1: Even 2: Odd COM1 Comm. Mode 0: Host-slave ASC [Modbus ASCII] 1: Continuous ASC [Continuous Sending ASCII]... -
Page 30: Display Parameters
6.2.6 Display Parameters Range Default Description Language 0: Chinese 1: English Disp.RefreshTime [s] 0.1~2.0 Display Refreshing Time. Auto-Locking 0: OFF 1: ON [If there is not any keypad operation in one minute and it’s not in the processes of ‘F2 Calibration’ &... -
Page 31: Equipment Adjustment & System Calibration
7. Equipment Adjustment & System Calibration 7.1 Adjustment&Calibration Procedure Wheel loader’s Idle Speed Adj. Indicator Power on Position Sensor Adjustment Oil Pressure Sensor Adjustment Zero Calibration with unloading and idle speed Zero Compensation with unloading and accelerating Span Calibration with loading and idle speed Span Compensation with loading and accelerating Loading Verification... -
Page 32: Equipment Adjustment
7.2 Equipment Adjustment 7.2.1 Wheel loader’s Idle Speed Adjustment Check if the bucket lifting process with unloading and idle speed is smooth. Check if the bucket lifting process with full loading and idle speed is smooth. If not smooth, it will affect seriously the calibrating and weighing accuracy of the weigher. If it’s ... - Page 33 Lift the lift-arm and bucket with idle speed. If the sensing distance between the Magnet Block and the Proximity Switch and is normal, the buzzer will beep twice and the following arrow signs will be displayed one by one in the process the Magnet Block passing by the Weighing Segment : ▲...
-
Page 34: Oil Pressure Sensor Adjustment
7.2.3 Oil Pressure Sensor Adjustment Olny after position sensor adjustment passed, it’s allowed to do ‘Oil Pressure Sensor Adjustment’. Press key【Pause】to enter Pause state with red sign ‘■’ displaying. Make sure the bucket of wheel loader is empty. ... - Page 35 Press key【Pause】to enter Pause state with red sign ‘■’ displaying. Fault Description Sulution Check if the actual operation process is correct. Check if the oil pressure sensors are connected correctly. ΔAD Value < 0 < 0 -AD LC-DN LC-UP Refer to ‘5.3.1 Oil Pressure Sensor Connector’, Parameter [107] ‘Loadcell Channel [Selection]’...
-
Page 36: System Calibration
7.3 System Calibration Before System Calibration, lift the lift-arm and bucket for 5~10 times to preheating the hydraulic oil. Let the wheel loader stay on the relatively flat ground in the process of System Calibration. 7.3.1 Zero Calibration【Zero】 Press key【Pause】to enter Pause state with red sign ‘■’ displaying. ... - Page 37 Press key【Ent】to display the dialogue box ‘Save A0 or LR?’. If it’s the first time to do Zero Calibration or IdleAcc.Value A0 is not in the range 0.0030~0.0080dm/s , please press key 【◄】 / 【 ►】 to select the button ‘Save LR’, then press key【Ent】to save the new Zero Value and Run Length Ratio.
-
Page 38: Zero Compensation【Z.cmp
7.3.2 Zero Compensation【Z.cmp】 Press key【Pause】to enter Pause state with red sign ‘■’ displaying. Make sure the bucket of wheel loader is empty. BUCKET-UP: Flip the bucket upward to the limit position. ARM-DOWN: Put the lift-arm down so that the bucket goes down to the lowest position. ... - Page 39 【Ent】: Save; 【Menu】: Exit without saving. Repeat the above steps for three times, if the variation of Zero Compensation Coefficient is in the allowable range, Zero Compensation process will be completed. Press key【Pause】to enter Pause state with red sign ‘■’ displaying. ...
-
Page 40: Span Calibration【Cal
7.3.3 Span Calibration【Cal】 Press key【Pause】to enter Pause state with red sign ‘■’ displaying. Use truck scale to get the seft-weight [Tare Weight] of the wheel loader. Load a bucket of materials, and use truck scale to get the gross weight of the wheel loader and ... - Page 41 Correction Ratio [SP.R = New Span Coefficient / Old New Span Coefficient]. AD: AD Value at Weighing Segment. ACC: Acceleration Value at Weighing Segment [dm/s R-AD: Real-time AD Value. Message ‘Save’: It’s allowed to save the detection results. ...
-
Page 42: Span Compensation【S.cmp
7.3.4 Span Compensation【S.cmp】 Press key【Pause】to enter Pause state with red sign ‘■’ displaying. Keep Calibrating Weight [the materials weight in the bucket for Span Calibration] unchanged. BUCKET-UP: Flip the bucket upward to the limit position. ARM-DOWN: Put the lift-arm down so that the bucket goes down to the lowest position. ... - Page 43 R-AD: Real-time AD Value. Message ‘Save’: It’s allowed to save the detection results. Alarm Message: It’s not allowed to save the detection results. 【Ent】: Save; 【Menu】: Exit without saving. Repeat the above steps for three times, if the variation of Span Compensation Coefficient is in ...
-
Page 44: Loading Verification
7.3.5 Loading Verification Keep Calibrating Weight [the materials weight in the bucket for Span Calibration] unchanged. BUCKET-UP: Flip the bucket upward to the limit position. ARM-DOWN: Put the lift-arm down so that the bucket goes down to the lowest position. ... -
Page 45: Fault Treatments
8. Fault Treatments Power Faults Check if the power switch turns on. Check if the power polarity is reversed. Check if the power voltage is correct. Check if the fuse in the weighing indicator has blown. ... -
Page 46: Working Specifications
9. Working Specifications 9.1 Brief Description Check oil pressure sensors and position sensor before starting the wheel loader. Start the wheel loader, then lift the lift-arm and bucket for 5~10 times to preheating the hydraulic oil. BUCKET-UP: Flip the bucket upward to the limit position. ... -
Page 47: Detailed Description
9.2 Detailed Description Checking Before Starting the wheel loader Check if there is a phenomenon of oil leakage at the oil connecting ports. Check if the detecting distance of position sensor is in the range of 5~8mm. ... - Page 48 Press key【Load】to enter loading state with the blue sign ‘▲’ displaying. After shoveling materials into the bucket, flip the bucket upward to the limit position. Then the magnet blocks on the lift-arm should be under the proximity switch. ...
-
Page 49: Appendix A. Print Formats
Appendix A. Print Formats Print Format 1 RECORD LOADING NO.: #200 DATE: 05-20-2009 TIME: 23:59:45 OP.: GOODS: TRUCK: 00000010 #: Weighing Normal SET: 60.00t S: Stall Alarm TOT: 59.90t L: Lower Limit Alarm of Single-bucket-loading-weight PCS: H: Upper Limit Alarm of Single-bucket-loading-weight 23:25 01# 4.80t D: Undertime Alarm... -
Page 50: Appendix B. Register Table Of Host-Slave Modbus[Ascii]
Appendix B. Register Table of Host-Slave MODBUS[ASCII] Command Data Name Type Address Attribute Description [HEX] Totalized Loading Weight Long 40001 Single-bucket- Long 40003 loading-weight Bucket Count Long 40005 Present Record No. Long 40007 40009.0 1: Stall Alarm. 40009.1 40009.2 1: Undertime Alarm. 40009.3 1: Overtime Alarm. - Page 51 Command Data Name Type Address Attribute Description [HEX] Historical Record No. Long 40019 For Record Query. Char 1~8: 1: Second. 2: Minute. 3: Hour. 4: Day. 5: Month. 6: Week. 7: Year. 8: 14H [20D] Historical Record Data 40021 12-Short Packet ~40032 Char...
- Page 53 2014F108-43 CPC16/042376 Changsha Supmeter Technological Co., Ltd. Address: Building A6, Lugu International Industrial Park, Changsha, 410205, China Tel: +86 731 85115100 Fax: +86 731 85158100 Website: www.supmeter.com E-mail: supmeter@supmeter.com...
Need help?
Do you have a question about the BST106-N59 and is the answer not in the manual?
Questions and answers