Table of Contents
Advertisement
Quick Links
Edit Text
Out
Revision: 05.2022-001
Industry
Ind
PIVOT-IR
USER MANUAL
PLEASE READ THIS MANUAL BEFORE SWITCHING THE UNIT ON.
IMPORTANT SAFETY INFORMATION INSIDE.
ICI cameras fall under US Federal Law and Export Control.
2105 W. Cardinal Dr. Beaumont, TX 77705
For more information, contact us: (409) 861-0788 | sales@infraredcameras.com | www.infraredcameras.com
Advertisement
Table of Contents

Subscribe to Our Youtube Channel
Related Manuals for ICI PIVOT-IR


Summary of Contents for ICI PIVOT-IR
- Page 1 PLEASE READ THIS MANUAL BEFORE SWITCHING THE UNIT ON. IMPORTANT SAFETY INFORMATION INSIDE. ICI cameras fall under US Federal Law and Export Control. 2105 W. Cardinal Dr. Beaumont, TX 77705 For more information, contact us: (409) 861-0788 | sales@infraredcameras.com | www.infraredcameras.com...
- Page 2 PIVOT-IR USER MANUAL Revision History 5.2022-001 Document created...
-
Page 3: Table Of Contents
PIVOT-IR USER MANUAL Contents Disclaimers ���������������������������������������������������������� 6 Terms and Conditions .................6 U.S. Government Regulations .............6 Copyright .....................6 Quality Assurance ................6 Customer Help ..................6 User Notice����������������������������������������������������������� 7 Calibration ................... 7 Accuracy ..................... 7 Cybersecurity ..................7 Disposal of Electronic Waste ............7 Intended Use ..................8... - Page 4 PIVOT-IR USER MANUAL Media Management ................. 25 8-7-1 Capture an Image ..............25 8-7-1-1 Manual Saving ..........25 8-7-1-2 Auto Saving ............26 8-7-1-3 Interval Photography ........26 8-7-1-4 Alarm Snapshot ..........27 8-7-2 Adding Voice Annotations to an Image ......28 8-7-3 Name an Image ..............
- Page 5 PIVOT-IR USER MANUAL 8-15-4-1 Sleep (Hibernation) Mode ......43 8-15-4-2 Automatic Shutoff ..........43 8-15-5 Wi-Fi Settings ..............44 8-15-6 Display Brightness Settings ..........45 8-15-7 Date and Time Settings .............45 8-15-8 Language Settings .............45 8-15-9 Storage Information ............46 8-15-10 Device Information .............46 8-15-11 Format the Memory Card ..........46 8-15-12 Factory Reset the Device ..........
-
Page 6: Disclaimers
PIVOT-IR USER MANUAL Disclaimers Terms and Conditions Warranty Terms and Condition of Sale are made available online at: https://infraredcameras.com/support/terms-and-conditions-of-sale/ 1-2 U.S. Government Regulations This product may be subject to U.S. Export Regulations. Please send any inquiries to support@infraredcameras.com 1-3 Copyright ©... -
Page 7: User Notice
PIVOT-IR USER MANUAL User Notice Calibration Annual calibration to the thermal camera is recommended. Contact customer service to schedule maintenance. Accuracy For very accurate results, we recommend that you wait a minimum of 5 minutes after you have started the camera before measuring a temperature. -
Page 8: Intended Use
PIVOT-IR USER MANUAL Intended Use Pivot-IR cameras are used for surface temperature assessment of energy emitted from the first 1/1000 of an inch of a subject. industrial and petrochemical buildings, electrical plants, Environment of use: security rooms, science labs, animal reserves as well as environmental conservatories, and aerial integrations, among others. -
Page 9: Training
PIVOT-IR USER MANUAL Training To read about infrared training, visit: https://infraredtraininginstitute.com/... -
Page 10: Safety Information
PIVOT-IR USER MANUAL Safety Information • Operation is subject to the following two conditions: (1) This device may not cause harmful interference, and (2) this device must accept any interference received, including interference that may cause undesired operation. • To prevent eye damage and personal injury, do not look into the laser. Do not point the laser directly at people or animals or indirectly off reflective surfaces. - Page 11 PIVOT-IR USER MANUAL • Do not put the battery in direct sunlight or other high-temperature locations. Damage or ignition of the battery may occur. • Do not solder directly onto the battery. Damage to the battery may occur. • Do not get water or salt water on the battery or device or permit the device or battery to get wet.
-
Page 12: Technical Specifications
UVC streaming, real-time infrared (with data) Image Format IR JPG (with data) + visible JPG Image Polarity 7 options Image Modes IR, fusion (ICI Dual Vision), visible, picture-in-picture Memory 16 GB, internal Screen 3.5” color touchscreen, 960 x 640 SPECIFICATIONS SUBJECT TO CHANGE WITHOUT NOTICE... - Page 13 PIVOT-IR USER MANUAL SPECIFICATIONS SUBJECT TO CHANGE WITHOUT NOTICE Brightness Adjustable Digital Camera 1920 x 1080, 2 MP Zoom 2x, 4x Emissivity Correction 0.1 to 1.0 Measurement Units °C, °F, and °K IP Rating IP54 Language Multinational Light LED, 200 W...
-
Page 14: Structure
PIVOT-IR USER MANUAL Structure Appearance and Definitions of Interface Lens Module Germanium Lens Touch Screen LED Flashlight Tripod Mount Power Indicator Microphone Type-C Power Strap Hook Visible Lens... -
Page 15: Package Includes
PIVOT-IR USER MANUAL Package Includes Pivot-IR USB to Type-C Cable ENSURE ALL SYSTEM EQUIPMENT AND COMPONENT ITEMS ARE PRESENT BEFORE BEGINNING INSTALLATION... -
Page 16: Quick Start Instructions
PIVOT-IR USER MANUAL Quick Start Instructions Tripod Setup The Pivot-IR can be used Mount the fully charged as a handheld device. Pivot-IR to a tripod using the ¼”-20 mount located on the side of the device. MAKE SURE TRIPODS DO NOT BLOCK THE DIRECT PATH OF THE OBJECT(S) TO BE IMAGED TO ENSURE THE EQUIPMENT WILL NOT BE MOVED OR KNOCKED DOWN. - Page 17 PIVOT-IR USER MANUAL TURN ON THE CAMERA BY PRESSING AND HOLDING THE POWER BUTTON FOR AT LEAST 3 SECONDS. Power on device by pushing and holding the power button for three seconds. PRESS AND HOLD THE POWER BUTTON FOR MORE THAN 5 SECONDS TO SHUT DOWN THE CAMERA.
-
Page 18: Lens Module Rotation
PIVOT-IR USER MANUAL Lens Module Rotation MAKE SURE TO HOLD THE CAMERA FIRMLY IN BOTH HANDS WHEN ROTATING THE LENS MODULE. Hold device in right hand with Rotate the lens module by the screen facing user. Using pushing with the thumb and the forefinger and thumb of lifting with the forefinger. -
Page 19: Charging Instructions
USB cable into an available USB port on a computer. CHARGE THE BATTERY FOR A MINIMUM OF 3 HOURS BEFORE USING. ICI DOES NOT RECOMMEND CHARGING THE DEVICE WHILE IT IS ON A TRIPOD. LAY DEVICE FACE DOWN ON A FLAT AND STABLE DESK OR TABLE WHILE... -
Page 20: Operation Instructions
PIVOT-IR USER MANUAL Operation Instructions How to Charge the Battery Charge the battery for a minimum of 3 hours before using the imager for the first time. When powered on, the battery status is shown by the indicator in the upper right corner of the screen. -
Page 21: Power On/Off The Device
PIVOT-IR USER MANUAL Power On/Off the Device To power the device on, push and hold the Power button for 3 seconds. It takes approximately 50 seconds for the head-up display to load and the camera to begin taking measurements. To power the device off, push and hold the Power button until the screen darkens. -
Page 22: User Interface
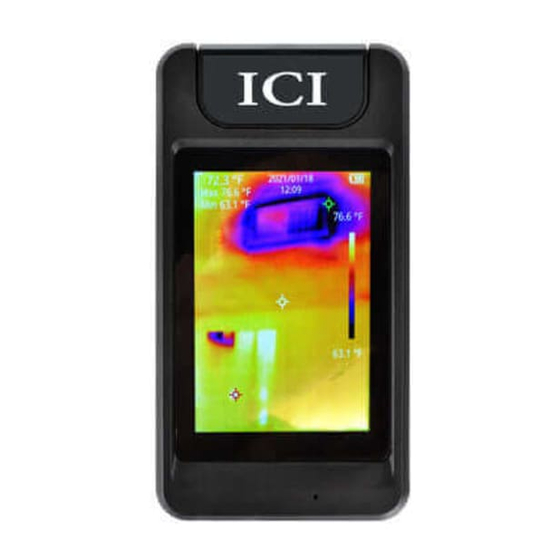
PIVOT-IR USER MANUAL User Interface The device interface appearance: Max 34.3 °C Min 32.1 °C 34.9 °C 31.9 °C Date/Time Capture/Gallery/Light/NUC Analysis Data Image Mode Display Window Zones Temperature Measurement Point Polarity Rotary Menu Level & Span Bar Main Menu 13. -
Page 23: Rotary Menus
PIVOT-IR USER MANUAL 8-4-1 Rotary Menus 8-4-1-1 Open the Rotary Menus Using the touchscreen, access the rotary menus by tapping on the preferred main menu icon. Each menu icon opens its own rotary menu with its own options; the settings menu is the exception. -
Page 24: Power On/Off The Flashlight
PIVOT-IR USER MANUAL DO NOT LOOK INTO THE FLASHLIGHT. LOOKING INTO THE FLASHLIGHT MAY CAUSE EYE DAMAGE AND PERSONAL INJURY. DO NOT POINT THE FLASHLIGHT DIRECTLY AT PEOPLE OR ANIMALS OR INDIRECTLY OFF REFLECTIVE SURFACES. Power On/Off the Flashlight Use the flashlight to assist visibility in dark locations. -
Page 25: Media Management
PIVOT-IR USER MANUAL Media Management 8-7-1 Capture an Image 8-7-1-1 Manual Saving By default, manual saving is enabled. After capturing an image, a small thumbnail is shown on the screen and the user can choose to save, annotate, scan, or cancel the save. -
Page 26: Auto Saving
PIVOT-IR USER MANUAL 8-7-1-2 Auto Saving Auto saving is disabled by default. Users can enable automatic saving as follows: Using the touchscreen, tap the Settings icon to open the settings menu. Tap Image Capture. A submenu opens. Toggle the Auto Save setting to the On position by tapping the switch. -
Page 27: Alarm Snapshot
PIVOT-IR USER MANUAL 8-7-1-4 Alarm Snapshot By default, alarm snapshot is disabled. Enabling the features allows the device to capture and automatically save a set number of images at a user-defined interval whenever a temperature threshold is exceeded (see Section 8-14 Temperature Alarms). -
Page 28: Adding Voice Annotations To An Image
PIVOT-IR USER MANUAL 8-7-2 Adding Voice Annotations to an Image Create voice annotations as follows: Capture an image. A save options box appears. Tap the Microphone icon to record voice annotations. Tap the Microphone icon again to stop recording. Tap the Save icon to save the image. Tap the Back icon to cancel saving. -
Page 29: Rename Images
PIVOT-IR USER MANUAL 8-7-3-3 Rename Images Media can be renamed at any time as follows: Using the touchscreen, tap the Settings icon to open the settings menu. Tap the Gallery icon. Press and hold the screen; then, drag up or down to scroll through the gallery. -
Page 30: Export Media (Usb Storage)
PIVOT-IR USER MANUAL 8-7-5 Export Media (USB Storage) In USB Storage mode, the user can connect the device to a computer to directly access the internal memory of the device. This allows the user to transfer the images to computer for analysis. -
Page 31: Delete Images
PIVOT-IR USER MANUAL 8-7-7 Delete Images Media can be deleted at any time as follows: Using the touchscreen, tap the Settings icon to open the settings menu. Tap the Gallery icon. Press and hold the screen; then, drag up or down to scroll through the gallery. -
Page 32: Non-Uniformity Correction
Menu. Image Modes There are 4 image modes available: Thermal: infrared image Fusion (ICI Dual Vision): infrared and visible image PIP (Picture-in-Picture): thermal image overlay over the visible image Digital: visible image only Change the image mode as follows: Using the touchscreen, tap the Image Mode icon from the main menu. A rotary menu appears. -
Page 33: Image Alignment
PIVOT-IR USER MANUAL 8-9-1 Image Alignment (Registration) When using fusion and picture-in-picture mode it is important to ensure the image alignment is set correctly to receive the best image. Align the images as follows: Using the touchscreen, tap the Image Mode icon from the main menu. A rotary menu appears. -
Page 34: Image Opacity
PIVOT-IR USER MANUAL 8-9-2 Image Opacity When using fusion mode it is important to ensure the image opacity is set correctly to receive the best image. Adjust the opacity as follows: Using the touchscreen, tap the Image Mode icon from the main menu. A rotary menu appears. -
Page 35: Polarity
PIVOT-IR USER MANUAL 8-11 Polarity Change the polarity (color palette) to enhance temperature differences on the thermal camera as follows: Using the touchscreen, tap the Polarity icon from the main menu. A rotary menu appears. Using the touchscreen, tap on the preferred color palette. If the preferred palette is not visible, tap and hold the rotary menu;... -
Page 36: Emissivity
PIVOT-IR USER MANUAL 8-13-2 Emissivity To more accurately measure materials with a low emissivity, an emissivity correction is necessary. Change the emissivity as follows: Using the touchscreen, tap the Settings icon to open the settings menu. Tap Parameters. A submenu opens. -
Page 37: Ambient Temperature
PIVOT-IR USER MANUAL 8-13-3 Ambient Temperature Reflected energy in the scene caused by atmospheric conditions can alter the temperature readings. Change the ambient temperature as follows: Using the touchscreen, tap the Settings icon to open the settings menu. Tap Parameters. A submenu opens. -
Page 38: Analysis Objects
PIVOT-IR USER MANUAL 8-13-5 Analysis Objects Users can have 1 center point analysis object as well as hot spot and cold spot temperature trackers. Radiometric temperature information is displayed in the upper left corner of the screen for each analysis object. -
Page 39: Hot Spot Temperature Tracking
PIVOT-IR USER MANUAL 8-13-5-2 Hot Spot Temperature Tracking By default, the hot spot temperature tracker is disabled. Enable the hot spot temperature tracker as follows: Using the touchscreen, tap the Analysis Object icon from the main menu. A rotary menu appears. -
Page 40: Delete All Analysis Objects
PIVOT-IR USER MANUAL 8-13-5-4 Delete ALL Analysis Objects Delete all existing analysis objects as follows: Using the touchscreen, tap the Analysis Object icon from the main menu. A rotary menu appears. Tap the disable analysis objects icon. The analysis objects disappear and the rotary dial automatically closes. -
Page 41: Threshold Settings
PIVOT-IR USER MANUAL 8-14-2 Threshold Settings Adjust the alarm threshold as follows: Using the touchscreen, tap the Settings icon to open the settings menu. Tap Temperature Alarm. A submenu opens. Toggle the preferred temperature alarm(s) (Above Alarm = High Temperature and Below Alarm = Low Temperature) to the On position by tapping the switch. -
Page 42: Settings
PIVOT-IR USER MANUAL 8-15 Settings 8-15-1 Screen Rotation By default, automatic scree rotation is enabled. If it becomes disabled it can be enabled as follows: Using the touchscreen, tap the Settings icon to open the settings menu. Tap Screen Rotation. A submenu opens. -
Page 43: Power Management Settings
PIVOT-IR USER MANUAL 8-15-4 Power Management Settings 8-15-4-1 Sleep (Hibernation) Mode Push and release the Power button to send the device into hibernation mode. The device sleeps for a period of time; then, it powers off. Adjust the shut off timing using the automatic shutoff settings in Section 8-15-4-2 Automatic Shutoff. -
Page 44: Wi-Fi Settings
PIVOT-IR USER MANUAL 8-15-5 Wi-Fi Settings Connect to wireless Internet as follows: Using the touchscreen, tap the Settings icon to open the settings menu. Tap Hotspot. A submenu opens. Toggle the Hotspot feature to the On position by tapping the switch. -
Page 45: Display Brightness Settings
PIVOT-IR USER MANUAL 8-15-6 Display Brightness Settings Users can change the brightness settings as follows: Using the touchscreen, tap the Settings icon to open the settings menu. Tap System. A submenu opens. Tap Brightness. A submenu opens. Select the preferred brightness: Low, Medium, or High. Saving occurs automatically. -
Page 46: Storage Information
PIVOT-IR USER MANUAL 8-15-9 Storage Information Storage information can be viewed as follows: Using the touchscreen, tap the Settings icon to open the settings menu. Tap System. A submenu opens. Tap Device Information. Capacity and remaining storage information is shown on screen. -
Page 47: Factory Reset The Device
PIVOT-IR USER MANUAL 8-15-12 Factory Reset the Device Users can perform a factory reset as follows: Using the touchscreen, tap the Settings icon to open the settings menu. Tap System. A submenu opens. Tap Factory Defaults. Tap Confirm to perform a factory reset. Tap Cancel to cancel operation. -
Page 48: Radiometry
PIVOT-IR USER MANUAL Radiometry Introduction to Radiometry The basic reason for employing image processing programs when analyzing IR images is to have a fast and comprehensive means to determine the information content of an image in numerical terms. Radiometry is considered the base from which to conduct this analysis. - Page 49 PIVOT-IR USER MANUAL Users are provided the capability to enter any value of surface optical property of the target surface deemed appropriate to the analysis. To set the emissivity enter a value from 0.01 to 1.0 in the input field .
-
Page 50: Temperature Correction
PIVOT-IR USER MANUAL Temperature Correction The accuracy of temperature conversion is also dependent on the physics of the scene. These physical properties include emissivity and reflection of the target, the transmission in the intervening atmosphere, and the background/ foreground temperature within the scene. -
Page 51: Cleaning And Maintenance
PIVOT-IR USER MANUAL Cleaning and Maintenance 10-1 Cleaning the Germanium Lens Do not use corrosive chemicals on the optical glass components. The germanium window surface is coated with anti-reflection coating. Dust, grease, and fingerprints produce harmful substances and leads to a decline in performance, or cause scratches. -
Page 52: Troubleshooting
PIVOT-IR USER MANUAL Troubleshooting If the user encounters any problems while using the imager, refer to the following options. If the problem persists, disconnect the power and contact the customer support department. 11-1 Thermal imager does not power on •... -
Page 53: Temperature Readings Are Incorrect
PIVOT-IR USER MANUAL 11-7 Temperature readings are incorrect • Turn off the device; then, turn it back on • To ensure the accuracy of temperature measurement, it is recommended to wait for 5 to 10 minutes after turning on the thermal imager and before attempting to take temperature measurements. -
Page 54: About Ici
PIVOT-IR USER MANUAL About ICI ICI manufactures complete systems and software. We can provide complete engineering, software, and OEM solutions. Our Fortune 500 clients rely on us for infrared equipment and thermography training (which we offer through the Infrared Training Institute).
Need help?
Do you have a question about the PIVOT-IR and is the answer not in the manual?
Questions and answers