Table of Contents
Advertisement
Available languages
Available languages
en
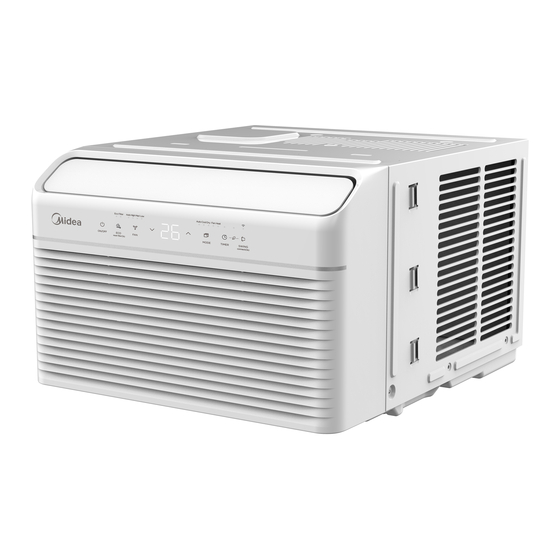
USER MANUAL
Inverter Window
Heat Pump
Capacity: 8000 ~ 12000BTU/h
Warning notices: Before using
this product, please read this
manual carefully and keep it for
future reference. For additional
support, please call customer
service at 1-866-646-4332.
The design and specifications are
subject to change without prior
notice for product improvement.
Consult with your dealer or
MAW12HV1CWT
the manufacturer for details.
MAW08HV1CWT
midea.com
Advertisement
Chapters
Table of Contents

Related Manuals for Midea MAW12HV1CWT


Summary of Contents for Midea MAW12HV1CWT
- Page 1 For additional support, please call customer service at 1-866-646-4332. The design and specifications are subject to change without prior notice for product improvement. Consult with your dealer or MAW12HV1CWT the manufacturer for details. MAW08HV1CWT midea.com...
-
Page 2: Table Of Contents
Owner’s Manual SAFETY PRECAUTIONS ..................3 INSTALLATION INSTRUCTIONS ..............8 OPERATING INSTRUCTIONS ................15 CARE AND CLEANING ..................20 TROUBLESHOOTING TIPS ................21 REMOTE CONTROL AND APP INSTRUCTIONS ........23 Read This Manual Inside you’ll find many helpful hints on how to use and maintain your air conditioner properly. -
Page 3: Safety Precautions
SAFETY PRECAUTIONS To prevent injury to the user or other people and property damage, the instructions shown here must be followed. Incorrect operation due to ignoring of instructions may cause harm or damage. The level of risk is shown by the following indications. This symbol indicates a hazardous situation which, if not WARNING avoided, could result in death or serious injury. - Page 4 WARNING • Do not disassemble or modify unit. It may cause failure and electric shock. • Do not damage or use an alternate power cord. It may cause fire and electric shock. If the power cord is damaged, it must be replaced by the manufacturer or an authorized service center or a similarly qualified person in order to avoid a hazard.
- Page 5 CAUTION • Do not clean the air conditioner with water. Water may enter the unit and degrade the insulation which could lead to electric shock. • Do not put a pet or house plant where it will be exposed to direct air flow. This could injure the pet or harm the plant.
- Page 6 Operation of Current Device The power supply cord contains a current Plug in & measuring device that detects damage to the power cord. Test your power supply press RESET cord as follows: RESET Plug in the air conditioner. 2. The power supply cord will have TWO TEST buttons on the plug head.
- Page 7 • Be aware that the refrigerants may not contain an odor. • Keep ventilation openings clear of obstruction. • Unit is only to be serviced by a Midea authorized servicer, please call Customer Service at 1-866-646-4332 for support. • Flammable refrigerant R32 is used within air conditioner. Please follow the instructions carefully to handle, install, clean, and service the air conditioner to avoid damage or hazard.
-
Page 8: Installation Instructions
INSTALLATION INSTRUCTIONS Tools You Will Need WARNING - Before You Begin Phillips Read these instructions completely Screwdriver and carefully. • IMPORTANT - Save these instructions. Drill • IMPORTANT - Observe all governing codes and ordinances. (If pilot holes are needed) We recommend that two people install this product. - Page 9 Before installing unit, the top rail must be assembled on the unit. A: Remove the air conditioner from the carton and place on a flat surface. B: Remove top rail from the rear of the packaging material as shown in Fig. A. C: Align the hole in the top rail with those in the top of the unit as shown in Fig.
- Page 10 Top Rail C. Once the panel has been installed on Fig. 3 the side of the cabinet, make sure it sits securely inside the frame channel by making slight adjustments. Slide the top and bottom ends of the frame into the top and bottom rails of the cabinet.
- Page 11 2. Storm Window If the air conditoner is blocked by Storm Fig. 5 Window, add wood as shown in Fig. 5, or remove storm window before air SASH conditioner is installed. Storm window 1-1/2"min If Storm Window Frame must remain, frame or other Board thickness (38 mm)
- Page 12 5. Install the Frame Lock Place the frame lock between the frame extensions and the window sill as shown (Fig. 8A for wooden windows), (Fig. 8B for Vinyl-Clad windows). Fig. 8B Fig. 8A 6. Drive Locking Screws A: For wooden windows: Drive 1/2”...
- Page 13 7. Secure Lower Sash A: To secure lower sash in place, attach right angle sash lock with 1/2”(12.7 mm) screw as shown (Fig. 10). Fig. 10 Fig. 11 B: Cut foam window seal and insert it into the space FOAM SEAL between the upper and lower sashes (Fig.
- Page 14 9. Suitable Weather Stripping In order to minimize air/light leaks between the room air conditioner and the window opening, suitable weather stripping (trim the provided weather stripping into suitable size) should be applied in case of any gaps found at the location as indicated by the arrows in Fig.
-
Page 15: Operating Instructions
OPERATING INSTRUCTIONS Normal Sounds High Pitched Chatter High efficiency compressors may have a high pitched sound during cooling cycle. Vibration Sound of Rushing Air Unit may vibrate and In front of the unit, you make noise because may hear the sound of of poor wall or rushing air being moved window construction... - Page 16 Air Conditioner Features WARNING To reduce the risk of fire, electrical shock, or injury to people or property, read the SAFETY PRECAUTIONS before operating this appliance. Outdoor temp.: 64°F ~ 109°F / 18°C ~ 43°C Cooling Operation Indoor temp.: 60°F ~ 90°F / 16°C ~ 32°C Outdoor temp.: 39°F ~ 75°F / 4°C ~ 24°C Heating Operation Indoor temp.: 39°F ~ 80°F / 4°C ~ 27°C...
- Page 17 ELECTRONIC CONTROL OPERATING INSTRUCTIONS Operation buttons buttons ON/OFF button Press button to change temperature setting. Press ON/OFF button to turn unit NOTE: Press or hold either on or off. button until the desired temperature is NOTE: The unit will automatically shown on the display.
- Page 18 2. To operate on COOL mode: • Press or hold the button • Choose Cool Mode to set the to change the Auto time by 0.5 cooling function. Use the Up and hour increments, up to 10 hours, Down buttons to choose the then at 1 hour increments up to 24 desired temperature.
- Page 19 FRESH operation (on some models): Error codes: Press SWING and TIMER buttons The unit may stop operation due to a at the same time for 3 seconds malfunction with the unit. If this occurs, to initiate FRESH feature and the an error code may appear on the display FRESH light illumiantes on some like below.
-
Page 20: Care And Cleaning
CARE AND CLEANING CAUTION Clean your air conditioner occasionally to keep it looking new. Be sure to unplug the unit before cleaning to prevent shock or fire hazards. Air Filter Cleaning The air filter should be checked at least once every two weeks to see if cleaning is necessary. -
Page 21: Troubleshooting Tips
TROUBLESHOOTING TIPS Before calling for service, review this list. It may save you time and expense. This list includes common occurrences that are not the result of defective workmanship or materials in this appliance. Problem Solution Wall plug disconnected. Push plug firmly into wall outlet. House fuse blown or circuit breaker tripped. - Page 22 Problem Solution Air conditioner Dirty or restricted air filter. Clean air filter. turns on and Outside temperature extremely hot. Set FAN speed to a higher off rapidly. setting to bring air past cooling coils more frequently. Check for potential obstructions blocking the outdoor intake/ exhaust.
-
Page 23: Remote Control And App Instructions
REMOTE CONTROL AND APP INSTRUCTIONS Handling the Remote Control Location of the remote control Use the remote control within a distance of 26 ft. (8m) from the air conditioner, pointing it towards the unit. The unit will beep when it receives a signal. CAUTION •... - Page 24 Function Buttons MODE ON/OFF Switches the operating Turns the unit on or off. modes as follows: Auto Cool Dry Heat TEMP Increases temperate in 1°F (1°C) increments. Max. temperature is ENERGY SAVER 86°F (30°C). Press this button to toggle energy saver mode. Scrolls through operation functions as follows: Comfort Sense (...
- Page 25 Remote Screen Indicators Information is displayed when the remote control is powered on. Sleep mode display Comfort Sense feature display Wireless control feature display Low battery detection display (If flashes) MODE display Transmission Indicator Displays the current mode, Lights up when remote including: sends signal to indoor unit.
- Page 26 Setting the TIMER TIMER ON/OFF - Set the amount of time after which the unit will automatically turn on/off. TIMER ON SETTING Press TIMER ON Press up or down button for Point remote to unit and wait button to initiate the multiple times to set the desired 1sec, the TIMER ON will be ON time sequence.
- Page 27 OS may or may not be supported until a new version is released. Your specific mobile phone or problems in your network may prevent the system from working and Midea will not be responsible for any problems that could be caused by incompatibility or network issues.
- Page 28 Apple QR code Scan to download app. • You can also go to Google Play or App Store and search for Midea Air. NOTICE All the images in this manual are for reference only, your product and app may look slightly different.
- Page 29 CREATE YOUR ACCOUNT • Make sure your smartphone is connected to your wireless router and your wireless router has a working 2.4GHz internet connection. • It is recommended to activate your account immediately to be able to recover your password by email. 1.
- Page 30 ADDITIONAL APP AND SMART HOME FUNCTIONS For additional instructions regarding the features of the app and Smart Home skill capabilities, scan the QR code below. Page 30 ...
- Page 31 Para obtener asistencia, llame el Central de Servicio Técnico al 1-866-646-4332. El diseño y las especificaciones están sujetos a cambios sin previo aviso para la mejora del producto. Consulte con su distribuidor o MAW12HV1CWT fabricante para obtener más detalles. MAW08HV1CWT midea.com...
- Page 32 Manual del propietario PRECAUCIONES DE SEGURIDAD ..............33 INSTRUCCIONES DE INSTALACIÓN ............38 INSTRUCCIONES DE OPERACIÓN ............. 45 CUIDADO Y LIMPIEZA ..................50 SOLUCIÓN DE PROBLEMAS ................51 INSTRUCCIONES DE CONTROL REMOTO Y APLICACIÓN ....53 Lea este Manual En su interior encontrará muchos consejos útiles sobre como usar y mantener su acondicionador de aire correctamente.
-
Page 33: Precauciones De Seguridad
PRECAUCIONES DE SEGURIDAD Para prevenir daños al usuario o a otras personas y a la propiedad, las instrucciones que se muestran aquí deben ser seguidas. El uso incorrecto debido a ignorar las instrucciones podría causar perjuicios o lesiones. El nivel de riesgo está clasificado por las siguientes indicaciones. - Page 34 ADVERTENCIA • No desmonte ni modifique la unidad. Puede causar fallas y descarga eléctrica. • No dañe ni utilice un cable de alimentación alternativo. Puede causar incendio y descarga eléctrica. Si el cable de alimentación está dañado, debe ser reemplazado por el fabricante o un centro de servicio técnico autorizado o una persona igualmente calificada para evitar un peligro.
- Page 35 PRECAUCIÓN • No coloque obstáculos alrededor de las entradas de aire o dentro de la salida de aire. Puede causar fallas o un accidente. • Limpie solo con un paño suave. No utilice detergentes fuertes que contengan cera o diluyentes, ya que puede dañar el producto. •...
- Page 36 Funcionamiento del dispositivo actual El cable de alimentación contiene un Enchufe y pulse dispositivo de medición que detecta daños en el proprio cable. Pruebelo de la el botón RESET siguiente manera: Enchufe el acondicionador de aire. RESET 2. El cable de alimentación tendrá DOS TEST botones en el cabezal del enchufe.
- Page 37 • Tenga en cuenta que los refrigerantes pueden no contener olor. • Mantenga las aberturas de ventilación libres de obstrucciones. • La unidad solo debe ser atendida por un centro de asistencia autorizada Midea, llame al Servicio al Cliente al 1-866-646-4332 para obtener asistencia técnica.
-
Page 38: Instrucciones De Instalación
INSTRUCCIONES DE INSTALACIÓN Herramientas que necesitará ADVERTENCIA Antes de empezar Destornillador Lea estas instrucciones completa y Phillips cuidadosamente. • IMPORTANTE - Guarde estas instrucciones. Taladro • IMPORTANTE - Observe todos los (Si se necesitan agujeros códigos y ordenanzas que rigen. piloto) Recomendamos que dos personas instalen este producto. - Page 39 Antes de instalar la unidad debe montar el carril superior en la unidad. A: Retire el acondicionador de aire de la caja y colóquelo sobre un superficie plano. B: Retire el carril superior del embalaje de los materiales como se muestra en la Fig. A. C: Alinee el agujero en el carril superior con los de la parte superior de la unidad como se muestra en la Fig.
- Page 40 Top Rail C. Una vez que el panel se ha instalado en Fig. 3 Carril superior el lado del gabinete, asegúrese de que se sienta firmemente dentro del canal de marco mediante pequeños ajustes. Deslice los extremos superior e inferior del marco en los carriles superior e inferior del gabinete.
- Page 41 2. Ventana de Tormenta Si el acondicionar de aire és bloqueado Fig. 5 por una ventana de tormenta, agregue la madera como se muestra en la Fig. 5, Hoja o retire la ventana de tormenta antes de Ventana de Aborda el grueso tormenta, instalar el acondicionador de aire.
- Page 42 5. Instale el Bloqueo de los Marcos Coloque el bloqueo de los marcos entre las extensiones del marco y el umbral de la ventana como se muestra en la Fig. 8A & Fig. 8B. Ventana de madera Ventana de vinilo revestido Fig.
- Page 43 7. Prenda la Hoja Inferior A: Para mantener la hoja inferior en su lugar mediante la fijación de la cerradura del bloqueo de ventana con el tornillo de 1/2” (12.7 mm) como se muestra (Fig. 10). Fig. 10 Fig. 11 B: Corte sello de espuma de la ventana e insértela en el FOAM SEAL Sello de espuma...
- Page 44 9. Instalación de la Banda Adesiva Para minimizar fugas de aire/luz entre el acondicionador de aire de la habitación y la abertura de la ventana, se deben aplicar una banda adesiva segun sea necesario (recorte las bandas provistas en el tamaño adecuado) en caso de que se encuentren espacios en la ubicación como lo indican las flechas en la Fig.
-
Page 45: Instrucciones De Operación
INSTRUCCIONES DE OPERACIÓN Sonidos normales Sonido Agudo Compresores de alto rendimiento pueden presentar un sonido agudo durante el ciclo de enfriamiento. Vibración Sonido de Corriente La unidad puede del Aire vibrar y hacer ruido debido a una Delante de la unidad, estructura débil de la es posible que ventana, o a una... - Page 46 Funcionamiento del acondicionador de aire ADVERTENCIA Para reducir el riesgo de incendio, descargas eléctricas o lesiones a personas o propiedades, lea las PRECAUCIONES DE SEGURIDAD antes de utilizar este aparato. Temperatura exterior: 64°F ~ 109°F / 18°C ~ 43°C Operación de refrigeración Temperatura interior: 60°F ~ 90°F / 16°C ~ 32°C Temperatura exterior: 39°F ~ 75°F / 4°C ~ 24°C...
- Page 47 INSTRUCCIONES DE FUNCIONAMIENTO DEL CONTROL ELECTRÓNICO Operación de los botones Botón FAN Pulse el botón Ventilador para Botón ON/OFF cambiar la velocidad del ventilador Pulse el botón ON/OFF para entre cuatro ajustes: Automático encender o apagar la unidad. (Auto), Bajo (Low), Medio (Med) o Alto (High).
- Page 48 1. Para operar en modo AUTOMÁTICO: 5. Para operar en modo CALENTAMIENTO (no para los modelos solo Enfriamiento): • Al ajustar el acondicionador de aire al modo AUTO, seleccionará • Seleccione Heat Mode para automáticamente enfriamiento o el configurar la función de funcionamiento solo del ventilador calentamiento.
- Page 49 Botón SWING Visualizaciones en el Visor Utilice el botón OSCILACIÓN Visor LED: (SWING) para iniciar la función de Muestra la temperatura ajustada en “C” oscilación automática de la rejilla o “F” y los ajustes del temporizador de salida. Cuando la oscilación automático.
-
Page 50: Cuidado Y Limpieza
CUIDADO Y LIMPIEZA ATENCIÓN Limpie su acondicionador de aire de vez en cuando para mantenerlo con un aspecto nuevo. Asegúrese de desenchufar la unidad antes de limpiarla para evitar descargas eléctricas o incendios. Limpieza del Filtro de Aire El filtro de aire deberá revisarse cuando menos una vez a cada dos semanas, para ver si es necesario limpiar. -
Page 51: Solución De Problemas
SOLUCIÓN DE PROBLEMAS Antes de llamar al servicio técnico, revise esta lista. Puede ahorrarle una gran cantidad de tiempo y dinero. Esta lista incluye ocurrencias comunes que no son consecuencia de un trabajo o materiales defectuosos en el equipo. Problema Solución Enchufe desconectado de la toma de pared. - Page 52 Problema Solución Filtro de aire sucio o flujo de aire restringido. Limpie el filtro de aire. El acondicionador Temperatura exterior extremadamente caliente. Establezca la velocidad del FAN en una de aire se configuración más alta para que el aire pase por los serpentines de enfriamiento con enciende y apaga más frecuencia.
-
Page 53: Instrucciones De Control Remoto Y Aplicación
INSTRUCCIONES DE CONTROL REMOTO Y APLICACIÓN Manejo del Control Remoto Ubicación del control remoto Utilice el control remoto a distancia a una distancia de 26 piés (8 metros) del acondicionador de aire, apuntando hacia el receptor. La recepción se confirma con un pitido. PRECAUCIÓN •... - Page 54 Función de los Botones Botón MODE Botón ON/OFF Enciende o apaga la unidad. Cambia los modos de funcionamiento de la Botón TEMP siguiente manera: Aumenta la temperatura Auto Cool Dry Heat Fan Auto Cool en incrementos de 1°F (1°C). Temperatura max. es Botón ENERGY SAVER 86°F (30°C).
- Page 55 Indicadores del visor del control remoto Las informaciones se muestran cuando se enciende el control remoto. Función Sleep activada Función Comfort Sense activada Modo Wireless activado Detección de batería baja (Si parpadea) Presenta MODE Indicador de Transmission Muestra el modo actual, Se enciende cuando el que incluye: control remoto envía...
- Page 56 Configuración del TIMER (temporizador) TIMER ON/OFF - Establezca la cantidad de tiempo después del cual la unidad se encenderá / apagará automáticamente. CONFIGURACIÓN DEL TIMER ON Pulse TIMER ON para Pulse los botones arriba o abajo Apunte el control remoto a la iniciar la secuencia de varias veces para configurar el tiempo unidad y espere 1 segundo, el...
- Page 57 Actualice la aplicación para volver a sincronizarla. AVISO Midea no será responsable de ningún problema que pueda ser causado por incompatibilidad o problemas de red, su router inalámbrico y teléfono móvil. Page 57 ...
- Page 58 Código QR de Android Código QR de Apple Escanear para descargar la aplicación. • También puede ir a Google Play o App Store y buscar Midea Air. AVISO Todas las imágenes de este manual son solo para referencia, su producto y aplicación pueden tener un aspecto ligeramente diferente.
- Page 59 CREA TU CUENTA • Asegúrese de que su Smartphone esté conectado a su router inalámbrico y que su router inalámbrico tenga una conexión a Internet de 2,4 GHz. • Se recomienda activar su cuenta inmediatamente para poder recuperar su contraseña por correo electrónico..
- Page 60 FUNCIONES ADICIONALES DE LA APLICACIÓN Y SMART HOME Para obtener instrucciones adicionales sobre las características de la aplicación y las capacidades del sistema Smart Home, escanee el código QR a continuación. Page 60 ...
- Page 61 Page 61 ...
Need help?
Do you have a question about the MAW12HV1CWT and is the answer not in the manual?
Questions and answers