Advertisement
Available languages
Available languages
Quick Links
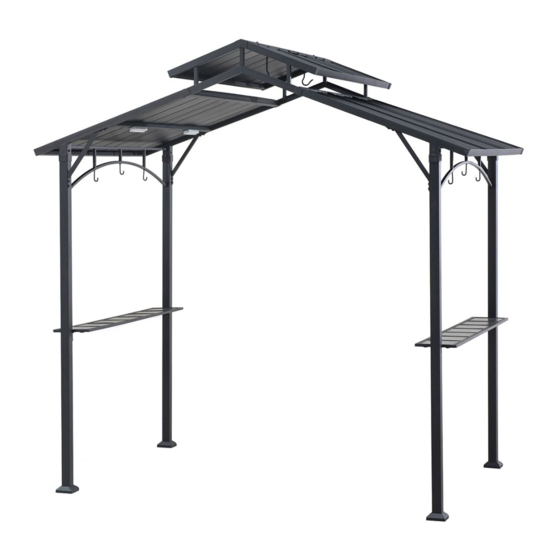
Hardtop Grill Gazebo
ITEM # 0757134 / 38115272
MODEL # A104000100
Français p. 16
ATTACH YOUR RECEIPT HERE
Purchase Date
Serial Number
Questions, problems, missing parts? Before returning to your retailer, call our customer
service department at 1-866-578-6569 anytime 24 hours / 7 days a week, or email to
lowes@sunjoygroup.com or visit www.sunjoyonline.com.
1
Advertisement

Subscribe to Our Youtube Channel
Related Manuals for Sunjoy A104000100


Summary of Contents for Sunjoy A104000100
- Page 1 Hardtop Grill Gazebo ITEM # 0757134 / 38115272 MODEL # A104000100 Français p. 16 ATTACH YOUR RECEIPT HERE Purchase Date Serial Number Questions, problems, missing parts? Before returning to your retailer, call our customer service department at 1-866-578-6569 anytime 24 hours / 7 days a week, or email to...
- Page 2 PACKAGE CONTENTS...
- Page 3 PACKAGE CONTENTS PART DESCRIPTION QUANTITY PART DESCRIPTION QUANTITY Roof Vent Roof Cladding – short panel(2) Base Roof Cladding – short panel(3) Base cover Trim Cap Post(1) Truss Beam (1) Truss Beam (2) Post(2) Top Connecting Pole Skew Support Piece Counter Connecting Board 1 Connecting Board 2 Tile (Pre-assembled)
- Page 4 HARDWARE CONTENTS M6 x 20 Bolt M6 Flat Washer M6 x 15 Bolt M6 x 40 Bolt QTY: 84 + 5 Spare QTY: 134 + 7 Spare QTY: 48 + 3 Spare QTY: 2 + 1 Spare Ø8 x 180 Stake M6 Wrench M4 x 10 Screw M6 Spring Washer...
- Page 5 WARNING • This product is intended for outdoor use only and should be placed on flat, horizontal ground. • Ensure enough clearance around the product. • Before assembling the product, find level ground no less than 6 ft. away from any structures or obstructions, such as fences, garages, houses, overhanging branches, laundry lines, or electrical wires.
- Page 6 ASSEMBLY INSTRUCTIONS 1. Attach truss beam(Q1)(Q2) to top roof vent (A1), assemble them with Connecting Board 1 (F1) by using bolt (AA) and flat washer (BB). Hardware Used M6 x 20 Bolt x 12 M6 Flat Washer x 12 2. Attach top hook (G) to Top Connecting Pole (E).
- Page 7 ASSEMBLY INSTRUCTIONS 3. Attach Top Connecting Pole (E) to top roof vent (A1) by using bolt (AA) and flat washer (BB) Hardware Used M6 x 20 Bolt M6 Flat Washer 4. Attach Connecting Board 3 (F3) to top roof vent (A1) by using bolt (AA) and flat washer (BB) Hardware Used M6 x 20 Bolt...
- Page 8 ASSEMBLY INSTRUCTIONS 6. Attach Connecting Board 2 (F2) to Truss 6 6 6 Beam (Q1)(Q2) by using bolt (AA) and 12-1 flat washer (BB) Hardware Used M6 x 20 Bolt M6 Flat Washer Step 2 7. Attach Roof cladding – long panels (H1) 6 6 7 (H2)(H3) to Cover Supporting Board (O) 12-1...
- Page 9 ASSEMBLY INSTRUCTIONS 8. Attach the Roof cladding – short panels (I1)(I2)(I3) to Cover Supporting Board (P) by using bolt (CC) and flat asher (BB). Hardware Used M6 x 15 Bolt x 16 M6 Flat Washer x 16 9. Attach trim cap (J) to Top Connecting Pole 6 6 9 by using bolts (EE) and flat washer (BB).
- Page 10 ASSEMBLY INSTRUCTIONS 10. Insert Base cover (C) into Pole (R1)(R2), 6 6 10 attach Base (B) and Pole (R1)( R2) by 12-1 using bolt (CC) and flat washer (BB). Hardware Used M6 x 15 Bolt M6 Flat Washer 11. ALift the assembled big top and attach the Posts (R1 &...
- Page 11 ASSEMBLY INSTRUCTIONS 13. Attach Skew support piece (L) onto Pole 6 6 13 (R1)(R2) and Truss Beam (Q1)(Q2) by 12-1 using bolts (AA) and flat washer (BB). Hardware Used M6 x 20 Bolt x 16 M6 Flat Washer x 16 Preassemble Step: Insert the Tile (M2) into the pane of the counter (M1).
- Page 12 ASSEMBLY INSTRUCTIONS 15. Lift up Base cover (C), use Stake (II) to 6 6 15 fasten the gazebo on the ground. Put 12-1 down Base cover (C) and now your gazebo is ready for use. Hardware Used ¢8 x 180 stake 16-1.
- Page 13 CARE & MAINTENANCE To extend the life of grill gazebo, do not use when there are high winds. Disassemble and pack away when the gazebo will not be used for an extended period.Ensure that the metal parts are all dry before packing away.
- Page 14 REPLACEMENT PARTS LIST For replacement parts, call our customer service department at 1-866-578-6569 anytime 24 hours / 7 days a week.
- Page 15 REPLACEMENT PARTS LIST For replacement parts, call our customer service department at 1-866-578-6569 anytime 24 hours / 7 days a week. PART DESCRIPTION NUMBER PART DESCRIPTION NUMBER Post(2) Roof Vent P000400713 P000200341 Skew Support Piece Base P000100207 P005000288 Counter Base cover P006100132 P002100220 Tile (Pre-assembled)
- Page 16 GAZEBO GRILL Á TOIT SOLIDE ARTICLE # 0757134 / 38115272 MODÈLE # A104000100 JOIGNEZ VOTRE REÇU ICI Numéro de série Date d’achat Des questions, des problèmes, des pièces manquantes? Avant de retourner l’article au détaillant, communiquez avec notre service à la clientèle au 1-866-578-6569 à n’importe quelle heure, ou envoyez un email à...
- Page 17 CONTENU DE L’EMBALLAGE...
- Page 18 CONTENIDO DEL PAQUETE PIÈCE QTÉ PIÈCE QTÉ DESCRIPTION DESCRIPTION Façade du Petit Toit Panneau de Toiture Court (2) Base Panneau de Toiture Court (3) Couvert de Base Cuirasse Poutre Inclinée (1) Poteau(1) Poutre Inclinée (2) Poteau(2) Poutre de Connexion du Toit Support de l’Angle Comptoir Poutre Horizontale 1...
- Page 19 QUINCAILLERIE INCLUSE Rondelle plate M6 Boulon M6 x 20 mm Boulon M6 x 15 mm Boulon M6 x 40 mm Qté. 134 + 7 de rechange Qté. 84 + 5 de rechange Qté. 48+ 3 de rechange Qté. 2 + 1 de rechange Clé...
- Page 20 AVERTISSEMENTS Ce produit est conçu pour emploi extérieur uniquement et doit être installé sur • une surface plate et horizontale. • Assurez-vous de laisser assez d’espace de dégagement autour de cet article. • Avant d’assembler le produit, cherchez une surface à niveau a une distance de pas moins de 6 pieds de n’importe quelle structure ou obstructions, comme barrières, garages, maisons, branches pendantes, fils à...
- Page 21 INSTRUCTIONS POUR L’ASSEMBLAGE 1. Fixez la Poutre Inclinée Q1 (Q2) à la façade du toit (A1), assemblez-les avec la Poutre Horizontale 2 (F2) avec boulon (AA) et rondelle (BB). Aditamentos utilizados x 12 Boulon M6 x 20 mm Rondelle M6 x 12 2.
- Page 22 INSTRUCTIONS POUR L’ASSEMBLAGE 3. Fixez la poutre de connexion du toit (E) à la façade du toit (A) avec boulon (AA) et rondelle (BB). Quincaillerie utilisée Boulon M6 x 20 mm Rondelle M6 4. Fixez la Poutre Horizontale 3 (F3) à la façade du toit (A) avec boulon (AA) et rondelle (BB).
- Page 23 INSTRUCTIONS POUR L’ASSEMBLAGE 6. Fixez la poutre horizontale 1 (F1) à la 6 6 6 poutre inclinée Q1 (Q2) avec boulon (AA) 12-1 et rondelle (BB). Quincaillerie utilisée Boulon M6 x 20 mm Rondelle M6 7. Fixez les Panneaux de Toiture longs 6 6 7 (H1,H2,H3) la Barre de Support de la 12-1...
- Page 24 INSTRUCTIONS POUR L’ASSEMBLAGE 8. Fixez les Panneaux de toiture courts (I1,I2,I3) à la barre de Support de la Toiture (O) avec boulon (CC) et rondelle (BB) Quincaillerie utilisée Boulon M6 x 15 mm x 16 Rondelle M6 x 16 9. Fixez la cuirasse (J) à la Poutre de 6 6 9 Connexion du Toit avec boulon (EE) et rondelle (BB).
- Page 25 INSTRUCTIONS POUR L’ASSEMBLAGE 10. Introduisez le couvert de Base (C) dans 6 6 10 le Poteau (R1 et R2), Fixez la Base (B) au Poteau (K1 et K2) avec boulon (CC) rondelle (BB). Quincaillerie utilisée Boulon M6 x 15 mm Rondelle M6 11.
- Page 26 INSTRUCTIONS POUR L’ASSEMBLAGE 13. Connectez le Support de l’Angle (L) aux 6 6 13 Poteaux (R1 et R2) et aux Poutre 12-1 Inclinées (Q1 et Q2) avec boulon (AA), rondelle (BB). Quincaillerie utilisée x 16 Boulon M6 x 20 mm Rondelle M6 x 16 Étape de Pré...
- Page 27 INSTRUCTIONS POUR L’ASSEMBLAGE 15. Soulevez le Couvert de la Base (C), avec 6 6 15 les Piquets (II), ancrez le gazebo à la 12-1 terre. Rabaissez le Couvert de la Base (C) et maintenant votre gazebo est prêt à en profiter. Quincaillerie utilisée Piquets Φ...
- Page 28 SOIN E T ENTRETIEN Pour que votre gazebo gril dure plus longtemps, ne l’utilisez pas quand il y a du vent fort. Démontez-le et gardez le pendant des périodes longues de ne pas l’employer. Assurez-vous que les que les métal soient sèches avant de les garder.
- Page 29 LISTE DE PIÈCES DE RECHANGE Pour pièces de rechange, veuillez appeler notre secteur de Service à la clientèle au 1-866-578-6569 à n’importe quelle heure.
- Page 30 LISTE DE PIÈCES DE RECHANGE Pour pièces de rechange, veuillez appeler notre secteur de Service à la clientèle au 1-866-578-6569 à n’importe quelle heure. PIÈCE PIÈCE PIÈCE # PIÈCE # DESCRIPTIONN DESCRIPTIONN P000400713 P000200341 Poteau(2) Façade du Petit Toit Support de l’Angle P000100207 Base P005000288...
Need help?
Do you have a question about the A104000100 and is the answer not in the manual?
Questions and answers