Table of Contents
Advertisement
Available languages
Available languages
Advertisement
Chapters
Table of Contents

Subscribe to Our Youtube Channel
Related Manuals for Black Stone 1899


Summary of Contents for Black Stone 1899
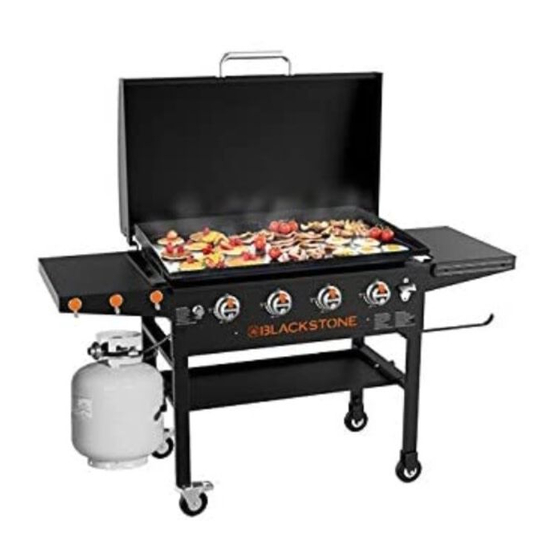
- Page 1 OWNER’S MANUAL Model 1899 36" GRIDDLE WITH HOOD 5003433 blackstoneproducts.com/support Please reference for the latest version of this manual, and to follow along with assembly videos. North Atlantic Imports LLC | 1073 West 1700 North Logan, UT 84321 | Blackstoneproducts.com...
- Page 2 Owner’s Manual | Model 1899 D A N G E R D A N G E R D A N G E R Never operate this appliance Do not store or use gaso- • This appliance is for outdoor unattended.
- Page 3 | Owner’s Manual Model 1899 COOKING TIPS LOW HEAT: Cooks slowly and requires more time. Breaks down connective tissue and fat for a tender, moist meal. • Fatty, thick cuts of meat. (eg: pork shoulder, brisket, chicken thighs, short ribs) •...
-
Page 4: Table Of Contents
Owner’s Manual | Model 1899 TABLE OF CONTENTS It is the consumer’s responsibility to see that the unit is properly assem- bled, installed, and maintained. Failure to follow the instructions in this manual could result in bodily injury and/or property damage. -
Page 5: Register Your Product
Register Your Product | Owner’s Manual Model 1899 REGISTER YOUR PRODUCT Registration allows our Customer Service Representatives to quickly provide assistance with your Blackstone product if needed. The North Atlantic Imports LLC 1-Year Warranty covers replacement parts up to one year after the date of purchase. (Please reference the Warranty chapter for more information.) To enable this warranty, you will need to provide:... -
Page 6: For Your Safety
Owner’s Manual | For Your Safety Model 1899 FOR YOUR SAFET Y WA R N I N G NEVER partially cook meat Before proceeding, make certain that you understand the FOR YOUR or poultry to finish cooking SAFETY section of this manual. Hazardous fire or explosion may result if later. - Page 7 For Your Safety | Owner’s Manual Model 1899 D A N G E R D A N G E R Section 02 When not in use, turn OFF Never place any items within GAS APPLIANCE appliance by rotating the 3-inches of the cooking appliance control knobs to surface while in use.
-
Page 8: Assembly Guide
Owner’s Manual | Assembly Guide Model 1899 ASSEMBLY GUIDE E XPLODED VIEW 1.6c 1.3b 1.3a 1.6b 1.3c 1.6a 1.1b 1.1a 1.1c 1.4b 1.5a 1.5b 1.4a PARTS PARTS PARTS 1.1a 1.4a 1.6c Control panel Left leg assembly Ignition needles 1.1b 1.4b... - Page 9 Assembly Guide | Owner’s Manual Model 1899 ILLUSTRATED PARTS LIST Griddle body (1 piece) Griddle top (1 piece) Hood (1 piece) Bottom shelf (1 piece) Left side shelf (1 piece) Right side shelf (1 piece) Side handle (1 piece) Propane...
- Page 10 Owner’s Manual | Assembly Guide Model 1899 Hardware pack (1 piece) a. M6x12 screws (13 pieces) b. Control knobs (4 pieces) c. M6x70 bolt (1 piece) d. M6 Nut (1 piece) e. M8 step bolts (4 pieces) f. M8x19 screws (2 pieces) g.
- Page 11 Assembly Guide | Owner’s Manual Model 1899 WA R N I N G WA R N I N G WA R N I N G The manufacturer has made • Do not mix old and new The manufacturer has made every effort to eliminate any...
- Page 12 Owner’s Manual | Assembly Guide Model 1899 S T E P 0 3 With the help of another person, set the griddle body on its feet. Use one (1) M6x70 bolt and one (1) M6 nut to attach the propane tank hanger to the upper bar of the right leg assembly.
- Page 13 Assembly Guide | Owner’s Manual Model 1899 WA R N I N G WA R N I N G Do not leave the hood Do not touch the handle • M closed for more than 10 while cooking. minutes while cooking.
- Page 14 Owner’s Manual | Assembly Guide Model 1899 C A U T I O N • Maximum weight on the side shelf is 10 lbs (4.5 kg). • The side shelf may get hot S T E P 0 9 Thread two (2) M8 step while griddle is in use.
- Page 15 Care & Maintenance Assembly Guide | Owner’s Manual Model 1899 WA R N I N G WA R N I N G NEVER APPLY COLD Do not leave the hood WATER ACROSS THE closed for more than 10 WHOLE SURFACE OF A minutes while cooking.
-
Page 16: Fuel | 20 Lb (9 Kg) Propane Tank
Owner’s Manual | Fuel | 20 lb. (9 kg) Propane Tank Model 1899 FUEL | 20 LB. (9 KG) D A N G E R PROPANE TANK • NEVER store a spare LPG cylinder under or near the appliance or in an enclosed area. -
Page 17: Section 02. Connection & Removal
Fuel | 20 lb. (9 kg) Propane Tank | Owner’s Manual Model 1899 WA R N I N G Section 02 Turn off LPG supply at CONNECTION & REMOVAL cylinder when appliance is not in use. WA R N I N G... - Page 18 Owner’s Manual | Fuel | 20 lb. (9 kg) Propane Tank Model 1899 D A N G E R Do not insert any tool or foreign objects into the valve outlet or safety relief valve. REMOVING THE LPG TANK FOR TRANSPORT/...
- Page 19 Fuel | 20 lb. (9 kg) Propane Tank | Owner’s Manual Model 1899 WA R N I N G Section 03 If growing bubbles appear LEAK TEST INSTRUCTIONS during leak test, do not use or move the LPG bottle. Immediately contact an...
-
Page 20: Ignition | Battery Powered
Owner’s Manual | Ignition | Battery Powered Model 1899 IGNITION | WA R N I N G BAT TERY POWERED Do not lean over the appli- ance while lighting. WA R N I N G PROPANE BURNER OPERATION If ignition does NOT occur in 5 seconds, turn burner For proper ignition and operation of the appliance follow the steps below. -
Page 21: Troubleshooting
Troubleshooting | Owner’s Manual Model 1899 TROUBLESHOOTING Visit BLACKSTONEPRODUCTS.COM/SUPPORT for additional troubleshooting. Section 01 BAT TERY POWERED IGNITION SYMPTOMS 01. Burner will not Light with ignition system 02. Pressing the ignitor button does not result in a clicking sound If ignition does not occur in 5 seconds, turn the burner controls off, wait 5 minutes and repeat the lighting procedure. -
Page 22: Section 02. Gas Flow
Owner’s Manual | Troubleshooting Model 1899 Section 02 GAS FLOW SYMPTOMS 01. A flame is coming out of the air gate. POSSIBLE CAUSES SOLUTION 01. Something is blocking the venturi Clean the burner assembly to remove in the burner tube. This is not the obstruction. - Page 23 Troubleshooting | Owner’s Manual Model 1899 SYMPTOMS 01. Appliance will not achieve a high heat or heats unevenly. 02. Burner flames start strong, then immediately drop to low even when burner is set to high position. 03. Flame height drops when a second burner is lit.
-
Page 24: Care & Maintenance
Owner’s Manual | Care & Maintenance Model 1899 CARE & MAINTENANCE WA R N I N G When not in use, turn unit Regularly clean your appliance between uses, especially after extended controls and gas source periods of storage. In order to extend the life and condition of unit, OFF. - Page 25 Care & Maintenance | Owner’s Manual Model 1899 STORAGE VALVE CHECK • In order to extend and maintain Ensure gas is o at the supply shut the life and condition of your o valve before checking appli- appliance, we strongly ance valves.
-
Page 26: Section 02. Cleaning The Burner Assembly
Owner’s Manual | Care & Maintenance Model 1899 WA R N I N G Section 02 Ensure that the fuel nozzle CLEANING THE BURNER ASSEMBLY is housed within the burner opening. Unit burners vary, however these instructions apply to all units. Clean burner assembly and check burner for damage. - Page 27 Care & Maintenance | Owner’s Manual Model 1899 WA R N I N G A clogged burner tube can lead to a fire beneath the appliance. BURNER MAINTENANCE BURNER FL AME CHECK In most circumstances, burning Always check burner flame residue o after cooking will keep before use.
-
Page 28: Section 03. Griddle Seasoning Instructions
Owner’s Manual | Care & Maintenance Model 1899 VIDEO TUTORIAL Section 03 GRIDDLE SEASONING INSTRUCTIONS How to Season a New Blackstone Griddle | Blackstone Griddle For best results, we recommended seasoning the griddle before cooking on griddle top. S T E P 0 1 Make sure griddle top is wiped clean of debris. - Page 29 Care & Maintenance | Owner’s Manual Model 1899 C A U T I O N Customers in humid or coastal climates may require more frequent WHY DO I NEED TO seasonings and the use of SEASON MY GRIDDLE? heavier cooking oils to avoid Seasoning leaves a hard protective rusting and corrosion.
-
Page 30: Section 04. Cleaning Your Griddle Top
Owner’s Manual | Care & Maintenance Model 1899 D A N G E R Section 04 DO NOT place flammable CLEANING YOUR GRIDDLE TOP items on side shelves near the griddle. Aerosol Follow these simple cleaning steps to ensure optimal performance and containers are particularly longevity of your Blackstone Griddle. - Page 31 Care & Maintenance | Owner’s Manual Model 1899 WA R N I N G NEVER APPLY COLD WATER ACROSS THE WHOLE SURFACE OF A FIRST TIME CLEANING REMOVING RUST HOT GRIDDLE AT ONCE. Blackstone Griddles are pre-treated If rust appears on the griddle surface, This may cause warping.
-
Page 32: Recipes
Owner’s Manual | Recipes Model 1899 RECIPES FOR LUNCH & DINNER OKL AHOMA FRIED ONION BURGER S T E P 0 1 Pre-heat your Blackstone to high heat. Serves 4 | 7 min. Ingredients S T E P 0 2 Make four 2 oz loosely packed meatballs with the ground beef and place on the hot griddle. - Page 33 Recipes | Owner’s Manual Model 1899 RECIPES FOR BREAKFAST STRAWBERRIES AND CREAM PANCAKES Recipe by Danielle Zechmann S T E P 0 1 In a mixing bowl, combine all dry ingredients. Serves 6 | 45 min. Dry Pancake Ingredients S T E P 0 2 In a separate bowl, mix egg yolk, milk, ricotta, butter, vanilla.
- Page 34 Owner’s Manual | Recipes Model 1899 RECIPES FOR LUNCH & DINNER TACOS BORRACHOS S T E P 0 1 Season the sirloin steaks with salt and black pepper, making sure Serves 4 | 2 - 4 hours that you rub the salt and pepper well into the steaks.
-
Page 35: Warranty
Warranty | Owner’s Manual Model 1899 NORTH ATLANTIC IMPORTS LLC 1-YEAR WARRANT Y North Atlantic Imports, the manufacturer, will warranty for one year from purchase all parts, workmanship, and finishes. It will be the manufacturer’s option as to whether to repair or replace any of the above items. All warran- ties are limited to the original purchaser only. - Page 36 North Atlantic Imports LLC | 1073 West 1700 North Logan, UT 84321 | Blackstoneproducts.com...
- Page 37 MANUEL D’UTILISATION Modèle 1899 PLAQUE CHAUFFANTE DE 36 PO AVEC CAPOT 5003433 blackstoneproducts.com/support Veuillez consulter pour obtenir la dernière version de ce manuel et suivre les vidéos d’assemblage. North Atlantic Imports LLC | 1073 West 1700 North Logan, UT 84321 | Blackstoneproducts.com...
- Page 38 Manuel d’utilisation | Modèle 1899 D A N G E R D A N G E R D A N G E R Ne pas stocker ni utiliser N’utilisez jamais cet appareil • Cet appareil est destiné à un sans surveillance.
- Page 39 | Manuel d’utilisation Modèle 1899 CONSEILS DE CUISINE À FEU DOUX : Cuit lentement et nécessite plus de temps. Décompose le tissu conjonctif et la graisse pour un repas tendre et moelleux. • Coupes de viande grasses et épaisses.(par exemple: épaule de porc, poitrine de poitrine, cuisses de poulet, côtes courtes)
- Page 40 Manuel d’utilisation | Modèle 1899 TABLE DES MATIÈRES Il incombe au consommateur de s’assurer que l’unité est correctement assemblée, installée et entretenue. Si vous ne suivez pas les instruc-tions de ce manuel, vous risquez des blessures corporelles et/ou des dégâts matériels.
-
Page 41: Enregistrer Votre Produit
Enregistrer votre produit | Manuel d’utilisation Modèle 1899 ENREGISTRER VOTRE PRODUIT L’enregistrement permet à nos représentants du service client de fournir rapidement une assistance avec votre produit Blackstone si nécessaire. La garantie d’un an de North Atlantic Imports LLC couvre les pièces de rechange jusqu’à... -
Page 42: Pour Votre Sécurité
Manuel d’utilisation | Pour votre sécurité Modèle 1899 POUR VOTRE SÉCURITÉ AT T E N T I O N NE JAMAIS cuire partielle- Avant de poursuivre, assurez-vous de bien comprendre la ment la viande ou la volaille section « POUR VOTRE SÉCURITÉ » de ce manuel. Le non-respect des pour terminer la cuisson plus instructions peut provoquer un incendie ou une explosion. -
Page 43: Section 02. Sécurité De Appareil À Gaz
Pour votre sécurité | Manuel d’utilisation Modèle 1899 D A N G E R D A N G E R Section 02 Lorsqu’il n’est pas utilisé, Ne placez jamais d’articles éteignez l’appareil en à moins de 3 pouces de la SÉCURITÉ... -
Page 44: Guide De Montage
Manuel d’utilisation | Guide de montage Modèle 1899 ASSEMBLY GUIDE E XPLODED VIEW 1.6c 1.3b 1.3a 1.6b 1.3c 1.6a 1.1b 1.1a 1.1c 1.4b 1.5a 1.5b 1.4a PIèCES QTÉ PIèCES QTÉ PIèCES QTÉ 1.1a 1.3c 1.6a Panneau de configuration 1 Feuille en U avant droite Bouclier thermique 1.1b... - Page 45 Guide de montage | Manuel d’utilisation Modèle 1899 ASSEMBLY GUIDE ILLUSTRATED PARTS LIST Corps de plaque chauffante Plaque chauffante (1 pièce) Capuche (1 pièce) (1 pièce) Tablette inférieure (1 pièce) Tablette latérale gauche (1 pièce) Tablette latérale droite (1 pièce) Poignée latérale (1 pièce)
- Page 46 Manuel d’utilisation | Guide de montage Modèle 1899 Pack matériel (1 pièce) a. Vis M6x12 (13 pièces) b. Boutons de commande (4 pièces) c. Boulon M6x70 (1 pièce) d. Écrou M6 (1 pièce) e. Boulons étagés M8 (4 pièces) f. Vis M8x19 (2 pièces) g.
- Page 47 Guide de montage | Manuel d’utilisation Modèle 1899 AT T E N T I O N AT T E N T I O N AT T E N T I O N Le fabricant a tout mis en • Ne mélangez pas des piles Le fabricant a tout mis en anciennes et neuves.
- Page 48 Manuel d’utilisation | Guide de montage Modèle 1899 ÉTAPE 03 Avec l’aide d’une autre personne ,posez le corps de la plaque chauffante sur ses pieds. Utilisez un (1) boulon M6x70 et un (1) écrou M6 pour fixer le support du réservoir de propane à...
- Page 49 Guide de montage | Manuel d’utilisation Modèle 1899 AT T E N T I O N AT T E N T I O N Ne laissez pas la hotte fermée Ne touchez pas la poignée • Le plus de 10 minutes pendant la pendant la cuisson.
- Page 50 Manuel d’utilisation | Guide de montage Modèle 1899 M I S E E N G A R D E • Le poids maximum sur la tablette latérale est de de 4,5 kg (10 lb). ÉTAPE 09 Vissez deux (2) boulons à...
- Page 51 Entretien et maintenance Guide de montage | Manuel d’utilisation Modèle 1899 AT T E N T I O N AT T E N T I O N Ne laissez pas la hotte fermée N’APPLIQUEZ JAMAIS D’EAU plus de 10 minutes pendant la FROIDE SUR UNE PLAQUE DE .
-
Page 52: Carburant | Réservoir De Propane De 9 Kg (20 Lb)
Manuel d’utilisation | Carburant | Réservoir de propane de 9 kg (20 lb) Modèle 1899 CARBURANT | D A N G E R RÉSERVOIR DE PROPANE • Ne rangez JAMAIS une bouteille de GPL de rechange sous ou près de DE 9 KG (20 LB) l’appareil ou dans un lieu... -
Page 53: Section 02. Raccordement Et Retrait
Carburant | Réservoir de propane de 9 kg (20 lb) | Manuel d’utilisation Modèle 1899 AT T E N T I O N Section 02 Coupez l’alimentation en gaz propane à la bouteille lorsque RACCORDEMENT ET RETRAIT l’appareil n’est pas utilisé. - Page 54 Manuel d’utilisation | Carburant | Réservoir de propane de 9 kg (20 lb) Modèle 1899 D A N G E R N’insérez aucun outil ou objet dans la sortie de la vanne ou la soupape de sûreté- RE TRAIT DU RÉSERVOIR DE GPL POUR LE TRANSPORT/ décharge.
-
Page 55: Section 03. Instructions D'essai D'étanchéité
Carburant | Réservoir de propane de 9 kg (20 lb) | Manuel d’utilisation Modèle 1899 AT T E N T I O N Section 03 Si des bulles apparaissent, n’utilisez pas et ne déplacez INSTRUCTIONS D’ESSAI D’ÉTANCHÉITÉ pas le réservoir de GPL Contactez immédiatement un... -
Page 56: Allumage | Alimenté Par Batterie
Manuel d’utilisation | Allumage | Alimenté par batterie Modèle 1899 ALLUMAGE | AT T E N T I O N ALIMENTÉ PAR Ne vous penchez pas au-dessus de la plaque de cuisson pendant l’allumage. BAT TERIE AT T E N T I O N Si l’allumage ne se produit... -
Page 57: Dépannage
Dépannage | Manuel d’utilisation Modèle 1899 DÉPANNAGE Visitez BLACKSTONEPRODUCTS.COM/SUPPORT pour un dépannage supplémentaire. Section 01 ALLUMAGE ALIMENTÉ PAR BATTERIE SYMPTÔMES 01. Le brûleur ne s’allume pas avec le système d’allumage 02. Une pression sur le bouton d’allumage n’entraîne pas de clic Si l’allumage ne se produit pas dans les 5 secondes, éteignez les commandes du... -
Page 58: Section 02. Flux Du Gas
Manuel d’utilisation | Dépannage Modèle 1899 Section 02 FLUX DU GAS SYMPTÔMES 01. Une flamme sort de la porte d’air. CAUSES POSSIBLES SOLUTION 01. Quelque chose bloque le venturi dans Nettoyez l’ensemble du brûleur pour le tube du brûleur. Cela ne permet pas éliminer l’obstruction. - Page 59 Dépannage | Manuel d’utilisation Modèle 1899 SYMPTÔMES 01. L’appareil n’atteindra pas une chaleur élevée ou chauffe de manière inégale. 02. Les flammes du brûleur démarrent fortement, puis tombent immédiatement à bas même lorsque le brûleur est réglé en position haute.
-
Page 60: Entretien Et Maintenance
Manuel d’utilisation | Entretien et maintenance Modèle 1899 ENTRETIEN ET AT T E N T I O N MAINTENANCE Lorsqu’il n’est pas utilisé, placez les molettes de l’appa- reil en position OFF et fermez Nettoyez régulièrement votre appareil entre les utilisations, en particulier l’approvisionnement en gaz. - Page 61 Entretien et maintenance | Manuel d’utilisation Modèle 1899 M I S E E N G A R D E Ne pas utiliser de Citrisol, de nettoyants abrasifs, de dégraissants ou de nettoy- STOCKAGE CL APE T DE NON-RE TOUR ants concentrés pour plaques de cuisson sur les pièces en...
-
Page 62: Section 02. Nettoyage Du Brûleur
Manuel d’utilisation | Entretien et maintenance Modèle 1899 AT T E N T I O N Section 02 Assurez-vous que la buse de carburant est logée dans NETTOYAGE DU BRÛLEUR l’ouverture du brûleur. Suivez ces instructions pour nettoyer ou remplacer des pièces du brûleur, ou en cas de di iculté... - Page 63 Entretien et maintenance | Manuel d’utilisation Modèle 1899 AT T E N T I O N Un tube de brûleur bouché peut provoquer un incendie sous l’appareil. ENTRE TIEN DU BRÛLEUR VÉRIFICATION DE L A FL AMME DU BRÛLEUR Dans la plupart des cas, brûler les résidus après la cuisson gardera le...
-
Page 64: Section 03. Instructions D'assaisonnement Plaque Chauffante
Manuel d’utilisation | Entretien et maintenance Modèle 1899 DIDACTICIEL VIDÉO Section 03 INSTRUCTIONS D’ASSAISONNEMENT How to Season a New Blackstone Griddle | Blackstone Griddle PLAQUE CHAUFFANTE Pour de meilleurs résultats, nous avons recommandé d’apprêter la plaque de cuisson avant de commencer à s’en servir. - Page 65 Entretien et maintenance | Manuel d’utilisation Modèle 1899 M I S E E N G A R D E Les clients des climats humides ou côtiers peuvent avoir besoin d’assaisonne- POURQUOI DOIS- ments plus fréquents et JE ASSAISONNER MA d’utiliser des huiles de...
-
Page 66: Section 04. Nettoyer Le Dessus De Votre Plaque Chauffante
Manuel d’utilisation | Entretien et maintenance Modèle 1899 D A N G E R Section 04 Ne placez pas d’objets inflam- mables sur les étagères NETTOYER LE DESSUS DE VOTRE latérales près de la plaque de PLAQUE CHAUFFANTE cuisson. Les aérosols sont particulièrement dangereux,... - Page 67 Entretien et maintenance | Manuel d’utilisation Modèle 1899 AT T E N T I O N N’APPLIQUEZ JAMAIS D’EAU FROIDE SUR UNE PLAQUE DE . Cela peut CUISSON CHAUDE PREMIER NE T TOYAGE ENLE VER L A ROUILLE provoquer une déformation.
-
Page 68: Recettes
Manuel d’utilisation | Recettes Modèle 1899 RECETTES POUR LE DÉJEUNER ET LE DÎNER BURGER À L’OIGNON FRIT OKL AHOMA ÉTAPE 01 Préchauffez votre Blackstone à feu vif. Pour 4 | 7 minutes Ingrédients ÉTAPE 02 Faire quatre 2 oz boulettes de viande légèrement tassées avec le bœuf •... - Page 69 Recettes | Manuel d’utilisation Modèle 1899 RECET TES POUR LE PETIT DÉJEUNER CRÊPES AMÉRICAINES AUX FRAISES E T À L A CRÈME Recette de Danielle Zechmann ÉTAPE 01 Dans un bol à mélanger, mélanger tous les ingrédients secs. Pour 6 | 45 minutes Ingrédients Crêpes Secs...
- Page 70 Manuel d’utilisation | Recettes Modèle 1899 RECETTES POUR LE DÉJEUNER ET LE DÎNER TACOS IVRES ÉTAPE 01 Assaisonner les steaks de surlonge avec du sel et du poivre noir, en Pour 4 | 2 à 4 heures veillant à bien frotter le sel et le poivre dans les steaks.
-
Page 71: Garantie
Garantie | Manuel d’utilisation Modèle 1899 GARANTIE D’UN AN DE NORTH ATLANTIC IMPORTS LLC North Atlantic Imports, le fabricant, garantira toutes les pièces, la fabrication et les finitions pendant un an. Le fabricant aura le choix de réparer ou de remplacer l’un des éléments ci-dessus. - Page 72 North Atlantic Imports LLC | 1073 West 1700 North Logan, UT 84321 | Blackstoneproducts.com...
- Page 73 MANUAL DEL PROPIETARIO Modelo 1899 PLANCHA DE 36" CON CAPUCHA 5003433 blackstoneproducts.com/support Consulte para obtener la última versión de este manual y seguir los videos de montaje. North Atlantic Imports LLC | 1073 West 1700 North Logan, UT 84321 | Blackstoneproducts.com...
- Page 74 Manual del propietario | Modelo 1899 P E L I G R O P E L I G R O P E L I G R O Nunca opere este aparato sin No almacene ni use gaso- •Este electrodoméstico es solo supervisión.
- Page 75 | Manual del propietario Modelo 1899 CONSEJOS DE COCINA FUEGO LENTO: Cocina lentamente y requiere más tiempo. Descompone el tejido conectivo y la grasa para una comida tierna y húmeda. • Cortes de carne grasos y gruesos. (por ejemplo: paleta de cerdo, pechuga, muslos de pollo, costillas) •...
- Page 76 Manual del propietario | Modelo 1899 TABLA DE CONTENIDO Es responsabilidad del consumidor asegurarse de que la unidad esté correctamente ensamblada, instalada y mantenida. El incumplimiento de las instrucciones de este manual puede provocar lesiones corpo-rales y / o daños a la propiedad.
-
Page 77: Registre Su Producto
Registre su producto | Manual del propietario Modelo 1899 REGISTRE SU PRODUCTO El registro permite a nuestros Representantes de Servicio al Cliente brindar asistencia rápidamente con su producto Blackstone si es necesario. La garantía de 1 año de North Atlantic Imports LLC cubre piezas de repuesto hasta un año después de la fecha de compra. -
Page 78: Por Su Seguridad
Manual del propietario | Por su seguridad Modelo 1899 POR SU SEGURIDAD A D V E R T E N C I A NUNCA ase parcialmente la Antes de continuar, asegúrese de comprender la sección carne o las aves y termine de POR SU SEGURIDAD de este manual. - Page 79 Por su seguridad | Manual del propietario Modelo 1899 P E L I G R O P E L I G R O Sección 02 Cuando no esté en uso, Nunca coloque ningún artí- APAGUE el artefacto girando culo a menos de 3 pulgadas...
-
Page 80: Guía De Montaje
Manual del propietario | Guía de montaje Modelo 1899 GUÍA DE MONTAJE VISTA EN DESPIECE ORDENADO 1.6c 1.3b 1.3a 1.6b 1.3c 1.6a 1.1b 1.1a 1.1c 1.4b 1.5a 1.5b 1.4a PIEzAS PIEzAS PIEzAS 1.1a Panel de control 1.3c Hoja U delantera derecha 1.6b... - Page 81 Guía de montaje | Manual del propietario Modelo 1899 GUÍA DE MONTAJE LISTA DE PIE Z AS ILUSTRADA Cuerpo de plancha (1 pieza) Plancha superior (1 pieza) Capucha (1 pieza) Balda inferior (1 pieza) Repisa lateral izquierda (1 pieza) Repisa lateral derecha (1 pieza)
- Page 82 Manual del propietario | Guía de montaje Modelo 1899 Paquete de hardware (1 pieza) a. Tornillos M6x12 (13 piezas) b. Perillas de control (4 piezas) c. Perno M6x70 (1 pieza) d. Tuerca M6 (1 pieza) e. Pernos escalonados M8 (4 piezas) f.
- Page 83 Guía de montaje | Manual del propietario Modelo 1899 A D V E R T E N C I A A D V E R T E N C I A A D V E R T E N C I A •No mezcle pilas nuevas y...
- Page 84 Manual del propietario | Guía de montaje Modelo 1899 PASO 03 Con la ayuda de otra persona, coloque el cuerpo de la plancha sobre sus patas. Utilice un (1) perno M6x70 y una (1) tuerca M6 para sujetar el colgador del tanque de propano a la barra superior del olución de problemas...
- Page 85 Guía de montaje | Manual del propietario Modelo 1899 A D V E R T E N C I A A D V E R T E N C I A No deje la campana cerrada No toque el mango mientras •El...
- Page 86 Manual del propietario | Guía de montaje Modelo 1899 P R E C A U C I Ó N •El peso máximo en el estante lateral es de 10 lb (4.5 kg). •El estante lateral puede PASO 09 Enrosque dos (2) pernos...
- Page 87 Cuidado y mantenimiento Guía de montaje | Manual del propietario Modelo 1899 A D V E R T E N C I A A D V E R T E N C I A No deje la campana cerrada NUNCA APLIQUE AGUA por más de 10 minutos mien-...
-
Page 88: Combustible | Cilindro De Propano De 20 Lb (9 Kg)
Manual del propietario | Combustible | Cilindro de propano de 20 lb (9 kg) Modelo 1899 COMBUSTIBLE | P E L I G R O CILINDRO DE PROPANO •NUNCA almacene un cilindro de GPL de repuesto debajo o cerca del aparato o DE 20 LB (9 KG) en un área cerrada. - Page 89 Combustible | Cilindro de propano de 20 lb (9 kg) | Manual del propietario Modelo 1899 A D V E R T E N C I A Sección 02 Cierre el suministro de gas GPL en el cilindro cuando el CONEXIÓN Y REMOCIÓN...
- Page 90 Manual del propietario | Combustible | Cilindro de propano de 20 lb (9 kg) Modelo 1899 P E L I G R O No inserte herramientas u objetos extraños en la salida de la válvula o en la válvula de E X TRACCIÓN DEL TANQUE DE PROPANO LÍQUIDO...
- Page 91 Combustible | Cilindro de propano de 20 lb (9 kg) | Manual del propietario Modelo 1899 A D V E R T E N C I A Sección 03 Si aparecen burbujas “en crecimiento”, no utilice ni INSTRUCCIONES DE PRUEBA DE mueva el tanque de gas GPL.
-
Page 92: Encendido | Batería
Manual del propietario | Encendido | Batería Modelo 1899 ENCENDIDO | A D V E R T E N C I A BATERÍA No se incline sobre la plancha mientras se enciende. A D V E R T E N C I A Si la ignición NO ocurre... -
Page 93: Solución De Problemas
Solución de problemas | Manual del propietario Modelo 1899 SOLUCIÓN DE PROBLEMAS Visite BLACKSTONEPRODUCTS.COM/SUPPORT para obtener infor- mación adicional sobre la solución de problemas. Sección 01 ENCENDIDO BATERÍA SÍNTOMAS 01. El quemador no se enciende con el sistema de encendido 02. - Page 94 Manual del propietario | Solución de problemas Modelo 1899 Sección 02 FLUJO DE GAS SÍNTOMAS 01. Una llama sale de la puerta de aire. POSIBLES CAUSAS SOLUCIÓN 01. Algo está bloqueando el venturi en el Limpie el conjunto del quemador para tubo del quemador.
- Page 95 Solución de problemas | Manual del propietario Modelo 1899 SÍNTOMAS 01. El aparato no alcanzará una temperatura alta o se calienta de manera desigual. 02. Las llamas del quemador comienzan con fuerza, luego caen inmediatamente a bajo incluso cuando el quemador está en posición alta.
-
Page 96: Cuidado Ymantenimiento
Manual del propietario | Cuidado y mantenimiento Modelo 1899 CUIDADO Y A D V E R T E N C I A MANTENIMIENTO Cuando no esté en uso, apague los controles de la unidad y la fuente de gas. Limpie regularmente su electrodoméstico entre usos, especialmente después de largos períodos de almacenamiento. - Page 97 Cuidado y mantenimiento | Manual del propietario Modelo 1899 P R E C A U C I Ó N No use Citrisol, limpiadores abrasivos, desengrasantes o limpiadores concentrados ALMACENAMIENTO CONTROL DE L A VÁLVUL A para planchas en piezas de plástico.
- Page 98 Manual del propietario | Cuidado y mantenimiento Modelo 1899 A D V E R T E N C I A Sección 02 Asegúrese de que la boquilla de combustible esté alojada LIMPIEZA DEL CONJUNTO dentro de la abertura del DEL QUEMADOR quemador.
- Page 99 Cuidado y mantenimiento | Manual del propietario Modelo 1899 A D V E R T E N C I A Un tubo de quemador obstruido puede provocar un incendio debajo del aparato. MANTENIMIENTO DE CONTROL DE LL AMA DEL QUEMADORES QUEMADOR En la mayoría de las veces, quemar...
- Page 100 Manual del propietario | Cuidado y mantenimiento Modelo 1899 VIDEO TUTORIAL Sección 03 INSTRUCCIONES DE CURACIÓN DE How to Season a New Blackstone Griddle | Blackstone Griddle LA PLANCHA Para obtener los mejores resultados, recomendamos curar la plancha antes de cocinar en la parte superior de la plancha.
- Page 101 Cuidado y mantenimiento | Manual del propietario Modelo 1899 P R E C A U C I Ó N Los clientes en climas húmedos o costeros pueden requerir condimentos más ¿POR QUÉ NECESITO frecuentes y el uso de aceites SA ZONAR MI PL ANCHA? de cocina más pesados...
- Page 102 Manual del propietario | Cuidado y mantenimiento Modelo 1899 P E L I G R O Sección 04 No coloque artículos inflam- ables en estantes laterales LIMPIEZA DE LA PARTE SUPERIOR cerca de la plancha. Los SU PLANCHA contenedores de aerosol son particularmente peligrosos Siga estos sencillos pasos de limpieza para garantizar un rendimiento óptimo...
- Page 103 Cuidado y mantenimiento | Manual del propietario Modelo 1899 A D V E R T E N C I A NUNCA APLIQUE AGUA FRÍA EN TODA LA SUPERFICIE DE UNA L A PRIMERA LIMPIE Z A ELIMINACIÓN DE ÓXIDO PLANCHA CALIENTE DE UNA VEZ.
-
Page 104: Recetas
Manual del propietario | Recetas Modelo 1899 RECETAS PARA ALMUERZO Y CENA HAMBURGUESA DE CEBOLL A FRITA DE OKL AHOMA PASO 01 Precalienta tu Blackstone a fuego alto. Para 4 | 7 minutos Ingredientes PASO 02 Haga cuatro de 2 oz Albóndigas sin apretar con la carne molida y •... - Page 105 Recetas | Manual del propietario Modelo 1899 RECETAS PARA DESAYUNO PANQUEQUES DE FRESAS Y CREMA Receta de Danielle Zechmann PASO 01 En un tazón, combine todos los ingredientes secos. Para 6 | 45 minutos Ingredientes secos PASO 02 En un recipiente aparte, mezcle la yema de huevo, la leche, la ricota, para panqueques la mantequilla y la vainilla.
- Page 106 Manual del propietario | Recetas Modelo 1899 RECETAS PARA ALMUERZO Y CENA TACOS BORRACHOS PASO 01 Sazone los filetes de solomillo con sal y pimienta negra, asegurán- Para 4 | 2 - 4 horas dose de untar bien los filetes con sal y pimienta.
- Page 107 Garantía | Manual del propietario Modelo 1899 NORTH ATLANTIC IMPORTS LLC GARANTÍA DE 1 AÑO North Atlantic Imports, el fabricante, garantizará por un año a partir de la compra a todas las piezas, mano de obra y acabados. Será la opción del fabricante en cuanto a si reparar o reemplazar cualquiera de los elementos anteriores.
- Page 108 North Atlantic Imports LLC | 1073 West 1700 North Logan, UT 84321 | Blackstoneproducts.com...
Need help?
Do you have a question about the 1899 and is the answer not in the manual?
Questions and answers