Table of Contents
Advertisement
Quick Links
Advertisement
Table of Contents
Troubleshooting

Related Manuals for Mio DigiWalker H610


Summary of Contents for Mio DigiWalker H610
- Page 1 User’s Manual...
- Page 2 Revision: R00 Trademarks All brand and product names are trademarks or registered trademarks of their respective companies. Note Information in this manual is subject to change without notice.
-
Page 3: Table Of Contents
Table of Contents Warnings and Notices...v Getting Started...1 1.1 Understanding Hardware Components... 1 Front Components ... 1 Back Components... 2 Left-Side Components ... 2 Right-Side Components ... 3 Top Components... 4 Bottom Components ... 4 1.2 Performing the Initial Start Up ... 5 1.3 Connecting to AC Power and Charging the Battery... - Page 4 Setting the Alarm... 22 3.3 Map ... 23 3.4 Weather... 23 Selecting a City ... 24 3.5 Currency Converter... 25 Adding, Editing, or Deleting the Exchange Rate... 25 3.6 Measurements... 27 3.7 Clothing ... 27 3.8 Area Codes ... 28 3.9 Packing List ...
- Page 5 8.7 Change Language... 68 Games...69 9.1 Starting and Exiting Games ... 69 10 Mio Transfer ...70 10.1 About Mio Transfer... 70 10.2 Installing Mio Transfer... 71 10.3 Copying MP3/ Video/ Pictures to Your Device... 73 Managing Your Files ... 75 10.4 Copying Contacts Information to Your Device ...
- Page 6 11.5 Adding Media Clips ... 85 Inserting Clips into Your Project... 85 Capturing Digital Video ... 85 Capturing Analog Video ... 86 Capturing Still Images ... 86 11.6 Editing Video Clips ... 87 Trimming a Clip ... 88 Trimming a Video into Multiple Clips... 89 11.7 Creating an Image Slideshow ...
-
Page 7: Warnings And Notices
Warnings and Notices For your safety, do not operate the controls of the product while driving. Use this product with caution. The product is a navigation aid. It does not provide exact measurements of direction, distance, location or topography. The calculated route is for reference only. Always follow the posted traffic signs, speed limits and road restrictions. - Page 8 A device holder is needed when using the device in a car. Be sure to place the device in an appropriate place, so as not to obstruct the driver’s view, or deployment of airbags. Do not mount where the driver’s field of vision is blocked.
-
Page 9: Getting Started
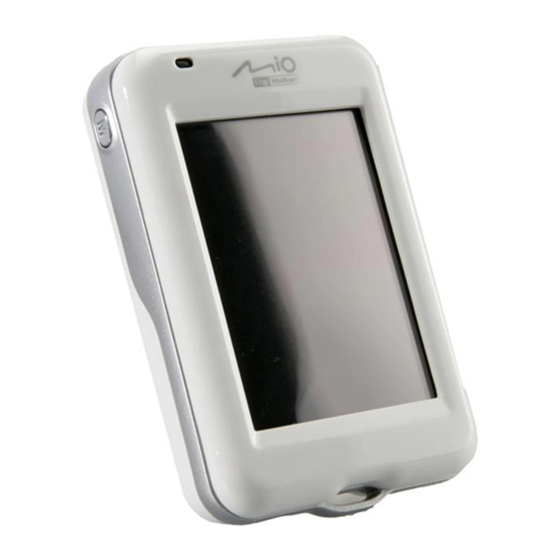
Getting Started 1.1 Understanding Hardware Components NOTE: Depending upon the specific model purchased, the color of your device may not exactly match the device shown in this manual. Front Components Component Charge Indicator Touch Screen Hand String Hole Hand string attaches to this hole. Description Glows in bright amber to indicate that the battery is charging, and turns green when the battery is fully charged. -
Page 10: Back Components
Back Components Ref Component Car Antenna This connector (under rubber dust cover) allows use of an Connector optional external antenna with magnetic mount, which may be positioned on top of the car for better signal reception in areas with poor reception. For music, sounds and voice prompts. -
Page 11: Right-Side Components
Right-Side Components Component SD/MMC Slot Reset Button Lock Switch Description Accepts an SD (Secure Digital) or MMC (MultiMediaCard) card for accessing data such as MP3 music. Restarts your device (soft reset). Locks and unlocks the device. -
Page 12: Top Components
Top Components Component Faceplate Release Button Power Button Bottom Components Component Earphones Connector Mini-USB Connector Description Releases the faceplate for replacement. Turns the device on and off. Description Connects to earphones. Connects to the AC charger or USB cable. -
Page 13: Performing The Initial Start Up
1.2 Performing the Initial Start Up 1. Make sure that power is supplied to your device. (See the next section.) 2. For the initial start up, press the power button for five seconds to turn on your device. NOTE: For normal operation, briefly press the power button to turn on and off your device. 3. - Page 14 5. The Home screen appears. You can now use your device.
-
Page 15: Connecting To Ac Power And Charging The Battery
1.3 Connecting to AC Power and Charging the Battery When charging the battery for the very first time, you should charge it for at least 6 hours. 1. Slide and click the AC converter onto the AC charger. 2. Connect the adapter cable to the bottom of your device. 3. -
Page 16: Using Your Device In A Vehicle
1.4 Using Your Device in a Vehicle Using the Device Holder CAUTION: Select an appropriate location for the device holder. Never place the holder where the driver’s field of vision is blocked. If the car’s windshield is tinted with a reflective coating, an external antenna (optional) may be needed to route the antenna to the top of the car through a window. -
Page 17: Operating Basics
1.5 Operating Basics Turning On and Off Briefly press the power button to turn on and off your device. When you press the power button to turn off, your device enters a suspend state. The system stops operating and the charge indicator flashes in green. NOTE: In case you turn off the power by pressing the power button for five seconds, you will need to press the power button for five seconds again for turning on. -
Page 18: Home Screen
Home Screen The first time you initialize your device, the Home screen appears. The Home screen is your starting place for various tasks. Tap a button to start a task or open another menu. You can access the Home screen at any time by pressing the Menu button on the side of your device. -
Page 19: Locking Your Device
Ref Button Name MioPlayer Includes MP3 Player, Video Player, and Photo Viewer. MP3 Player plays MP3 music. Video Player plays video clips. Photo Viewer displays pictures. Game Provides various games. Locking Your Device You can lock your device so that accidental touching of the device does not cause your device to operate. -
Page 20: Inserting A Sd/Mmc Card
Inserting a SD/MMC Card Your device has an SD/MMC slot where you can insert an optional Secure Digital or MultiMediaCard storage card. To use a card, insert it into the slot, with the connector pointing to the slot and its label facing the front of the device. -
Page 21: Connecting The Earphones With The Remote Control
1.7 Connecting the Earphones with the Remote Control Earphones and an earphones remote control are supplied with your device. The remote control provides basic control buttons for your device when the MP3 player function is in use. Play/Pause Stop Volume Previous Next... -
Page 23: Travel Kit-Compass
Travel Kit—Compass 2.1 Starting and Exiting Compass Compass shows direction on the screen. Tap the button on the Home screen and tap the button to start the Travel Kit Compass program. The Compass screen appears. When the status indicator is green, the letter “N” indicates the magnetic north. -
Page 24: Notes On Using Compass
Status indicator To exit Compass, tap 2.2 Notes on Using Compass Follow these guidelines for an accurate electronic compass: Hold the device level. Keep the device away from objects that generate magnetic fields, such as cars, large belt buckles, computers, cell phones, etc. If you must use the compass inside a car, the device should be at least 20 cm (7.87 inches) away from metal objects such as car doors, dashboard, air vents, etc. -
Page 25: Calibrating The Compass
2.3 Calibrating the Compass Calibrate the compass whenever needed. For example: When the status indicator appears in red. When the device has not been used for a long time. After significant environmental changes such as location changes and temperature fluctuations. 1. - Page 26 4. Tap the button to go back to the Compass screen. Once the calibration is completed, the status indicator turns green.
-
Page 27: Travel Kit-Worldmate
Travel Kit—WorldMate 3.1 Starting and Exiting WorldMate WorldMate provides useful tools for travelers such as clocks, weather forecast, currency converter, packing list, and more. 1. Tap the button on the Home screen. Travel Kit 2. Tap the button to start the program. WorldMate 3. - Page 28 4. If this is not the first time you use WorldMate, you will see the screen of the service that you used last time. 5. Tap to go to the WorldMate main menu where you can select a service to use. (See later sections for details.) 6.
-
Page 29: Clocks
3.2 Clocks Use Clocks to view the date, time, and weather forecasts of the five major cities. NOTE: The five major cities include your home city and four other cities which are Tokyo, Los Angeles, London, and Paris by default. Make sure that you have set up the correct time zone, date, and time in Settings. -
Page 30: Setting The Alarm
Setting the Alarm Tap to activate the alarm (with a check in the checkbox). Tap to activate the sound (with a check in the checkbox). Tap to select the alarm sound. Save and return to the previous screen. When the alarm goes off, a window pops up along with a sound if you have set one. -
Page 31: Map
3.3 Map Use Map to view a day/night world map. Tap the button on the WorldMate main menu to open the screen as shown. A flashing cross indicates the current city’s location on the map. To select another city, tap the city name and select from the list. -
Page 32: Selecting A City
Selecting a City Tap the city name on the Weather screen to open the screen as shown. This field varies with the setting of the previous item. It can be City, Country, or U.S. Zip Code. Save and return to the previous screen. -
Page 33: Currency Converter
3.5 Currency Converter Use Currency Converter to convert currencies. Once you enter a value for a currency, two other currency values are displayed simultaneously. You can enter up to three values and the values will be automatically summed up. NOTE: You can acquire the latest exchange rates through Internet and transfer the information to your device. - Page 34 To add a new currency, tap the button. Tap an input field and tap to enter the text or number. To edit a currency, tap the currency name. Then, tap the field you want to edit and tap to enter the text or number.
-
Page 35: Measurements
3.6 Measurements Use Measurements to convert measurements. Measurements Tap the button on the WorldMate main menu to open the screen as shown. Tap the field and tap to enter the value. The converted value is displayed below. 3.7 Clothing Use Clothing to view the size conversion tables for USA, Europe, UK, and Japan. NOTE: Use the information as reference only. -
Page 36: Area Codes
3.8 Area Codes Use Area Codes to view the international dialing prefixes, and the US and Canadian area codes. Area Codes Tap the button on the WorldMate main menu to open the screen as shown. Tap a column title to change the sort order. -
Page 37: Packing List
3.9 Packing List Use Packing List as a note to help you pack your bags. Packing List Tap the button on the WorldMate main menu to open the screen as shown. Tap to select a category for the packing list. Tap an item to check or uncheck it. -
Page 38: Adding, Editing, Or Deleting Categories
To edit an item, tap the item in the packing list and tap . In the edit screen, select a different category if needed. Tap the description field and tap modify the text. To delete an item, tap the item in the list and tap . -
Page 39: Tip, Tax Calculation
3.10 Tip, Tax Calculation Use Tip, Tax Calculation to calculate the recommended tip and tax amounts in over 30 countries worldwide. NOTE: The tip rate is provided as a reference only. You can manually change the tip and tax rates. Tip, Tax Calculation Tap the as shown. -
Page 40: Calculator
3.11 Calculator Use Calculator to perform the basic mathematical calculations. Calculator Tap the button on the WorldMate main menu to open the screen as shown. Backspace Clear all. Change sign 3.12 WorldMate Data Update Use the WorldMate data update tool to update the latest weather forecasts and the currency exchange rates to your device. - Page 41 WorldMate 3. Click 4. Follow the onscreen instructions to complete the installation.
-
Page 42: Updating The Worldmate Data
Updating the WorldMate Data NOTE: Make sure that Mio Transfer is installed before using the update tool. (See Section 10.2 for information.) Make sure that the Internet connection on your computer is available before updating the WorldMate data. 1. Turn on your computer and your device. -
Page 43: Contacts
Contacts 4.1 Starting and Exiting Contacts Contacts allows you to keep a list of names, addresses, and phone numbers. NOTE: If you have created Microsoft Outlook Contacts information on your computer, you can copy the information to your device. (See section 10.4 for information.) Tap the button on the Home screen to start the program. -
Page 44: Using The Contacts List
4.2 Using the Contacts List After starting Contacts, the contacts list appears. It shows the names and phone numbers (mobile phone numbers by default) of your contacts. You can use the various buttons on the screen to search a contact, navigate to the address of a contact and so on. -
Page 45: Navigating To A Contact's Address
4.4 Navigating to a Contact’s Address You can set a contact’s address as your GPS navigation destination. 1. Tap the button on the Home screen to start the program. Contacts 2. In the contact list, select the desired contact and tap 3. -
Page 46: Managing Contacts
4.5 Managing Contacts Adding a Contact 1. Tap the button on the Home screen to start the program. Contacts 2. Tap 3. Tap an entry field twice The soft keyboard appears. 4. Use the soft keyboard to enter the information in the field and tap... - Page 47 Tap the soft keyboard to enter text and numbers. Switch between upper 5. Enter the information in other fields such as address and phone number fields. You will need to scroll down to see all available fields. 6. Tap save the contact’s information and return to the contact list. and lower cases.
-
Page 48: Editing A Contact
Editing a Contact To modify a contact’s information: 1. In the contact list, tap the contact twice to open the summary screen. 2. Tap twice the field you want to edit and use the soft keyboard to edit. 3. Tap to save the changes. -
Page 49: Mioplayer-Mp3 Player
MioPlayer—MP3 Player 5.1 Starting and Exiting MP3 Player MP3 Player turns your device into an MP3 player. It features: Playback of MP3/WAV/WMA files Basic playback controls such as play, pause, stop, next and previous Playback includes single selection playback, repeat, single repeat, sampling playback, normal sequence and random sequence. -
Page 50: Preparing The Mp3 Files For You Device
Before using the program, have the MP3 files ready on either your device’s My Flash Disk\Mp3 folder or on a storage card. A tool called Mio Transfer is supplied for you to easily copy the files from your computer to the correct location. (See section 10.3 for information.) 5.3 Playing MP3 Files... -
Page 51: Mp3 Playback Controls
NOTE: During the playback, the screen backlight will automatically shut off if you haven’t tapped the screen within the preset time (30 seconds by default).The backlight will restore when you press the Power or Menu button or when the playback of the current play list has ended. -
Page 52: Displaying Lyrics
NOTE: You can search and download these .lrc files from the internet. Use the Mio Transfer to copy the lyrics to the correct location of your device. (See section 10.3 for information.) When copying a lyric file to your device, be sure to use the same filename as the audio file. -
Page 53: Using The Play Lists
5.6 Using the Play Lists By default, the program automatically loads all MP3 files in the play list. You can also create your own play lists for future use. Creating a Play List 1. After starting MP3, tap screen. The screen shows the current play list. Play the selected file. - Page 54 2. To add a song to the play list, tap songs. 3. A screen appears displaying all the audio files. Tap the song(s) you wish to add and then tap 4. To save the play list, tap 5. The keyboard screen appears where you can change the default name of the play list.
-
Page 55: Opening A Play List
6. To return to the control panel, tap Opening a Play List To open one of the play lists that you have created: 1. After starting MP3, tap 2. Tap to display all the play lists you have created. 3. Tap the play list you want to open and tap Delete the selected play list. -
Page 56: Equalizer
5.7 Equalizer The program provides 11 preset audio profiles. Tap to open the equalizer panel. to cycle through the available options: Default, Hall, 3D, Soft, Disco, Heavy, Dance, Classic, Jazz, Pop and Rock. to save your selection and return to the control panel. Tap to cancel your selection and return to the control panel. -
Page 57: Mioplayer-Video Player
MioPlayer— Video Player MioPlayer Pro—Video Player 6.1 Starting and Exiting Video Player CAUTION: DO NOT view videos while driving. It may be illegal in your state/country for a display showing a video to be in view of the driver. Video Player allows you to watch the video clips on your device. (See later section for the formats that your device supports.) on the Home screen and tap MioPlayer... -
Page 58: Preparing The Video Files For Your Device
Use Video ToolBox supplied with your device to convert video files to the format supported by your device. (See section 11.4 for information.) A tool called Mio Transfer is supplied for you to easily copy the files from your computer to the correct location. (See section 10.3 for information.) 6.3 Playing Video Clips... - Page 59 A frame indicates the file is selected Selected file/ Total number of files Delete the selected file Play the selected file. Switch to the MP3 Player. NOTE: The files are sorted by file names in the list. The file information such as the length of the video and file size is displayed together with the file name.
-
Page 60: Video Playback Controls
6.4 Video Playback Controls Use the onscreen control buttons to control the playback. Tap to watch the video in full screen. You can tap on a point along the track bar to move directly to a different location for the playback. To return to the video file list, tap Playback mode: Repeat... -
Page 61: Mioplayer-Photo Viewer
To view the pictures, have the picture files ready either on your device’s My Flash Disk\My Picture folder or on a storage card. A tool called Mio Transfer is supplied for you to easily copy the files from your computer to the correct location. (See section 10.3 for information.) -
Page 62: Viewing Pictures In Thumbnail View
7.3 Viewing Pictures in Thumbnail View 1. If your files are in a storage card, insert the card into your device. 2. Tap on the Home screen and tap MioPlayer 3. The program will search the matching files in the specific folder on your device and in all folders on a storage card. -
Page 63: On-Screen Control Buttons
7.5 On-Screen Control Buttons On-screen control buttons provide various functions and settings. Tap anywhere on the picture to display the buttons as shown. To close the buttons, tap the picture again. Button Name Transfer Slideshow Interval Information Description Transfers pictures between the device and the storage card. - Page 64 Delete Zoom Back Deletes the current picture. Opens the zoom bar. Tap the button as many times as needed to zoom in to 1.2x, 1.5x, 1.8x, or 2.0x. When you have zoomed in the picture, you can drag the picture to view other parts of the picture.
-
Page 65: Viewing The Slideshow
7.6 Viewing the Slideshow To view the slideshow of all your pictures, use one of the following ways: When in the thumbnail view, tap slideshow. When in full screen, tap anywhere on the picture to display the on-screen control buttons. Then tap to start the slideshow. -
Page 66: Transferring Pictures
icon indicates that the slideshow is on. To stop the slideshow, tap anywhere on the screen. 7.7 Transferring Pictures You can copy pictures from your device to your storage card or from your storage card to your device. 1. In full screen view, tap anywhere on the picture to display the control buttons. 2. - Page 67 4. The preview screen appears. You can tap to select a picture or several pictures. You can also tap to select all pictures in the source folder. Back A frame indicates that the picture is selected. Select all. Transfer 5. After selecting the picture(s), tap to start the file transfer.
-
Page 69: Settings
Settings 8.1 Starting and Exiting Settings You can customize the system settings such as backlight brightness, volume, and language. Once you change the settings, the new settings will remain until you change them again. Tap the button on the Home screen. The Settings menu appears as shown Settings below. -
Page 70: Backlight
8.2 Backlight 1. Tap the button on the Home screen. Settings 2. Tap the button. Backlight 3. Move the knob along the track bar to adjust the brightness of the backlight. To darken the backlight, move the knob to the left. To lighten the backlight, move the knob to the right. -
Page 71: Volume
8.3 Volume 1. Tap the button on the Home screen. Settings 2. Tap the button. Volume 3. Move the knob along the track bar to adjust the volume. To decrease the volume, move the knob to the left. To increase the volume, move the knob to the right. -
Page 72: Screen
8.4 Screen You can calibrate the touch screen if it is not responding accurately to your taps. 1. Tap the button on the Home screen. Settings 2. Tap the button. Screen 3. Tap to start the calibration. 4. Tap and hold the centre of the target. -
Page 73: Power
5. When the target moves to another position, tap and hold the centre of the new target. Repeat each time to complete the calibration process. 6. When completed, tap 8.5 Power To check the remaining power level of your battery and/or set up the power saving feature: 1. -
Page 74: Date&Time
You can set a timer to automatically turn off your device when it is idle for a set period of time. The options include Never, 30 minutes, 20 minutes, and 10 minutes. 4. Tap to save the changes. 8.6 Date&Time 1. - Page 75 4. To change the date, tap the down arrow in the “Date” item. A calendar pops up. Tap the left arrow on the calendar to go to the earlier month and year or the right arrow to the later month and year. Alternatively, you can tap the month or year on top of the calendar to directly change the month or year.
-
Page 76: Change Language
8.7 Change Language NOTE: To change the language of the Mio Map navigation software, use Mio Map settings. (See the document supplied with the navigation software.) Settings 1. Tap the button on the Home screen. Change Language 2. Tap the 3. -
Page 77: Games
Games 9.1 Starting and Exiting Games Games provides various games for you to play. Tap the button on the Home screen. The Games menu appears as shown Games below. To start playing a game, simply tap the game button on the menu. To exit Games menu, tap... -
Page 78: Mio Transfer
Mio Transfer 10.1 About Mio Transfer Mio Transfer allows you to easily transfer data such as MP3, video and photos between your device and a computer, synchronize your contacts and recover the system and the application programs to its default states. It provides the following... -
Page 79: Installing Mio Transfer
Recover Allows you to recover the system and the application programs to its default states. Mio online Provides link to the Mio website. About Provides program information. Allows you to transfer the MP3 files between your device and your computer. - Page 80 Install Mio Transfer 3. Click Next 4. Click . Follow the onscreen instructions to complete the installation. NOTE: If Mio Transfer has already been installed on your computer, clicking Installl Mio Transfer will remove the application from your system.
-
Page 81: Copying Mp3/ Video/ Pictures To Your Device
10.3 Copying MP3/ Video/ Pictures to Your Device Before playing MP3 music, video, or viewing pictures, you need to have the MP3, video or picture files ready on your device. Use Mio Transfer to copy the files from your computer to the correct location on your device. - Page 82 5. Select your target device by clicking one of the icons: - the flash memory of your device - a storage card inserted into your device. 6. Select the folder where your files are stored from the left column. Select the file you want to copy and tap progress of file transfer and the selected file will be copied to the target device.
-
Page 83: Managing Your Files
Creates a new folder in the selected drive or folder. 10.4 Copying Contacts Information to Your Device You can use Mio Transfer to copy the Microsoft Outlook Contacts information from your computer to your device. This saves you the time for entering the information all over again on your device or on your computer. -
Page 84: Recovering Your Device
2. Connect the mini-USB end of the USB cable to the bottom of your device and the other end to a USB port on your computer. 3. Start Mio Transfer by clicking the icon on the Windows Desktop. The Mio Transfer screen appears. - Page 85 6. When the recovering process is complete, reset your device. (Refer to Section 12.1 for more information.)
-
Page 87: Video Toolbox
Video ToolBox 11.1 About Video ToolBox Video ToolBox allows you to import media in a variety of sources and save it in a specific file format so you can watch the video on your device. You can also use the editing tools such as trimming the clip and adding special effects to create a customized project. - Page 88 3. Click and follow the onscreen instructions to finish the Video Toolbox installation.
-
Page 89: User Interface
11.3 User Interface Name File menu Select to open a menu where you can save your project file and set project preferences. Options Panel Displays controls, buttons, and other information that you can use to customize the project. The contents of this panel change depending on the step you are in and the selected project element. -
Page 90: Four Steps To Create A Video File
11.4 Four Steps to Create a Video File Step 1: Determine Video Output Setting 1. On Windows desktop, click Video ToolBox 2.0 Home Edition 2. On the first screen, select 3. Click Enter Step 2: Add/Edit Media Clip 4. Click one of the Add Media buttons depending on your media source. (For detailed information, see sections 11.5 to 11.7.) To add a video file, click To add an image file, click... -
Page 91: Step 3: Choose Style
To add video from an analog source (e.g. TV tuner card), click 5. Click to continue. Next Step 3: Choose Style 6. If you want, you can choose a movie style from the available themes and edit movie style elements. If you do not want to apply a style for your project, select the default white theme. -
Page 92: Step 4: Create Video File
7. Click to continue. Next Step 4: Create Video File 8. Click to save your video file in the selected output video format. Create 9. In the dialog box, enter the filename and click Save... -
Page 93: Adding Media Clips
11.5 Adding Media Clips Inserting Clips into Your Project Insert video, image and DVD/DVD-VR video into the project’s Media Clip List. To insert a clip, just click an locate the file and click NOTE: Video ToolBox can only import DVD videos from non-copy-protected DVD discs or folders. -
Page 94: Capturing Analog Video
Capturing Analog Video When footage is captured from analog sources such as VHS, Video¬8, or TV, it is converted to a digital format that can be read and stored by the computer. Video ToolBox automatically saves the captured video in the DV AVI format. To capture analog video: 1. -
Page 95: Editing Video Clips
11.6 Editing Video Clips When video clip(s) are added, the editing tools include: Multi-trim Video Allows you to choose desired segments from a video file and extract them. Split Video Cuts the selected clip into two. Auto-enhance Select to automatically adjust the hue, saturation, brightness and the contrast of the clip. -
Page 96: Trimming A Clip
Trimming a Clip To split a video clip: 1. Select the clip you want to split on the Media Clip List. 2. Drag the Jog Bar to the point where you want to cut the clip. 3. Click to cut the clip into two clips. Split Video To remove one of these clips, select the unwanted clip and click To trim a video clip with the Trim Bar:... -
Page 97: Trimming A Video Into Multiple Clips
3. Drag the Jog Bar to the point in the clip that you want to set as the start/end of the clip then click Trimming a Video into Multiple Clips 1. Click Multi-trim Video 2. In the Multi-trim Video dialog box, view the whole clip first by clicking to determine how you want to mark segments. - Page 98 5. Click when finished. The video segments that you kept are then inserted onto the Media Clip List. Multi-Trim Video Control Control Button Reverses or advances through the video in fixed increments. By default, these buttons move up or down through the video in increments of 25 seconds.
-
Page 99: Creating An Image Slideshow
11.7 Creating an Image Slideshow You can create a video slideshow using your images. To create, click Image) and, in the dialog box, select the images (press multiple files) you want to include in the slideshow and click of each image can be set in the Preferences dialog box. Use the rotate buttons Rearrange the clips in the Media Clip List by dragging and dropping the clip to the desired position. -
Page 100: Choosing A Style
11.8 Choosing a Style A style refers to a set if attributes including beginning/ending clips, transition effects, and background music. Style elements are added to the Media Clip List. Selecting a Movie Style In the Options Panel, click the style you want to use. A beginning clip and an ending clip in the selected style will be added to your project. -
Page 101: Changing The Transition Effect
Changing the Transition Effect With multiple video clips or image files in the Media Clip List, default transition effects are applied to the project according to the style selected. To change the transition effect 1. In the Media Clip List, click the transition effect you want to change. 2. -
Page 102: Change The Background Music
3. Adjust the text attributes using the settings in the Options Panel. Font face Select your desired font style. Font size Set your desired font size. Vertical text Makes the orientation of the title vertical. Font style Set the text as bold, italic and/or underlined. -
Page 103: Troubleshooting And Maintenance
Troubleshooting and Maintenance Troubleshooting and Maintenance 12.1 Resetting Your System Occasionally, you may need to reset your device. For example, you should reset your system when it stops responding; or appears to be “frozen” or “locked up.” Insert a small rod, such as a straightened paperclip, into the reset button of your device. -
Page 104: Troubleshooting
12.2 Troubleshooting NOTE: If you encounter a problem you cannot solve, contact an authorized service center for assistance. Power Problems Power does not turn on when using battery power The remaining battery power may be too low to run your device. Connect the AC charger to your device and to AC power. -
Page 105: Connection Problems
Connection Problems Cable Connection Problems Make sure that your device and your computer are both turned on before trying to establish a connection. Make sure that the cable is securely plugged into the USB port on your computer and on the device. Connect the USB cable directly to your computer—do not run the cable through a USB hub. -
Page 106: Maintaining Your Device
12.3 Maintaining Your Device Taking good care of your device will ensure trouble-free operation and reduce the risk of damage to your device. Keep your device away from excessive moisture and extreme temperatures. Operating Temperature: 0˚C~40˚C (32 °F~104°F). Storage Temperature: -20˚C~60˚C (-4 °F~140°F). Avoid exposing your device to direct sunlight or strong ultraviolet light for extended periods of time. -
Page 107: Regulatory Information
Regulatory Information NOTE: Marking labels located on the exterior of your device indicate the regulations that your model complies with. Please check the marking labels on your device and refer to the corresponding statements in this chapter. Some notices apply to specific models only. 13.1 Regulations Statements Class B Regulations Federal Communications Commission Radio Frequency Interference... -
Page 108: European Notice
Increase the separation between the equipment and receiver. Connect the equipment into an outlet on a circuit different from that to which the receiver is connected. Consult the dealer or an experienced radio/TV technician for help. Any changes or modifications not expressly approved by the manufacturer could void the user’s authority to operate the equipment. -
Page 109: Safety Precautions
EN6100-3-2: Limits for harmonic current emissions EN6100-3-3: Limitation of voltage fluctuation and flicker in low-voltage supply system EN60950 / IEC 60950: Product Safety The manufacturer cannot be held responsible for modifications made by the User and the consequences thereof, which may alter the conformity of the product with the CE Marking. -
Page 110: About The Battery
About the Battery Use a specified charger approved by the manufacturer. CAUTION: This unit contains a non-replaceable internal Lithium Ion battery. The battery can burst or explode, releasing hazardous chemicals. To reduce the risk of fire or burns, do not disassemble, crush, puncture, or dispose of in fire or water.
Need help?
Do you have a question about the DigiWalker H610 and is the answer not in the manual?
Questions and answers