
Related Manuals for ILVE ILREF256I/2


Summary of Contents for ILVE ILREF256I/2
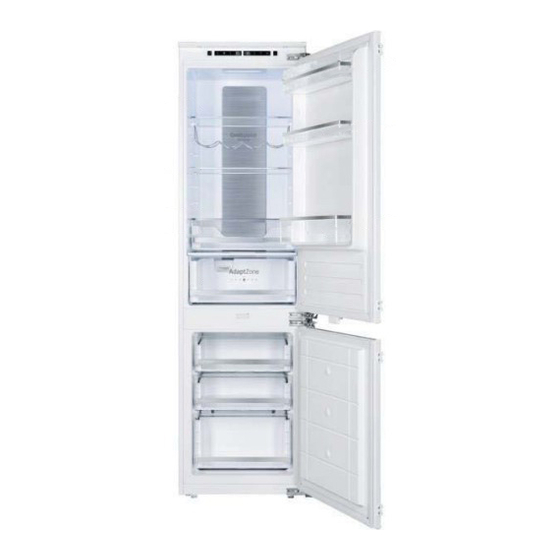
- Page 1 ILVE.COM.AU ILVE REFRIGERATION INSTALLATION AND OPERATIONS MANUAL MODELS ILREF256I/2, ILREF316/2, ILFRZ217/2...
- Page 2 Congratulations, you are now the proud owner of an ILVE cooking appliance. Thank you for purchasing ILVE and welcome to the exciting world of cooking the ILVE way. This instruction manual has been specially created to inform you of the full range of features your ILVE appliance has to offer and serves as an introduction to the wonderful benefits of ILVE’s dynamic cooking systems.
-
Page 3: Table Of Contents
Installation preparation Installing your appliance into the cabinetry Attaching the door panel Mounting the door panel to the appliance Before first use General fridge/freezer use ( ILREF256I/2) General column fridge use (ILREF316/2, ILFRZ217/2) 15 Storage Control panel Care and cleaning... -
Page 4: Warnings And Pre Installation Check
WARNINGS AND PRE INSTALLATION CHECK Please read the user instructions carefully before using the appliance for the first time and before installing it. Failure to install the appliance, or to have it installed, as per the user manual could invalidate the warranty. Any service calls relating to misuse or incorrect installation could incur a service charge. - Page 5 WARNING; RISK OF FIRE / FLAMMABLE MATERIALS This appliance is not intended for use by persons (including children) with reduced physical, sensory or mental capabilities, or lack of experience and knowledge, unless they have been given supervision or instruction concerning use of the appliance by a person responsible for their safety.
-
Page 6: Pre Install Checklist
EXPLODED VIEW OF REFRIGERATOR & CABINETRY ILREF256I/2 560-570 550 min 1780 1770 min.30 min. 30 air ow 560-570 560-570 550 min ILREF316/2 ILFRZ217/2 1780 1770 1770 min.30 air ow Rev.13052022... - Page 7 INSTALLATION KIT COMPONENTS LIST NB: Ice Tray not included in the ILREF316 NB: Egg Tray and drain kit not included in the ILFRZ217 Rev.13052022...
-
Page 8: Installation Preparation
INSTALLATION PREPARATION DOOR HINGE The ILREF256I/2 is available with left or right hand hinge options, however, each model is still reversible The ILREF316/2 model are supplied in right hand hinge only but is reversible The ILFRZ model are supplied in left hand hinge only but is reversible... -
Page 9: Installing Your Appliance Into The Cabinetry
INSTALLING YOUR APPLIANCE INTO THE CABINETRY PLACING THE REFRIGERATOR INTO THE CABINET With the help of another individual, manoeuvre the appliance into the cabinet. Pull the power cord through a pre drilled hole at the back of the cabinet or a the power point is inside the cabinet, plug in the refrigerator before installing it into the cabinet. Ensure you do not kink or bend the power cord as damaging the cord could be a safety and fire risk. -
Page 10: Attaching The Door Panel
Top of the appliance ATTACHING THE DOOR PANEL Close the appliance door and measure from the top of the cabinet cavity to the bottom of the door bracket on both sides ensuring that the distance is the same. You will need to know this measurement when pre-drilling the fixing points in the decor panel. -
Page 11: Mounting The Door Panel To The Appliance
MOUNTING THE DOOR PANEL TO THE APPLIANCE Ensure that there is a gap of 3–4 mm between the non-hinge side of the appliance and the vertical cabinet wall. Mount the door panel onto the appliance door using the screw thread ad a fixing guide. Screw the bracket back onto to the appliance and use the hex nut to secure and level. - Page 12 IMPORTANT After completing the installation, check that the appliance is secured within the cabinet unit and that the doors close and open correctly. If there is no resistance from the door seals when opening the doors, then it is probable that the appliance and all decor doors are not fitted properly REVERSING THE APPLIANCE DOOR - TO BE DONE BEFORE FITTING THE PANEL We recommend you seek the help of another individual to support the doors whilst performing this operation.
-
Page 13: Before First Use
The presence of some frosting is not a malfunction of the freezer. CRISPER DRAWER HUMIDITY ADJUSTMENT (ILREF256I/2) The crisper drawer within this appliance features a humidity level adjustment slider. Vegetables and similar produce that are subject to wilting (e.g. -
Page 14: General Fridge/Freezer Use ( Ilref256I/2)
GENERAL FRIDGE/FREEZER USE ( ILREF256I/2) • Never put liquids in the refrigerator uncovered. • Never put hot foods in the refrigerator. Warm food should be allowed to cool to room temperature before being put into the refrigerator. • Nothing should rest against the rear wall of the refrigerator. -
Page 15: General Column Fridge Use (Ilref316/2, Ilfrz217/2)
GENERAL COLUMN FRIDGE USE (ILREF316/2) • Never put uncovered liquid in the refrigerator • Never put hot food in the refrigerator. Warm food should be allowed to cool to room temperature before being put into the refrigerator. • Nothing should rest against the rear wall of the refrigerator, as this will cause frost and possible condensation problems which will be difficult to remove. -
Page 16: Storage
STORAGE The fridge section is for short term food storage. Although low temperatures can be maintained, extended periods of food storage is not recommended. As the cold air circulates within the fridge, the temperature can vary between the different sections. As such, foods should be stored in different sections according to type. -
Page 17: Control Panel
CONTROL PANEL ILREF256I/2 FRIDGE/FREEZER CONTROL PANEL Display Fig. 3 A. FRESH ZONE TEMPERATURE ADJUSTMENT SENSOR This button is used to adjust the temperature within the Fresh Zone. Press this button once to alter the display to show the current temperature in the Fresh Zone, and then as many times as necessary until the desired temperature is selected. The settings range from -3 to 3°C... - Page 18 ILREF316/2 COLUMN FRIDGE CONTROL PANEL A. REFRIGERATOR TEMPERATURE ADJUSTMENT SENSOR This button is used to adjust the temperature within the fridge. Press the sensor once to activate adjustment, and then as many times as necessary until the desired level is selected. The settings range from 1 to 6 with 1 being the warmest and 6 the coldest. B.
-
Page 19: Care And Cleaning
CARE AND CLEANING ILREF316/2 Always disconnect the appliance from the power supply before any cleaning or maintenance. The fridge and freezer sections should be cleaned using a solution of bicarbonate soda and lukewarm water. Do not use abrasive products or detergents. After washing, rinse and dry thoroughly. Clean the shelves and balconies separately by hand with a mild solution of washing up liquid and water. -
Page 20: Defrosting The Appliance
DEFROSTING THE APPLIANCE DEFROSTING THE ILREF256/2 FRIDGE The fridge is self defrosting. Any water created will run out of the fridge through the channel at the back of the fridge, unless the drain hole is blocked. It is important to keep the channel clear at all times using the cleaning tool/drain plug supplied. - Page 21 TROUBLESHOOTING If you have any problems with your appliance, you should check the troubleshooting prior to calling the Customer Care. ILREF256/2 IF THE APPLIANCE IS NOT WORKING, YOU SHOULD CHECK: • That there is power to the appliance. • The house fuses are intact and the fuse in the plug has not blown. •...
-
Page 22: Troubleshooting
TROUBLESHOOTING ILREF316/2 IF THE APPLIANCE IS NOT WORKING, YOU SHOULD CHECK: • That there is power to the appliance. • The house fuses are intact and the fuse in the plug has not blown. • The fridge has not been turned off •... - Page 23 TROUBLESHOOTING ILREF217 IF THE APPLIANCE IS NOT WORKING, YOU SHOULD CHECK: • That there is power to the appliance. • The house fuses are intact and the fuse in the plug has not blown. • The freezer has not been turned off (page 9). •...
-
Page 24: Climate Range
CLIMATE RANGE The information about the climate range of the appliance is provided on the rating plate. It indicates at which ambient temperature (that is room temperature in which the appliance is working) is optimal for the operation of the appliance. CLIMATE CLASS ALLOWABLE AMBIENT TEMPERATURE SN EXTENDED TEMPERATE... - Page 25 NOTES...
-
Page 26: Warranty
Post: Locked Bag 3000, Annandale, N.S.W 2038 deterioration of parts and accessories and glass P: 1300 MY ILVE (694 583) breakage); (b) use for purpose for which the ILVE product was not WARRANTY REGISTRATION sold or designed; Your ongoing satisfaction with your ILVE product is (c) use or installation which is not in accordance with any specified instructions for use or installation;... - Page 27 Act or other statute. Agents. If the Appliance is located outside our (d) The liability of ILVE to you for a breach of any normal Service Area of our agents you, t he express or non-excludable implied term, condition or...
- Page 28 /ilve_appliances/ /ILVEappliances /company/eurolinx-pty-ltd /ILVEappliances Australia National Telephone Number 1300 MYILVE (694 583) New Zealand Telephone Number 0508 458 369 ILVE showrooms are open daily from 9am-5pm and Saturdays 10am-4pm ilve.com.au NSW & ACT (Head Office) WA & NT New Zealand...
Need help?
Do you have a question about the ILREF256I/2 and is the answer not in the manual?
Questions and answers