
Subscribe to Our Youtube Channel
Related Manuals for SoundMax SM-CCR3033


Summary of Contents for SoundMax SM-CCR3033
- Page 1 SM - CCR3 0 3 3 USB/ SD / M M C M ED I A PLAYER I nst ruct ion m anual USB/ SD / M M C- " "...
-
Page 2: Table Of Contents
D e a r custom e r ! Thank you for purchasing our product. For safet y, it is st rongly recom m ended t o read t his m anual carefully before connect ing, operat ing and/ or adj ust ing the product and keep the m anual for reference in t he fut ure. Ta ble of con t en t s Table of cont ent s .................... -
Page 3: I M Port Ant Safeguards
I m por t a n t sa fe gua r ds ‚ Read carefully t hrough t his m anual t o fam iliarize yourself wit h t his high-qualit y sound syst em . ‚ The beginning of operat ion is t he m om ent of t he unit inst allat ion. Before use t he device in winter it is recom m ended t o heat up t he passenger com part m ent during 20 seconds or t o t he operat ion t em perature. -
Page 4: Accessories
Acce ssorie s 1. Receiver 1 pc 2. Rear connect or 1 pc 3. Mount ing part s: Release key 2 pcs Mount ing collar 1 pc Met al m ount ing st rip 1 pc Trim fram e 1 pc 4. -
Page 5: I Nst Allat Ion/ Connect Ion
I n st a lla t ion / conn e ction Ge n e r al n ot es ‚ Choose t he m ount ing locat ion where t he unit will not int erfere wit h t he norm al driving funct ion of t he driver. - Page 6 Tr im fr a m e inst a llat ion To install t he t rim fram e, press it t o t he unit body and push it t o fix it in place. This should be done before inst alling t he front panel;...
- Page 7 Conn e ct ion diagr am N ot e : Power antenna wire is int ended for power supply of t he antenna and for rem ot e cont rol of an addit ional am plifier.
-
Page 8: Cont Rol Elem Ent S
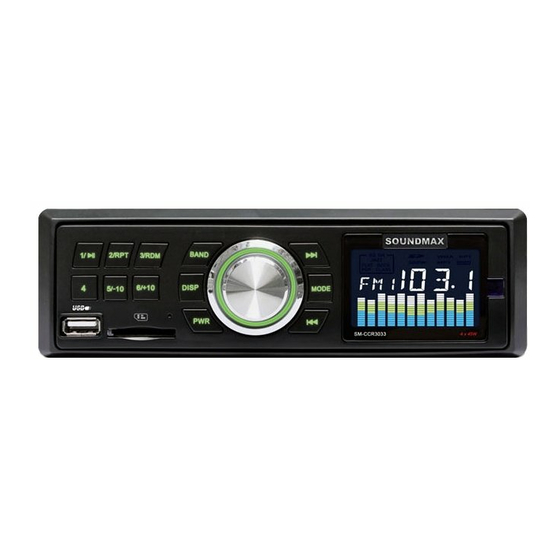
Cont rol e le m e n t s Fr ont pane l 4 but t on 1/ PLAY/ PAUSE but t on 2/ RPT butt on 3/ RDM but t on DI SP but ton BAND but t on SELECT but t on/ VOLUME regulat or <... -
Page 9: Lcd Layout
LCD la y ou t 1. Graphic indicat or of playback 2. Not act ive for t his m odel 3. Digit display ( frequency, t rack num ber, et c.) 4. Mem ory card playback indicat or 5. USB playback indicat or 6. -
Page 10: General Operat Ions
Ge n er a l ope r a t ion s Tu r ning t h e u n it on / off Press PWR but t on t o t urn t he unit on. Press t he but t on again t o t urn t he unit off. M ode se le ct Press MODE butt on repeatedly t o select bet ween Radio, auxiliary input , USB or Mem ory Card m odes. -
Page 11: Radio Operat Ions
Ra dio ope r at ion s Ba nd se le ct I n Radio m ode press BAND but t on to select a radio band: FM1, FM2 or FM3. 6 stat ions can be saved in each band m aking tot al 18 st at ions. M a n u al/ au t om a t ic t un ing <... -
Page 12: Usb/ Sd/ Mmc Operat Ions
USB/ SD/ M M C ope ra t ion s Conn e ct ing a USB- device / m e m or y ca rd I nsert a USB device int o t he USB port of t his unit . Or insert an SD/ MMC m em ory card unt il a click int o t he m em ory card slot . -
Page 13: Troubleshoot Ing Guide
Trou ble sh oot in g guide Below is a t able describing sim ple m easures t hat can help you elim inate m ost problem s likely t o em erge when t his unit is in use. I f below m easures do not help, t urn t o a service center or t o the nearest dealer. Sy m pt om Ca use Solu t ion... -
Page 14: Specificat Ion
Spe cifica t ion Ge n e r al Maxim um power output : 4 x 45 W Dim ensions/ weight : 177 x 150 x 50 m m / 0.67 kg Suit able speaker im pedance: 4 – 8 Ohm Fuse: 8 A/ 0. - Page 15 " " " " " " " " " " " " " " " 1 " " " " " " " " ....................15 " ...................16 " ..................17 ...................18 " ..................22 " ..................23 " .....................24 " " ....................25 " USB- ............25 "...
- Page 16 " ‚ " " " " " " ‚ " " " " " " " " " " " " " " " " " " " " " " " " " ‚ " " " " " "...
- Page 17 ‚ " " " " " " " " " " " " " " " " " " " " " " ‚ " " " " " " " " " " ‚ " " " " " "...
- Page 18 " ‚ " " " " " " " " " " " " , " " " " " ‚ " " " " " " " " " " " " " " " " " " " ‚...
- Page 19 " " " " " " ‚ " " " " " " " ‚ " " " " " " " " " " " " " " " " " " " " " " " " " "...
- Page 20 " " – " " – " " – " " " " " " " " " " " " " " " " " " " " " " " " " " " " " " " "...
- Page 21 " " " " " " " " " " " " :" " " "...
- Page 22 " " 1/ PLAY/ PAUSE 2/ RPT 3/ RDM DI SP BAND SELECT/ VOLUME < MODE 11. USB- 5/ - 10 " " " SD/ MMC 6/ + 10...
- Page 23 " " " " " " " " " " " " " " " " " " " " " " "...
- Page 24 " " " " " " " " " PWR, " " " " " " " " MODE, , AUX, USB " " " " " " " « » «USB» " " " " " " ( " "...
- Page 25 " " " " " " " " " " BAND, : FM1, FM2 FM3. " " " " " < ‚ " " " " " " " " " " " " " " " " " " "...
- Page 26 " " " " :" USB/ SD/ MMC- " " " " " " " " " " " " USB- " " " " " " FAT32. " " " " " " " " USB- " " " "...
- Page 27 " " " " " " " " " " " " " " " " " " " " " " " " " " " " " " " " " " " " " " " " " "...
- Page 28 " " " 4 x 45 177 x 150 x 50 / 0,67 " " 4 – 8 8 A/ 0, 5 A " USB/ SD/ MMC " - 20 C - + 60 " 87,5 – 108,0 " " "...
Need help?
Do you have a question about the SM-CCR3033 and is the answer not in the manual?
Questions and answers