Marantz SR7200 User Manual
Marantz user guide av surround receiver sr7200
Hide thumbs
Also See for SR7200:
- User manual (40 pages) ,
- Service manual (50 pages) ,
- User manual (37 pages)
Table of Contents
Advertisement
Advertisement
Table of Contents

Related Manuals for Marantz SR7200


Summary of Contents for Marantz SR7200
- Page 1 Model SR7200 User Guide AV Surround Receiver...
- Page 2 CAUTION: TO REDUCE THE RISK OF ELECTRIC SHOCK, REFER SERVICING TO QUALIFIED SERVICE PERSONNEL WARNING TO REDUCE THE RISK OF FIRE OR ELECTRIC SHOCK, DO NOT EXPOSE THIS APPLIANCE TO RAIN OR MOISTURE. CAUTION: TO PREVENT ELECTRIC SHOCK, MATCH WIDE BLADE OF PLUG TO WIDE SLOT, FULLY INSERT.
-
Page 3: Important Safety Instructions
IMPORTANT SAFETY This product was designed and manufactured to meet strict quality and safety standards. There are, however, some installation and operation precautions which you should be particularly aware of. Read Instructions - All the safety and operating instructions should be read before the appliance is operated. Retain Instructions-The safety and operating instructions should be retained for future reference. - Page 4 Servicing-Do not attempt to service this video product yourself as opening or removing covers may expose you to dangerous voltage or other hazards. Refer all servicing to qualified service personnel. Damage Requiring Service-Unplug this video product from the wall outlet and refer servicing to qualified service personnel under the following conditions: When the power-supply cord or plug is damaged.
- Page 5 Night mode Multi room mode Surround mode MULTI ROOM NIGHT AUTO DIGITAL ANALOG DISPLAY OFF Display off Input indicator ⁄4 ⁄1 AV SURROUND RECEIVER SR7200 SURROUND MULTI ROOM NIGHT DISPLAY OFF SPEAKERS 7CH INPUT STANDBY POWER ON/STNDBY PHONES ¡2 ¡3 MULTI...
- Page 6 VIDEO SYSTEM CONNECTIONS FOR VIDEO COMPONENTS SATELLITE TUNER or VCR2 COMPONENT AUDIO AUDIO VIDEO S-VIDEO DIGITAL VIDEO OUT IN Y CbCr ANTENNA (75Ω) AUDIO VIDEO S-VIDEO DIGITAL MONITOR TV COMPONENT S-VIDEO VIDEO VIDEO CVBS Y CbCr DIGITAL IN / OUT MULTI MULTI ROOM...
- Page 7 S - VIDEO COMPONENT REMOTE CONTROL AUDIO VIDEO SPEAKER SYSTEMS A VIDEO OUT IN To a component with REMOTE (Marantz RC-5 D-BUS) jacks Refer to "CONNECTION FOR A SUBWOOFER" (Page 6) TAPE DECK CD RECORDER SPEAKER SYSTEM A SURROUND SPEAKER WOOFER...
-
Page 8: Table Of Contents
TABLE OF CONTENTS INTRODUCTION ... 2 DESCRIPTION ... 2 FEATURES ... 2 FRONT PANEL FEATURES ... 3 REAR PANEL CONNECTIONS ... 4 REMOTE CONTROL UNIT RC7200SR ... 7 OPERATION OF REMOTE CONTROL UNIT ... 7 SET-UP ... 8 ON SCREEN DISPLAY MENU SYSTEM ... 8 OSD MAIN MENU ... -
Page 9: Introduction
INTRODUCTION Thank you for purchasing the Marantz SR7200 DTS/Dolby Digital Surround receiver. This remarkable component has been engineered to provide you with many years of home theater enjoyment. Please take a few minutes to read this manual thoroughly before you connect and operate the SR7200. -
Page 10: Front Panel Features
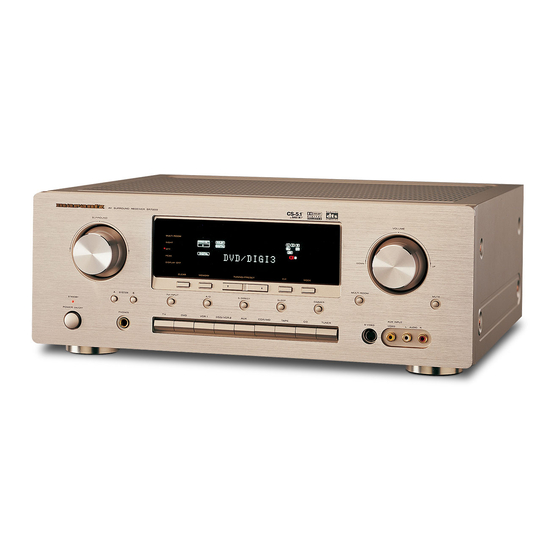
FRONT PANEL FEATURES (SEE PAGE iii.) q POWER switch and STANDBY indicator When this switch is pressed once, the unit turns ON and display appears on the display panel. When pressed again, the unit turns OFF and the STANDBY indicator lights. When this unit is in the standby mode, pressing one of the FUNCTION SELECTOR buttons also allows to turn the power on. -
Page 11: Rear Panel Connections
The coaxial connections are not for AC-3 RF from the LD player, If you want to decode this type of signal, an external demodulator must be used. ¡7 REMOTE CONT. IN/OUT terminals Connect to a Marantz component equipped with remote control (RC- 5) terminals. ¡8 MULTI ROOM REMOTE I/O terminals IN : Connect to multi-room remote control device, available from your Marantz dealer. -
Page 12: Video Inputs
The one marked UNSWITCHED is always live as long as the SR7200 is plugged into a live outlet. A component connected here may be left on permanently, or may be switched off with its own power switch. - Page 13 (RC-5) jacks, it allows system remote control to operate. Connect REMOTE CONTROL OUT jack of SR7200 to REMOTE CONT. IN of other Marantz equipment, i.e. CD player or tape deck, by using an RCA pin cable. Note:...
-
Page 14: Remote Control Unit Rc7200Sr
1. Remote control The distance between the transmitter of the remote control unit and the IR SENSOR of the SR7200 should be less than about 5 meters. If the transmitter is pointed to a direction other than the IR SENSOR or if there is an obstacle between them, remote control may not be possible. -
Page 15: Set-Up
SET-UP After all components are connected, initial setup must be performed. ON SCREEN DISPLAY MENU SYSTEM The SR7200 incorporates an on-screen menu system, which makes various operations possible by using the cursor (<, >, ^, buttons on the remote controller. -
Page 16: Osd Main Menu
A/D button u. SYSTEM SETUP 3/3 (DC CONTROL OUTPUT) SR7200 has two DC control jacks, each one is selectable to link with input functions for the main room or multi room. You can select MAIN ROOM, MULTI ROOM or OFF for DC1 & DC2 independently by <... -
Page 17: Speakers Setup
SPEAKERS SETUP The home theater system you already have installed should function provided that there are left, center and right front speakers, left and right rear/surround speakers and a subwoofer. For best results we recommend that all front speakers be of the same type, with identical or similar driver units. -
Page 18: Surround Mode
SURROUND MODE SOURCE DIRECT : Switch the source direct ON or OFF with < or > button. This bypasses the surround processing and crossover for the main speakers (front left and right will be full range and the subwoofer will be ON) Note: Surround mode cannot be changed in Source Direct mode. -
Page 19: Basic Operation
BASIC OPERATION LISTENING TO THE TUNER MANUAL TUNING To select the tuner as the source, press the TUNER button t on the front panel or press the TUNER button , on the remote control unit. Press the TUNER button t on the front panel or press the TUNER button , on the remote control unit to select the desired frequency band if required. -
Page 20: Playback Operation
⁄6 on the remote for more than 3 seconds. The left most column of the station name indicator flashes, indicating the character entry ready status. [Operation (Using the SR7200)] When you press the TUNING/PRESET turned, alphabetic and numeric characters will be displayed in the following order: A →... -
Page 21: Other Functions
Connect your TV TUNER (etc) to the TV IN terminal. Be sure to connect the video input. Turn OFF the power to the TV TUNER and the SR7200 will be in standby mode. Turn ON the TV TUNER and tune in a receivable station. -
Page 22: On Screen Display Infomation
The on-screen display, which can be activated by the Main unit or remote, appears on the TV screen to show the current setting status of the SR7200. 1. GENERAL INFORMATION When the OSD button ⁄7 is pressed, the current setting are displayed on the TV monitor. - Page 23 5.SLEEP TIMER When the SLEEP button o is pressed, the setting on or off and the remaining time of the sleep timer function are displayed. You can change the mode between on, off and the amount of time to elapse before the unit will shut itself off by cycling the SLEEP button o. 6.
-
Page 24: Remote Control Unit Rc7200Sr
• PRESET CODES Function buttons already contain preset codes (using the RC-5/RC-6 remote control language) for other remote-controllable Marantz audio- visual component. • LUMINOUS BUTTONS The remote controller uses luminous buttons which store light allowing it to be used even in the darkened. -
Page 25: Mute Button
m ENT buttons Used to execute a function selected with the Jog Dial n. There are 2 ENT buttons, one on each side, so that the remote controller can be used just as easily with either hand. The characters on the display can also be programmed. , Function buttons Used to switch the remote controller to the command sets for specific sources (amplifier, receiver, etc.), thereby allowing a single remote... -
Page 26: Basic Operation
Stop when the LEARN indicator starts to blink. Place the DVD’s remote controller so that its infrared signal transmitter is facing the infrared signal receiver on the Marantz remote controller at a distance of about 5 centimeters (2 inches). Top View... - Page 27 LEARN indicator is displayed and starts to blink. Place the DVD player’s remote controller so that its infrared transmitter window is facing the infrared signal receiver window on the Marantz remote controller at a distance of about 5 centimeters (2 inches). Press the DVD Function button ,.
- Page 28 REWRITING NAMES This remote controller allows the names accessible by Jog Dial control n to be rewritten with new ones of your choosing. • Rewriting of names is performed for each individual function. • Let’s use a DVD player as an example to show how to change the ’s “OSD”...
- Page 29 Erasing Jog Dial Codes To clear all codes and names previously set for each of the functions (DVD, TV, etc.). 1) Press the function you want to erase. 2) Hold down the CLEAR button ⁄5 and press both ENT buttons m at the same time.
- Page 30 Press the buttons for the operations you wish to program as a macro in the sequence you want the macro to program them. The name of the button pressed appears on LCD a. The number of steps in the macro is displayed on LCD c and this number increases by 1 with each button pressed.
- Page 31 EXAMPLES OF MACRO PROGRAMS Example 1 Change the input source for the amplifier to CD and play the 3rd track on a CD in the CD player. Use a ballpoint pen or other sharp point to press the MACRO button x, then press the CD Function button ,. CD-M is displayed on the LCD.
-
Page 32: Other Functions
OTHER FUNCTIONS LUMINOUS BUTTONS The buttons on this remote controller are designed to remain luminous in dim lighting conditions. If the buttons are no longer luminous when the remote controller is used in low light, recharge them by placing it near a fluorescent or other light source for a sufficient amount of time. -
Page 33: Jog Dial Command Functions Listing
Each of the 10 Jog Dial commands on the LCD has 5 character labels attached for pre-programmed remote commands. These commands can be used with various Marantz A/V components, or other components using the Philips RC-5 remote control language. You can easily replace the factory-supplied remote command codes with different codes from other brands of component. -
Page 34: Surround Modes
SURROUND MODES The SR7200 incorporates digital signal processors (DSP) which can reproduce various surround effects you experience in concert halls and movie theaters, etc. These Surround Modes, are provided to reproduce a variety of surround sound effects, according to the content of the source to be played. - Page 35 The relation between the selected surround mode and the input signal The surround mode is selected with the surround mode selector knob of the SR7200 or the remote control unit. However, the sound from the speakers depend upon the relationship between the selected surround mode and the input signal. They are as follows;...
-
Page 36: Troubleshooting
If your trouble cannot be recovered with the remedy actions listed in the following table, malfunction of the internal circuitry is suspected; immediately unplug the power cable and contact your dealer, nearest Marantz distributor or the Marantz Service Center in your country. CAUSE Connect the power plug to the outlet. - Page 37 The memory functions are backed up for up to about one week. NOTE: First of all keep SR7200 Standby or Powered-on more than 6 hours, to sufficient time for memory back up.
-
Page 38: Technical Specifications
TECHNICAL SPECIFICATIONS FM TUNER SECTION Frequency Range ... 87.5 - 108.0 MHz Usable Sensitivity ... IHF 1.8 µV/16.4 dBf Signal to Noise Ratio ... Mono/Stereo 76/72 dB Distortion ... Mono/Stereo 0.2/0.3 % Stereo Separation ... 1 kHz 45 dB Alternate Channel Selectivity ... ± 400 kHz 60 dB Image Rejection ... - Page 39 P.O. Box 685, Bell Village, Port Louis, Mauritius PO BOX 1280, Sandhausen 69200, Germany A division of Marantz Europe B.V., Building SFF2, P.O. Box 80002, 5600 JB Eindhoven, The Netherlands 14 Malvern Road, Mt. Albert, Auckland, New Zealand Sandkerveien 64, Oslo 0483, Norway P.O.
Need help?
Do you have a question about the SR7200 and is the answer not in the manual?
Questions and answers