Table of Contents
Advertisement
Quick Links
Advertisement
Table of Contents
Troubleshooting

Related Manuals for Janome Continental M17


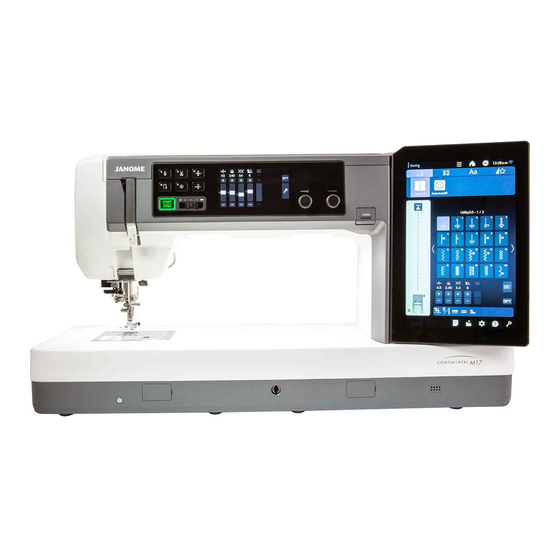
Summary of Contents for Janome Continental M17
- Page 1 Instruction Book Continental M17 (Ordinary sewing / Sewing application)
- Page 2 Before You Use the Machine WARNING: This product contains a lithium button/coin cell battery. If a new or used lithium button/coin cell battery is swallowed or enters the body, it can cause severe internal burns and can lead to death in as little as 2 hours.
- Page 3 IMPORTANT SAFETY INSTRUCTIONS When using an electrical appliance, basic safety precautions should always be followed, including the following: This sewing machine is designed and manufactured for household use only. Read all instructions before using this sewing machine. DANGER — To reduce the risk of electric shock: 1.
-
Page 4: Fcc Caution
FCC Caution hanges or modifications not e press appro ed the part responsi e or comp iance cou d oid the user s authorit to operate the e uipment NOTE: This e uipment has een tested and ound to comp ith the imits or a digita de ice pursuant to part 15 of the FCC Rules. -
Page 5: Table Of Contents
TABLE OF CONTENTS FCC Caution ..............2 Sewing with the Dual Feed Device ......44-45 Sewing with Professional grade foot HP ....... 46 ESSENTIAL PARTS Dual Feed Flex Professional Grade Foot HP2 ....47 Names of Parts ............. 5-6 Floating Mode ..............48 Standard Accessories .......... - Page 6 TABLE OF CONTENTS MONOGRAMMING INFORMATION AND CUSTOMIZING Function Keys ...............121 Function Menu ............. 160 Manual Thread Tension ..........122 Quick Stitch Select ..........160-161 Individual Thread Tension Adjustment ......122 Quilt Block Advisor ............161 Unified Thread Tension Adjustment ......122 Back left Position Key ...........161 Spacing ................122 Manual Dual Feed Setting ........162-164 Reducing the Size of Letters ........122...
-
Page 7: Essential Parts
ESSENTIAL PARTS Names of Parts Top cover Thread take-up lever Bobbin winding tension disk Left thread guide Foot compartment Right thread guide Bobbin winder spindle Thread cutter (Bobbin winder) Bobbin winder stopper Bobbin winding button Thread cutter (rightmost) Pop up spool pins lever Retractable thread guide Spool pins Face plate... -
Page 8: Standard Accessories
Handwheel Touch panel stylus holder USB ports (lower) oot contro jac Carrying handle (lower) Power inlet Power switch Accessory storage Battery cover Thumb wheel Presser foot lifter Attachment connector cap Carrying handle (upper) Embroidery unit Hoop socket Carriage Embroidery table (rear) Embroidery table (front) * You can store accessories in embroidery tables. - Page 9 Standard Accessories Part Name Part No. 1 Zigzag foot A (Set on the machine) 859802006 2 Overcasting foot M 859810007 3 Satin stitch foot F 859806011 4 Blind hemming foot G 859807001 5 Zipper foot E 859805009 6 CONCEAL® zipper foot Z* 859815002 7 Automatic buttonhole foot R 862822013...
- Page 10 Standard Accessories Part Name Part No. 1 Knee lifter 846417011 2 Touch panel stylus 868826004 3 Needle plate (set on the machine) 867642001 4 Straight stitch needle plate 867802001 5 Professional grade needle plate HP 867803002 6 Optic magnifier 867401006 7 Optic magnifier 858415500 8 Optic magnifier...
- Page 11 Standard Accessories Part Name Part No. 1 Cloth guide 868827005 2 Embroidery hoop RE46d (with template) 868815000 m roider hoop ith temp ate 868816001 4 Embroidery hoop RE20d (with template) 868817002 m roider hoop ith temp ate 868818003 Magnetic clamps x 8** (for RE46d 859821001 7 Special bobbin holder for embroidery 867513208 8 Sub thread guide stick...
-
Page 12: Foot Control And Thread Cutter Switch
Foot Control and Thread Cutter Switch To attach the foot control q and the thread cutter switch w to the base plate e, tighten setscrews r, and setscrews t with washers y as shown. q Foot control w Thread cutter switch e Base plate r Setscrew A t Setscrew B... - Page 13 Adjusting the horizontal position of the thread cutter switch z Loosen the setscrews q under the switch. q Setscrew w Washer ide the s itch to the e t or right and fi it at the desired position by tightening the setscrews with a screwdriver.
-
Page 14: Accessory Storage
Accessory Storage The accessories can be conveniently stored in the accessory case, the compartment in the embroidery tables and the compartments under the top cover. To store the accessories in the embroidery tables, remove the upper table cover (refer to the manual instruction for embroidery). -
Page 15: Getting Ready To Sew Connecting The Power Supply
The symbol “O” on the switch indicates the “off” position of the switch. Foot controller Model 21390 is for use with sewing machine Continental M17. For the U.S.A. and Canada only Polarized plug (one blade wider than the other): To reduce the risk of electric shock, this plug is intended to fit in a po ari ed out et on one a... -
Page 16: Using Foot Control
Using foot control If you wish to use the foot control, pull out the cord from the oot contro and insert the pin connector into the jac on the machine. z First make sure the power switch q is off. x Insert the machine plug w of the power supply cable into the machine socket e. -
Page 17: Thread Cutter Switch
Thread Cutter Switch If you wish to use the thread cutter switch, pull out the cord from the foot control and insert the pin connector into the jac on the machine z First make sure the power switch q is off. x Insert the machine plug w of the power supply cable into the machine socket e. -
Page 18: Controlling Sewing Speed
After sewing, depress the thread cutter switch q on the right side of the foot control to trim both the needle and bobbin threads. Do not depress the thread cutter switch until the start/ stop button turns green w. q Thread cutter switch NOTE: •... -
Page 19: Machine Operating Buttons
Machine Operating Buttons q Start/stop button Press this button to start or stop the machine. This button can be used both in the ordinary sewing mode and embroidery mode. In the ordinary sewing mode, the machine starts running or the first e stitches then runs at the speed set by the speed control slider. - Page 20 e Auto-lock button • When the following stitch patterns are selected: Utility App i ue ui t Bridge Decorative Press the auto-lock button to sew a locking stitch immediately. The machine will automatically stop. When the machine is stopped, press the auto-lock button and the LED signal i will blink.
-
Page 21: Top Cover Release Button
Top Cover Release Button Top cover release button Press this button to open the top cover. To close the top cover, press the cover down with your hand. Pop Up Spool Pins Lever Pop up spool pins lever Move the pop up spool pins lever to the right to raise spool pins. -
Page 22: Thumb Wheel
Thumb Wheel Turn the thumb wheel to lower or raise the needle to check the needle drop position. q Thumb wheel NOTE: Do not use the thumb wheel to penetrate the fabric. Reference charts There are 3 reference charts on the top cover. You can check groups and how to thread the machine and wind the bobbin. -
Page 23: Common Keys
Common Keys CAUTION: Do not press the visual touch screen with hard or sharp o jects i e penci s or scre dri ers Use the touch panel stylus included in the standard accessories. q Function menu key (refer to page 160) Press this key to open the function menu. -
Page 24: On-Screen Help
On-screen Help Press the help key to open the help menu. You can view instructions on 13 essential machine operation topics. Select the help topic by pressing the arrow and the step- by-step instruction will open. q Help key w Arrow To view the next page, press the next page key. -
Page 25: Raising And Lowering The Presser Foot
Raising and Lowering the Presser Foot CAUTION: Do not turn the handwheel, thumb wheel or press the up/down needle button when the presser foot is in extra lifted position. This may cause damage to the presser foot. The presser foot lifter button, the presser foot lifter or the knee lifter raises and lowers the presser foot. -
Page 26: Replacing The Presser Foot
Replacing the Presser Foot CAUTION: • Always make sure to press the lockout key before replacing the presser foot. • Use the proper foot for the selected pattern. The wrong foot can cause the needle to break. z Raise the needle by pressing the needle up/down button. -
Page 27: Removing And Attaching The Foot Holder
Removing and Attaching the Foot Holder Remove the foot holder before using Professional grade u er or arning oot feed foot AD, Stitch regulator or the embroidery foot. CAUTION: Always make sure to press the lockout key to lockout the machine before replacing the foot holder. Removing the foot holder Raise the needle by pressing the needle up/down button. -
Page 28: Attaching Dual Feed Foot Ad, Dual Feed Flex Professional Grade Foot Hp2 Or Dual Feed Foot Vd (Single)
Attaching Dual Feed Foot AD, Dual Feed Flex Professional Grade Foot HP2 or Dual feed foot VD (single) z Attach the dual feed holder to the presser bar. q Dual feed holder x Tighten the thum scre ith our fingers Push the dual feed link to engage it with upper feed drive. -
Page 29: Attaching Darning Foot Pd-H Or Darning Foot
Attaching Darning Foot PD-H or Darning Foot (open-toe) PD-H Attach darning foot PD-H or darning foot (open-toe) PD-H to the presser bar by putting the pin on the needle clamp screw. q Pin w Needle clamp screw Tighten the thum scre firm ith the scre dri er Replacing Needles CAUTION:... -
Page 30: Fabric And Needle Chart
Fabric and Needle Chart Fabric Thread Needle • For general sewing, use a red tip needle. Lawn • Fine threads and needles should be used for sewing Georgette Cotton #80-100 Blue tip needle fine a rics Fine Tricot Synthetic Universal needle •... -
Page 31: Winding The Bobbin
Winding the Bobbin Removing the bobbin Press the lockout key. Slide the hook cover release button to the right, and remove the hook cover plate. q Hook cover release button w Hook cover plate Lift out the bobbin from the bobbin holder. e Bobbin NOTE: •... - Page 32 Setting the spool of thread or thread cone (special size) Use the spoo ho der specia to ho d the specific si e o the spool of threads as shown. The sizes of the spools of thread are as follows: The ho e diameter o the spoo has a range o mm and the spoo ength has a range o Spool holder (special)
- Page 33 Winding the bobbin NOTE: ou can adjust the o in inding speed re er to page 167). z Raise the thread guide bar. Pass the thread through the guide on the thread guide bar from behind. q Thread guide bar x Pass the thread under the right thread guide.
-
Page 34: Inserting The Bobbin
Inserting the Bobbin z Press the lockout key. Place the bobbin in the bobbin holder with the thread running off counterclockwise as shown on the hook cover plate. q Lockout key w End of thread e Bobbin holder r Hook cover plate x o d the o in ith our fingertip so it does not rotate. -
Page 35: Threading The Machine
Threading the Machine CAUTION: Always make sure to press the lockout key to lockout the machine before threading the machine. z Press the needle up/down button to raise the take-up lever to the highest position. Press the lockout key to lockout the machine. Press the presser foot lifter button to raise the presser foot. - Page 36 Threading the Machine (Continued) ⁄0 hi e ho ding the thread at the spoo firm dra the thread up and to the back of the take-up lever. Draw the thread forward to draw it into the eye of the take- up lever.
-
Page 37: Automatic Needle Threader
Automatic Needle Threader NOTE: • The needle threader can be used with a #11 to #16 needle. • Thread size 50 to 90 is recommended. • Do not use thread size 30 or thicker. • The needle threader cannot be used with the twin needle. -
Page 38: Drawing Up The Bobbin Thread
Drawing up the Bobbin Thread After using auto thread cutting or threading the bobbin holder, you can start sewing without drawing up the bobbin thread. However, you need to draw up the bobbin thread when sewing gathering stitches etc. z Remove the bobbin. Insert the bobbin into the bobbin holder again and rethread the bobbin holder according to the instructions on page ut ea e a... -
Page 39: Replacing The Needle Plate
Replacing the Needle Plate Use the straight stitch needle plate when embroidering, using the dua eed oot ui t piecing or ree motion The straight stitch needle plate can be used for straight stitches with the left, center or right needle drop positions. Use professional grade needle plate HP for straight stitch with the left needle drop position. -
Page 40: Ordinary Sewing Mode
ORDINARY SEWING MODE Ordinary Stitch Patterns In the ordinary sewing mode, there are 4 categories available. q Utility stitches and buttonholes ecorati e and ui ting stitches e Monogramming r Tapering Press one of the tabs to select the category. NOTE: In this manual, the pattern number refers to the initial letter for each group or category. - Page 41 w Decorative and quilting stitches This category consists of the following 17 groups. App i ue stitches A Cross-stitches (C) Heirloom stitches (H) ui ting stitches ui t t e stitches Satin stitches (S) (S) (BR) (D) (BO) Bridge stitches (BR) Decorative stitches (D) Botanical stitches (BO) Long stitches (L)
-
Page 42: Function Keys In Ordinary Sewing Mode
Function Keys in Ordinary Sewing Mode q Foot-up key If this option is turned on, the needle stops at the down position and the presser foot will automatically go up when the machine stops. Press this key to turn this option on or off (refer to page 55). - Page 43 !0 Program key Press this key to program a pattern combination. hen this e is pressed the sa e fi e e pre ie delete key, letter size key, hand stitch style key, initial/ end lock key and cursor keys will appear. !1 Cursor keys Press one of the cursor keys to move the cursor up or down.
-
Page 44: Utility Stitches
Utility Stitches Straight stitches Patterns U1 to U5 are straight stitches for seaming. Press the pattern selection key for the desired stitch. Starting to sew Place the fabric next to the seam guide line on the needle plate. Lower the needle to the point where you want to start. -
Page 45: Securing Seams
Securing Seams For fastening the ends of seams, press the reverse button and sew several reverse stitches. The machine sews in reverse as long as you press and hold the reverse button. q Reverse button Press the reverse button once when sewing the lock- a-matic stitch (pattern U2) or locking stitch (pattern U3) and the machine will lock the stitches off and stop automatically. -
Page 46: Sewing With The Dual Feed Device
Sewing with the Dual Feed Device atterns U to U and can e se n ith the dual feed device. The dual feed device is extremely effective when sewing hard to feed materials such as PVC coated fabric or leather. It also eliminates layer slippage. - Page 47 Place the fabric under the foot and lower the needle at the point where you wish to start. Start sewing at medium speed. When seaming plaid fabrics, match the plaids of the upper and lower layers and pin them together. Remove the pins as you sew.
-
Page 48: Sewing With Professional Grade Foot Hp
Sewing with Professional grade foot HP atterns U to U and can e se n ith the professional grade foot HP. Use the professional grade foot HP for straight stitch to provide professional results. See page 26 for how to attach the professional grade foot Replace the needle plate with the professional grade needle plate HP when using the professional grade foot HP. -
Page 49: Dual Feed Flex Professional Grade Foot Hp2
Dual Feed Flex Professional Grade Foot HP2 This foot provides superior visibility and is great for cur es and precise topstitching o ds a rics firm in sync with the feed dogs to achieve professional results. ee page or ho to attach dua eed e pro essiona grade foot HP2 and to engage the dual feed device. -
Page 50: Floating Mode
Floating Mode You can decrease layer slippage and wrinkles by lifting the presser oot s ight in the oating mode ress the oating mode e q Floating mode key atterns not suita e or oating mode cannot e selected (pattern selection keys are grayed out). ress to adjust the presser oot height resser oot hight adjustment... -
Page 51: Variety Of Straight Stitches
Variety of Straight Stitches U1 Straight stitch in center needle position Use this stitch for seaming, rolled hemming etc. U2 Lock-a-matic stitch Use this stitch to secure the beginning and the end of a seam with backstitching. When you reach the end of the seam, press the reverse button once. -
Page 52: Zigzag Stitches
U5 Triple stretch stitch This strong, durable stitch is recommended for areas where both elasticity and strength are needed to ensure comfort and durability. Use it to reinforce areas such as crotch and armhole seams. Also use it when constructing items such as backpacks for extra strength. -
Page 53: Variety Of Overcasting Stitches
U11 Multiple zigzag stitches These stitches are used for mending tears. Variety of Overcasting Stitches U11, U12 Multiple zigzag stitch: Zigzag foot A This stitch is used to finish a ra edge o s nthetics and other stretch fabrics that tend to pucker. e a ong the a ric edge ea ing an ade uate seam allowance. - Page 54 U17 Double overcasting stitch: Overcasting foot M This stitch is excellent for fabrics that tend to fray extensively such as linens and gabardines. Place the fabric edge next to the guide of the foot and sew. Two rows of zigzag stitches are simultaneously sewn over the edge to insure that the fabric will not ravel.
-
Page 55: Manual Stitch Settings
Manual Stitch Settings You can alter the stitch width, needle drop position of the straight stitches, needle thread tension, presser foot pressure value and stitch length. Turn the stitch idth or ength adjusting dia or press the “+” or “–” key beside the setting you wish to change to change the setting. -
Page 56: Middle Touch Screen
Altering stitch length Turn the stitch ength adjusting dia c oc ise to increase (−) the stitch length. Turn the stitch ength adjusting dia counterc oc ise to decrease the stitch length. (−) You can also change the setting with the “+” or “–” key. Press the “+”... -
Page 57: Adjusting Thread Tension
Adjusting Thread Tension This machine is e uipped ith automatic thread tension control, which optimizes the tension balance for the selected stitch pattern. Balanced thread tension Straight stitch: Both needle and bobbin threads interlock between the layers. Zigzag stitch: The needle thread appears slightly on the wrong side of the fabric. -
Page 58: Favorite Stitch Adjustment
Favorite Stitch Adjustment You can save customized stitch settings (stitch length, stitch width, thread tension and presser foot pressure, depending on the selected stitch patterns) as “Favorite titch Adjustment hen the a orite stitch adjustment option is turned ON q (refer to page 170), the last-used customized stitch settings are automatically assigned when the stitch pattern is selected. - Page 59 “Save fav. setting” dialog box will open. You can store 2 sets of favorite stitch settings (FS1 and FS2). Press FS1 r or FS2 t to register the favorite stitch settings. The s uare rac et y indicates that the customized preset stitch value is applied to the setting.
- Page 60 To select the favorite stitch settings, press the open favorite key q. The selected set of favorite stitch settings is indicated in light blue w. Select the desired set of customized stitch settings by pressing FS1 w or FS2 e. To delete favorite stitch settings, press the delete key r.
-
Page 61: Cloth Guide
Cloth Guide z Press the lockout key. q Lockout key Remove the hook cover plate (refer to page 29). x Set the left edge of the cloth guide hook cover into opening. Push down the mark on the cloth guide hook co er to fit in p ace w Cloth guide hook cover e Left edge... -
Page 62: Other Utility Stitches
Other Utility Stitches U20, U21 Blind hemming Refer to pages 134-135 for sewing instructions. U22, U26 Shell tuck Refer to page 136 for sewing instructions. U23 Visible hemming Select pattern U23. Fold and press a single hem. Place the fabric with the right side up. - Page 63 U25 Box Stitching Use this stitch to join hea eight a rics O er ap t o ra edges together and use this stitch to join them. U27 Hemstitch Use this stitch for fagoting or decorative stitch. U28 Decorative Hemstitch Use for overcasting the edge of thick fabrics, visible hem and seams, decorative stitching.
-
Page 64: Buttonholes And Specialty Stitches
BUTTONHOLES AND SPECIALTY STITCHES Variety of Buttonholes B1 Sensor (Square) buttonhole This s uare uttonho e is ide used on medium to heavy weight fabrics. The buttonhole size is automatically determined by placing a button in the foot. B2 Auto (Square) buttonhole This is a so a s uare uttonho e simi ar to the sensor s uare uttonho e ut ou can manua... - Page 65 B1 Sensor (Square) Buttonhole The size of a buttonhole is automatically set by placing a button in the rear of automatic buttonhole foot R. The button holder of the foot takes a button size of 1 cm in diameter When selecting the buttonholes, the right touch screen advises you to lower the buttonhole lever.
- Page 66 c Draw the needle thread to the left through the hole of the foot. Mark the buttonhole position on the fabric and place it under the buttonhole foot. Lower the needle at the starting point by turning the handwheel. y Starting point v Lower the presser foot and pull the buttonhole lever down as far as it will go.
- Page 67 n The uttonho e is se n automatica in the se uence sho n hen the uttonho e is finished the machine will stop automatically with the needle in the up position. Press the thread cutter button and remove the fabric. m A ter ou finish uttonho e se ing push the buttonhole lever up as far as it will go.
- Page 68 Manual settings You can alter the buttonhole opening width, button hole width and buttonhole stitch density on the manual setting window. hen ou press the adjust e the manua setting window expands to show a slider for value setting. q Adjust e w Altering buttonhole opening width Press the “+”...
-
Page 69: Using The Stabilizer Plate
Using the Stabilizer Plate The stabilizer plate holds and supports the fabric so it is helpful when sewing buttonholes over the hem of thick fabrics. z Insert the tab of the stabilizer plate q into the slot w of the buttonhole foot. q Stabilizer plate w Slot x Place the button on the button holder of the foot. -
Page 70: B2 Automatic (Square) Buttonhole
B2 Automatic (square) Buttonhole Pull the button holder all the way out. Mark the buttonhole position on the fabric. Place the fabric under the foot, and lower the needle at the starting point. Lower the foot and start sewing while pulling the needle thread lightly to the left. - Page 71 c Start sewing again, and the machine sews the front bartack and right side of the buttonhole. Stop the machine when you reach the ending point. Then press the reverse button q. v Start sewing again, and machine sews the back bartack and locking stitches then stops automatically with the needle in the up position.
-
Page 72: Other Buttonholes
Other Buttonholes B3, B4 Round end and fine fabric buttonholes The se ing procedure is the same as that o s uare (sensor) buttonhole (refer to pages 63-65). NOTE: • The opening idth can e adjusted rom • The uttonho e idth can e adjusted rom •... -
Page 73: B13 Welted Buttonhole (Bound Buttonhole)
B13 Welted Buttonhole (Bound Buttonhole) A welted buttonhole is made by stitching a strip or patch of fabric to the buttonhole. Welted buttonholes are particularly suitable for tailored garments, but are not recommended for sheer or delicate fabrics where the patch might show through or add bulk. z Baste a patch to the garment fabric with the right sides together. - Page 74 m Fold over the length of the garment fabric, sew back and orth eside the origina seam to secure aps o the patch. r Wrong side of garment fabric t Sew back and forth , Fold over the end of fabric and sew back and forth three times over the triangular end.
-
Page 75: Corded Buttonhole
Corded Buttonhole To sew a corded buttonhole, follow the same procedure as or s uare sensor uttonho e Select pattern B1. z Place the button on the button holder on the buttonhole foot. oo a fi er cord on the spur on the ront o the oot Bring the ends of cord toward the back and under the foot. -
Page 76: B15 Darning
B15 Darning z Attach automatic buttonhole foot R and pull the button holder all the way out. Place the fabric under the foot, and lower the needle at the starting point. Then lower the foot. q Button holder w Starting point tart the machine and se to the re uired ength then press the reverse button. -
Page 77: B17-B20 Fly Stitch
B17-B20 Fly stitch stitch is a triang e tac ing stitch or use on a ipper ottom and on the side poc ets o pants Attach the satin stitch foot F. To sew: Place the garment under the foot and lower the needle at the starting point. -
Page 78: Decorative Stitches Decorative Stitches
DECORATIVE STITCHES Decorative Stitches The patterns in this section are c assified into groups These patterns are programmable and you can make a pattern combination. (S) (BR) (D) (BO) (L) (AN) (LS) (K) (SE) (W) (M) (CS) Applique stitches (A): 2 pages titches in this group are or app i ue (Refer to page 156.) - Page 79 Cross-stitches (C): 2 pages This group provides cross-stitches for craft sewing and home décor. Heirloom stitches (H): 3 pages This group provides heirloom stitches for craft sewing and home décor.
- Page 80 Heirloom stitches (continued from previous page) Quilt stitches (Q): 8 pages titches in this group are or patch or and ui ting (Refer to pages 95-100, 149-159.)
- Page 81 Quilt stitches (continued from previous page)
- Page 82 Quilt stitches (continued from previous page)
- Page 83 Quilt stitches (continued from previous page) Quilt Style (QS): 3 pages There are stitch patterns created rom ui t oc s in this group.
- Page 84 Quilt Style (continued from previous page) Satin stitches (S): 3 pages The stitches on page 1 and 2 can be elongated up to 5 times their original length while the stitch density remains the same. (Refer to page 100.)
- Page 85 Satin stitches (continued from previous page) Bridge stitches (BR): 1 page Bridge stitches are used for inserting straight stitches after a stitch pattern. The number beside the stitch image on the straight stitch key indicates the stitch count of a programmable unit. Patterns BR9, BR10 and BR12 will inherit the needle drop position and stitch length of the previous pattern in the programmed pattern combination.
- Page 86 Decorative stitches (continued from previous page)
- Page 87 Decorative stitches (continued from previous page)
- Page 88 Decorative stitches (continued from previous page)
- Page 89 Botanical (BO): 4 pages There are patterns o trees grass and o ers in this group.
- Page 90 Botanical (continued from previous page) Long stitches (L): 2 pages Patterns in this group are ideal for decorating garments and for adding border trims.
- Page 91 Animals (AN): 2 pages There are patterns of animals in this group. Life Style (LS): 3 pages There are patterns related to lifestyle in this group.
- Page 92 Life Style (continued from previous page) Kids (K): 5 pages There are patterns for kids in this group.
- Page 93 Kids (continued from previous page)
- Page 94 Kids (continued from previous page) Seasons (SE): 2 pages There are patterns related to seasons in this group.
- Page 95 Words (W): 1 page There are word patterns in this group. Mirage (M): 2 pages This group provides satin patterns without connecting straight stitches (refer to page 101).
- Page 96 Created Stitch (CS): 1 to 3 pages In this section, you can select original stitch patterns created with Stitch Composer. Refer to Stitch Composer for how to transfer created stitch patterns from a PC to the machine.
-
Page 97: Quilting (Q)
Quilting (Q) Using the quilting guide bar The ui ting guide ar is he p u hen se ing para e evenly spaced rows of stitches. nsert the ui ting guide ar into the ho e in the ac o the oot ho der ide the ui ting guide ar and set it to the desired spacing. -
Page 98: Quilt Block Advisor
Quilt Block Advisor The size and number of each piece of fabric can be ca cu ated automatica There are di erent ui t patterns available. Press the Function menu key to open the function menu. ress the ui t oc Ad isor e q Function menu key ui t... - Page 99 Other quilt designs e ect the design pressing the ui t icons ou ish to sew. Set the size of work u (Width/Height) by pressing the “–” or “+” key. Set the number of rows or circle i by pressing the “–” or e i re uired The ui t oc ad isor indicates the si e o piece and...
- Page 100 Example: Nine patch quilting z Prepare 2 pieces of fabric (A1 and A2) in different Strips (Cut from A1 and A2) colors. Cut 3 strips of fabric from fabric A1 and 3 strips of fabric from fabric A2. All strips should be the same size.
- Page 101 v Arrange set A piece and set B piece alternately to orm nine patch ui t oc patterns 1 1 Set A Set B 2 2 Set B Set A 3 3 Set A Set B b Stitch set A pieces and set B pieces together. n Arrange nine patch pieces as you wish and sew onto a ui t ase...
-
Page 102: Q123-Q128 Hand-Look Quilt Stitches
Q123-Q128 Hand-look Quilt Stitches atterns are specia stitches or ui ting which look like hand sewn stitches. Use a transparent nylon thread for the needle and ordinary sewing thread for the bobbin. The bobbin thread is pulled up on the right side of the fabric and the stitches look as if they were sewn by hand. -
Page 103: Mirage (M)
Mirage (M) Sew Mirage stitch and open the fabric to make patterns without connecting straight stitches. NOTE: Use a medium fabric (such as sheeting, broadcloth) or Mirage stitch patterns Using fine a rics ma cause wrinkles when opened. There are two ways to sew the Mirage stitch patterns (sewing on one or two pieces of fabric). -
Page 104: Created Stitches (Cs)
Created Stitches (CS) Original stitch patterns created with Stitch Composer are saved in this group. nsert the U ash dri e containing the origina stitch patterns and press the open fi e e q Open fi e e Select the USB icon and the folder list will appear. e ect the desired o der to open and the fi... -
Page 105: Twin Needle Sewing
Twin Needle Sewing Some of the utility stitches and decorative stitches can be sewn with a twin needle. Replace the needle with the twin needle supplied with the standard accessories. CAUTION: • Turn the power switch off or press the lockout key before changing the needle. - Page 106 Press the twin needle key and select the desired pattern. Patterns not suitable for twin needle sewing cannot be selected (pattern selection keys are grayed out). Buttonholes, specialty stitches and monogram cannot be selected. w Twin needle key NOTE: • When you sew patterns with the twin needle, test the stitches first e ore ou se on the garment •...
-
Page 107: Programming A Pattern Combination
PROGRAMMING A PATTERN COMBINATION The patterns in the decorative stitch category and monograms can be programmed to make a pattern combination. Press the program key and select as many patterns as you wish to program. You can program up to 100 patterns in each combination. The images of programmed patterns are shown on the left side of the right touch screen. -
Page 108: Bridge Stitches
Bridge Stitches Bridge stitches are used for inserting straight stitches after a stitch pattern. If you want more space between French knots (D6), for example, insert pattern BR9 after pattern D6. Two counts of straight stitches are added to pattern D6. NOTE: Patterns BR9, BR10 and BR12 will inherit the stitch length and needle drop position of the previous... -
Page 109: Editing A Pattern Combination
Editing a Pattern Combination Deleting a pattern The pattern before the cursor or shown in blue is deleted by pressing the delete key. q Cursor w Delete key To delete a pattern in the middle of a combination, press the cursor key to select the pattern you wish to delete. The stitch image of the selected pattern turns blue. -
Page 110: Inserting A Pattern
Inserting a pattern Press the cursor key to select the pattern next to where you wish to insert a pattern. Enter the desired pattern to insert it before the selected pattern. t Inserted pattern Startover Key This is a 2-way function key to start sewing a pattern combination over from the beginning. -
Page 111: Checking Pattern Combination Length
First pattern startover The key shows a triangle and single bar that means the machine i start o er rom the first pattern ou ish to start se ing rom the eginning o the first pattern of the combination, press the startover key twice and start the machine. - Page 112 The readout of the total length is a theoretical value and the actual length may vary depending on sewing conditions. For example, select pattern LS1 three times, and sew a pattern combination. If the actual length differs considerably from the readout, measure the actual length and enter the nearest value by pressing the “+”...
- Page 113 For example select patterns LS1, LS17 and LS13. The theoretical value is 51 mm. However, the read out is calculated according to the measured actual length. In this case the adjusted a ue is Press the default key to clear the entered length. e Default key...
-
Page 114: Tapering
Tapering You can taper the beginning and end of the decorative stitch patterns to create tapered corners and points. Press the tapering tab to enter the tapering mode (refer to page 39). q Tapering tab NOTE: • The tapering length varies depending on the stitch pattern and its tapering shape. - Page 115 Tapered stitch sample 1 Example: To sew tapered stitch pattern #10 Select stitch pattern #10. Start the machine. The machine sews the start tapering pattern and pattern body. e to the re uired ength then press the auto oc button. The machine sews the end tapering pattern and stops.
- Page 116 Flipping a tapered pattern 1 ress the static ip e to ip a tapered pattern ertica ithout ipping its start and end tapering degree ang e tatic ip e...
- Page 117 Adjustment of tapered stitches ou can adjust the shape o the tapered stitch pattern ress the tapering adjustment e The dialog box will open. q Tapering adjustment e Tapering shape Select the shape of the tapering for the beginning and the end of the stitch patterns by pressing the tapering shape keys.
- Page 118 Press the pattern length key. Press the “+” !0 or “–” !1 key to set the length to repeat the pattern body. o Pattern length key You can also set the number to repeat the pattern body by pressing the numeric pad key. Press the numeric pad key and the numeric keypad window will open.
- Page 119 Flipping a tapered pattern 2 ress the mirror image e to ip a tapered pattern vertically. !3 Mirror image key...
- Page 120 Saving tapered stitches The customi ed tapered pattens can e sa ed as a fi e in the machine s interna memor or a U ash dri e ress the sa e fi e e a ter customi ing a tapered stitch The tapered stitch fi...
- Page 121 v Press the tapering shape key (for start tapering pattern) r. Press the tapering shape key (for end tapering pattern) t. Press the pattern length key y. Press the “+” key 4 times, or press the numeric pad key u and enter “5”. Press the OK key i.
- Page 122 , The machine automatically stops at the end of the corner with the lock stitch.
-
Page 123: Function Keys
MONOGRAMMING You can program letters and symbol designs for monogramming. Press the monogramming tab and the font selection window will open. You can select one of 6 fonts. Select the desired font by pressing the corresponding key. q Monogramming tab w Block font key e Script font key r Broadway font key... -
Page 124: Manual Thread Tension
Manual Thread Tension This machine is e uipped ith automatic thread tension contro o e er ou ma need to manua adjust the tension balance depending on the sewing conditions. Individual Thread Tension Adjustment To app the thread tension adjustment to each etter individually, select the letter by moving the cursor. -
Page 125: Programming A Monogram
Programming a Monogram Simply enter the characters by pressing the corresponding keys to program a monogram. Example 1: ui t in Select Block font. nter Press the letter case key to select lower case. q Letter case key Enter “u”, “i”, “l” and “t”. Start sewing. - Page 126 Example 2: “ Café” in Broadway font Press the monogramming tab and select Symbol. Enter a heart. Press the cursor key and select Broadway font. Enter “C”. q Monogramming tab w Cursor key Press the letter case key and select lower case letters. Enter “a”...
-
Page 127: Saving A Pattern Combination
Press the next page key to go to page 4 of 5. Enter “é”. r Next page key NOTE: Use a blue tip needle for sewing a monogram. App a sheet o sta i i er to fine a rics or stretch fabrics. - Page 128 ou ish to use a a out e oard press the keyboard key. Press the letter case key to select upper case or lower case. r Keyboard key t Letter case key Enter a new name and press the OK key to change the fi...
-
Page 129: Opening A Pattern Combination
Opening a Pattern Combination You can open the pattern combination and monogram sa ed in the machine s interna memor or a U drive. ress the open fi e e and the open fi e indo open. q Open fi e e e ect the memor ocation either the machine s interna memor or a U ash dri e... -
Page 130: Hand Stitch Style Hand Stitch Style
HAND STITCH STYLE Hand Stitch Style You can create your own heartful seams as if sewn by hands by giving subtle differences to sewing patterns. This can e used or decorati e patterns o chi dren s c othing or sma artic es other than cra ui ts Use thick thread (#30) for more effective sewing results. -
Page 131: Sewing Application Variety Of Sewing Application
SEWING APPLICATION Variety of Sewing Application e ing app ication is a uni ue eature that pro ides ou with useful sewing applications. Press the home key to go to the home window. q Home key Press the sewing application key on the home window and the sewing application menu will open. -
Page 132: Seaming Woven
Optional Sewing Application The option category of the sewing application provides you with 9 useful sewing applications. Press the optional foot tab and the optional sewing application menu will open. The 9 optional sewing applications are as follows: q Beading on e uin e Piping r Cording... -
Page 133: Curve
Curve Short straight stitches for seaming curved lines. Topstitching Long straight stitches for topstitching with thick threads. -
Page 134: Rolled Hem
Rolled hem q Straight Stitch Rolled hemming with straight stitch w Zigzag Stitch Rolled hemming with narrow zigzag stitch e 4 mm & 6 mm Rolled hemming using optional rolled hemming feet D1 and D2 To sew: Attach rolled hem foot D. o d the a ric edge t ice to orm a hem ide and ong then press... -
Page 135: Overedge Woven
Overedge woven Overcasting stitch for 2 layers of regular woven fabrics. Overedge stretch/knit nit stitch or finishing ra edges o stretch or nit a rics For better results, use zigzag foot A and sew leaving an ade uate seam a o ance After sewing, trim the seam allowance close to the stitches. -
Page 136: Blind Hem
Blind hem The following 2 options are available. q Woven For blind hemming regular woven fabric w Stretch/Knit For blind hemming stretch or knit fabric To sew: Attach blind hem foot G. o d the a ric to orm a hem ea ing a allowance as shown. - Page 137 Adjusting the needle drop position Press the “+” key q in the lower row to move the needle drop positions to the left. Press the “–” key w in the upper row to move the needle drop positions to the right. The needle drop position will change, while the stitch width (2.8 mm) remains consistent.
-
Page 138: Shell Tuck
Shell tuck The following 3 options are available. q Small Narrow shell tuck stitch w Medium Medium width shell tuck stitch e Large Regular shell tuck stitch To sew: Use a light weight fabric (Tricot, for example). Fold the fabric in bias r as shown and stitch on the fold. Allow the needle to barely clear the folded edge to create a shelled edge. -
Page 139: Lapped Zipper Sewing
Lapped zipper sewing Press the lapped zipper icon and the zipper sewing window will open. Press the sewing step icon and the machine setting will automatica adjust to suit each se ing step NOTE: Dual feed foot VD (single) and dual feed zipper foot ED (single) appear on the right touch screen when the dual feed key is pressed. - Page 140 Sew left side Attach zipper foot E. Fold back the left seam allowance. Turn the right seam a o ance under to orm a Place the zipper teeth next to the fold and pin in place. w Zipper teeth e Fold Opening size Lower the foot onto the topside at the bottom of the zipper so that the needle pierces the fabric next to the...
- Page 141 Basting Replace the foot with zigzag foot A. Baste the opened fabric and zipper tape together. q Basting Sew right side Replace the foot with zipper foot E. ac stitch across the end o opening to Stitch through the garment and zipper tape, guiding the zipper teeth along the bottom edge on the foot.
-
Page 142: Conceal® Zipper
CONCEAL® zipper* Press the CONCEAL® zipper foot Z* icon and the window will show the step-by-step icon keys. repare a concea ed ipper onger than the opening size. Press the sewing step icon and machine settings will automatica adjust to suit each se ing step Lock-a-Matic Attach zigzag foot A. - Page 143 Left side of tape Raise the foot and close the zipper. Replace the foot with zipper foot E. Turn and fold the bodice to the right. Seam along the edge of the left zipper tape and reverse the stitches 2 cm e ore the ipper ottom Right side of tape Turn and fold the bodice to the left.
-
Page 144: Pouch Zipper
Pouch zipper Press the pouch zipper icon and the window will show the step-by-step icon keys. Prepare 2 pieces of fabric and a zipper tape. NOTE: Dual feed foot VD (single) and dual feed zipper foot ED (single) appear on the right touch screen when the dual feed key is pressed. -
Page 145: Gathering
Gathering oth threads under and ehind the presser foot (refer to page 36). e t o ro s o straight stitches apart Knot the threads at the beginning. c Pull the bobbin threads at the end to gather the fabric. v Knot the threads at the end and distribute the gathers evenly. -
Page 146: Basting
Basting There are 2 basting stitches available in this section. Basting (Auto) This stitch is used or asting ipper tape or fitting o garments. Sew in the same way as that for straight stitch sewing. Basting (Manual/Quilting) Attach the darning foot PD-H. NOTE: Refer to page 27 for how to attach the darning foot PD-H. -
Page 147: Button Sewing
Button Sewing When attaching a button to thick fabric, you need to make a shank by using the button shank plate. The feed dogs lower automatically when selecting the button sewing section. Attaching button sewing foot T Make sure to press the lockout key to lock the machine. Raise the presser foot with the presser foot lifter. -
Page 148: Tacking
Tacking Tacking is used to reinforce pockets, crotches and belt carriers where extra strength is needed. There are 3 auto tacking sizes and manual tacking available. Attach satin stitch foot F. Auto tacking Lower the needle at the starting point and start sewing. The machine will sew the tack of the selected size and stop automatica hen it is finished... -
Page 149: Eyelet
Eyelet Please refer to page 75 for “B21-B25 Eyelets”. Smocking Choose a soft, lightweight fabric such as batiste, gingham or challis. Cut the fabric three times wider than the projected idth NOTE: The purple tip needle is recommended for smocking. -
Page 150: Fagoting
(Smocking: continued from previous page) Gathering e ro s o straight stitches cm apart to across the area to be smocked. Tie the threads along one edge. Pull the bobbin threads at the end to gather the fabric. Knot the threads at the end and distribute the gathers evenly. -
Page 151: Quilt Application
Quilt Application Patchwork piecing There are 6 stitches for seaming patchwork pieces in this section. The default stitch length is set at 1.8 mm, ideal for patch or piecing ut ou can fine tune the stitch ength by pressing the “+” or “–” key. Attach seam oot O hich he ps ou to eep a... -
Page 152: Quilting
Quilting The straight stitch needle plate is recommended for straight stitch 1 and straight stitch 2 (refer to page 37 for how to replace the needle plate). or ordinar and u ui ts se ect traight titch or “Zigzag Stitch 1”, and use darning foot PD-H (refer to page 27 for how to attach the darning foot). -
Page 153: Stitch Regulator Function / A.s.r. Foot Holder
Stitch Regulator Function / A.S.R. Foot Holder The A.S.R. foot holder (Accurate stitch regulator foot holder) reacts to movement of the fabric and provides the same stitch length for free motion, ruler work or variable zigzag. z Remove the foot holder (refer to page 25). Attach the A.S.R. - Page 154 n Sew the fabric while guiding it with your hands. The status indicator y will turn red during operation. The buzzer sounds and the stitch length will be longer than the setting when the fabric moves too fast. * The A.S.R. foot holder also can be used with ruler work or variable zigzag (refer to the next page).
-
Page 155: Changing The Foot Attachment
Changing the foot attachment This foot holder comes with the ASR closed-toe foot attached o e er it is a so compati e ith the A open toe oot A O the A c ear ie and the A ru er or oot A c osed toe oot A open toe oot A... -
Page 156: Ruler Work
Ruler Work CAUTION: Do not lower the needle while the foot is raised, otherwise the needle clamp may hit the foot and cause injur or rea age uide the oot a ong the ui ting temp ate optiona to create straight, curved or repetitious patterns depending on the shape of the ruler. -
Page 157: Variable Zigzag
Variable Zigzag This uni ue eature a o s ou to contro ig ag idth with the knee lifter. Select q-M or q-L, using darning foot PD-H for sewing ui t a ers uide the a ric ith our hands hi e sewing. -
Page 158: Applique
Applique There are t pes o app i ue stitches a ai a e in this section. You can select the needle stop position to be either up or down by pressing the needle stop position key. q Needle stop position key The letter above the stitch image denotes the baseline of the needle drop position. -
Page 159: Straight Stitches (With Dual Feed)
Starting over from the corner Press the startover key before sewing in the new direction to sew from the beginning of the pattern. r Startover key T o o starto er options are a ai a e or app i ue stitches. -
Page 160: Decorative Quilt Stitch
Decorative Quilt Stitch ou can decorate the seam on the ui t or patch or a ric ith decorati e ui t stitches Use satin stitch foot F. Clasp Stitches ou can c ose ui t a ers and atting using the c asp stitch. -
Page 161: Sashiko
Sashiko These stitches are used to create a mock Sashiko stitching. Hand-look QU Use a transparent nylon thread for the needle and ordinary sewing thread for the bobbin. The bobbin thread is pulled up on the right side of the fabric and the stitches will look as if sewn by hand. -
Page 162: Information And Customizing Function Menu
INFORMATION AND CUSTOMIZING Function Menu Press the function menu key q to open the function menu. You can select or set the following functions from this menu. titch e ect ui t oc Ad isor r Manual Dual Feed Setting t Machine Information Quick Stitch Select You can select the stitch pattern directly with the... -
Page 163: Quilt Block Advisor
Example: To select satin stitch pattern 14 Press “S” to select satin stitch pattern group. Press “1” and then “4” to select the desired stitch pattern. Press the key to select satin stitch pattern 14. ress the O e to c ose the uic stitch se ection window. -
Page 164: Manual Dual Feed Setting
Manual Dual Feed Setting ou ish to se patterns other than U to U and ith the dua eed de ice turn on the manua dua feed setting. Press the ON key y of the manual dual feed setting. NOTE: Sewing results of manual dual feed sewing may vary depending upon sewing conditions. - Page 165 NOTE: If the manual dual feed setting is turned on when dual feed sewing is turned on in ordinary sewing mode, dual feed sewing will switch to the manual dual feed setting. NOTE: • If the drop feed key o is turned on in ordinary sewing mode when the manual dual feed setting is turned on, a message will appear as shown.
-
Page 166: Machine Information
Machine Information You can see the software version of the machine, total power-on time of the machine and total operating time of the machine. Press the machine information key t to open the machine information window. !0 Software version !1 Total power-on time !2 Total operating time... -
Page 167: Customizing Machine Settings
Customizing Machine Settings Press the set mode key to enter the machine setting mode. You can select various options and customize the machine settings to suit your personal preference. q Set mode key Press one of the 5 keys to select the mode to customize. w Machine setting mode key Press the machine setting mode key to enter the common setting mode. -
Page 168: Machine Setting Mode
Machine Setting Mode q Sound Volume The signa sound can e adjusted pressing the key. Set the value to “OFF” by pressing the “–” key several times to mute the signal sounds. w Screen Brightness ou can adjust the rightness o the isua touch screen by pressing the “+”... - Page 169 !6 Screen Saver Press the ON key to turn on the screen saver, and the visual touch screen will show the screen saver when the machine is in standby status. Press the import key to import a screen saver from a ash dri e You can create an original screen saver with “Screen Saver Tool.”...
- Page 170 @2 Format the interna memor o the machine or U ash dri e does not function due to damage to the memory bank, you need to re-enable it by formatting the memory. To ormat the machine s interna memor press the machine icon e and a confirmation message i appear.
-
Page 171: Sewing Setting Mode
Sewing Setting Mode q Thread Cut after Auto-Lock The machine automatically trims the threads after sewing locking stitches when this option is turned on. w Needle Stop Position The machine always stops with the needle in the down position except when sewing buttonholes, specialty stitches, monograms, etc. - Page 172 !0 Variable ZZ Sensitivity ou can adjust the amount o need e s ing ith the nee lifter movement for variable zigzag in sewing applications. Press the “+” key so the needle swings a small amount when moving the knee lifter. Press the “–”...
-
Page 173: Wireless Lan Setting Mode
DHCP option is turned on. The IP address can be changed in the network settings. r MAC Address The MAC address of the Continental M17 is displayed. t Sewing Machine Name The se ing machine name or net or identification is displayed. -
Page 174: Network Settings
Press the Wireless LAN settings button on the wireless LAN router. The dialog box appears and the wireless LAN router will automatically connect with your Continental M17. To use the Wireless LAN settings push-button configuration method the ire ess router must support... - Page 175 the se ected ire ess net or re uires an encr ption key for connection, the Encryption Key Entry dialog box appears. Be careful to enter uppercase or lowercase etters as re uired Enter the encryption key and press the OK key to establish the network.
- Page 176 IP address, Subnet Mask and Default Gateway for this machine. • When the DHCP option of Continental M17 is turned ON, turn on the DHCP option of your wireless router as well. u Sewing Machine Name Settings Press the arrow key i to open the sewing machine name setting window.
-
Page 177: Language Setting Mode
Digitizer Jr. for the CM17 on your computer. For more information, access the following URL. https janome co jp e e do n oads M softwares.html To connect the machine to your PC with wireless LAN refer to page 171. -
Page 178: Care And Maintenance
CARE AND MAINTENANCE WARNING: • Turn the power switch off and unplug the machine before cleaning. • Do not dismantle the machine in any way other than as explained in this section. CAUTION: • Do not store the machine in a high-humidity area, near a heat radiator, or in direct sunlight. -
Page 179: Cleaning The Inside Of The Thread Guide
Cleaning the Inside of the Thread Guide Clean the inside of the thread guide plate under the top cover at least once a month. z Remove the needle thread and remove the thread guide plate by pulling it up. q Thread guide plate x Clean the area around and under the pre-tension leaf with the lint brush. -
Page 180: Correcting Distorted Stitch Patterns
Correcting Distorted Stitch Patterns Sewing results of the stitch patterns may vary depending upon sewing conditions, such as sewing speed, type of the fabric, number of layers etc. Always test sew on a scrap piece of the fabric that you wish to use. -
Page 181: Replacing The Coin Cell Battery For The Internal Clock
Replacing the Coin Cell Battery for the Internal Clock If the clock on the right touch screen always indicates “0:00” when turning the power switch on, replace the coin cell battery in the sewing machine. WARNING: • Battery may explode if mistreated. o not recharge disassem e or dispose o fire •... -
Page 182: Replacing The Needle Plate For Emergency
Replacing the Needle Plate Emergency Procedure CAUTION: Never turn the needle plate release dial while running the machine. If the needle plate will not automatically snap off when pressing the needle plate release key on the lockout screen, you can replace the needle plate using the needle plate release dial. -
Page 183: Problems And Warning Signals
Problems and Warning Signals If a buzzer sounds and the right touch screen shows a warning sign, follow the guidance below. Warning Sign Cause Try this The start/stop button is pressed with the foot control Disconnect the foot control. connected. The foot control is broken. -
Page 184: Troubleshooting
Troubleshooting Condition Cause Reference The needle thread 1. The needle thread is not threaded properly. Pages 33-34 breaks 2. The needle thread tension is too tight. Page 55 3. The needle is bent or blunt. Change the needle. 4. The needle is incorrectly inserted. Page 27 5. - Page 185 Condition Cause Reference Visual Touch 1. The screen rightness is not adjusted proper Page 166 Screen is not clear. The needle thread 1. Thread tension is not balanced. Page 55 appears on the wrong side of the fabric when the stitch width value is larger than “7.0”.
-
Page 186: Troubleshooting (Automatic Needle Threader)
Troubleshooting (Automatic Needle Threader) If the automatic needle threader is stuck and will not return to the up position automatically, correct it as follows: Carefully turn the handwheel away from you or toward you to move the needle up a little. The automatic needle threader will return to the up position automatically. -
Page 187: Stitch Chart
Stitch Chart Part No.: 868-821-A01 Part No.: 868-821-A02 titch patterns in ue can e ipped ertica ori onta mirror image... - Page 188 Stitch Chart Part No.: 868-821-A03 Part No.: 868-821-A04 titch patterns in ue can e ipped ertica ori onta mirror image...
- Page 189 Stitch Chart Part No.: 868-821-A05 Part No.: 868-821-A06 titch patterns in ue can e ipped ertica ori onta mirror image...
- Page 190 Stitch Chart Part No.: 868-821-A07 Part No.: 868-821-A08 titch patterns in ue can e ipped ertica ori onta mirror image Version 1.10 14/07/2021...
- Page 191 Stitch Chart Part No.: 868-821-A09 Part No.: 868-821-A10 titch patterns in ue can e ipped ertica ori onta mirror image...
- Page 192 868-800-002 (EN)
Need help?
Do you have a question about the Continental M17 and is the answer not in the manual?
Questions and answers