
Related Manuals for Bestar Embassy 60621-000035


Summary of Contents for Bestar Embassy 60621-000035
- Page 1 TUSCANY BROWN : BRUN TOSCANE : PARDO TOSCANA CAPPUCCINO CHERRY : CERISIER CAPPUCCINO : CEREZO CAPPUCCINO Right assembly - p.3 ASSEMBLY INSTRUCTIONS INSTRUCTIONS D’ASSEMBLAGE INSTRUCCIONES DE ENSAMBLAJE Left assembly - p.17...
- Page 2 Thank you for choosing a product. Your total satisfaction is our #1 priority. C ust omer service and warranty information PROBLEMS OR INFORMATION POUR TOUT PROBLÈME OU INFORMATION PROBLEMA O INFORMACION Merci d’avoir choisi les produits. Vous satisfaire est notre priorité. Service à...
-
Page 3: Tools Required
PARTS CODE / CÓDIGO QTY / QTÉ / CANT. CODE / CÓDIGO QTY / QTÉ / CANT. CODE / CÓDIGO QTY / QTÉ / CANT. CODE / CÓDIGO QTY / QTÉ / CANT. bottom the use of electric tools must be made two people are required to with vigilance. - Page 4 HARDWARES CODE / CÓDIGO QTY / QTÉ / CANT. CODE / CÓDIGO QTY / QTÉ / CANT. CODE / CÓDIGO QTY / QTÉ / CANT. CODE / CÓDIGO QTY / QTÉ / CANT. runners 406 mm (16” REAL SIZE CODE / CÓDIGO QTY / QTÉ...
-
Page 5: Important Notice
IMPORTANT NOTICE / Duly complete the self-adhesive sticker. / To better serve you! Model Right assembly - p.3 Production Number ASSEMBLY INSTRUCTIONS INSTRUCTIONS Customer Service D’ASSEMBLAGE INSTRUCCIONES DE ENSAMBLAJE Left assembly - p.17 Certified/Certifié/Certificado ISO 9001 Important/Importante Please retain the self-adhesive sticker which you will install at step 11 of the instruction manual. -
Page 6: Hardware Installation
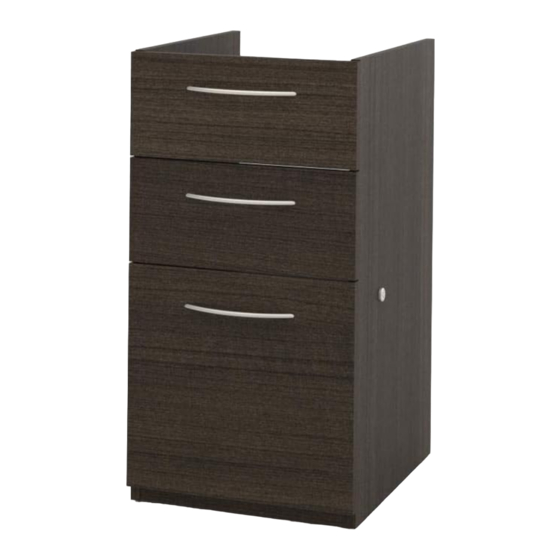
HARDWARE INSTALLATION / Pedestal with 3 Drawers / H-03 CA70B VR-207 SE-686 H-36 PA-844 Code / Código Qty / Qté / Cant. x 12... - Page 7 HARDWARE INSTALLATION / Pedestal with 3 Drawers / CO-249 Use these holes / Push plastic lever and slide out piece to be used for parts CA09A and CA01A VE-244 CO-249 VR-207 CA09A left side left side CL09A CA09A right side right side Code / Código Qty / Qté...
- Page 8 IMPORTANT NOTICE / Main hardware system / Make sure to properly tighten each cam to ensure furniture solidity. Otherwise, parts could be damaged or the user could be injured. tighten insert insert tools required important ASSEMBLY / Pedestal with 3 Drawers / Assemble on the back edge Assembling sequence Parts /...
- Page 9 HARDWARE INSTALLATION / Pedestal with 3 Drawers / 3 possibilities / not included not included not included Code / Código Qty / Qté / Cant.
-
Page 10: Installation
INSTALLATION / Pedestal with 3 Drawers / important / importante Assemble on the back edge Assembling sequence Parts / tighten 17 18 CA70B VR-212 insert two people are required to assemble and move this model. VR-212 without pre-drilled hole not included not included not included CA70B... - Page 11 HARDWARE INSTALLATION / Drawers / VM-601 PO-479 CL-745 EC-744 inferior drawer CA09A left side middle drawer VR-207 CR-141 left side Code / Código Qty / Qté / Cant.
- Page 12 ASSEMBLY / Superior Drawer / Assembling sequence Parts / + bottom CA05A CA01A CA01A CA05A left side VM-601 bottom / finished surface right side VR-212 Code / Código Qty / Qté / Cant.
- Page 13 ASSEMBLY / Middle Drawer / Assembling sequence Parts / + bottom CA05A CA01A CA01A CA05A left side VM-601 bottom / finished surface right side VR-212 Code / Código Qty / Qté / Cant.
- Page 14 ASSEMBLY / Inferior Drawer / Assembling sequence Parts / EX-681 CA09A EX-702 CA09A EX-702 EX-681 bottom CA09A right side EX-681 EX-702 VM-601 EX-702 bottom / EX-681 finished surface CA09A left side VR-212 filing / rangement / orden CA09A CA09A CA09A CA09A Letter / Legal /...
- Page 15 INSTALLATION / Drawers / Adjustement / After installing drawers into cabinet, adjust drawer fronts and tighten screws VM-601. not included superior drawer middle drawer not included not included Inferior Drawer Important/Importante Ball bearings must be on front part of slider when installing drawers.
-
Page 16: Product Care
Important/Importante For future reference and to better serve you, please apply the self-adhesive sticker in an accessible space such as inside a drawer. To better serve you! Model Production Number Customer Service PRODUCT CARE / Avoid placing the furniture in the sunlight or near a source of heat. Use a soft dry cloth for dusting. To clean heavy dirt, use a cloth dipped in a solution of mild detergent and water.
Need help?
Do you have a question about the Embassy 60621-000035 and is the answer not in the manual?
Questions and answers