Advertisement
Quick Links
60510-2168
CAPPUCCINO CHERRY :
WWW.BESTAR.CA : 1-888-8BESTAR (1 888 823-7827)
Certified
MODEL
:
60510-2163
TUSCANY BROWN :
WWW.BESTAR.CA : 1-888-8BESTAR (1 888 823-7827)
60510-2139
WWW.BESTAR.CA : 1-888-8BESTAR (1 888 823-7827)
40
:
BORDEAUX :
:
ASSEMBLY
INSTRUCTIONS
INSTRUCTIONS
D’ASSEMBLAGE
INSTRUCCIONES DE
ENSAMBLAJE
Advertisement

Related Manuals for Bestar 60510-2163


Summary of Contents for Bestar 60510-2163
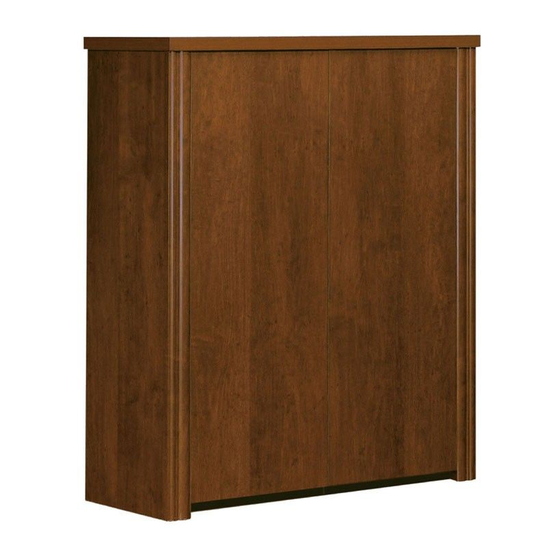
- Page 1 MODEL 60510-2168 60510-2163 TUSCANY BROWN : CAPPUCCINO CHERRY : WWW.BESTAR.CA : 1-888-8BESTAR (1 888 823-7827) WWW.BESTAR.CA : 1-888-8BESTAR (1 888 823-7827) 60510-2139 BORDEAUX : WWW.BESTAR.CA : 1-888-8BESTAR (1 888 823-7827) ASSEMBLY INSTRUCTIONS INSTRUCTIONS D’ASSEMBLAGE INSTRUCCIONES DE ENSAMBLAJE Certified...
- Page 2 Thank you for choosing a BESTAR product. Your total satisfaction is our #1 priority. Customer Service and warranty information do not call to the place of purchase Please call our customer service department for immediate assistance using the following toll free number: www.bestar.ca...
- Page 3 / PIÈCES / PIEZAS HC41E / moulure / moldura HC42E HC70E 2” x 35 7/16” (51mm x 900mm) / dos / panel trasero BB81C 13” x 29 1/4” (330mm x 742mm) / QUINCAILLERIES / QUINCALLA CA-99 H-03 ST-614 VR-207 1/2” (13 mm) CA-100 H-36 ST-760...
- Page 4 NOTE IMPORTANTE / NOTA IMPORTANTE Assurez-vous de bien remplir l’autocollant. / Asegúrese de completar correctamente la etiqueta. MODEL 00000-0000 COLOR : WWW.BESTAR.CA : 1-888-8BESTAR (1 888 823-7827) Pour mieux vous servir! ASSEMBLY INSTRUCTIONS INSTRUCTIONS D’ASSEMBLAGE / Modèle: INSTRUCCIONES DE ENSAMBLAJE Numéro de production:...
- Page 5 INSTALLATION DES QUINCAILLERIES / INSTALACIÓN DE LAS QUINCALLAS Cabinet 2 portes / Gabinete 2 puertas BB81C BB81C / ASSEMBLAGE / ENSAMBLAJE tremper dans l’eau tremper dans l’eau poner en remajo el algua poner en remajo el algua BB81C BB81C moulures / molduras 2”...
- Page 6 INSTALLATION DES QUINCAILLERIES / INSTALACIÓN DE LAS QUINCALLAS Cabinet 2 portes / Gabinete 2 puertas BB81C Retirez le papier sur seulement une des faces du RU-420. Retire el papel de sólo uno de los costados del RU-420. BB81C BB81C H-03 H-36 RU-420 Service...
- Page 7 INSTALLATION DES QUINCAILLERIES / INSTALACIÓN DE LAS QUINCALLAS Cabinet 2 portes / Gabinete 2 puertas Séquence d’assemblage Secuencia de ensamblaje Pièces Piezas: / moulures / molduras moulures / molduras 2” x 35 7/16“ (51 mm x 900 mm) Séquence d’assemblage Secuencia de ensamblaje Pièces Piezas: / moulures / molduras...
- Page 8 PRÉ-ASSEMBLAGE / PREENSAMBLAJE Cabinet 2 portes / Gabinete 2 puertas Séquence d’assemblage Secuencia de ensamblaje Pièces Piezas: CH-840 VR-212 Service...
- Page 9 INSTALLATION DES QUINCAILLERIES / INSTALACIÓN DE LAS QUINCALLAS Cabinet 2 portes / Gabinete 2 puertas HC41E HC70E H-03 H-36 GO-88 RO-95 VR-207 Service...
- Page 10 PRÉ-ASSEMBLAGE / PREENSAMBLAJE Cabinet 2 portes / Gabinete 2 puertas Assemblez sur le côté Realice el ensamblaje sobre la parte lateral deux personnes sont requises pour assembler et déplacer ce modèle. se necesitan dos personas para Séquence d’assemblage ensamblar y desplazar este mueble. Secuencia de ensamblaje Pièces Piezas: HC41E...
- Page 11 INSTALLATION / INSTALACIÓN Dos / Panel trasero Séquence d’assemblage Secuencia de ensamblaje Pièces Piezas: dos panel trasero panel trasero 13“ x 29 1/4” (330 mm x 742 mm) surface non-finie superficie sin acabado panel trasero 13“ x 29 1/4” (330 mm x 742 mm) serrez apretar VC-204...
- Page 12 INSTALLATION / INSTALACIÓN Dos / Panel trasero La vis fournie avec le dispositif anti-bascule est destinée à fixer le dispositif dans le meuble. Pour la fixation au mur, compléter par une vis adaptée (non-inclue) au support mural. En cas de doute, contacter un magasin de bricolage. El tornillo que viene incluido con el soporte antivuelco está...
- Page 13 INSTALLATION / INSTALACIÓN Cabinet 2 portes / Gabinete 2 puertas deux personnes sont requises pour assembler et déplacer ce modèle. se necesitan dos personas para ensamblar y desplazar este mueble. Retirez le papier du RU-420. Retire el papel del RU-420. Alignement en profondeur : Aligner l’arrière du cabinet 2 portes avec l’arrière du classeur latéral.
- Page 14 INSTALLATION / INSTALACIÓN Tablette / Estante HC42E HC42E non-inclus no se incluye TI-365 Service...
- Page 15 INSTALLATION / INSTALACIÓN Portes / Puertas non-inclus no se incluye Service...
- Page 16 INSTALLATION / INSTALACIÓN Portes / Puertas Utilisez la vis A pour l’ajustement horizontal, les vis B pour l’ajustement en profondeur et les vis C pour l’ajustement vertical. Utilice el tornillo A para realizar el ajuste horizontal, los tornillos B para el ajuste de profundidad y los tornillos C spara el ajuste vertical.
- Page 17 INSTALLATION / INSTALACIÓN Pour mieux vous servir en cas de besoin, veuillez compléter et apposer l’auto collant dans un endroit facilement accessible tel que le dessous de la pièce HC41E. Para uno mejor servicio en caso de necesidad, ponar la etiqueta en uno lugar de fácil acceso como por ejemplo la parte inferior de la pieza HC41E.
- Page 18 / Note / Nota Lorsque vous avez complété l’assemblage de votre meuble, installez les capuchons de plastique Una vez que haya completado el ensamblaje del mueble, coloque los capuchones de plástico 23/32” 18mm 3/32” 2,5mm / Entretien du produit / Mantenimiento del producto Évitez d'exposer le meuble au soleil ou près de toute source de chaleur.
-
Page 19: Problems And Solutions
It is very important to install the hinges and hinge plates on the correct parts while respecting the instruction manual. For the installation and adjustment of the doors, please refer to your instruction manual or log on to the BESTAR internet site (www.bestar.ca). - Page 20 The new logo shows an open and radiant person. It also evokes the past of BESTAR, the fact that we were the first manufacturer of ready-to-assemble furniture to design U-Shape furniture. Finally, if you take the logo in its simplest form, it shows that BESTAR is there for its employees, for its customers...
Need help?
Do you have a question about the 60510-2163 and is the answer not in the manual?
Questions and answers