Table of Contents
Advertisement
Advertisement
Table of Contents

Related Manuals for AMA Instruments GC 5000 Series

Summary of Contents for AMA Instruments GC 5000 Series
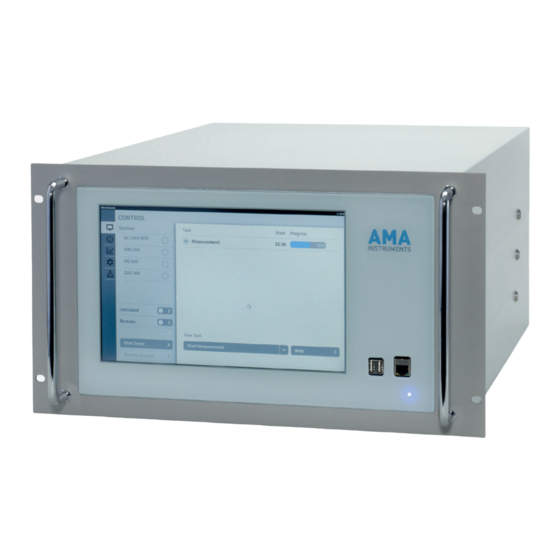
- Page 1 OPERATING MANUAL Gas Chromatograph – GC 5000 Series...
- Page 2 Address of manufacturer: AMA Instruments GmbH Soeflinger Straße 100 89077 Ulm, Germany +49 731 933-2100 Fax +49 731 933-2110 Imprint: Operating Manual GC 5000 Series Version 6.0; English Date: 09/2014...
-
Page 3: Table Of Contents
Table of Contents Page Information for the owner …………………………………………………... 4 How to use the manual ……………………………………………………………… 4 Specific normal operation …………………………………………………………… 4 Delivery information …………………………………………………………………. 5 Standard and regulations …………………………………………………………… 6 Declaration of conformity …………………………………………………………… 6 Copyright ……………………………………………………………………………… 7 Service address ……………………………………………………………………… 7 Hazard Information …………………………………………………………………... - Page 4 Page Starting operation …..…………………………………………………………..… 37 How to start measurement…………………………………………………………. 37 How to adjust the retention time windows………………………………………… 41 How to stop measurements ………………..……………………………………… 43 Calibrating and validating ..……………………………………………………… 44 Calibration ..…………………..……………………………………………………... 44 8.1.1 Calibration intervals .……..………………………………………………….……… 44 8.1.2 Calibration setup ……………………………………………..……………….…….. 44 8.1.3 How to start a calibration…………………………….……………………………...
- Page 5 Page 13.0 Spare parts list …………………………………………………………………….. 88 14.0 Warranty ……………………………………………………………………………. 89 15.0 GESYTEC-II protocol ……………………………………………………………... 90 15.1 Telegram definitions…………………………………………………………………. 90 15.2 Status request MZ…………………………………………………………………… 90 15.3 Status response ZM…………………………………………………………………. 91 15.4 Data request DA ..…………………………………………………………………… 92 15.5 Data response AD…………………………………………………………………… 92 15.6 Control command ST ……………………………………………………………….
-
Page 6: Information For The Owner
Information for the owner 1.1 How to use the manual Caution! Please read this manual carefully before starting with operation. The manual will provide you with information on using, installing, operating and maintaining this unit. It ensures proper functioning and helps you to operate the device more easily and efficiently. -
Page 7: Delivery Information
Note! In case one of the indicator labels is red or both, note it on bill of lading, inspect the shipment for damage and inform AMA Instruments within 10 days after arrival at latest. The scope of delivery is corresponding to the relevant purchase contract and is shown on the documents enclosed with the shipment: 3. -
Page 8: Standard And Regulations
Harmonized standards EN 61326 and EN 61010 In accordance with the named above EC directives, the EC Declarations of Conformity are kept available for the relevant Authorities by AMA Instruments GmbH Soeflinger Strasse 100 D-89077 Ulm / Germany If this product is used outside the European Union, the standards and regulations valid in the owner’s country must be observed. -
Page 9: Copyright
1.6 Copyright The reproduction, transmission or use of this document or its contents is not permitted without express written authority. Technical data are subject to change. All rights are reserved by AMA Instruments GmbH, Ulm, Germany. 1.7 Service address If you require further information, which are not treated in sufficient depth in this document or in case of malfunction, please contact your local supplier. -
Page 10: Hazard Information
Hazard information 2.1 General hazard information Please observe the following notes to safeguard against damage to the system described as well as to any systems which may be connected to it. Safety information and warnings are given particular emphasis in this manual by means of various symbol terms defined below. -
Page 11: Responsibility Of The Operator
2.2 Responsibility of the operator The analyzer described can only be used for applications which are described in chapter 3.1. to 3.3. For operation of the systems, the technical data described in chapter 3.4 must be observed. The analyzer described in this manual has been designed, manufactured, inspected and documented in compliance with the relevant safety standards. -
Page 12: Product Description - Technical Specifications
Product description - technical specifications The GC 5000 series has been developed for continuous monitoring of organic compounds in air and gas streams. Depending on the application requirements following models are available: GC 5000 PROCESS This instrument allows for monitoring of organic compounds in process and industrial installations at ppm levels. -
Page 13: Normal Use Of Gc 5000 Voc
Application The GC 5000 BTX analyzer is configured and calibrated ex factory with ex factory: your required standard application. This means that the equipment of the system is adapted specifically to the required measuring task. 3.2 Normal use of GC 5000 VOC The AMA GC 5000 VOC has been developed for the continuous monitoring of emission and immission levels of organic pollutants in ambient air in the range of C... -
Page 14: Hardware Description
electronics and can be controlled by the analyzer via internal bus communications. For these reasons the GC 5000 PROCESS covers a wide range of industrial and process monitoring applications. General range of applications: • Emissions monitoring • Continuous monitoring of waste air in drying and distillation plants •... - Page 15 Fig. 2: Rear view Fig. 3: Gas regulation inside the analyzer Operating Manual GC 5000; Version 6 English – Date 05/2014...
-
Page 16: Description Of Gc Components
Description of GC components 3.5.1 System control and watchdog System control is realized via a built-in PC board with Windows 7 and the AMA control software. Note The GC 5000 features a hardware watchdog. In case of a software crash or an operating system crash, the watchdog resets the internal PC. -
Page 17: Technical Data Gc 5000
3.6 Technical data GC 5000 General Case 19” plug-in case Height 6 height units Depth 600 mm Weight approx. 40 kg Ambient temperature 5° C to 35° C (if temp. exceeds this range, air conditioning is required) Humidity 5% to 95% relative humidity, non-condensing CE-marking, conformity with EMC guideline 2004/108/EG Instrument supply Voltage... - Page 18 GC oven Oven liner Stainless steel Internal dimensions H 55 mm x W210 mm x D 210 mm Analytical column Fused silica capillary, length up to 60 m Heating Forced air Temperature range 40° C to 210 ° C Temperature control Closed loop PID, set point resolution 1°...
-
Page 19: Options
Options 3.7.1 Calibration gas selector (optional) The AMA GC 5000 can be equipped with two different calibration gas supplies. 1. Calibration gas generator: The analyzer is equipped with a communication interface to external gas generators. 2. Calibration gas cylinders: Fig. 4: Gas flow scheme of the calibration gas selector Optionally the analyzer can be equipped with a valve array for the selection of different sources of sampling. -
Page 20: Optional Modules (Accessories For Gc 5000)
3.7.3 Optional Modules (Accessoiries for GC 5000) 3.7.3.1 Dilution Calibrator – DIM 200 Microprocessor The DIM 200 provides calibration gas at specified concentration levels for controlled gas precise calibration of monitoring devices. The calibration gas is generated calibration by diluting a source calibration gas with zero gas (e.g. nitrogen or purified air). - Page 21 Operation Module set-up Menu-driven user interface for manual set-up and operation DIM 200 control software for convenient module set-up optionally available Display Large and back-lighted LCD display to indicate module status level and dilution factors Data entry Touch panel (4 keys) Operation modes Manual operation, remote control via digital I/O’s, remote control by any AMA monitoring device via bus communication...
-
Page 22: Zero Air Generator Zag 300
3.7.3.2 Zero-air generator – ZAG 300 The ZAG 300 generates laboratory grade purified air for operation of GC- FID equipment or to be used as zero-gas for system validation or calibration of online GC systems or other analytical instrumentation. The system will generate purified air from an existing oil-free compressed air supply by catalytic removal of hydrocarbons. -
Page 23: Hydrogen Generators - Hg 300 And Hg 500
3.7.3.3 Hydrogen generators – HG 300 and HG 500 The HG 300 and the HG 500 series of 19” hydrogen generators offer high performance and reliable operation even under harsh operating conditions, such as in industrial installations. Utilizing field proven PEM cell technology, hydrogen is produced from deionized water on demand only. - Page 24 Technical data HG 300 and HG500: General Case 19” plug-in case Height 4 height units Depth 460 mm Weight 15 kg to 24 kg, depending on version / flow rate Ambient temperature 5° C to 35° C Humidity 5% to 80% relative humidity, non-condensing CE-marking, conformity with EMC-guidelines 2004/108/EC Electrolysis cell PEM electrolysis cell, does not require caustic solutions to operate...
-
Page 25: Installation
Installation 4.1 Safety Instructions Warning! Electrical parts apply voltage while in use. Disregard may result in death, physical injury or damage to property. Therefore make sure that the housing of the GC 5000 is closed before switching on. Caution! Hydrogen is combustible and explosive. Therefore avoid wrong gas connections. -
Page 26: Installation Condition
Note Electrical connections are displayed on the type plate on the rear panel of the system. 4.2 Installation conditions An appropriate location for installation of the GC 5000 should be vibration- free as far as possible. The system is suitable to run in measurement cabinets or containers. -
Page 27: Electrical Connections
Caution! Use nitrogen 5.0 (99.999%, GC grade quality) as carrier gas and hydrogen 5.0 as combustion gas. Make sure that the combustion air is dry and free of oil traces. Pure gases prevent the system from contamination. Electrical connections For stand alone operation the analyzer requires an electric mains connection. -
Page 28: Start Up And Shut Down
Start up 5.1 Safety instructions Warning! Please read following operating instructions carefully before starting operation. Warning! Electrical parts apply voltage while in use. Disregard may result in death, physical injury or damage to property. Therefore make sure that the housing of the GC 5000 is closed before switching on. Caution! Hydrogen is combustible and explosive. -
Page 29: Start Up Instructions
Note Follow the start up instructions in the mentioned order. Disregard may result in a detector ignition alarm or a carrier gas alarm and the analyzer is not ready for operation. 5.2 Start up instruction • Pressure of nitrogen: approx. 3 bar. (if used as carrier gas) pressures •... - Page 30 Warning! Electrical parts apply voltage while in use. Disregard may result in death, physical injury or damage to property. Therefore make sure that the housing of the GC 5000 is closed before switching on. Note! After switching on the analyzer, it is possible that the enrichment tube heats up to 230°...
-
Page 31: Decommissioning
5. 3 Decommissioning How to put the analyzer out of operation in case of repair or transportation: 1. Stop the time program. But do not close the gas lines! 2. Wait until the GC oven has cooled down to 50 ° C. 3. -
Page 32: Setting Up The Gc 5000 Software
Setting up the GC 5000 Software The AMA control software consists of three parts, the hardware server, the measurement server and the graphical user interface (GUI). You can leave the two servers in the backgrounds. All interaction with the GC is done with the GUI. -
Page 33: Status Tab
Colored circle The colored circles on the right of the name of the device indicate the indicates the statuses of the devices: status Green A green check mark means that the device runs error-free and it is ready to start. Yellow A yellow exclamation point means that the device is still not ready or there is a problem. -
Page 34: Events Tab
In this screen the set points and current values of all parameters are displayed. Here you can check the easiest which parameter did not yet reach its set point when the status is still yellow after switching on. The other items of the tab menu (validation and calibration) are described later in chapter 8. -
Page 35: How To Unlock - Password Protection
6.4 How to unlock – Password protection To avoid an unauthorized access to the parameter editors the AMA control software is equipped with a password protection. Tab bar → → → → Unlock icon Password protection 1. “Unlock” has to be activated before parameters can be saved. The following window will pop up: 2. -
Page 36: Control Modes
6.5 How to select control modes Tab bar Monitor icon Local control / Remote control The GC 5000 can be operated in two different control modes: 1. Local control Here you have two choices: After selecting “Start measurement” in the pull-up menu the analyzer performs one run and waits for the next click onto the “Start”... - Page 37 The following charts show the configuration of the data bytes which can be Protocol bytes sent from the GC 5000 BTX via the Gesytec II protocol. Control byte Start sampling Zero gas on (calibration gas 1) Span gas on (calibration gas 2) Not used Not used Not used...
- Page 38 Tab bar Monitor icon Local control Service mode The service mode has to be activated before doing maintenance work while the analyzer is operating. Then the analyzer does not accept any control commands from the main computer of the monitoring station. In this case controlling is only possible by the analyzers software but results and status are still transmitted.
-
Page 39: Starting Operation
Starting operation The required application for your analyzer is already configured by AMA Instruments. So there is no need to develop a method for operation. 7.1 How to start measurements Tab bar Monitor icon Start … 1. Open the pull-up menu and select “Start measurement” for a single run or “Start time program”... - Page 40 4. Enter the time for the start in the 24 hours format, i.e. 18 o’clock means 6 o’clock pm. The analyzer waits until this time and then starts the cycle. Monitoring of Tab bar Gauge icon Overview measurement You can monitor the current program step in the status tab of the AMA control software after the analyzer has started: When the injection starts, the GC temperature program and acquisition of chromatogram start as well.
- Page 41 Tab bar Diagram icon Results After the chromatogram is completed, you can see the results: Tab bar Diagram icon Time series Here you can see diagrams of the concentration gradient for four weeks. Select the components for the diagrams from the pull-down menus. Operating Manual GC 5000;...
- Page 42 Tab bar Diagram icon Chromatograms Here you can load already acquired chromatograms: Operating Manual GC 5000; Version 6 English – Date 05/2014...
-
Page 43: How To Adjust The Retention Time Windows
7.2 How to adjust the retention time windows If you find “0.00” or “---“ results although the peaks are present in the chromatogram, the retention time windows are not at the correct position and have to be adjusted. 1. Tab bar Gear wheels icon Retention times Note: You should have recorded at least three chromatograms to make... - Page 44 Then select a peak by clicking onto the corresponding retention time window. You can modify the retention time or window width by clicking onto the arrow keys or by editing the numeric values between the arrow keys. If the view of the peak is too small, you can zoom by clicking the “+” keys or by dragging a box around the area to zoom with the mouse.
-
Page 45: How To Stop Measurements
7.3 How to stop measurements Tab bar Monitor icon Stop When you want to stop the running time program, you have three possible choices: • Stop immediately. Then running program steps and the GC temperature program are immediately stopped. • Stop after the current run. Then running program steps and the GC temperature program continue and are completed but the GC 5000 will not start another cycle. -
Page 46: Calibrating And Validating
Calibrating and validating the GC 5000 Calibration 8.1.1 Calibration intervals A GC 5000 needs to be calibrated from time to time. It depends on the stability of the detector: Note Calibration intervals for GC 5000: By using a FID detector a three month interval is sufficient, with a PID detector a calibration interval once a month is recommended. - Page 47 Click onto “Edit” to modify the calibration setup. Then a new window pops 1. Select the span gas source for all levels. The options are depending on installed hardware (if calibration valves or a DIM 200 are present). 2. You cannot modify the span gas dilution if you do not have a DIM 200. 3.
-
Page 48: How To Start A Calibration
1. Select “DIM 200” as the span gas source for all levels. 2. Enter the span gas dilutions for each calibration level. 3. Enter the concentrations for the span gas. You cannot enter concentrations for any component for a calibration level. These values are calculated automatically from the span gas concentrations and the dilutions. - Page 49 If neither calibration valves nor a DIM 200 is installed, you can start a manual calibration. Tab bar Monitor icon Guided/manual calibration Then a new window pops up: In this window you can select if you want to calibrate a single level or if you want to calibrate all levels.
- Page 50 If you do not have any calibration valve, you have to connect the calibration gas to the sample input. If you have one calibration valve, you have to connect the calibration gas to the calibration gas input. If you have the calibration gas selector with two calibration valves and a bypass valve, you have to connect the calibration gas to the calibration gas 1 input for level 1 and to the calibration gas 2 input for level 2 or higher.
- Page 51 Normally you should see the successful result: Operating Manual GC 5000; Version 6 English – Date 05/2014...
-
Page 52: Check The Results Of The Calibration
Note Samples connected to the sample input of the GC 5000 have to be provided pressure-less. If you want to connected gas from a gas cylinder, you have to also install a T-fitting with an open end as a bypass output. Use a pressure regulator with a needle valve on the gas cylinder and adjust the calibration gas flow to 70 ml/min or more (The analyzer has a maximum sample flow of 50 ml/min). - Page 53 If you see here that a peak is outside of its retention time window, close this window and adjust the retention time windows by Tab bar Gear wheels icon Retention times as described in chapter 7.2. After adjustment click “Recalculate calibration” in the second last screen.
- Page 54 If you still have a bad calibration function, although all function values all calibration values are present: You can disable the use of single runs for the calculation of the calibration function. Select “Remove outliers” and a new window is opened: If you see that the results of one calibration run have an abnormal high distance from the calculated calibration function, you can deselect this run and the results of this run are not used for the calculation of the calibration...
- Page 55 Here you can see that after the removal of the outlier, the calibration function is ok. Operating Manual GC 5000; Version 6 English – Date 05/2014...
-
Page 56: Validation
Validation 8.2.1 Principle of validation Definition A validation is a run with zero gas and /or a span gas in order to check the drift, repeatability and/or memory effects. The run is treated as a regular sample, i.e. no new calibration data will be produced. -
Page 57: Validation Setup
8.2.3 Validation setup Configure the type of tests the system should do: Tab bar Gear wheels icon Validation Here you see the setup for validations. Click onto “Edit” to modify the setup. Then a new window pops up: Operating Manual GC 5000; Version 6 English – Date 05/2014... - Page 58 3 types of validation tests Zero gas check It checks for memory effect or contamination Drift check It checks for a deviation between the original span value and the current span value Deviation check It checks for a deviation between two current span values 1.
-
Page 59: How To Start Validation
8.2.4 How to start a validation How to run an initial validation: Run initial validation TAB bar Run validation Start initial validation Note Before running a drift check for the first time, an initial validation has to be performed. It is also necessary to run an initial validation after each calibration. -
Page 60: Check The Validation Status
8.2.5 Check the validation status When the calibration has finished, you can check the results by Tab bar Gauge icon Validation The results of validations are displayed in this tab. A green background means that the value is below the warning level. A yellow background means that the value is below the error level but above the warning level. -
Page 61: Time Program
Time program If the GC 5000 should do continuous measurements after a specified cycle time and the GC 5000 is not controlled via the Gesytec II protocol, you can setup a time program. 9.1 How to setup the time program Tab bar Gear wheels icon Measurement... -
Page 62: How To Start The Time Program
In this window you see the timing and task selections. First click the “+” button and select a task. Then select a timing option. You have the choice from daily, weekly, monthly, after a number of cycles, after a power failure or after a drift check warning. - Page 63 2. If you click on “Yes”: The cycle immediately starts. 3. If you click on “00:00” a new input window appears: 4. Enter the time for the start in the 24 hours format, i.e. 18 o’clock means 6 o’clock pm. The analyzer waits until this time and then starts the cycle.
-
Page 64: Functional Description
Functional description This chapter refers especially to personnel who is in charge of maintenance work or applications. 10.1 Measuring principle BTX The AMA BTX Analyzer is a system for automatic sampling, enrichment and GC analysis. The measurement is based on the principle of adsorption of compounds on special materials in an enrichment tube, thermal desorption and detection of the organic compounds with the help of a FID or a PID detector after separation on a capillary column. -
Page 65: Measuring Principle Voc
4. Separation by gas chromatography and Analysis of data: A gas chromatographic capillary column is used to separate the sampled objects. The separated compounds are detected by a FID or a PID. The measured peak areas can be compared with the function of calibration. - Page 66 3. Desorption with sample transfer to the focusing tube: After sampling, the enrichment tube is heated and the adsorbed materials are flushed onto the focusing tube. 4. Injection: After sample transfer the focusing tube is heated in a very fast way and the adsorbed materials are vaporized again and flushed onto the capillary column of the gas chromatograph module.
-
Page 67: Measuring Principle Process
10.3 Measuring principle Process The AMA Process Analyzer is a system for automatic sampling, injection and GC analysis. The measurement is based on the principle of injection of a definite sample volume onto a GC column and detection of the organic compounds with the help of a FID or a PID detector after separation. -
Page 68: Maintenance
Maintenance 11.1 Security instructions Warning! Electrical parts apply voltage while in use. Disregard may result in death, physical injury or damage to property. Disconnect the GC 5000 from the power supply before starting with maintenance. Warning! The enrichment tube is normally heated to 230° C (up to 300° C). Disregard may result in third-degree-burns. -
Page 69: Maintenance Schedule
On a preventive maintenance basis we recommend to replace the following components at regular intervals. Maintenance work shall only be done by AMA Instruments or by authorized maintenance personnel, i.e. authorized for maintaining and repairing this kind of systems and electrical circuits in accordance with accepted technical safety standards. -
Page 70: Maintenance Work
11.3 Maintenance work 11.3.1 Exchange the enrichment tube (BTX) Warning! The enrichment tube is normally heated to 230° C (up to 300° C). Disregard may result in third-degree-burns. Wait until the tube has cooled down! How to remove the old tube and mount the new one: Disconnect the thermocouple plug of the enrichment tube. -
Page 71: Maintenance Of The Pump
11.3.2 Maintenance of the pump The built-in pump is absolutely maintenance free. If the membrane is abraded (the flow rate will drop dramatically) the complete pump has to be exchanged. 11.3.3 Exchange the input filter of the MFC To protect the MFC from dust or other small particles a filter is mounted in front of the MFC. -
Page 72: Exchange Or Repair The Capillary Column
11.3.4 Exchange or repair the capillary column Warning! Electrical parts apply voltage while in use. Disregard may result in death, physical injury or damage to property. Disconnect the GC 5000 from the power supply before starting to exchange the capillary column. Note The column is fragile. - Page 73 How to prepare and cut a capillary column in the right way: 1. Cut the ends square with none of the polyimide coating projecting beyond the ends. 2. Inspect the ends with a 20X magnifier to make sure the cut is square. 3.
-
Page 74: Adjust The Detector Signal
11.3.5 Adjust the detector signal Adjust the level of the detector base signal: 1. Turn the trimmer in the upper left corner of the detector amplifier case. 2. Adjust the base signal level after warm up of the system in such a way, that the signal is <100mV when the detector is off and >... -
Page 75: Check The Thermocouples
11.3.8 Check the thermocouples Warning! Electric parts apply voltage while in use. Disregard may result in death, physical injury or damage to property. Disconnect the GC 5000 from the power supply before starting to check the thermocouples. Caution! There can be a wrong temperature measurement because of different electrical potential. -
Page 76: Exchange Of The Pid Lamp
11.3.10 Exchange of the PID lamp Warning! Electrical parts apply voltage while in use. Disregard may result in death, physical injury or damage to property. Shut down and switch off the GC 5000 and disconnect it from the power supply before starting to exchange the PID lamp. -
Page 77: Clean The Pid Lamp Window
11.3.11 Clean the PID lamp window 1. Demount the PID as described in 13.3.9. 2. Use a particle-free wipe and dry methanol to clean the lamp window. 3. Mount the PID again as described in 13.3.9. 11.3.12 Exchange the rotor of the rotary valve Warning! During the exchange of the valve the GC 5000 has to be switched on as the valve can be turned. - Page 78 How to exchange the rotor of the rotary valve: Turn off the carrier gas supply but let the GC 5000 switched on. Remove the cover of the valve oven. Loosen the set screw in the heater of the valve (Caution, hot!) and pull the heater off the valve.
-
Page 79: Exchange The Gc Oven Motor
11.3.13 Exchange the GC oven motor Note The column is very fragile. Handle it carefully and avoid hits while operating in the GC oven. Switch off the system, unplug the power cable and open the cover. Unlock the opening mechanism of the GC oven cover. Pull the locking knob and draw the cover to the right. -
Page 80: Exchange The Peltier Cooler Fan (Btx)
11.3.15 Exchange the Peltier cooler fan (BTX) Close the carrier gas supply. Remove the PVC cover. Unplug the thermocouple plug of the enrichment tube. Disconnect the power cable of the Peltier cooler. Demount the 1/8” nuts on both sides of the enrichment tube. Loosen the brass nuts on the ceramic isolators. -
Page 81: Exchange The Enrichment Or Focusing Tube (Voc)
11.3.17 Exchange the enrichment or focusing tube (VOC) Warning! The enrichment and focusing tubes are normally heated to more than 200° C. Disregard may result in third-degree-burns. Wait till the tubes have cooled down! How to remove the old tube and mount the new one: 13. -
Page 82: Exchange The Peltier Cooler Fan (Voc)
11.3.18 Exchange the Peltier cooler fan (VOC) 1. Close the carrier gas supply. Remove the PVC cover. Unplug the thermocouple plugs of the enrichment and focusing tubes. Disconnect the power cable of the Peltier cooler. Loosen the brass nuts on the ceramic isolators. Demount the 3/16”... -
Page 83: Troubleshooting
Advices to program errors. Errors Refer to serious hardware problems within the analyzer; contact AMA Instruments for maintenance as errors are not serviceable by the user. 12.1 General faults The list below refers mainly to general problems. The repair should be done by authorized trained personnel, respectively service technician. - Page 84 Fault Cause Detect and Repair Valve oven, GC 1. Fuse is broken. Check the corresponding fuses in the oven or detector is electronic control unit. not heating 2. Carrier gas pressure is below Check the carrier gas supply. minimum 3. The heater element is broken Exchange heater element.
-
Page 85: Error Messages
12.2 Error messages If an error occurs, it will be logged in the event list (Tab bar Attention icon). The repair should be done only by authorized trained personnel, respectively service technician who is able to read the English manual. Type of error Cause Detect and repair... - Page 86 Type of error Cause Detect and repair The carrier gas The carrier gas cylinder is 1. Exchange the carrier gas cylinder. pressure is below empty. minimum! The ignition of the 1. The gas flows are 1. Measure the gas flows at the corresponding needle FID is not possible! not adjusted properly.
- Page 87 4. The ignition voltage is too 1. Measure the ignition voltage at the white and the low. green/yellow wires at the white jack of the FID cable. (You have to press the ignition button before you can measure the ignition voltage for two seconds.) 2.
- Page 88 Type of error Cause Detect and repair Communication Built-in computer gets no Check if the cable between temperature controller and breakdown to connection to the temp- PC is disconnected. Check if the LEDs of the temperature controller. erature controller. temperature controller are flashing. Communication Built-in computer gets no Check if the cable between valve controller and PC is...
-
Page 89: Warning Messages
12.3 Warning messages There are two different warnings which may occur. A warning message advices to a small inconsistency in the program. Type of Warning Cause Detect and Repair The temperature of The cycle time is too short. 1. Adjust the time program setup. (see chapter the enrichment tube was too high at the start of sampling. -
Page 90: Spare Parts List
Spare parts list The list below contains the main components. They are necessary for maintenance which will be performed on a preventive basis. Component Art.-No Back panel fan (BTX and Process) 1253 BTX enrichment tube (only BTX) Fan of the Peltier cooler (only BTX) GC column (standard BTX) 1310 GC oven motor... -
Page 91: Warranty
Warranty The warranty for the system lasts 12 month (referring to the date of delivery). 1. The warranty covers only faulty material and workmanship. Repairs necessitated by improper handling or improper transportation are not subject to the warranty. 2. The warranty does not cover moveable parts and wear parts like the Valco valve and the pump, commodities like adsorption tubes, glow plugs etc. -
Page 92: Gesytec-Ii Protocol
Gesytec-II protocol 15.1 Telegram Definitions All telegrams of the Gesytec-II protocol are listed below. Telegrams with the same identifications as in the Gesytec (Bayern-Hessen) protocol have partly different contents. Therefore you should always work with the complete documentation to avoid any confusion. For a better understanding in the following telegrams: Telegram control characters are enclosed in <>... -
Page 93: Status Response Zm
15.3 Status response ZM Telegram identification: Telegram length: Variable Telegram type: Response Brief description: Status of the monitoring instruments as reply to Field no. Start byte Data format Field description <STX> Start of text Length byte Telegram identification Number of monitoring instruments to transmit data Monitoring instrument ID instrument 1... -
Page 94: Data Request Da
15.4 Data request DA Telegram identification: Telegram length: Variable Telegram type: Command Brief description: Data request of the monitoring station Field no. Start byte Data format Field description <STX> Start of text Length byte Telegram identification Monitoring instrument identification (optional) <ETX>... - Page 95 Field no. Start byte Data format Field description Serial number Monitoring instrument ID instrument 4 (optional) Measured value ±nnnn±ee Operating status Error status Serial number Monitoring instrument ID instrument 5 (optional) Measured value ±nnnn±ee Operating status Error status Serial number Monitoring instrument ID instrument 6 (optional) Measured value...
-
Page 96: Control Command St
15.6 Control command ST Telegram identification: Telegram length: Telegram type: Command Brief description: Output control words to a monitoring instrument of the monitoring station. Only one monitoring instrument is addressed. Field no. Start byte Data format Field description <STX> Start of text Length byte Telegram identification... -
Page 97: Appendix
15.8 Appendix Protocol bytes of the AMA Instruments GC5000BTX The following charts show the configuration of the data bytes which can be sent from the AMA GC 5000 BTX Analyzer via the “Gesytec-II” protocol. Control byte Start sampling Zero gas on (calibration gas 1) -
Page 98: Analog Outputs
Analog outputs 16.1 Analog outputs connection If you have the optional 6 or 12 4-20mA outputs installed in your GC, you have to connect them to the data logger like shown in this scheme. Operating Manual GC 5000; Version 6 English – Date 05/2014... -
Page 99: Analog Outputs Configuration
16.2 Analog outputs configuration The analog outputs are configured with the AMA Measurement System Manager. You find the program on the desktop in the folder GC5000\40_MeasSysMgr. In this window you see the selected components, the minimum concentrations (assigned to 4mA) and the maximum concentrations (assigned to 20mA).If you want to activate more channels or modify the minimum or maximum values for the concentrations, you can do this by clicking “Edit”. - Page 100 You can select components from the pull-down menu. You can enter concentration values in the corresponding fields in the concentration columns. When you are finished, click “OK” and the new settings are used. Operating Manual GC 5000; Version 6 English – Date 05/2014...
-
Page 101: Digital I/O
Digital I/O 17.1 General If you have a board with digital inputs and outputs in your analyzer, you can remote-control the analyzer via the digital inputs and read the analyzer’s status and alarms via the digital outputs. The following scheme shows how to connect the inputs and outputs correctly: Operating Manual GC 5000;... -
Page 102: Digital Outputs
17.2 Digital outputs 1. Alarm 1 – 4 These four outputs are for high alarms or low alarms for monitored components. The alarm outputs are configured with the AMA Measurement System Manager. You find the program on the desktop in the folder GC5000\40_MeasSysMgr. - Page 103 3. GC not ready This output is high while the GC is not ready for a new start. 4. System alarm This output is high while the system has an error. 5. Local control / Service mode This output is high while the system is under local control. 6.
-
Page 104: Digital Inputs
17.3 Digital inputs You have to set an input to low signal for at least two seconds to send a control command securely. 1. Start sample You can start a measurement with this input. 2. Start zero gas check You can start a zero gas check with this input. 3. -
Page 105: Digital Outputs For External Calibrators
Digital outputs for external calibrators If you have the optional calibration valve with the two digital outputs, you can remote-control an external calibrator in a way that the calibrator is automatically switched to zero gas or span gas when needed. The following scheme shows how to connect the inputs and outputs correctly: Operating Manual GC 5000;...
Need help?
Do you have a question about the GC 5000 Series and is the answer not in the manual?
Questions and answers