La Marzocco linea Manual
Hide thumbs
Also See for linea:
- Manual (112 pages) ,
- Technical bulletin (1 page) ,
- Installation manuallines (1 page)
Table of Contents
Advertisement
manual
linea
fb70
&
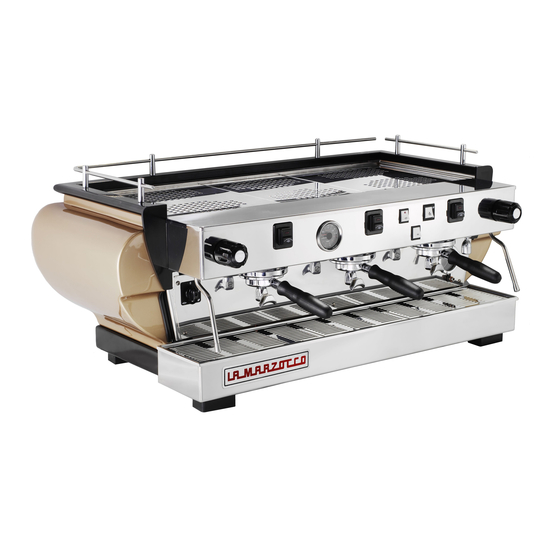
The Linea's straight lines and simple charm occupy many cafes,
roasters and chains, whose names define the industry. The Linea
is the classic La Marzocco machine that has long supported and
helped to develop the specialty coffee industry since the 1990s.
It is a heavy duty workhorse that performs reliably in the highest
volume settings. Tried and true machine, the Linea is perfect for
your new cafe, bar, or restaurant.
Advertisement
Table of Contents

Subscribe to Our Youtube Channel
Related Manuals for La Marzocco linea


Summary of Contents for La Marzocco linea
- Page 1 La Marzocco machine that has long supported and helped to develop the specialty coffee industry since the 1990s. It is a heavy duty workhorse that performs reliably in the highest volume settings. Tried and true machine, the Linea is perfect for your new cafe, bar, or restaurant.
-
Page 2: Table Of Contents
& Operating Manual V1.1 - 11/2014 Chapters 1. General Warnings and Safety Specifications page 2 La Marzocco S.r.l. page 4 2. Definition of Available Models Via La Torre 14/H Località La Torre 50038 Scarperia e San Piero 3. Installation... -
Page 3: General Warnings And Safety Specifications
1. General Warnings and Safety Specifications 5) Check to see that data on the rating that they are exclusively of the kind which WARNING plate correspond to those of the mains conforms to current safety regulations, THIS MACHINE IS FOR PROFESSIONAL USE electrical supply to which the machine will being careful not to exceed the power and ONLY AND SHOULD BE INSTALLED IN LOCA-... - Page 4 (as described in the preceding point) COMMON DIMENSIONS AND WEIGHTS FOR and close the water supply tap. Do not CAUTION attempt to repair it, and contact qualified THE LINEA SERIES AS ALREADY MENTIONED IN THE PRECEDING and authorized professionals. Any repairs LINEA 1 gr...
-
Page 5: Definition Of Available Models
2. Definition of Available Models This operating manual refers exclusively to the following models, of our own manufacture: EE Model, AV Model, PADDLE Model with 1, 2, 3 and 4 groups Legend Main Switch Hot water switch Group lever Water level sight glass Manual fill switch Steam knob Pressure gauge... - Page 6 General description 25’ approximately. Operating pressure used to hold the ground coffee; the The models AV, EE and PADDLE are built is maintained by a pressure switch. The espresso flows from the group, through in the 1, 2, 3 and 4 group versions and water boiler has various fittings used for a spout, into the cup(s) after the brewing are essentially composed of the following...
- Page 7 Legend Main Switch Water level sight glass Pressure gauge Coffee groups Coffee dispensing control panel (AV model) Cup warmer switch (non-UL machines) Hot water switch Manual fill switch Steam nozzle/wand Steam knob Hot water nozzle Manual brew switch General Description The AV model machine is built in the 1, 2, 3, and 4 group versions and is essentially composed of the same parts as EE model.
-
Page 8: Installation
3. Installation Legend 380/220/200 Volt cable 220/200 Volt cable Water tubing Drain tubing Main Switch Expansion valve Drain piping Group cover Terminal Bleed screw Motor pump PID Temperature Controller Filter outlet Switch (not provided) Filter inlet Plug (not provided) Connectors Drain wells not provided WARNING... - Page 9 MODELS “EE” “AV” and “PADDLE” → Single/Three phase 220VAC - 50/60 WARNING 1, 2, 3 and 4 groups Hz electrical connection with ground, HAZARDOUS VOLTAGE DISCONNECT FROM protected receptacle and approved circuit POWER SUPPLY BEFORE SERVICING 1) Accessories breaker Check the package to make sure that the →...
- Page 10 water supply line and the filtration system a) Power supply cord in order to eliminate any residual particles • This is the main power supply cable that which could otherwise get stuck in taps or provides power to the entire espresso valves thus preventing them from working machine.
-
Page 11: Machine Operation And Coffee Preparation
Connect the other end to a suitable waste 4. Machine Operation and Coffee Preparation water collection system. In case such a system is not available, and if Once installation has been completed, you inflowing water will compress the air in acceptable according to local regulations, can proceed to hook up the filter holders the boiler it will be necessary, in order to... - Page 12 2) STEAM BOILER the boiler itself switches on the heating CAUTION By turning the main switch (part 1) to elements in order to bring the water DO NOT REMOVE THE FILTER HOLDER WHILE position “1”, the automatic fill system contained in such boiler up to operating RELATIVE GROUP IS BREWING HOT LIqUIDS.
- Page 13 group from right to left (part 1) thus delivered onto the ground coffee, already allowing coffee to be brewed; when you set in the filter and the portafilter, which have obtained your desired amount of is measured through a water volume coffee, return the paddle handle back to control system, which is located above original position on the right-hand side,...
- Page 14 N.B. You may press the same button again in flow within the factory-set time of the The programs for the first group from the order to terminate coffee brewing before electronic module. left will become the default programs for 2. insufficient water flow through the its programmed stop.
- Page 15 GENERAL NOTIONS FOR PREPARING IMPORTANT high as 11-12 bar; this may occur any COFFEE time that, while activating the groups, The temperature of the water in the When the machine has reached its the motor pump forces cold water into coffee boiler, and therefore of the groups, operating pressure, 1.2 - 1.5 bar which the coffee boiler at a pressure of 8-9 bar...
-
Page 16: Pid Temperature Controller
5. PID Temperature controller Description Front display description: SV lamp Display Coffee boiler element Pilot light N.B. Auto-tuning/self-tuning lamp In 1,2,3 group machines the PID Controller is installed on left side. In 4 group machines on left and right side. PV: Process Value: measured temp Keys Keys... - Page 17 Basic operations How to set and display the values: Press the SEL key to display the value * For more detailed information on the potential of this device, consult the: PXR3_Fuji_Micro_controller_Manual.pdf One press to increase the value by 1. Press and hold this key to increase to For further assistance you may contact the After Sales Department: desired value then wait a few seconds to automatically exit programming function.
-
Page 18: Dispensing Steam And Hot Water
6. Dispensing Steam and Hot Water STEAMING MILK In order to prevent part of the liquid to DISPENSING HOT WATER be heated from being sucked back into In order to allow for any condensed water You can obtain hot water by using the the boiler (due to a possible temporary in the wand to be released ALWAYS allow fixed nozzle (fig. -
Page 19: Maintenance And Periodic Cleaning Operations
7. Maintenance and periodic cleaning operations • Make one cup of coffee in order to WARNING CAUTION remove any unpleasant flavour. NEVER REMOVE THE FILTER HOLDER WHEN THE MACHINE MUST BE INSTALLED SO THAT Cleaning the drain collector WATER IS BEING DELIVERED. THIS OPERATION qUALIFIED TECHNICAL PERSONNEL CAN CAN BE ExTREMELY DANGEROUS SINCE THE EASILY ACCESS IT FOR MAINTENANCE. - Page 20 remove it by unscrewing the retainer ply is connected) clockwise, or reduce it If the machine has not been used for screw, then soak in espresso detergent by turning the screw counter-clockwise. more than 8 hours or, in any case, after powder.
-
Page 21: Commissioning And Demolition
8. De-commissioning and demolition Start by setting the main switch (part 1) to Current regulations make it illegal to dis- the "0" position. card such machine by leaving it on public grounds or on any private property. Disconnecting from the power outlet In case the machine is connected through Recycling notice: the plug (part 24), make sure that the... -
Page 22: Mandatory Maintenance And Check-Up Operations
8. Mandatory maintenance and check-up operations These operations are in addition to the Maintenance and Periodic Cleaning Operations as specified in Chapter 7. The following maintenance and check-up operations sould be carried out by a qualified technician. N.B. These periodic maintenance operations are not covered by warranty. EVERY THREE MONTHS If MP Model: ▪...
Need help?
Do you have a question about the linea and is the answer not in the manual?
Questions and answers