
Related Manuals for Warmboard Warmsource


Summary of Contents for Warmboard Warmsource
- Page 1 0622 WARMBOARD COMFORT SYSTEM Installation Guide For use with Warmsource and Warmsource Flex natural gas boiler Warmsource and Warmsource Flex propane gas boiler...
-
Page 2: Table Of Contents
Install vent system in accordance with local Air Conditioning Page 17 codes and manufacturers instructions 6 Warmsource boilers require no programming or Do not place chemical vapor emitting Testing the System Page 18 commissioning, and water temperatures are products near the unit calibrated using our Indoor Reset algorithm. -
Page 3: Wcs Preparation
T&P, condensation line, water line) Drywall 24" x 36" WCS Engineered Drawings Insulate walls, floors (inside the Panel Installation Kit) Install Warmsource, then plumb in and fire up Drywall using “Construction Mode” Panel Installation Guide (inside the Panel Installation Kit) -
Page 4: Plumbing And Mechanical
Included, Pre-Plumbed Included, Not Pre-Plumbed WCS Design Drawings The following components are pre-plumbed inside The following are included with Warmsource Our WCS Design Drawings list all the necessary the Warmsource unit: but NOT pre-plumbed. Refer to the WCS Design plumbing and mechanical materials. Reference this Drawings for location and pipe sizing: document regularly. -
Page 5: Warmsource Specification
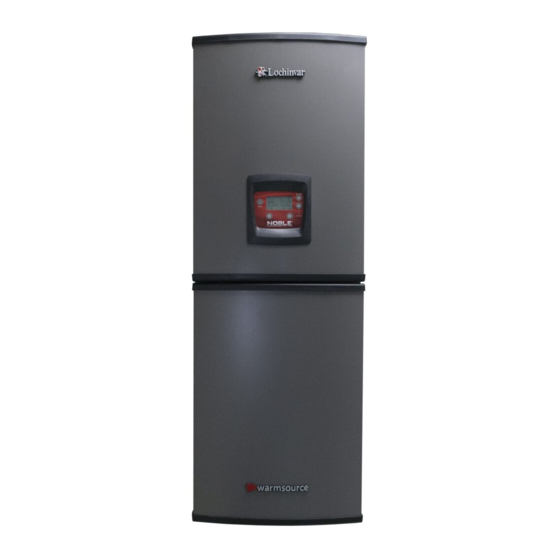
WARMSOURCE SPECIFICATION WARMBOARD COMFORT SYSTEM // GAS Front View Side View: 80K Side View: 110K, 150K, 199K Vent Vent Vent r Exhaust haust Air Exhaust 9" 9" 9" 9" 9" 9" Pressure Pressure Pressure Air Intake Air Intake Air Intake... - Page 6 1.800.556.0595 1 / 2 1 / 2 " " for assistance 1 / 2 " 1 / 4 1 / 4 " " 33" 3 / 4 1 / 2 " " Top View: 80K Top View: 110K Top View: 199K 110K 48"...
-
Page 7: Warmsource Preparation
Install Location Electrical Requirements 46"* Warmsource boiler: 160W Like all gas-fired boilers, Warmsource makes some • Warmsource pump: 30-165W (varies by heat load) noise and may be disruptive if installed near a 29"* 18" • Smart Reset Controller (SRC): 20W bedroom or common living space. -
Page 8: Warmsource Installation
Securely fasten the sleepers to the wall studs, then mount the bracket to the sleepers) Once the bracket is secured, use the lifting handles to place Warmsource on to the mounting bracket (the unit is very heavy and requires two individuals to move safely) -
Page 9: Warmsource Flex Specification
WARMSOURCE FLEX WARMBOARD COMFORT SYSTEM // GAS SPECIFICATION Front View Side View: 80K Bottom View: Air Exhaust Air Exhaust Air Vent Air Vent Pressure Pressure 9" 9" Relief Valve Relief Valve Air Intake mended when including distribution lines Air Intake en both units is not to exceed 48”... - Page 10 17" 1 / 2 " 1.800.556.0595 3 / 4 3 / 4 " " for assistance 1 / 2 1 / 2 " " 1 / 2 " 3 / 4 " 1 / 2 " 1 / 4 " 17"...
-
Page 11: Warmsource Flex Preparation
Use of a drain pan is recommended. section 1208.1) Electrical Requirements Warmsource boiler: 160W • Warmsource pump: 30-165W (varies by heat load) • Smart Reset Controller (SRC): 20W 48” (own 110V GFI outlet required for Warmsource unit) Manifold Controller (MC): 10W per loop... -
Page 12: Warmsource Flex Installation
Plumb the cold water line to the backflow Overflow Bypass preventer and the pressure reducing valve To Warmsource (WCS Design Drawings) Plumb Warmsource Flex to the boiler through 1 / 4 the 1 " supply and return copper connections (boiler fitting is 1" sweat) -
Page 13: Filling And Purging
FILLING & PURGING WARMBOARD COMFORT SYSTEM // GAS Propylene Glycol To fill Warmsource and the Manifold 1 loops Once the system is plumbed and pressure tested with with water (city or well supply), lift the fast fill lever air (T&M Installation Guide), the next step is to fill the... -
Page 14: Construction Mode
“Sensor 2” terminal. Use the white jumper for 100˚F water, the red jumper for 120˚F Step 3: Plug Warmsource into the 110 volt outlet and confirm the system is ON by viewing the LCD screen Connect Warmsource to an appliance timer to... -
Page 15: Manifold Cabinet
Manifold Controller (MC) and those displayed in your WCS Design Drawings. Controls Warmboard Controls consist of the following: 110 volt thermostats (one per heating zone) 110 volt Manifold Controller (one per manifold) 24 volt solenoid valve loop actuators... -
Page 16: Thermostats
THERMOSTATS 1.800.556.0595 for assistance Thermostat Installation Warmboard Comfort System offers 3 different types of thermostats: Every thermostat MUST be installed in the location Heating specified in the WCS Design Drawings. Failure to Controls the heat in one zone of the house do so will cause the system to behave inaccurately. -
Page 17: Air Conditioning
Connecting an AC system to WCS is very similar to wiring a 24v thermostat from an AC unit, just follow the steps below. Remove the front cover from Warmsource Locate terminal connection “AC1/Fan” on the Smart Reset Controller (SRC) -
Page 18: Testing The System
LCD should read between 90–140˚F (Manifold Controllers, actuators, thermostats) and choose “Tutorial” to familiarize yourself with Match the specifications in the Warmboard Design the controls Once these steps have been completed sequentially, Drawings for each loop and zone to ensure the Once complete, go to “Settings”... - Page 19 Failure to stringently adhere to any of the recommended pro- cedures of this installation guide and/or any other Warmboard document related to this product shall release Warmboard of all liability with respect to this product or the use thereof.
Need help?
Do you have a question about the Warmsource and is the answer not in the manual?
Questions and answers