
Related Manuals for Warmboard Warmsource-N


Summary of Contents for Warmboard Warmsource-N
- Page 1 0322 WARMBOARD COMFORT SYSTEM Installation Guide For use with Warmsource-N natural gas boiler Warmsource-P propane gas boiler...
-
Page 2: Table Of Contents
LCD screen will impact system consulting Warmboard Inc. performance and operation. WCS Preparation Page 3 2 The Warmboard Comfort System (WCS) MUST 8 When plumbing for the system is complete, Plumbing and Mechanical Page 4 be installed by a licensed general contractor, operate WCS in “Construction Mode”... -
Page 3: Wcs Preparation
Frame walls, roof sheeting Install all 110 volt electrical boxes and outlets involved. It is important to keep Warmboard supplied Install tubing, manifolds (some loops) (WCS Design Drawings) documents on site at all times as you will need to reference them regularly for additional information. -
Page 4: Plumbing And Mechanical
PVC intake and exhaust venting (pg. 14-32) Constant pressure circulation pump(s), pre-set Gas (pg. 50-53) and condensation line (pg. 58) to “Constant Pressure ” by Warmboard Inc. Pressure relief valve discharge (pg. 34) Included, Not Pre-Plumbed 1 / 2 " cold water line from the domestic water... -
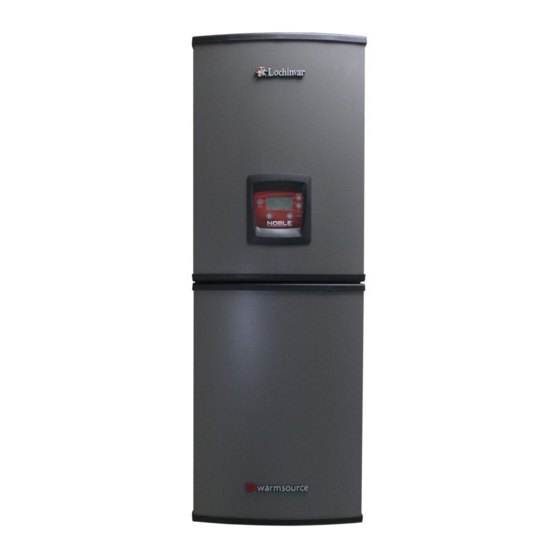
Page 5: Warmsource Specification
WARMSOURCE SPECIFICATION WARMBOARD COMFORT SYSTEM // GAS Front View Side View: 80K Side View: 110K, 150K, 199K Vent Vent Vent Air Exhaust Air Exhaust Air Exhaust 9" 9" 9" 9" 9" 9" Pressure Pressure Pressure Air Intake Air Intake Air Intake... - Page 6 1.800.556.0595 for assistance Bottom View: 80K Top View: 80K Bottom View: 110K, 150K, 199K 110K, 150K, 199K 110K, 150K, 199K 110K, 150K, 199K 110K, 150K, 199K 110K, 150K, 199K 110K, 150K, 199K 1 / 2 1 / 2 1 / 2 "...
-
Page 7: Warmsource Preparation
This illustration shows the recommended minimum dimensions for the Warmsource mechanical area. This image also depicts the space necessary for Install the Warmboard-supplied ball valves and piping and mechanical components. The minimum hose bibs as shown in our Design Drawings depth is 40"... -
Page 8: Warmsource Installation
WARMSOURCE INSTALLATION 1.800.556.0595 for assistance Securing Warmsource Double check code clearances and recommended minimum clearance dimensions (pg. 6) Fasten the mounting bracket to the wall (the use of two, 2"x 4" x 18" wood sleepers may be necessary. Securely fasten the sleepers to the wall studs, then mount the bracket to the sleepers) Once the bracket is secured, use the lifting handles to place Warmsource on to the mounting bracket... -
Page 9: Filling And Purging
FILLING & PURGING WARMBOARD COMFORT SYSTEM // GAS 18" Propylene Glycol To fill Warmsource and the Manifold 1 loops Once the system is plumbed and pressure tested with with water (city or well supply), lift the fast fill lever air (T&M Installation Guide), the next step is to fill the... -
Page 10: Construction Mode
CONSTRUCTION MODE 1.800.556.0595 for assistance Once the system is properly filled, use “Construction It is required to use a Combustion Analyzer while in Mode” to heat the structure before thermostats, Construction Mode to verify, and adjust, the carbon MC(s) or actuators are installed. Construction Mode monoxide output. -
Page 11: Manifold Cabinet
Manifold Controller (MC) and those displayed in your WCS Design Drawings. Controls Warmboard Controls consist of the following: 110 volt thermostats (one per heating zone) 110 volt Manifold Controller (one per manifold) 24 volt solenoid valve loop actuators... -
Page 12: Thermostats
THERMOSTATS 1.800.556.0595 for assistance Thermostat Installation Warmboard Comfort System offers 3 different types of thermostats: Every thermostat MUST be installed in the location Heating specified in the WCS Design Drawings. Failure to Controls the heat in one zone of the house do so will cause the system to behave inaccurately. -
Page 13: Air Conditioning
AIR CONDITIONING WARMBOARD COMFORT SYSTEM // GAS AC Installation Warmboard thermostats offer single-stage air conditioning control. Connecting an AC system to WCS is very similar to wiring a 24v thermostat from an AC unit, just follow the steps below. Remove the front cover from Warmsource Locate terminal connection “AC1/Fan”... -
Page 14: Testing The System
LCD should read between 90–140˚F (Manifold Controllers, actuators, thermostats) and choose “Tutorial” to familiarize yourself with Match the specifications in the Warmboard Design the controls Once these steps have been completed sequentially, Drawings for each loop and zone to ensure the Once complete, go to “Settings”... - Page 15 Failure to stringently adhere to any of the recommended pro- cedures of this installation guide and/or any other Warmboard document related to this product shall release Warmboard of all liability with respect to this product or the use thereof.
Need help?
Do you have a question about the Warmsource-N and is the answer not in the manual?
Questions and answers