Table of Contents
Advertisement
Available languages
Available languages
Advertisement
Chapters
Table of Contents

Related Manuals for GF MSA 330


Summary of Contents for GF MSA 330
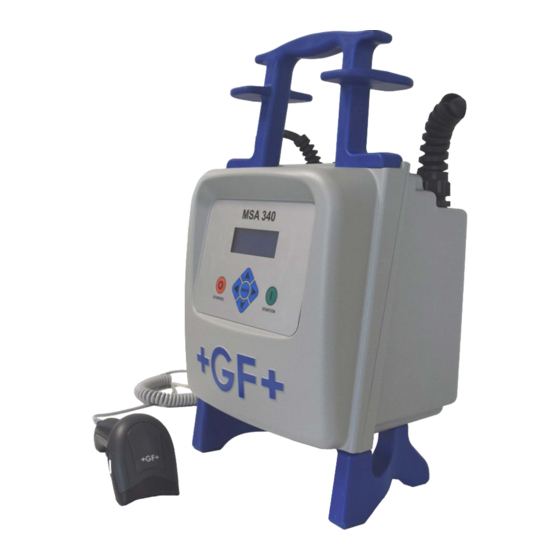
- Page 1 GF Piping Systems Instruction manual Manuale Istruzioni Bedienungsanleitung MSA 330 / MSA 340 Polyvalent Electrofusion Units MSA 330 / MSA 340 Saldatrici polivalenti per elettrofusione MSA 330 / MSA 340 Polyvalentes Elektroschweissgerät...
- Page 3 Operating instructions MSA 230 / MSA340 Index Index Page General Information • Warning notice • Other symbols and notices • Abbreviations Introduction Product Description Components description 1.2.1 Operation Controls 1.2.2 Display 1.2.3 Electrical switch 1.2.4 Ambient temperature sensor 1.2.5 USB interface 1.2.6 Power Cable 1.2.7...
- Page 4 Index Operating Manual MSA 330 / MSA 340 3.10 Additional configuration 3.11 Configuration for MSA Welding Book usage Data Management View Protocols Export Protocols 4.2.1 Content of PDF file 4.2.2 Visualization of CSV file Delete Protocols Error messages Administrator information...
- Page 5 Operating Manual MSA 330 /MSA 340 I General Information I General Information To allow an easy understanding of the manual and point out duties of the operator, symbols are frequently used. The following tables contain the explanation of all symbols used in this manual.
- Page 6 Operating Manual MSA 330 / MSA 340 Introduction Dear Customer, Thank you for choosing this product. The electrofusion units MSA 330 and MSA 340 are designed according to the current technology standards. Using them for purposes other than those described in this manual may cause injury to the operator or to others.
- Page 7 Operating Manual MSA 330 /MSA 340 1 Introduction Components description 1.2.1 Operation Controls There are seven buttons the user can press to operate the machine. START (green button) and STOP (red button) are the most important, used to get a confirmation or a stop for all the actions. The remaining (yellow) are auxiliary buttons used for menu navigation and data entry.
- Page 8 1 Introduction Operating Manual MSA 330 / MSA 340 1.2.2 Display The display, an alphanumeric LCD 4 rows x 20 characters each, is the main user interface of the welding machine. It shows the steps to be executed in sequence, the fusion data, possible errors and alarm messages.
- Page 9 Operating Manual MSA 330 /MSA 340 1 Introduction Barcode Reader When connected to the machine, it enables a quick insertion of welding and operator parameters by reading the related bar code. The scanner operates keeping it near to the barcode and pushing the button.
- Page 10 2 Fusion process Operating Manual MSA 330 / MSA 340 Fusion process Overview of operating procedure A standard welding workflow is shown in the picture below MSA 330 S/N: S160B5911011 SW vers.:1.12 Next revision:05/11 CONNECT FITTING! - - - Ohm 230V Ta=23°C...
- Page 11 Operating Manual MSA 330 /MSA 340 2 Fusion process Switching On Attention Before connecting the machine to the power source, the operator must read chapter ‘Technical characteristics‘! Caution Check the voltage! generator has to started before connecting electro-fusion unit must...
- Page 12 2 Fusion process Operating Manual MSA 330 / MSA 340 2.3.2 Job number The JOB NUMBER functionality must be enabled in the configuration menu (see ‘Configuration’ chapter). JOB NUMBER -------------- Esc OK In the JOB NUMBER page, the user can insert the current job code (max 16 digits) either by reading a barcode (symbology Code 128), or inserting it manually.
- Page 13 Operating Manual MSA 330 /MSA 340 2 Fusion process Enter fusion data Fusion data entry can be done via barcode reading, manual insertion or automatically, in CP mode (only for US version). Barcode input is the default setting, thus, during the first welding process, the machine will assume to read the fusion parameters in a barcode.
- Page 14 2 Fusion process Operating Manual MSA 330 / MSA 340 At this stage, to ensure a reliable jointing, pipes and fitting have to be carefully prepared: pipes shall be scraped, cleaned, aligned (preferably using a clamping tool) and inserted till the stop mark into the fitting.
- Page 15 Operating Manual MSA 330 /MSA 340 2 Fusion process If the problem still remains, the fitting and the barcode shall be replaced. If all the steps above are not solving the issue, it is recommended assistance from Regional service Center.
- Page 16 2 Fusion process Operating Manual MSA 330 / MSA 340 The message above is an advice, to inform the user the fusion process may not be concluded successfully due to internal temperature of the machine. Since the fittings have different curves depending on...
- Page 17 Operating Manual MSA 330 /MSA 340 2 Fusion process Traceability (MSA 340 only) Advise To use the TRACEABILITY function, this option has to be enabled configuration menu (see ‘Configuration’ chapter). Traceability consists in the collection of all the available information about the most important elements (pipes, fitting and their installation depth) involved in the fusion process.
- Page 18 2 Fusion process Operating Manual MSA 330 / MSA 340 buttons to select the digits and the ()() to move through the different fields. At the end the START/OK ( I ) button is used to confirm the content. TRACEABILITY FITTING...
- Page 19 E= 2.00kJ 01.01.08 15:22 During the fusion process, the display shows the information concerning the output voltage, the remaining fusion time and the applied energy. Note The MSA 330 (MSA 340) tunes the fusion time according to external temperature case barcode reading.
- Page 20 2 Fusion process Operating Manual MSA 330 / MSA 340 2.10.2 Cooling time COOLING INTERVAL time=15minutes 01.01.08 15:25 After the completion of the fusion process, the protocol summary and the remaining cooling time, if contained in the barcode, are displayed alternately.
- Page 21 Operating Manual MSA 330 /MSA 340 3 Configuration settings Configuration settings To enter into the configuration menu, press MENU, select MACHINE SETUP acting on ()()buttons and push START/OK ( I ). The buttons ()() allows to navigate all the machine settings; to jump into a specific menu and change the corresponding setting, select it on the display and press START/OK ( I ).
- Page 22 3 Configuration settings Operating Manual MSA 330 / MSA 340 ADDITIONAL CONFIG. (*) Visible only with administrator rights. Language The LANGUAGE item, allows to choose the language of the messages displayed by the machine as well as the language used in the welding protocol reports.
- Page 23 Operating Manual MSA 330 /MSA 340 3 Configuration settings There are two choices: barcode and manual. For US a third is available, named CP mode. 3.3.1 Barcode It is the default setting: fusion data are entered by reading the fitting barcode.
- Page 24 3 Configuration settings Operating Manual MSA 330 / MSA 340 TRACEABILITY MODE Required Esc OK Select by ()() the traceability mode and press START/OK ( I ) to confirm the setting. To cancel the operation press STOP/ESC (O). Welder identification The WELDER PASS menu enables the insertion of the operator identity and the job number.
- Page 25 Operating Manual MSA 330 /MSA 340 3 Configuration settings Memory management The fusion protocols are stored in the internal memory. They will be preserved until there will be enough space. The MEMORY MANAGEMENT menu allows the user to select how to proceed when the memory is full: •...
- Page 26 3 Configuration settings Operating Manual MSA 330 / MSA 340 3.10 Additional configuration The ADDITIONAL CONFIGURATION menu allows to configure the machine regarding special customer request. standard configuration is composed like shown below. ADDITIONAL CONFIG. 0000000000000000000 Esc OK Please don’t change the configuration without contacting Georg Fischer sales department in advance.
- Page 27 Operating Manual MSA 330 /MSA 340 4 Data Management Data Management The electro-fusion unit saves the welding protocols for each fusion cycle in the internal memory. Data are kept till the operator deletes them or the memory is full. To conform to ISO12176 and UNI10566 standards, the welding machine will store (and provide for a later analysis) the following data: The MSA’s Serial Number...
- Page 28 4 Data Management Operating Manual MSA 330 / MSA 340 To enter the data management menu, press MENU, select DATA RETRIEVAL by ()() and press START/OK ( I ) to see the possible options. Then the buttons ()() allow to scroll the different options; press START/OK ( I ) to jump to the chosen one.
- Page 29 Operating Manual MSA 330 /MSA 340 4 Data Management Export Protocols Using an external USB memory stick the operator can export all the stored welding protocols. EXPORT PROTOCOLS PDF FORMAT Esc OK Insert the USB memory stick on the USB connector available on the rear panel of the machine, then select EXPORT PROTOCOLS.
- Page 30 4 Data Management Operating Manual MSA 330 / MSA 340 4.2.2 Visualization of CSV file When you open the CSV file with Microsoft Excel, if data are displayed ® in only one column, a setting procedure could be necessary to get a correct visualization of the file.
- Page 31 Operating Manual MSA 330 /MSA 340 4 Data Management • Select “Comma” and go ahead pressing “Next >” button. • Confirm pressing “Finish” button. Data are correctly displayed when each field is placed into a separated column.
- Page 32 4 Data Management Operating Manual MSA 330 / MSA 340 Delete Protocols By selecting DELETE PROTOCOLS, all stored data will be deleted. Attention Before going forward with this operation, ensure that all data inside the internal memory are saved into an external USB memory.
- Page 33 5 Error messages Error messages In case of anomalies or errors, the MSA 330 (MSA 340) will pop up with a specific message useful to identify the possible issue. The related number will be even tracked within the welding protocol, to give evidence of the accident.
- Page 34 6 Administrator information Operating Manual MSA 330 / MSA 340 Administrator information The electro-fusion (EF) unit can be configured at different levels: • In depth for setti ng the workflow to be used by the operator • For minimal aspects, during the normal operations For this reason the machine, at power on, is programmed to show the minimal set of menus, including just a few basic options.
- Page 35 Operating Manual MSA 330 /MSA 340 7 Fitting coding Fitting coding In the table below are summarized the symbols used to identify the fitting type. This is useful mainly for manual data entry. Symbol Description Elbow 45° - 90 Τ...
- Page 36 8 Technical characteristics Operating Manual MSA 330 / MSA 340 Technical characteristics Mains voltage and Either 230 V (±15%) or 115V (±15%) frequency 50/60 Hz Suggested power Fitting Generator Current generators type power Outlet (min) ELGEF d20- 3KVA d125 ELGEF d140- 4.5KVA...
- Page 37 Operating Manual MSA 330 /MSA 340 8 Technical characteristics Standards • ISO 12176-2; • ISO 12176-3; • ISO 12176-4; • UNI 10566 (2009); • EN 60335-1 (Safety); • EN 61000-6-2 (EMC); • EN 61000-6-4 and others (EMC).
- Page 38 9 Maintenance Operating Manual MSA 330 / MSA 340 Maintenance Cleaning Clean the unit regularly with a slightly damp cloth. The membrane keyboard and other plates can be cleaned with industrial alcohol if necessary (no solvents or Trichlor products). Under no circumstances should the unit be sprayed or immersed in water nor cleaned with compressed air.
- Page 39 Operating Manual MSA 330 /MSA 340 10 Accident Prevention 10 Accident Prevention 10.1 Operating the Unit Do not let unauthorized or untrained personnel use the unit. When the unit is not in operation, avoid unauthorized use by keeping it in a dry, locked room.
- Page 40 10 Accident Prevention Operating Manual MSA 330 / MSA 340 10.4 Defect Unit Arrange that damaged housings or other parts are replaced or repaired by an authorized service agent. If the unit is not working properly it must be sent without hesitation to an authorized service agent.
- Page 41 Operating Manual MSA 330 /MSA 340...
-
Page 42: Table Of Contents
Operating Manual MSA 330 / MSA 340 Indice Pagina Informazioni sull’uso del manuale • Informazioni sugli avvertimenti • Altri simboli e informazioni • Abbreviazioni Introduzione Descrizione del prodotto Descrizione comandi 1.2.1 Pulsanti 1.2.2 Display 1.2.3 Interruttore 1.2.4 Sonda temperatura ambiente 1.2.5... - Page 43 Operating Manual MSA 330 /MSA 340 3.10 Configurazioni aggiuntive 3.11 Configurazione per l’utilizzo dell’ MSA Welding Book Gestione dati Vedi protocolli Copia protocolli 4.2.1 Contenuto del file PDF 4.2.2 Visualizzazione del file CSV Elimina protocolli Messaggi di errore Informazioni per l’amministratore...
-
Page 44: I Informazioni Sull'uso Del Manuale
I Informazioni sull’uso del manuale Operating Manual MSA 330 / MSA 340 I Informazioni sull’uso manuale Per consentire una facile comprensione di quanto descritto e porre in evidenza i compiti dell’operatore viene riportata qui di seguito la simbologia, con il relativo significato, utilizzata nel presente manuale istruzioni. - Page 45 Operating Manual MSA 330 /MSA 340 I Informazioni sull’uso del manuale Abbreviazio Significato Adobe Portable Document format ® Comma Separated Values format...
-
Page 46: Introduzione
La MSA 330 (MSA 340) è dotata di sonda per la misura della temperatura ambiente, in modo da correggere automaticamente il tempo di saldatura in funzione della temperatura esterna, per la corretta erogazione di energia al giunto. -
Page 47: Descrizione Comandi
Operating Manual MSA 330 /MSA 340 1 Introduzione Descrizione comandi 1.2.1 Pulsanti L’utente ha a disposizione sette tasti con cui interagire con la macchina. Due di questi START (verde) e STOP (rosso) vengono usati per confermare o cancellare le azioni in corso. I restanti cinque (gialli) servono invece per la navigazione dei menu e l’inserimento manuale di dati... -
Page 48: Display
1 Introduzione Operating Manual MSA 330 / MSA 340 1.2.2 Display Costituisce l’Interfaccia utente ed è formato da 4 righe contenenti ciascuna, 20 caratteri alfanumerici. Tramite i messaggi, informa l’utilizzatore delle fasi di lavoro in atto. E’ possibile modificare la luminosità dello stesso con i tasti e e salvare permanentemente il valore con il tasto ... -
Page 49: Lettore Codice A Barre
Operating Manual MSA 330 /MSA 340 1 Introduzione Lettore codice a barre Lo scanner permette un’immissione veloce dei dati di saldatura e dei dati dell’operatore tramite la lettura dei relativi codici a barre. La lettura tramite scanner è eseguita tenendolo a pochi centimetri dal codice a barre e premendo il pulsante. -
Page 50: Saldatura
2 Saldatura Operating Manual MSA 330 / MSA 340 Saldatura Vista generale della sequenza di saldatura La sequenza riportata in figura riassume il flusso di lavoro standard della saldatrice. MSA 330 S/N: S160B5911011 SW vers.:1.12 Prossima rev.:05/11 COLLEGARE MANICOTTO! - - - Ohm 230V Ta=23°C... -
Page 51: Accensione
Operating Manual MSA 330 /MSA 340 2 Saldatura Accensione Attenzione Prima di collegare la macchina alla presa di rete o al generatore, leggere attentamente il capitolo 8 ‘Specifiche tecniche‘! Attenzione Controllare la tensione di alimentazione! Il generatore deve essere attivato prima dell’allacciamento della saldatrice e deve garantire una tensione di uscita costante. -
Page 52: Codice
2 Saldatura Operating Manual MSA 330 / MSA 340 2.3.2 Codice Per l’utilizzazione della funzione ORDINE DI LAVORO è necessario entrare nel menu di configurazione della macchina e attivare l’opzione stessa (vedi capitolo ‘Configurazione’). ORDINE DI LAVORO -------------- Esc OK Dal menu ORDINE DI LAVORO è... -
Page 53: Inserimento Dati Di Saldatura
Operating Manual MSA 330 /MSA 340 2 Saldatura Premere START/OK ( I ) per eseguire il controllo del collegamento con il raccordo. raccordo viene riconosciuto, saldatrice passerà automaticamente all’azione successiva. Inserimento dati di saldatura L’inserimento dei dati di saldatura può essere fatto in due modi: tramite lettura automatica del codice a barre o input manuale. - Page 54 2 Saldatura Operating Manual MSA 330 / MSA 340 A questo punto, al fine di garantire una saldatura corretta, le operazioni di raschiatura, pulizia dei tubi e allineamento, dovranno essere già state accuratamente completate. Suggerimento E’ consigliato utilizzare delle ganasce esterne mantenere i tubi a contatto con il raccordo correttamente.
-
Page 55: Inserimento Manuale
Operating Manual MSA 330 /MSA 340 2 Saldatura È importante quindi, verificare che i cavi di fusione collegati non presentino segni di danneggiamento (cavi e connettori). Se i cavi di fusione non dovessero presentare alterazioni, sarà necessario il controllo del raccordo e del codice a barre forniti e la ripetizione dell’operazione di immissione dati. -
Page 56: Avviso Di Possibile Arresto Anticipato
2 Saldatura Operating Manual MSA 330 / MSA 340 Avviso di possibile arresto anticipato Attenzione Prima di iniziare il processo di fusione, nel caso la temperatura interna della macchina fosse troppo alta, un messaggio apparirà sul display e sarà necessario attendere che la macchina si raffreddi! TEMP. - Page 57 Operating Manual MSA 330 /MSA 340 2 Saldatura La fase di tracciabilità consiste nell’inserire tutte le informazioni disponibili relative ai tre elementi coinvolti nella saldatura (due tubi, un raccordo e la relativa profondità dell'installazione). I dati sono raccolti, salvati e decodificati dalla saldatrice secondo la normativa ISO 12176-4, ad eccezione della profondità...
-
Page 58: Sistema Gps (Solo Msa 340)
2 Saldatura Operating Manual MSA 330 / MSA 340 Nel caso in cui il codice a barre, contenente i dati di tracciabilità, sia danneggiato e, quindi, non leggibile tramite scanner o penna ottica, l’operatore potrà inserire manualmente le cifre riportate sotto il codice a barre stesso. -
Page 59: Processo Di Fusione
Attenzione La MSA 330 (MSA 340) calcola automaticamente la durata del ciclo di saldatura in base alla temperatura ambiente ed alle informazioni fornite dal codice a barre. Pertanto... -
Page 60: Tempo Di Raffreddamento
2 Saldatura Operating Manual MSA 330 / MSA 340 Una volta concluso correttamente il processo di fusione e prima di indicare il tempo di raffreddamento del giunto, sul display vengono brevemente indicate le informazioni relative alla durata e all’energia utilizzate per la saldatura. Questi ed altri dati saranno salvati nella memoria interna della macchina. -
Page 61: Configurazione
Il numero di voci presenti nel menu dipende dal tipo di utente e dal tipo di macchina (se MSA 330 o MSA 340). Se l’utente è il responsabile della macchina, in virtù di uno specifico codice a barre, potrà modificare tutti le voci indicate a seguire. -
Page 62: Selezione Lingua
3 Configurazione Operating Manual MSA 330 / MSA 340 CONFIG. AGGIUNTIVE (*) Visibili soltanto con il codice a barre di amministratore Selezione lingua Entrando in questo menu si ha la possibilità di scegliere la lingua dei messaggi visualizzati sul display e del testo usato nella descrizione dei protocolli di saldatura. -
Page 63: Input Dati
Operating Manual MSA 330 /MSA 340 3 Configurazione Input dati Entrando in questo menu si ha la possibilità di impostare la modalità di inserimento dei parametri di saldatura associati al raccordo elettro- saldabile. INPUT DATI Codice a barre Esc OK Selezionare tramite le frecce ()() la modalità... -
Page 64: Tracciabilità (Solo Msa 340)
3 Configurazione Operating Manual MSA 330 / MSA 340 Tracciabilità (solo MSA 340) Entrando in questo menu si ha la possibilità di impostare la modalità di tracciabilità della saldatura. E’ possibile scegliere fra tre opzioni: • Richiesto: tutti i dati relativi agli elementi utilizzati nel processo di fusione (raccordo e tubi) devono essere inseriti. -
Page 65: Gestione Memoria
Operating Manual MSA 330 /MSA 340 3 Configurazione Ad ogni successiva accensione della saldatrice, il display mostrerà i dati precedentemente inseriti i quali potranno essere confermati premendo START/OK ( I ) oppure cancellati premendo MENU. L’inserimento viene effettuato tramite la lettura del codice a barre o manualmente. -
Page 66: Tolleranza Resistenza
3 Configurazione Operating Manual MSA 330 / MSA 340 Per procedere, selezionare tramite le frecce ()() la modalità scelta e premere START/OK ( I ) per confermare la selezione. GESTIONE MEMORIA Promemoria Esc OK Tolleranza resistenza Il menu TOLLERANZA RESISTENZA permette di impostare la precisione del valore della resistenza del raccordo durante la misurazione. -
Page 67: Configurazione Per L'utilizzo Dell' Msa Welding Book
Operating Manual MSA 330 /MSA 340 3 Configurazione 3.11 Configurazione per l’utilizzo dell’ MSA Welding Book MSA WELDING BOOK è un’applicazione per PC in grado di combinare i protocolli di saldatura registrati dall’MSA330/340 in formato CSV con foto scattate durante i processi di fusione. Per abilitare questa funzionalità, l’utilizzatore deve modificare la configurazione dei bit all’interno del... -
Page 68: Gestione Dati
Operating Manual MSA 330 / MSA 340 Gestione dati La saldatrice MSA 330 (MSA 340) consente l’archiviazione dei dati associati a ciascun ciclo di saldatura. I dati sono conservati sino a quando l’operatore non decide di cancellarli o sino all’esaurimento della capacità... -
Page 69: Vedi Protocolli
Operating Manual MSA 330 /MSA 340 4 Gestione dati Tramite le frecce ()() è possibile scorrere l’elenco delle opzioni di gestione dei protocolli di saldatura memorizzati nella memoria della macchina. VEDI PROTOCOLLI COPIA PROTOCOLLI ELIMINA PROTOCOLLI (*) Visibili soltanto con il codice a barre di amministratore E’... -
Page 70: Contenuto Del File Pdf
4 Gestione dati Operating Manual MSA 330 / MSA 340 Inserire la chiavetta USB nella porta disponibile sulla parte posteriore della macchina e selezionare COPIA PROTOCOLLI dal menu GESTIONE DATI. Tramite le frecce ()() è possibile selezionare il formato del file da copiare nella memoria USB. -
Page 71: Visualizzazione Del File Csv
Operating Manual MSA 330 /MSA 340 4 Gestione dati 4.2.2 Visualizzazione del file CSV All’apertura del file CSV, tramite Microsoft Excel, è possibile riscontrare ® un errore nella visualizzazione dei dati in quanto elencati in una singola colonna. • Selezionare la prima colonna e aprire il menu “Dati -> Testo in colonne”. - Page 72 4 Gestione dati Operating Manual MSA 330 / MSA 340 • Selezionare “Virgola” e confermare premendo “Avanti >”. • Confermare ulteriormente premendo “Fine”. I dati sono visualizzati correttamente quando ogni campo è inserito in colonne separate.
-
Page 73: Elimina Protocolli
Operating Manual MSA 330 /MSA 340 4 Gestione dati Elimina protocolli Selezionando ELIMINA PROTOCOLLI si cancelleranno tutti i dati contenuti nella memoria della macchina. Attenzione Prima di procedere con questa operazione, assicurasi che tutti dati presenti all’interno della memoria della macchina siano stati salvati in una memoria USB o siano stati stampati. -
Page 74: Messaggi Di Errore
5 Messaggi di errore Operating Manual MSA 330 / MSA 340 Messaggi di errore Nel report di dati, qualsiasi errore verificatosi durante le operazioni di saldatura viene segnalato per mezzo di un numero al quale corrisponde una possibile causa. Il messaggio di errore compare sul display con il seguente formato: ERRORE N.: 4... -
Page 75: Informazioni Per L'amministratore
Operating Manual MSA 330 /MSA 340 6 Informazioni per l’amministratore Informazioni l’amministratore La saldatrice a elettrofusione può essere configurata a diversi livelli: • In dettaglio, per definire il flusso di lavoro da usare in cantiere, • Per alcuni aspetti di base, durante le normali operazioni in campo Per semplicità... -
Page 76: Codifica Simboli
7 Codifica simboli Operating Manual MSA 330 / MSA 340 Codifica simboli Se l’inserimento dei dati dovesse essere effettuato manualmente, sarà necessario inserire dei simboli per identificare il tipo di raccordo da saldare. Nella tabella sottostante, sono elencati i simboli con relativa descrizione. -
Page 77: Specifiche Tecniche
Operating Manual MSA 330 /MSA 340 8 Specifiche tecniche Specifiche tecniche Alimentazione O 230 V (±15%) o 115V (±15%) 50/60 Hz Potenza consigliata del Tipo Potenza Corrente(min) generatore raccordo Generatore ELGEF 3KVA d20-d125 ELGEF 4.5KVA d140-d630 Altri 6KVA costruttori d16-d450... -
Page 78: Norme Di Riferimento
8 Specifiche tecniche Operating Manual MSA 330 / MSA 340 Norme di riferimento • ISO 12176-2; • ISO 12176-3; • ISO 12176-4; • UNI 10566 (2009); • EN 60335-1 (Safety); • EN 60335-2-45 (Safety); • EN 61000-6-2 (EMC); • EN 61000-6-3 ed altre (EMC). -
Page 79: Manutenzione
Operating Manual MSA 330 /MSA 340 9 Manutenzione Manutenzione La saldatrice MSA 330 (MSA 340), se trattata correttamente, ha bisogno di manutenzione ordinaria limitata alla pulizia generale tramite un panno umido, evitando l’uso di solvente. È importante comunque custodire la macchina in luoghi asciutti e puliti per evitarne danneggiamenti. -
Page 80: Istruzioni Sulla Sicurezza
Non utilizzare la saldatrice vicino a materiale facilmente infiammabile! Pericolo 10.1 Corretto utilizzo L’ MSA 330 (MSA 340) è destinata esclusivamente per la giunzione di tubi e raccordi in materiale termoplastico. Ogni altro utilizzo è da considerarsi improprio. Inoltre l’uso diverso da quello destinato solleva il costruttore da qualsiasi responsabilità... -
Page 81: Disposizioni
Operating Manual MSA 330 /MSA 340 10 Istruzioni sulla sicurezza 10.5 Disposizioni È necessario attenersi alle prescrizioni, norme e direttive nazionali vigenti riguardanti la sicurezza sul lavoro. La rottamazione del prodotto con tutti i suoi componenti (elettronica, acciaio, alluminio e plastica) deve avvenire secondo le normative vigenti in materia di smaltimento rifiuti. - Page 82 Operating Manual MSA 330 / MSA 340...
- Page 83 Operating Manual MSA 330 /MSA 340 Inhaltsverzeichnis Page Allgemeines • Warnhinweise • Weitere Symbole and Hinweise • Abkürzungen Einleitung Produkt Beschreibung Detail Beschreibung 1.2.1 Bedienfeld 1.2.2 Anzeige 1.2.3 Netzschalter 1.2.4 Umgebungstemperatur Sensor 1.2.5 USB Schnittstelle 1.2.6 Netzkabel 1.2.7 Schweisskabel Barcode Lesegerät Verlängerungskabel...
- Page 84 Operating Manual MSA 330 / MSA 340 3.10 Erweiterte Konfiguration 3.11 Konfiguration für MSA Welding Book Anwendung Daten Management Anzeigen von Protokollen Export von Protokollen 4.2.1 Aufbau des PDF Dokuments 4.2.2 Darstellung des CSV Dokuments Löschen von Protokollen Fehler Meldungen...
-
Page 85: I Allgemeines
Operating Manual MSA 330 /MSA 340 I Allgemeines I Allgemeines Für das schnelle Erfassen dieser Anleitung und das sichere Umgehen mit der Maschine werden Ihnen hier die in der Anleitung verwendeten Warnhinweise, Hinweise und Symbole sowie deren Bedeutung vorgestellt. • Warnhinweise In dieser Anleitung werden Warnhinweise verwendet, um Sie vor Verletzungen oder vor Sachschäden zu warnen. -
Page 86: Einleitung
Unterschieden in Abbildungen und Informationen zu dieser Anleitung führen können. Produkt Beschreibung Das MSA 330 (MSA 340) ist ein Schweissgerät zum Verschweissen von PE Elektroschweissfittingen. Die Eingabe der Schweissparameter erfolgt durch Einlesen eines Barcodes entsprechend Norm ISO/TR 13950 oder manuell. -
Page 87: Detail Beschreibung
Operating Manual MSA 330 /MSA 340 1 Einleitung Detail Beschreibung 1.2.1 Bedienfeld Das Bedienfeld besteht aus sieben Tasten. START (grüne Taste) und STOP (rote Taste) sind am wichtigsten, diese werden als Bestätigung oder Abbruch von allen Aktionen verwendet. Die anderen (gelben) werden alks Hilfstastem zur Menünavigation und Dateneingabe benutzt. -
Page 88: Anzeige
1 Einleitung Operating Manual MSA 330 / MSA 340 1.2.2 Anzeige Das Display – LCD alphanumerisch mit 4 Zeilen x je 20 Charakter - ist die Benutzerschnittstelle Schweissmaschine. Hier werden Arbeitsschritte, Schweissdaten, mögliche Fehler und Alarme angezeigt. Die Helligkeit ist mit den Pfeiltasten und veränderbar und wird mit der ... -
Page 89: Barcode Lesegerät
Operating Manual MSA 330 /MSA 340 1 Einleitung Barcode Lesegerät Scanner ermöglich das schnelle Einlesen von Schweissparametern und Bedienerdaten entsprechend der Barcodeinformation. Den Scanner nahe an den einzulesenden Barcode heranführen und mit der Taste am Scanner die Lesung starten. Bei erfolgreicher Lesung ertönt ein Signalton und die Anzeige wechselt. -
Page 90: Schweissen
2 Schweissen Operating Manual MSA 330 / MSA 340 Schweissen Übersicht Bedienungsablauf Abgebildet ist ein Beispiel eines Bedienungsablaufs. MSA 330 S/N: S160B5911011 SW vers.:1.12 Naech. revision:05/11 FITTING ANSCHLIESSEN - - - Ohm 230V Ta=23°C 50Hz 01.01.08 15:20 SCHWEISSDATEN ----------------------------- ------- 6.59 Ohm... -
Page 91: Gerät Einschalten
Operating Manual MSA 330 /MSA 340 2 Schweissen Gerät einschalten Achtung Vor dem Anschluss des Gerätes an die Spannungsversorgung muss das Kapitel ( „Technische Daten“ gelesen werden! Hinweis Prüfe die Eingangsspannung! Der Stromgenerator muss vor dem Anschluss des MSA Gerätes... -
Page 92: Eingabe Auftragsnummer
2 Schweissen Operating Manual MSA 330 / MSA 340 2.3.2 Eingabe Auftragsnummer Hinweis Die Möglichkeit zur Eingabe von einer Auftragsnummer muss im Konfigurationsmenü freigeschaltet werden (siehe Kapitel “Konfiguration“). AUFTRAGS NR. -------------- Esc OK Die Eingabe erfolgt entweder durch Einlesen eines Barcodes (symbologie Code 128) oder manuell (max. -
Page 93: Schweissdaten Einlesen
Operating Manual MSA 330 /MSA 340 2 Schweissen Wenn das Elektroschweissgerät den Fitting erkannt hat, wechselt die Anzeige für die Eingabe weiterer Daten. Falls das Display nicht wechselt, prüfen Sie bitte den Anschluss der Kabel an den Fitting. Schweissdaten einlesen Schweissdaten werden mittels Barcode, manuell oder in CP Modus (nur in der US Version erhältlich) eingegeben. - Page 94 2 Schweissen Operating Manual MSA 330 / MSA 340 Um eine zuverlässige Verbindung gewährleisten zu können, müssen die Rohre und der Fitting sorgfältig vorbereitet werden: Rohre müssen geschält, gereinigt, ausgerichtet (vorteilhaft mit Haltevorrichtungen) und bis zum Anschlag in den Fitting eingefügt werden.
-
Page 95: Manuelle Eingabe
Operating Manual MSA 330 /MSA 340 2 Schweissen Mögliche Fehlerursache: • ungenügender Kontakt, überprüfe Verbindung Schweisskabel an die Fittingkontakte. • Überprüfe den Inhalt des Fitting Barcodes mit dem angeschlossenen Fitting • Falls der Fehler weiter besteht, wechsle Fitting und Barcode... -
Page 96: Gerätetemperatur Warnung
2 Schweissen Operating Manual MSA 330 / MSA 340 Gerätetemperatur Warnung Damit beim Verschweissen von grossen Fittingen sichergestellt werden kann, dass Schweissung vollständig abläuft, wird Geräteinnentemperatur vor der Freigabe der Schweissung überprüft. Wenn die Innentemperatur zu hoch ist, wird der Anwender gewarnt und sollte die Maschine abkühlen lassen! -
Page 97: Rückverfolgbarkeit (Nur Msa 340)
Operating Manual MSA 330 /MSA 340 2 Schweissen Rückverfolgbarkeit (nur MSA 340) Hinweis Funktion „RUECKVERFOLGBARKEIT“ muss Konfigurationsmenü freigeschaltet werden (siehe Kapitel “Konfiguration“). Beim Elektroschweissen werden Rückverfolgbarkeitsdaten Informationen der zu verschweissenden Komponenten (Rohre, Fitting und Installationstiefe) verstanden. Die Daten werden eingelesen, gespeichert und dekodiert entsprechend ISO 12176-4, die Installationstiefe wird manuell eingegeben. -
Page 98: Gps (Nur Msa 340)
2 Schweissen Operating Manual MSA 330 / MSA 340 Nach Einlesen der Rückverfolgbarkeits-Informationen wechselt das Display zur Anzeige der Schweissdaten, der Schweissvorgang startet automatisch. Die Daten zur Rückverfolgbarkeit können auch manuell eingegeben werden. Es genügt die Pfeiltaste nach rechts () zu drücken, um in den Eingabemodus zu gelangen. -
Page 99: Schweissprozess
Während des Schweissvorganges wird die Ausgangsspannung, restliche Schweisszeit und Energieeintrag angezeigt. Bemerkung Das MSA 330 (MSA 340) passt die Schweisszeit entsprechend der Umgebungstemperatur an. Die resultierende Schweisszeit kann sich somit von der nominalen Zeit, welche vom Barcode gelesen wurde, unterscheiden. -
Page 100: Abkühlzeit
2 Schweissen Operating Manual MSA 330 / MSA 340 2.10.2 Abkühlzeit ABKUEHLINTERVALL Zeit=15minuten 01.01.08 15:25 Nach erfolgreicher Schweissung wird die Daten Zusammenfassung und die verbleibende Abkühlzeit abwechselnd angezeigt. Diese Anzeigen bleiben aktiv bis STOP/ESC (O) Taste betätigt wird, um die nächste Verbindung zu starten. -
Page 101: Konfiguration
Operating Manual MSA 330 /MSA 340 3 Konfiguration Konfiguration Um in das Konfigurationsmenü zu gelangen, drücken Sie die Taste MENU, wählen Sie EINSTELLUNGEN MASCHINE mit den Pfeiltasten ()() und bestätigen Sie die Auswahl mit START/OK ( I ). Mit den Pfeilen ()() navigieren Sie durch das Menü, zur Auswahl pressen Sie START/OK ( I ). -
Page 102: Sprache
3 Konfiguration Operating Manual MSA 330 / MSA 340 ERWEITERTE KONFIG. (*) Nur mit Administrator Code sichtbar Sprache Auswahl der Display und Protokollsprache. SPRACHEINSTELLUNG Esc OK Auswahl der gewünschten Sprache mit ()() Tasten, Bestätigung mit START/OK ( I ) Taste. Zum Verlassen des Menüpunktes ohne zu Speichern STOP/ESC (O) Taste. -
Page 103: Barcode
Operating Manual MSA 330 /MSA 340 3 Konfiguration Wählen Sie mit den Pfeiltasten den Modus aus und bestätigen Sie die Auswahl mit START/OK ( I ) Taste, mit STOP/ESC (O) verlassen Sie das Menü. 3.3.1 Barcode Als werkseitige Einstellung ist die Eingabe mittels Barcode konfiguriert. -
Page 104: Ausweis Und Auftragsnummer
3 Konfiguration Operating Manual MSA 330 / MSA 340 RUECKVERFOLGBARK Notwendig Esc OK Wählen Sie mit den Pfeiltasten den Modus aus und bestätigen Sie die Auswahl mit START/OK ( I ) Taste, mit STOP/ESC (O) verlassen Sie das Menü. Ausweis und Auftragsnummer In diesem Menü... -
Page 105: Speichermanagement
Operating Manual MSA 330 /MSA 340 3 Konfiguration Wählen Sie mit den Pfeiltasten den Modus aus und bestätigen Sie die Auswahl mit START/OK ( I ) Taste, mit STOP/ESC (O) verlassen Sie das Menü. Speichermanagement Die Schweissprotokolle werden in einen internen Speicher des MSA gespeichert. -
Page 106: Erweiterte Konfiguration
3.11 Konfiguration für MSA Welding Book Anwendung Das MSA Welding Book ist eine Anwendung für PC, welche automatisch Schweissprotokolle von MSA 330/340 Geräten mit Bildern, welche während der Installation aufgenommen wurden, verbindet. Um diese Funktionalität freizuschalten, muss die Einstellung im Menü... -
Page 107: Daten Management
Operating Manual MSA 330 /MSA 340 4 Daten Management Daten Management Das Elektro-Schweissgerät speichert das Protokoll jeder Schweissung in einen internen Speicher. Die Protokolle verbleiben im internen Speicher diese entweder Bediener oder entsprechend Speichermanagement gelöscht werden. Die Daten der Protokolle entsprechen der ISO12176 und UNI10566 Norm, folgende Informationen sind verfügbar:... -
Page 108: Anzeigen Von Protokollen
4 Daten Management Operating Manual MSA 330 / MSA 340 Um in das Daten Menü zu gelangen , betätige die Taste MENU, wähle DATENABFRAGE mit den Tasten ()() aus und bestätige mit START/OK ( I ). Mit den Pfeiltasten werden die Funktionen sichtbar, mit der Taste START/OK ( I ) wählen Sie die gewünschte Funktion aus. -
Page 109: Export Von Protokollen
Operating Manual MSA 330 /MSA 340 4 Daten Management Export von Protokollen Bei Verwendung eines USB Datenträgers (Stick) werden ALLE Protokolle aus dem internen Speicher exportiert. PROT. EXPORTIEREN PDF FORMAT Esc OK Setzen Sie den USB Stick in die Schnittstelle ein, dann wählen Sie PROT. -
Page 110: Darstellung Des Csv Dokuments
4 Daten Management Operating Manual MSA 330 / MSA 340 4.2.2 Darstellung des CSV Dokuments Falls die Daten bei Öffnen mit Microsoft® Excel nur in einer Spalte dargestellt werden, müssen ein paar wenige Einstellungen im EXCEL vorgenommen werden. • Markiere die erste Spalte, wähle “Daten” -> Text in Spalten”... - Page 111 Operating Manual MSA 330 /MSA 340 4 Daten Management • Wähle “Komma” und “Weiter >”. • Bestätigen mit “Fertig stellen”. Die Daten sind richtig dargestellt, wenn jades Feld in einer eigenen Spalte steht.
-
Page 112: Löschen Von Protokollen
4 Daten Management Operating Manual MSA 330 / MSA 340 Löschen von Protokollen Bei der Auswahl von PROT. LOESCHEN werden ALLE Protokolle aus dem internen Speicher unwiderruflich gelöscht. Achtung Vor Ausführen dieses Befehls stellen Sie bitte unbedingt sicher, dass die Daten des internen Speichers bereits auf einen USB-key erfolgreich übertragen wurden. -
Page 113: Fehler Meldungen
Operating Manual MSA 330 /MSA 340 5 Fehler Meldungen Fehler Meldungen Bei Auftreten kritischer Zustände oder Fehlern zeigt das Display eine entsprechende Fehlermeldung an. Die entsprechende Fehlernummer wird auch in das Schweissprotokoll eingetragen. Beispiel einer Fehler Meldung: FEHLER NR: 4 SCHWEISSUNG UNTERBR . -
Page 114: Adminstator Information
Werkseitig wird das Gerät mit minimaler Konfiguration ausgeliefert, somit sind nicht alle Funktionen aktiviert. Um weitere Funktionen des MSA 330 (340) freizuschalten oder zu verändern, benötigt der Maschinenverantwortliche den Zugang zur Administrator Ebene. Dies wird wird durch einen Administrator Barcode gewährleistet,... -
Page 115: Fitting Symbole
Operating Manual MSA 330 /MSA 340 7 Fitting Symbole Fitting Symbole In der Tabelle sind die verwendeten Symbole für die verschiedenen Fittingtypen zusammengefasst. Dies ist hauptsächlich bei manueller Eingabe hilfreich. Symbol Beschreibung Bogen 45° - 90 Τ T-Stück 90° Single socket Ι... -
Page 116: Technische Daten
8 Technische Daten Operating Manual MSA 330 / MSA 340 Technische Daten Netzspannung und 230V (±15%) oder 115V(±15%) Frequenz 50/60Hz Empfohlene Generator Fitting Generator Ausgangs- Leistung Leistung Strom (min) ELGEF 3KVA d20-d125 ELGEF 4.5KVA d140- d630 Andere Hersteller 6KVA d16-d450... -
Page 117: Normen Und Richtlinien
Operating Manual MSA 330 /MSA 340 8 Technische Daten Normen und Richtlinien • ISO 12176-2; • ISO 12176-3; • ISO 12176-4; • UNI 10566 (2009); • EN 60335-1 (Sicherheit); • EN 61000-6-2 (EMC); • EN 61000-6-4 und andere (EMC). -
Page 118: Unterhalt
9 Unterhalt Operating Manual MSA 330 / MSA 340 Unterhalt Während der Kontrolle, Wartung und Reinigung das Gerät immer vom Netz trennen ! GEFAHR Reinigung Gerät regelmässig mit einem feuchten Lappen reinigen. Die Frontplatte und Schilder können bei starker Verschmutzung mit Alkohol gereinigt werden (kein Verdünner oder Trichlor). -
Page 119: Unfallschutz Vorschriften
Operating Manual MSA 330 /MSA 340 10 Unfallschutz Vorschriften 10 Unfallschutz Vorschriften 10.1 Betrieb des Gerätes Das Gerät vor Unbefugten, nicht instruiertem Personal und Kindern fernhalten. Nichtbenutzte Geräte vor unbefugter Benutzung gesichert in einem trockenen, verschlossenen Raum aufbewahren. Der sichere Betrieb des Gerätes setzt folgendes voraus: •... -
Page 120: Defektes Gerät
10 Unfallschutz Vorschriften Operating Manual MSA 330 / MSA 340 10.4 Defektes Gerät Beschädigte Gehäuse oder andere Teile unverzüglich durch eine autorisierte Service Stelle auswechseln oder instandsetzen lassen. Falls das Gerät Fehlfunktionen zeigt, muss es unverzüglich durch eine autorisierte Service Stelle instandgesetzt werden. - Page 121 EU Declaration of Conformity (DoC) Konformitätserklärung UE (DoC) Dichiarazione di conformità UE (DoC) Déclaration de conformité UE (DoC) Declaracion de conformidad UE(DoC) Declaração de conformidade UE (DoC) MSA 330 □ MSA 340 □ The following product : Fusion control Unit...
- Page 122 10 Unfallschutz Vorschriften Operating Manual MSA 330 / MSA 340...
- Page 123 Operating Manual MSA 330 /MSA 340 10 Unfallschutz Vorschriften...
- Page 124 GF Piping Systems Worldwide at home Our sales companies and representatives ensure local customer support in over 100 countries www.gfps.com Argentina / Southern South America Finland Mexico / Northern Latin America Singapore Georg Fischer Central Plastics Georg Fischer AB Georg Fischer S.A. de C.V.
Need help?
Do you have a question about the MSA 330 and is the answer not in the manual?
Questions and answers
ERRO 6 TEMPERATURA AMBIENTE ELEVADA
Error code 6 indicates that the ambient temperature is too high, exceeding the working threshold for the GF MSA 330.
This answer is automatically generated