Table of Contents
Advertisement
Quick Links
Fichier : 20190517_S-8600_&_M-2800_User_guide S-8600
& M-2800
Version : V1.0
S-8600 & M-2800
User guide
AXEM Technology
11 rue Auguste Perret, 94042 Créteil, FRANCE – info@axemtec.com – +33 (0)1 41 94 11 85 – www.axemtec.com
Siret : 45071140300045 - APE : 4652Z - RCS : CRETEIL 450711403 - N° TVA intracom : FR05450711403 - Capital : 500 000,00 €
1/27
Advertisement
Table of Contents

Related Manuals for AXEM Technology S-8600


Summary of Contents for AXEM Technology S-8600
- Page 1 Fichier : 20190517_S-8600_&_M-2800_User_guide S-8600 & M-2800 Version : V1.0 S-8600 & M-2800 User guide 1/27 AXEM Technology 11 rue Auguste Perret, 94042 Créteil, FRANCE – info@axemtec.com – +33 (0)1 41 94 11 85 – www.axemtec.com Siret : 45071140300045 - APE : 4652Z - RCS : CRETEIL 450711403 - N° TVA intracom : FR05450711403 - Capital : 500 000,00 €...
-
Page 2: Table Of Contents
Fichier : 20190517_S-8600_&_M-2800_User_guide S-8600 & M-2800 Version : V1.0 Table of content Background..........................4 S-8600 view ..........................5 1-1: Front View ..........................5 1-2: Back View ..........................5 1-3: Side View ..........................5 Reader Configurations ......................6 Initial Use .......................... 6 3.1.1... - Page 3 Fichier : 20190517_S-8600_&_M-2800_User_guide S-8600 & M-2800 Version : V1.0 3.6.3 Set GPIO Level ......................23 3.6.4 Setting Buzzer Status ....................25 3.6.5 Charging The Serial Communication Baud Rate ............26 Develop your own RFID Application ..................27 3/27 AXEM Technology 11 rue Auguste Perret, 94042 Créteil, FRANCE –...
-
Page 4: Background
Fichier : 20190517_S-8600_&_M-2800_User_guide S-8600 & M-2800 Version : V1.0 1 Background Description Date Version Author Auditor First parution 17/05/2019 V1.0 YDA, ACA 4/27 AXEM Technology 11 rue Auguste Perret, 94042 Créteil, FRANCE – info@axemtec.com – +33 (0)1 41 94 11 85 – www.axemtec.com... -
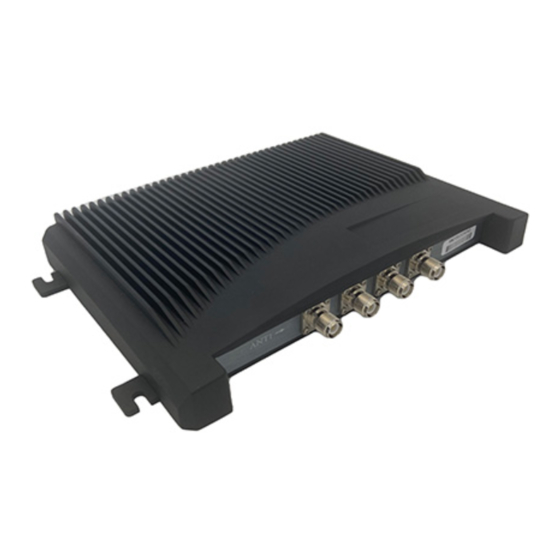
Page 5: 8600 View
Fichier : 20190517_S-8600_&_M-2800_User_guide S-8600 & M-2800 Version : V1.0 2 S-8600 view 1-1: Front View 1-2: Back View 1-3: Side View 5/27 AXEM Technology 11 rue Auguste Perret, 94042 Créteil, FRANCE – info@axemtec.com – +33 (0)1 41 94 11 85 – www.axemtec.com... -
Page 6: Reader Configurations
Fichier : 20190517_S-8600_&_M-2800_User_guide S-8600 & M-2800 Version : V1.0 3 Reader Configurations Initial Use 3.1.1 Step 1: Powering the Reader Plug the power cable in, with the indicator light on and sound of a short beep, reader is ready. As illustrated below: 3.1.2 Step 2: Connecting Antenna(s) to Reader... -
Page 7: Step 3: Connecting Data Line To Reader
Fichier : 20190517_S-8600_&_M-2800_User_guide S-8600 & M-2800 Version : V1.0 3.1.3 Step 3: Connecting Data Line to Reader Method NO.1: You can connect the reader to your PC via RS-232 serial port, as illustrated below: Next, please switch the DIP to the position as illustrated below: Method NO.2: You can also connect the reader to your PC via TCP/IP, as illustrated below:... -
Page 8: Step 4: Operating Reader Via Demo
Fichier : 20190517_S-8600_&_M-2800_User_guide S-8600 & M-2800 Version : V1.0 DIP Switch: ①:EN, ON Status, EN is low level. ②:GPIO1, ON Status, GPIO1 is low level. ③④:TCP/IP, ON Status is TCP/IP communication. ⑤⑥:Blank. ⑦⑧:RS232, ON Status is RS232 communication. 3.1.4 Step 4: Operating Reader via Demo Put the UHFDemo.exe, reader.dll, customControl.dll into the same folder, and double-click... - Page 9 Fichier : 20190517_S-8600_&_M-2800_User_guide S-8600 & M-2800 Version : V1.0 3. Click Connect, if it succeeds, the Operation History will display as below: If the reader is connected via TCP/IP, please follow those steps: Ensure that an Ethernet Card has been installed in the PC.
-
Page 10: Setting Rf Parameter
Fichier : 20190517_S-8600_&_M-2800_User_guide S-8600 & M-2800 Version : V1.0 Text communication with the reader: Click on Get in Firmware Version or in Reader Identifier, the following screen displays: Now the reader has been connected to PC successfully. 3.2 Setting RF Parameter After connecting the reader with PC, we need to set some basic RF parameters: RF Output Power &... -
Page 11: Setting Rf Spectrum
Fichier : 20190517_S-8600_&_M-2800_User_guide S-8600 & M-2800 Version : V1.0 The output power range is 0 - 33dBm. When this setting completes, it will be saved in the reader automatically even if the power is cut off. Our default output power is 30dBm (1W). -
Page 12: Measure Rf Port Return Loss
Fichier : 20190517_S-8600_&_M-2800_User_guide S-8600 & M-2800 Version : V1.0 antenna and port. For normal antennas, you can set the threshold to 3-6dB. Sensitivity of Ceramic Antenna and Handset could be more lower. Notes: Reader detects antenna connection by measuring the Return Loss of RF ports. - Page 13 Fichier : 20190517_S-8600_&_M-2800_User_guide S-8600 & M-2800 Version : V1.0 Method NO.1: Real-time Mode 1. Click Tag Inventory (Real Time Mode). Select the connected antenna(s) port. Set the number of Repeat per command, which is the times of repeat inventory command. For example, inventory command will execute anti-collision algorithm one time when you set the value to 1.
- Page 14 Fichier : 20190517_S-8600_&_M-2800_User_guide S-8600 & M-2800 Version : V1.0 Method NO.2: Buffer Mode 1. Click Inventory, the screen will display as below: Note: the identified tags won’t be shown in the Tag list. 2. Click Stop first, then click Get Buffer. All the data in cache will be uploaded as illustrated below:...
-
Page 15: Fast Switching Antenna To Inventory Tags
Fichier : 20190517_S-8600_&_M-2800_User_guide S-8600 & M-2800 Version : V1.0 Functions description under Buffer Mode: Get and Clear: Read the data form cache and then clear the cache. It will be empty when you read the cache again. Query tag Quantity: If you just want to know there are how many tags in cache without details, click on this button. -
Page 16: Accessing Iso-18000-6C Tag
Fichier : 20190517_S-8600_&_M-2800_User_guide S-8600 & M-2800 Version : V1.0 3.4 Accessing ISO-18000-6C Tag Click Access Tag, and the screen will display as following: 3.4.1 Read tags You can type the parameter(zones to be read, Start Address and Data Length) as illustrated below: Note: the unit of Starting Address and Data Length is WORD which is 16 bit double-byte. -
Page 17: Write Tags
Fichier : 20190517_S-8600_&_M-2800_User_guide S-8600 & M-2800 Version : V1.0 Picture as below shows two tags have been identified successfully. 3.4.2 Write Tags The area of Write Tag is the same as Read Tag, but you need to provide access password and information of write data. -
Page 18: Kill Tags
Fichier : 20190517_S-8600_&_M-2800_User_guide S-8600 & M-2800 Version : V1.0 A password is necessary to be provided for locking tags. When the operation is completed successfully, the screen will display as follows: Same as Write Tags, data of identified tags will be displayed in Tag List. -
Page 19: Error Display Might Be Returned
Fichier : 20190517_S-8600_&_M-2800_User_guide S-8600 & M-2800 Version : V1.0 3. Access tags and choose the EPC NO. which is needed , as illustrated below: After choosing the tag, please click Select and the screen will display as follows: We could see that the column on the left for Selected Tag has been selected. Next, all the operations are based on the tag with this EPC NO. -
Page 20: Accessing & Inventorying Iso-18000-6B Tag
Fichier : 20190517_S-8600_&_M-2800_User_guide S-8600 & M-2800 Version : V1.0 1. Parameters incorrect: for example, zones(password/ EPC/ TID/ User) to be read do not exist. 2. Tags beyond the area that the RF could cover: distance when accessing to tags is about 60%- 70% of tag inventory;... -
Page 21: Accessing To Iso-18000-6B Tag
Fichier : 20190517_S-8600_&_M-2800_User_guide S-8600 & M-2800 Version : V1.0 Each time when the reader identifies a tag’s UID, the buzzer will sound with a short beep. If the buzzer sounds with a long beep, it means the reader start the anti-collision function and identifies multiple tags at the same time. -
Page 22: Other Settings
Fichier : 20190517_S-8600_&_M-2800_User_guide S-8600 & M-2800 Version : V1.0 Notes for access operations: Access operations only for the selected tag. It can read multi-byte data of tag at the same time, length of the data is not limited. -
Page 23: Operating Temperature Monitoring
Fichier : 20190517_S-8600_&_M-2800_User_guide S-8600 & M-2800 Version : V1.0 Operations as below (Reader Setup->RF Setup): Note: If DRM was opened, the sensitivity of the reader will reduce accordingly. Please use this function based on practical application. 3.6.2 Operating Temperature Monitoring Reader will generate heat under intensive work. - Page 24 Fichier : 20190517_S-8600_&_M-2800_User_guide S-8600 & M-2800 Version : V1.0 The image of GPIO port as below: PIN ID Function Equivalent Circuit Instructions PIN 1 GPIO 1 Input + ◆Voltage between PIN 1,2 (PIN 3,4) <=12V PIN 2 GPIO 1 Input - ◆Hetero-polarity...
-
Page 25: Setting Buzzer Status
Fichier : 20190517_S-8600_&_M-2800_User_guide S-8600 & M-2800 Version : V1.0 Operations as below: Users can use the serial port commander to read and write GPIO in their own applications. 3.6.4 Setting Buzzer Status Reader’s working status is provided to users through the Buzzer. Three ways to set the buzzer: 1. -
Page 26: Charging The Serial Communication Baud Rate
Fichier : 20190517_S-8600_&_M-2800_User_guide S-8600 & M-2800 Version : V1.0 3.6.5 Charging The Serial Communication Baud Rate Reader supports two kinds of baud rate: 38400 bps and 115200 bps. You can set baud rate as below: This setting will be stored even if the power is cut off. -
Page 27: Develop Your Own Rfid Application
Fichier : 20190517_S-8600_&_M-2800_User_guide S-8600 & M-2800 Version : V1.0 4 Develop your own RFID Application Most reader functions can be operated through the demo. But in practical applications, user might need to develop their own applications. Please defer to the document: UHF RFID Reader Serial Interface Protocol V3.1.
Need help?
Do you have a question about the S-8600 and is the answer not in the manual?
Questions and answers