Advertisement
Table of Contents
Aluminum Easel Assembly Instructions (page 1)
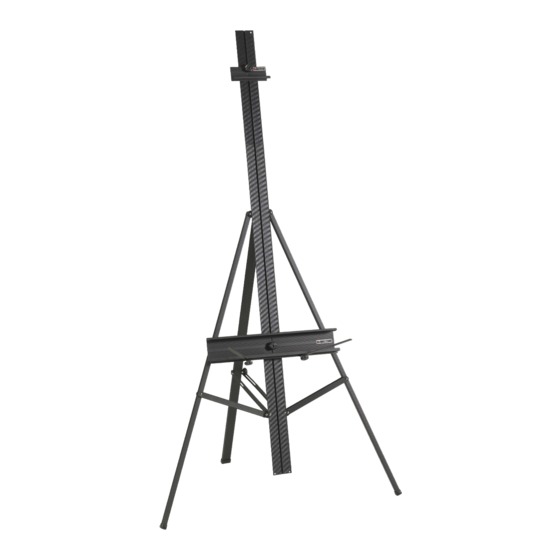
[A] Easel, [B] Adjustment Knobs, [C] Lower Canvas Support (large)
Part A
[1] Easel
Step 1.
Empty contents of carton. Remove all plastic
packaging.
Step 2.
Make sure all parts are included.
Call 1-313-895-0700 if any parts are missing.
See Parts List above.
Step 3.
Take Easel [A] and pull out (spread) the side
legs. Loosen knob on rear tilting leg and tilt rear
leg so that tilting brackets reach knob on lower
portion of rear leg. See FIG 1.
Step 4.
Position tilting brackets over bolt going through
lower part of leg. See FIG 2. Tighten knob at
desired angle.
Martin/F. Weber Co., Detroit, MI USA
www.weberart.com
Email: Custservmud@aol.com
Made in China
Torino
Item No. 92-AE122
Carton Contains:
and [D] Upper Canvas Support (small)
Part B
[2] Adjustment Knobs
with T-Bolts attached
Part C
[1] Lower Canvas Tray
with Palette Holders
FIG 1
[A]
Tilting Brackets
Part D
[1] Upper Canvas Support
Knob
Rear Leg
FIG 2
Advertisement
Table of Contents

Related Manuals for Weber Torino 92-AE122


Summary of Contents for Weber Torino 92-AE122
- Page 1 Step 4. Position tilting brackets over bolt going through lower part of leg. See FIG 2. Tighten knob at desired angle. Knob Rear Leg Tilting Brackets Martin/F. Weber Co., Detroit, MI USA www.weberart.com FIG 2 Email: Custservmud@aol.com Made in China...
- Page 2 Re-tighten to secure. Step 7. Double check all nuts and knobs making sure all are tightened. Your easel is now ready to use. See FIG 6. FIG 5 Martin/F. Weber Co., Detroit, MI USA www.weberart.com Email: Custservmud@aol.com Made in China...
Need help?
Do you have a question about the Torino 92-AE122 and is the answer not in the manual?
Questions and answers