Table of Contents
Advertisement
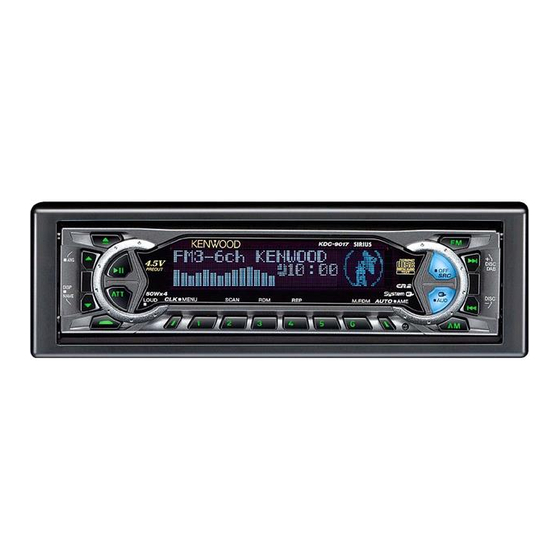
KDC-X917
KDC-X817
KDC-9017
KDC-X717
CD-RECEIVER
INSTRUCTION MANUAL
COMPACT
DIGITAL AUDIO
Take the time to read through this instruction manual.
Familiarity with installation and operation procedures will help you obtain the
best performance from your new CD-receiver.
For your records
Record the serial number, found on the back of the unit, in the spaces designated on
the warranty card, and in the space provided below. Refer to the model and serial
numbers whenever you call upon your KENWOOD dealer for information or service on
the product.
Model KDC-X917, KDC-X817, KDC-9017, KDC-X717 Serial number
© B64-1891-00 (KW)
Advertisement
Table of Contents

Related Manuals for Kenwood KDC-X717


Summary of Contents for Kenwood KDC-X717
- Page 1 Record the serial number, found on the back of the unit, in the spaces designated on the warranty card, and in the space provided below. Refer to the model and serial numbers whenever you call upon your KENWOOD dealer for information or service on the product.
-
Page 2: Table Of Contents
Contents Safety precautions ...4 Handling Compact discs...6 General features Power ...8 Volume...9 Attenuator...9 Switching Modes...9 Loudness ...10 System Q...10 Speaker & Woofer setting ...10 Faceplate Angle Adjustment ...11 Switching Full-Screen Display ...11 Switching the Upper Part Display...12 Switching the Lower Part Display ...12 Forced Closing ...14 Removing the Faceplate...14 Non-Fading Output ...15... - Page 3 KENWOOD CORPORATION 2967-3, ISHIKAWA-CHO, HACHIOJI-SHI TOKYO, JAPAN KENWOOD CORP. CERTIFIES THIS EQUIPMENT CONFORMS TO DHHS REGULATIONS N0.21 CFR 1040. 10, CHAPTER 1, SUBCHAPTER J. Location : Bottom Panel FCC WARNING This equipment may generate or use radio frequency energy.
-
Page 4: Safety Precautions
DNPS, DNPP, Magazine random play, and CD Text display. Note that none of the KDC-C100, KDC-C302, C205, C705, and non-Kenwood CD changers can be connected. 2CAUTION You can damage both your unit and the CD changer if you connect them incorrectly. - Page 5 NOTE • If you experience problems during installation, consult your Kenwood dealer. • If the unit fails to operate properly, press the RESET button. The unit returns to factory settings when the RESET button is pressed. If the unit still fails to operate...
-
Page 6: Handling Compact Discs
Handling Compact discs Playing a CD that is dirty, scratched or warped can cause the sound to skip and the unit to operate incorrectly, resulting in worsened sound quality. Take the following precautions to prevent your CDs from getting scratched or damaged. Handling CDs •... - Page 7 Do Not Load CD Accessories Do not use commercially available CD accessories that can be loaded into the CD slot, such as stabilizers, protective sheets, or CD cleaning discs, since they can cause the unit to malfunction. Removing the CD Only remove the CD from the machine in a horizontal direction, holding it flat.
-
Page 8: General Features
MENU LOUD DISP NAME DISP ATT/ LOUD KDC-X917/X817/9017 LOUD indicator KDC-X717 LOUD indicator (KDC-X917/X817/9017) ¢ Description about this indicator for these features can be displayed SRC/ by setting the Lower Part Display (page 12) to "... + Function indicator." Power... -
Page 9: Volume
Volume Increasing Volume: Press the L button to turn up the volume. Decreasing Volume: Press the M button to turn down the volume. Attenuator This function allows you to turn down the volume quickly. Turning Attenuator On/Off: Press the ATT button to switch the attenuator on and off. When the attenuator is off, the volume returns to the original level. -
Page 10: Loudness
General features Loudness This function amplifies low and high tones when the volume is turned down. The LOUD indicator lights up when the loudness function is Turning Loudness On/Off: Press the LOUD button for at least one second to switch the loudness on and off. -
Page 11: Faceplate Angle Adjustment
In Source mode: Demonstration Spectrum Analyzer 1 Spectrum Analyzer 2 Spectrum Analyzer 3 Spectrum Analyzer 4 (KDC-X917/X817/9017)/ Each source display+ Graphic (KDC-X717) In Stand by mode: Demonstration Date + Clock + Function indicator "ALL OFF" NOTE Please see the menu settings about selecting the display mode. -
Page 12: Switching The Upper Part Display
Each time you press the CLK button, the lower part display changes as follows: In Tuner mode: Spectrum Analyzer1 Spectrum Analyzer2 + Clock Spectrum Analyzer2 + Graphic (KDC-X717 only) Graphic + Clock (KDC-X717 only) Date + Function indicator (KDC-X917/X817/9017)/ Date (KDC-X717) Radio text + Function indicator (only during RDS station reception) (KDC-X917/X817 only) —... - Page 13 In CD/External disc control mode: Spectrum Analyzer1 Spectrum Analyzer2 + Clock Spectrum Analyzer2 + Graphic (KDC-X717 only) Graphic + Clock (KDC-X717 only) Date + Function indicator (KDC-X917/X817/9017)/ Date (KDC-X717) Disc name (DNPS)* + Function indicator (KDC-X917/X817/9017)/...
-
Page 14: Forced Closing
General features Forced Closing This function prevents tampering with the unit your car is being serviced etc. Hiding the unit with the ignition turned on (forced closing): Press the SRC button for at least one second. The faceplate will slide open. When the period of time which you have set in the "Time setting for removing the faceplate"... -
Page 15: Non-Fading Output
Doing so may cause the connector on the faceplate bracket to malfunction. Press the right side of the faceplate until it locks. Function of the KDC-X917/KDC-X817/KDC-X717 Non-Fading Output You can turn the non-fading output on and off. -
Page 16: Audio Control Setting
ON. Bass center frequency, bass quality factor, bass extend, middle center frequency, middle quality factor, and treble center frequency. Function of the KDC-X917/KDC-X817/KDC-X717 Bass Center Frequency Adjust the center frequency of the bass. Display and setting: "Bass FRQ"... -
Page 17: Middle Center Frequency
Function of the KDC-X917/KDC-X817/KDC-X717 Middle Center Frequency Adjust the center frequency of the middle. Display and setting: "MID FRQ" : 0.5 / 1.0 / 1.5 / 2.0 kHz. Middle Level Adjust the middle level. Display and setting: "MID" : - 8 – + 8... -
Page 18: High-Pass Filter Frequency For Front Output
Audio control features Function of the KDC-X917/KDC-X817/KDC-X717 High-pass Filter Frequency for Front Output Adjust the frequency of the High-pass filter for front output. Display and setting: "HPF Front" : Through / 40Hz / 60Hz / 80Hz / 100Hz / 120Hz /... -
Page 19: Tuner Features
Tuner features MENU LOUD DISP NAME #1-6 NAME KDC-X917/X817/9017 Preset station number ST indicator Band display KDC-X717 Preset station number AUTO indicator Band display — 19 — ¢ AUTO AUTO/ Frequency Frequency ST indicator... -
Page 20: Tuning
The AUTO 1 indicator lights up when auto seek tuning is selected, and the AUTO 2 indicator lights when preset station seek tuning is selected. (KDC-X717 only) Selecting Tuning Mode: Press the AUTO button. Each time you press the AUTO button, the mode switches as follows. -
Page 21: Direct Access Tuning
Recalling a Preset Station: Press the preset station button (#1-6) for the desired station. The number of the recalled station is displayed. Function of the KDC-X917/KDC-X817/KDC-X717 Direct Access Tuning When you know the frequency of the station that you want to listen to, you can input it directly for quick access. -
Page 22: Station Name Preset (Snps)
Tuner features Station Name Preset (SNPS) You can assign names to radio stations with the Station Preset Memory. Up to 32 FM stations and 16 AM stations can be assigned names. Adjust the frequency to the station whose name you want to enter. -
Page 23: Station Name Preset Play (Snpp)
Station Name Preset Play (SNPP) You can search for the station for any station if its name has been preset using Station Name Preset. Press the DNPP button on the remote. "SNPP" will be displayed once the station name preset play mode is entered. -
Page 24: Rds (Radio Data System)
RDS features Function of the KDC-X917/KDC-X817 Description about this indicator for these features can be displayed by setting the Lower Part Display (page 12) to "... + Function indicator." RDS (Radio Data System) RDS is a service used by radio stations to transmit data outside normal radio broadcast signals. -
Page 25: Registration Of A Station As A Pty
8. Soft Rock (Soft Rock) 9. Top 40 (Top 40) 10. Country (Country) 11. Oldies (Oldies) 12. Soft (Soft) 13. Nostalgia (Nostalgia) 14. Jazz (Jazz) 15. Classical (Classical) 16. R&B (Rhythm and Blues) 17. Soft R&B (Soft R & B) 18. -
Page 26: Playing Cds
M.RDM DISP/ NAME KDC-X917/X817/9017 Disc number Track number Track time Disc title/Track title/DNPS IN indicator KDC-X717 Track number Track time Disc title/Track title/DNPS IN indicator (KDC-X917/X817/9017) ¢ Description about this indicator for these features can be displayed DISC+ by setting the Lower Part Display (page 12) to "... + Function indicator."... -
Page 27: Playing Other Disc Mode
The external disc control mode will differ, depending on the unit that is connected. Mode Display Examples • "CD2" ...when a CD player is connected • "CD-CH"/"MD-CH"/"DISC" ...when a disc changer is connected • "CD-CH1"/"MD-CH1"/"DISC1" , "CD-CH2"/"MD-CH2"/"DISC2" ...when two disc changers are connected Pausing and Restarting Disc Play: Press the 38 button to make the disc pause. -
Page 28: Disc Search
CD/External disc control features Disc Search Function of disc changers) Search forward or backward through the discs in a disc changer. Making a Reverse Disc Search: – Press the DISC button to display the desired disc number. Each time the button is pressed, the displayed disc number decreases by one. -
Page 29: Text Scroll
NOTE Random play is canceled when you eject the disc. Text Scroll This function permits the text to be scrolled and the entire text to be displayed. The scrolling method differs depending on the setting of scrolling in the menu. To scroll automatically: Press the DISP or CLK button to display the disc or track title on the upper or lower part display. -
Page 30: Presetting Disc Names (Dnps)
CD/External disc control features Presetting Disc Names (DNPS) Store the names of discs to be displayed when played. Play the disc whose name you want to preset. NOTE • This function is not available for disc changers that do not feature the Disc Name Preset function. -
Page 31: Magazine Random Play
• Magazine random play is canceled when you eject the disc. • The time needed for random selection depends on the number of discs loaded in the disc magazine. Function of the KDC-X917/KDC-X817/KDC-X717 Direct Track Search Using the remote, directly input the track number that you want to listen to. -
Page 32: Direct Disc Search
CD/External disc control features Function of the KDC-X917/KDC-X817/KDC-X717 Direct Disc Search (Function of disc changers with remote) Using the remote, directly input the disc number that you want to listen to. Using the number buttons on the remote, input the number of the disc that you want to listen to. -
Page 33: Menu System
Menu settings DISP MENU #1-6 KDC-X917/X817/9017 Menu display TI indicator KDC-X717 Menu display (KDC-X917/X817/9017) ¢ Description about this indicator for these features can be displayed by setting the Lower Part Display (page 12) to "... + Function indicator." Menu System... -
Page 34: Security Code
Menu settings Security Code <In Stand by mode> When the battery is removed from the unit's power switch, you cannot turn on the unit again unless the preset security code is input. This function helps prevent theft. NOTE You must follow steps 1 to 8 to be able to use the Security Code function. -
Page 35: Touch Sensor Tone
Touch Sensor Tone This function produces a beep sound that accompanies button operation. It can be switched on or off. Display and setting: "Beep ON" : Beep setting is on. (Default setting) "Beep OFF" : Beep setting is off. NOTE The beep sound is not output from the preout jacks. -
Page 36: Memo Mode
Menu settings Memo Mode You can input the text to be displayed and set the date when that text will appear in the display with the calendar function. Display and setting: Select the display "Memo Mode" during the selecting function in the menu mode. -
Page 37: Selectable Illumination
Display and setting: "Bright 0" – "Bright 10" NOTE The initial setting value while your car's light switch is turned on is "5" , and while the light is turned off is "10". — 37 — Function of the KDC-X717... -
Page 38: Dimmer
Display and setting: "Off Wait" : 0sec / 3sec (Default setting) / 5sec / 10sec / 15sec / 20sec / 25sec (sec=seconds) Function of the KDC-X917/KDC-X817/KDC-X717 System Q When this system is set to on, the System Q factors (Bass... -
Page 39: External Amp Control
Function of the KDC-X917/KDC-X817/KDC-X717 External Amp Control Adjust the bass boost level of the external amplifier using the main unit. Display and setting: "AMP Bass Flat"/"AMP Bass FLT" : Bass boost level is flat. (Default setting) "AMP Bass +6" : Bass boost level is low (+6dB). -
Page 40: Basic Operations Of Remote
Basic Operations of remote KDC-X917/X817/X717 ¢ KDC-9017 TUNE FM/DISC ¢ TUNE TUNE TRACK DSIC AM/DISC — DNPP/ DNPP REMOTE CONTROL UNIT 2CAUTION Do not set the remote on hot places such as above the dashboard. Loading and Replacing the Batteries: Use two "AAA"-size batteries. - Page 41 • SRC button Each time you press the SRC button, the mode switches as follows: Tuner mode CD mode External disc control mode 1 External disc control mode 2 / AUX mode Standby mode NOTE • The mode switches to the next mode from any mode which cannot be used.
- Page 42 Basic Operations of remote CD/External disc control features • 4/¢ buttons Press the 4 button to search through the tracks backward. Press the ¢ button to search through the tracks forward. Use to move the cursor while entering disc name. •...
-
Page 43: Accessories
Accessories External view External view ... Number of items ...1 ...1 ...2 ...1 ...2 ...2 2CAUTION Do not use any accessories other than those provided with your unit. If you use other accessories, you may damage the Installation Procedure 1. To prevent a short circuit, remove the key from the ignition and disconnect the - battery. -
Page 44: Connecting Wires To Terminals
(Pink / Black) (KDC-X917/X817/X717 only) Ignition wire (Red) Car fuse box Battery wire (Yellow) Ground wire (Black) - (To car chassis) — 44 — To KENWOOD disc changer/ DAB control input/ KPA-SD100/KPA-HD100/KPA- SS100 NOTE To connect these leads, refer to the relevant instruction manuals. -
Page 45: Installation (Non-Japanese Cars)
Installation (non-Japanese cars) Installation (non-Japanese cars) Firewall or metal support Accessory4 Phillips truss Accessory2 head sheet Metal mounting metal screw strap (commercially available) NOTE Make sure that the unit is installed securely in place. If the unit is unstable, it may malfunction (for example, the sound may skip). -
Page 46: Removing The Unit
Removing the Unit Removing the hard rubber frame Insert the removal tool into the indentations in the hard rubber frame, and pull it gently until the lock is released. Accessory0 Removal tool Removing the Unit Refer to the section “Removing the hard rubber frame” and then remove the hard rubber frame. -
Page 47: Installation (Japanese-Cars)
Installation (Japanese-cars) Installing Radio Bracket in Japanese-made Cars (J-Cars) Factory-installed Radio Bracket Factory trim bezel Accessory9 J-Car Trim Plate (place thick part on bottom) (For Nissan Car) After aligning the J-Car bracket with the factory-installed radio bracket, tighten the screws. Accessory8 J-Car Bracket (follow indications for L/R) -
Page 48: Troubleshooting Guide
Troubleshooting Guide What might seem to be a malfunction in your unit may just be the result of slight misoperation or miswiring. Before calling service, first check the following table for possible problems. PROBLEM The power does not turn on. The fuse has blown. - Page 49 PROBLEM No sound can be heard, or the Attenuator is turned on. volume is low. The fader or balance settings are set all the way to one side. The input/output wires or wiring harness are connected incorrectly. The values of Volume offset are low. One of the speaker wires is being pinched by a screw in The sound quality is poor or the car.
- Page 50 Troubleshooting Guide CD/External disc control mode PROBLEM The disc control mode cannot No wire has been connected to the disc changer input be selected. terminal on the unit. The specified disc does not The specified CD is quite dirty. play, but another one plays The CD is upside-down.
- Page 51 ] Cool down the unit by opening the windows or turning on the air conditioner. As the temperature falls below 60°C (140°F), the disc will start playing again. If this indicator blinks, the CD player is malfunctioning. ] Eject the CD and try inseting it again.
-
Page 52: Specifications
AM tuner section Frequency range (10 kHz space) ...530 kHz – 1700 kHz Usable sensitivity (S/N = 20dB) ...28 dBµ (25 µV) CD player section Laser diode ...GaAlAs (λ=780 nm) Digital filter (D/A) ...8 Times Over Sampling D/A Converter ...1 Bit Spindle speed ...500 –... - Page 53 1 NOTE You cannot presetrng disc names on a CD where while this unrt IS controlling a CD changer “KDC-C662”, or “KDC-C462” ( REMARQUE II n’est pas possible d’attribuer une etrquette est present lorsque cette unrte sert a dinger “KDCC665”. “KDC-C465”, “KDC-C662”, ou “KDCC462”...
- Page 54 A~en~o~~ This card is necessary to boy the panel again because theft of damage. Attention: Gene carte est n&cessaire pour se procurer panneau dans le cas de perte ou d’endommagement celui que vous possbdez. Attentie: Deze kaart is nodig als u een nieuw paneel with aanschaffen in geval van diefstal of beschadiging.
- Page 56 Andorra Iceland Malta Norge Schweiz Svizzera Suisse Sverige Dear Customer, Thank you for purchasing this kenwood product booklet, our warranty is only valid in the countries please contact your retailer for information on warranty KENWOOD Corporation Customer Information 3-l 7-9 Aobadai...
- Page 57 Take or ship it to any KENWOOD Authorized Service Center in the U S A along with &complete problem (if you are uncertain as to whether a Service Center is authorized please call 1 SOO-KENWOOD for the nearest Service Center 1-800-536-96831...
Need help?
Do you have a question about the KDC-X717 and is the answer not in the manual?
Questions and answers