
Subscribe to Our Youtube Channel
Related Manuals for IKI Corner IKI 6 kW

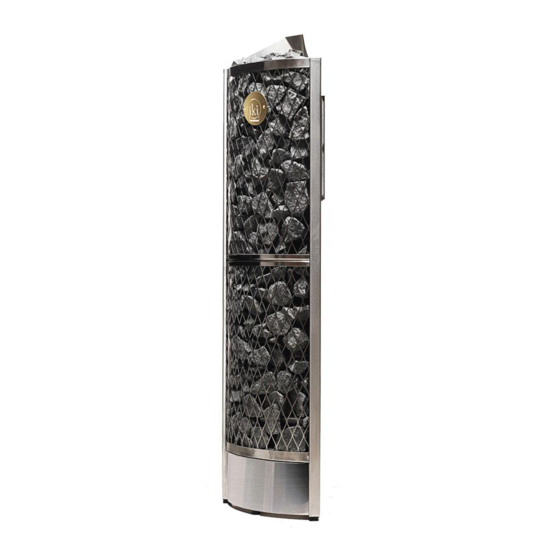
Summary of Contents for IKI Corner IKI 6 kW
- Page 1 Instructions for installation and use Corner IKI and Wall IKI sauna heaters with mounted unit Corner IKI 6 kW / MC10060NA Wall IKI 6 kW / MW10060NA Corner IKI 9 kW / MC10090NA Wall IKI 9 kW / MW10090NA 2/2022...
- Page 3 Its use for any other purpose is prohibited. CONTACT INFORMATION IKI LLC Address: 5621 Dupont Ave. S. Minneapolis, MN 55419 Email: ikisaunas@gmail.com Phone: (612) 801 7126 www.ikikiuas.com...
-
Page 4: Table Of Contents
Contents WARNINGS ................................ 4 PRIOR TO INSTALLATION ........................... 6 Installation of the heater ........................... 7 Piling of the stones ............................8 Wiring diagram ..............................11 Supply wires ..............................12 Safety distances ............................... 12 Model table ..............................13 Requirements for water quality ........................13 Operating the heater timer and temperature .................... -
Page 5: Warnings
WARNINGS • Keep away from the heater when it is hot. The stones and outer surface of the heater may burn your skin. • Do not throw too much water on the stones. The evaporating water is boiling hot. • Do not let young, handicapped or ill people bathe in the sauna on their own. •... - Page 6 inside the heater rock space or near the heater that could change the amount or direction of the air flowing through the heater, thus causing the resistance temperature to rise too high, which may set the wall surfaces on fire! Do not operate heater without stones or if the stones have been piled incorrectly so that the heating elements are visible.
-
Page 7: Prior To Installation
PRIOR TO INSTALLATION Before you begin installing the heater, pay attention to the following points in the heater: • Beware of the sharp edges of the stainless-steel mesh. Use a long-sleeved shirt and protective gloves during the installation and once taking the heater out of the cardboard box. -
Page 8: Installation Of The Heater
1. Choose the place for the heater according to the required safety distances. The installation must be carried out in the place where the heater will be situated. The safety distances for Electric IKI 6 – 9 kW are measured from the heater's mesh frame outwards (Page 12: Safety distances). Negligence to comply with the safety distances may cause fire hazard. -
Page 9: Piling Of The Stones
Piling of the stones Beware of the sharp edges of the stainless-steel mesh. Use a long-sleeved shirt and protective gloves during the installation and once taking the heater out of the cardboard box! Wash the stones before piling. Olivine, olivine-diabase, peridotite or black volcanite stones are recommended stones, in sizes 2-4 inches (5-10 cm) in diameter. -
Page 12: Wiring Diagram
Wiring diagram 1= Contactor 2= Thermostat 3=Timer 4=Heating elements 5=Ground 6 Overheating limit control... -
Page 13: Supply Wires
Supply wires Heater model Input kW Voltage Amps Circuit breaker A Wire Size AWG Corner/Wall IKI 6 28.75 Corner/Wall IKI 9 37.5 All supply wire to be 90 °C copper. Safety distances Corner IKI Wall IKI A: 4 inches (100 mm) -
Page 14: Model Table
Height of heater Radius of Max. amount of Power Sauna heater stones Corner IKI 6 kW 176-317 ft³ 54,7 ‘’ / 139 cm 11,8 ‘’ / 30 cm 90 kg / 198 lb. 6 kW Corner IKI 9 kW 282-565 ft³... -
Page 15: Operating The Heater Timer And Temperature
To restart the heater, turn the timer first down to zero and then push the reset button firmly. The button is located at the bottom part of the heater. If the heater will not start operating or continues to shut off, contact IKI LLC for further assistance. -
Page 16: Warning Placards
The heating time is about 60–75 minutes depending on the size of the room and its ventilation. • Recommended bathing temperature for IKI stone pillars is 131- 167F (55–75C). The temperature should be set to the desired range from the temperature knob in the control unit. -
Page 17: Troubleshooting
Troubleshooting If the sauna room does not heat up, check that: • The power is on and the circuit breakers are in working condition and are the correct size. • The timer is set to the operating range. The temperature is set in a controller to a higher temperature than the temperature in the sauna •... -
Page 18: Warranty
Warranty IKI LLC (the manufacturer) assures a warranty to its products as stipulated here, guaranteeing the quality and functionality of the products during the warranty period. The warranty requires that the buyer follow the instructions regarding the placement of the heater, its installation, use and maintenance as well as those regarding the qualities of the stones used in the heater. -
Page 19: Quality Guarantee / Freight Guarantee
Quality guarantee / Freight guarantee Guarantee of materials. The manufacturer guarantees the durability of the stainless-steel parts (resistor platform and frame) in private home use for 10 years. During the warranty period any defects that appear in the heater's raw materials or are production-based will be repaired free of charge. For example, the use of seawater on the heater is forbidden. -
Page 20: Ventilation
Ventilation The ventilation in the sauna room needs to be considered. Proper air-flow allows bathers to enjoy fresh, oxygen-rich air. The air should fully exchange 6 times an hour. The supply air inlet should be installed on the wall or the ceiling at about 20 inches (500 mm) above the heater. The supply air inlet vent should be 2-4 inches (50-100 mm) in diameter. -
Page 21: Gravity Ventilation
Gravity ventilation... -
Page 22: The Sauna Room
The Sauna Room 2.1. Insulation and Wall Materials of the Sauna Room In an electrically heated sauna, all the massive wall surfaces which store plenty of heat (such as bricks, glass blocks, plaster etc.), must be sufficiently insulated in order to keep the heater output at a reasonably low level. - Page 23 DOOR Must open out and should not have a lock. Types of door fastenings that may be used are magnetic catches, friction catches, spring-loaded or gravity loaded door closers, and the like. ROOM LIGHT Should be a vapor proof, wall mounted type, with rough-in box mounted flush with inside paneling. It should be mounted 6’’...
- Page 24 Copyright IKI LLC | We reserve the right to changes.
Need help?
Do you have a question about the Corner IKI 6 kW and is the answer not in the manual?
Questions and answers