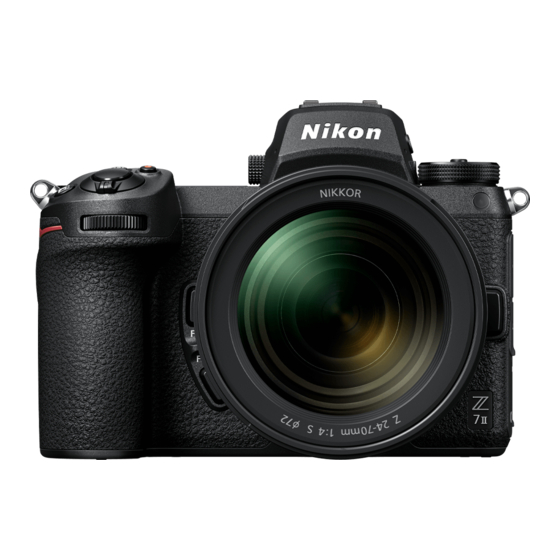
Advertisement
Quick Links
En
Features Available with "C" Firmware
Version 1.40
Updating the Z 7II/Z 6II "C" firmware from version 1.30 to
version 1.40 gives access to the features described below. For
information on features available with prior updates, see the
Z 7II/Z 6II Reference Manual.
"Firmware Version"
To view the camera firmware version or update the camera
firmware, select [Firmware version] in the setup menu.
Updates can be performed using a computer or smart device.
•
Computer: Check the Nikon Download Center for new versions of the
camera firmware. Information on performing updates is available via
the firmware download page.
https://downloadcenter.nikonimglib.com/
•
Smart device: If the smart device has been paired with the camera
using the SnapBridge app, the app will automatically notify you when
updates become available, and you can then download the update to
the camera memory card via the smart device. For information on
performing updates, see SnapBridge online help. Note that automatic
notifications may not be displayed at exactly the same time as the
updates are made available on the Nikon Download Center.
1
SB2D02(11)
6MO02311-02
Advertisement

Summary of Contents for Nikon Z 7II
- Page 1 6MO02311-02 Features Available with “C” Firmware Version 1.40 Updating the Z 7II/Z 6II “C” firmware from version 1.30 to version 1.40 gives access to the features described below. For information on features available with prior updates, see the Z 7II/Z 6II Reference Manual.
- Page 2 New Options for Custom Settings f2 “Custom Controls”: “Save Focus Position” and “Recall Focus Position” [Save focus position] and [Recall focus position] have been added to the roles that can be assigned to camera controls for Custom Setting f2 [Custom controls]. Assign [Save focus position] to [Lens Fn button] and [Recall focus position] to [Lens Fn2 button] respectively to save and quickly restore the lens’s current focus position using these controls (“memory...
- Page 3 ❚❚ Memory Recall Select [Save focus position] for Custom Setting f2 [Custom controls] > [Lens Fn button]. Select [Recall focus position] for Custom Setting f2 [Custom controls] > [Lens Fn2 button]. Focus on the desired subject in the shooting display and press and hold the lens Fn button.
- Page 4 Cautions: Memory Recall • Focus positions cannot be saved while shooting information is displayed. • Changes in ambient temperature may result in focus being recalled to a position different from that at which it was saved. • Previously-saved focus positions tend to change if recalled after lens focal length is adjusted via zoom.
- Page 5 New Custom Setting: f9 “Focus Ring Rotation Range” A [Focus ring rotation range] item has been added to the Custom Settings menu at position f9. Choose how far the focus or control rings on Z mount lenses must be rotated to go all the way from the minimum focus distance to infinity.
- Page 6 New Custom Setting: f10 “Switch Focus/ Control Ring Roles” A [Switch focus/control ring roles] item has been added to the Custom Settings menu at position f10. If [On] is selected, the focus ring will perform the role currently assigned to the control ring.
-
Page 7: Establishing A Connection
Remote Control (ML-L7) Options A [Wireless remote (ML-L7) options] item has been added to the setup menu. When paired with the camera via Bluetooth, optional ML-L7 remote controls can be used to control the camera remotely during still photography, movie recording, and the like. ❚❚... - Page 8 Keep the power button on the remote control pressed for over three seconds. • The camera and remote control will begin pairing. During pairing, the status LED on the remote control will flash about twice a second. • A connection will be established between the camera and remote control when pairing is complete.
- Page 9 ❚❚ The Setup Menu “Wireless Remote (ML-L7) Options” Item The [Wireless remote (ML-L7) options] item in the setup menu contains the following options: • [Wireless remote connection]: Select [Enable] to connect to the remote control with which the camera has been most recently paired.
- Page 10 ❚❚ Parts of the ML-L7 Remote Control: Names and Functions Performs the same function as the camera 1 “−” button W ( Q ) button. Performs the same function as the camera X 2 “+” button button. Press once to start movie recording and 3 Movie-record button again to stop.
- Page 11 The color and behavior of the status LED indicates remote control and shooting 5 Status LED status. For more information, see “The Remote Control Status LED (Z 7II/Z 6II)” ( 0 12). Press the button to release the shutter. •...
- Page 12 The Remote Control Status LED (Z 7II/Z 6II) Color Behavior Status Flashes approximately once a Searching for paired Green second camera. Flashes quickly (approximately Green Pairing. twice a second) Flashes approximately once Green Connected to camera. every three seconds Orange Flashes once Photography started.
- Page 13 Troubleshooting Try the solutions listed below if you experience any of the following when using an ML-L7 remote control. • [Wireless remote (ML-L7) options] cannot be selected in the setup menu and the camera cannot be paired with the remote control: - Check that the camera battery is charged or use an optional charging AC adapter or an optional power connector and AC adapter.
- Page 14 © 2022 Nikon Corporation...


Need help?
Do you have a question about the Z 7II and is the answer not in the manual?
Questions and answers