Table of Contents
Advertisement
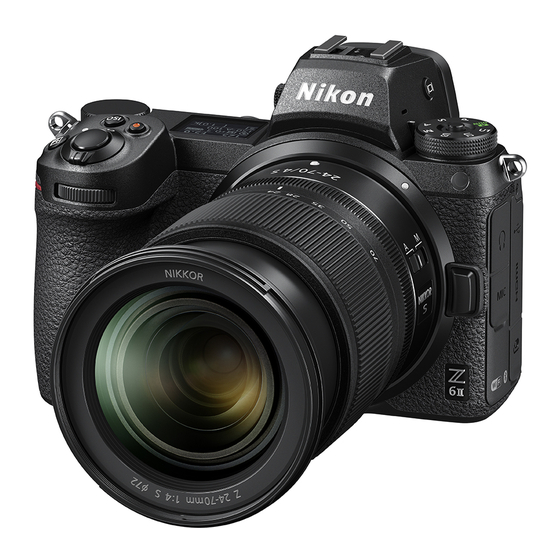
DIGITAL CAMERA
User's Manual
First Steps
Basic Photography and Playback
Troubleshooting
Technical Notes
• Read this manual thoroughly before using the camera.
• To ensure proper use of the camera, be sure to read
"For Your Safety" (page x).
• After reading this manual, keep it in a readily accessible
place for future reference.
1
18
30
31
En
Advertisement
Table of Contents

Subscribe to Our Youtube Channel
Related Manuals for Nikon Z 6 II


Summary of Contents for Nikon Z 6 II
- Page 1 DIGITAL CAMERA User's Manual First Steps Basic Photography and Playback Troubleshooting Technical Notes • Read this manual thoroughly before using the camera. • To ensure proper use of the camera, be sure to read “For Your Safety” (page x). • After reading this manual, keep it in a readily accessible place for future reference.
-
Page 2: When Your First Photo Can't Wait
When Your First Photo Can’t Wait ❚❚ Getting Ready Insert the battery ( 0 7). For information on charging the battery, see “Charging the Battery” ( 0 2). Insert a memory card ( 0 9). Attach a lens ( 0 12). •... - Page 3 ❚❚ Take ( 0 18) and View ( 0 28) Pictures Rotate the mode dial to b . To focus, press the shutter- release button halfway (i.e, lightly press the shutter- release button, stopping when it is pressed halfway). Without lifting your finger from the shutter-release button, press the button the rest of the way down to take...
-
Page 4: Package Contents
Package Contents Be sure all items listed here were included with your camera. ❏ Camera ❏ EN-EL15c rechargeable Li-ion battery with terminal cover ❏ MH-25a battery charger (comes with either an AC wall adapter or power cable of a type and shape that varies with the country ❏... - Page 5 For information on lenses supplied as part of a lens kit, see the lens manuals available for download from the Nikon Download Center. D The Nikon Download Center A pdf version of this manual is available from the Nikon Download Center, together with an English-language reference manual with detailed operating instructions, which can be viewed online in html.
-
Page 6: About This Manual
About This Manual ❚❚ Symbols The following symbols and conventions are employed in this manual. Use them to help locate the information you need. This icon marks notes, information that should be read before using this product. This icon marks tips, additional information you may find helpful when using this product. - Page 7 For more information, see “For Your Safety” ( 0 x). ❚❚ Nikon User Support Visit the site below to register your camera and keep up-to-date with the latest product information. You will find answers to frequently asked questions (FAQs) and can contact us for technical assistance.
-
Page 8: Table Of Contents
Table of Contents When Your First Photo Can’t Wait ............. ii Package Contents................... iv About This Manual ................. vi For Your Safety ..................x Notices....................... xv First Steps Attaching the Strap................. 1 Charging the Battery ................2 The Battery Charger............2 Charging AC Adapters ............ - Page 9 Camera Care ..............32 Battery Care..............37 Using the Charger............40 Using the Charging AC Adapter....... 40 Trademarks and Licenses..............41 Notices...................... 49 Bluetooth and Wi-Fi (Wireless LAN) ..........52 Warranty Terms - Nikon Europe Service Warranty ....59 Table of Contents...
-
Page 10: For Your Safety
For Your Safety To prevent damage to property or injury to yourself or to others, read “For Your Safety” in its entirety before using this product. Keep these safety instructions where all those who use this product will read them. A DANGER: Failure to observe the precautions marked with this icon carries a high risk of death or severe injury. - Page 11 Do not let your skin remain in prolonged contact with this product while it is on or plugged in. Failure to observe this precaution could result in low-temperature burns. Do not use this product in the presence of flammable dust or gas such as propane, gasoline or aerosols.
- Page 12 Do not handle the plug when charging the product or using the AC adapter during thunderstorms. Failure to observe this precaution could result in electric shock. Do not handle with bare hands in locations exposed to extremely high or low temperatures. Failure to observe this precaution could result in burns, or frostbite.
- Page 13 Do not leave the product where it will be exposed to extremely high temperatures, for an extended period such as in an enclosed automobile or in direct sunlight. Failure to observe this precaution could result in fire or product malfunction. Do not look directly at the AF-assist illuminator.
- Page 14 If battery liquid comes into contact with the eyes, rinse with plenty of clean water and seek immediate medical attention. Delaying action could result in eye injuries. Follow the instructions of airline personnel. Batteries left unattended at high altitudes in an unpressurized environment may leak, overheat, rupture, or catch fire.
-
Page 15: Notices
• Nikon will not be held liable for any damages resulting from the use of this product. • While every effort has been made to ensure that the information in... - Page 16 Only Nikon brand electronic accessories (including lenses, chargers, batteries, AC adapters, and flash accessories) certified by Nikon specifically for use with this Nikon digital camera are engineered and proven to operate within the operational and safety requirements of this electronic circuitry.
- Page 17 Before taking pictures on important occasions (such as at weddings or before taking the camera on a trip), take a test shot to ensure that the camera is functioning normally. Nikon will not be held liable for damages or lost profits that may result from product malfunction.
- Page 18 Notices xviii...
-
Page 19: First Steps
First Steps Attaching the Strap To attach a strap (whether the supplied strap or one that has been purchased separately): Attaching the Strap... -
Page 20: Charging The Battery
Charging the Battery Charge the supplied EN-EL15c battery before use. D The Battery and Charger Read and follow the warnings and cautions in “For Your Safety” ( 0 x) and “Caring for the Camera and Battery: Cautions” ( 0 32). The Battery Charger Depending on the country or region, the charger comes with either an AC wall adapter or a power cable. - Page 21 The ambient temperature is too hot or too cold: Use the battery charger at temperatures within the designated temperature range (0– 40 °C/+32–104 °F). If the problem persists, unplug the charger and end charging. Bring the battery and charger to a Nikon-authorized service representative. Charging the Battery...
-
Page 22: Charging Ac Adapters
Charging AC Adapters When a battery is inserted in the camera, the optional EH-7P charging AC adapter can be used to charge the battery or power the camera. • EN-EL15a or EN-EL15 batteries cannot be charged using a charging AC adapter. Use an MH-25a battery charger instead. •... - Page 23 After confirming that the camera is off, connect the charging AC adapter ( ) and plug the adapter Keep the plug straight during insertion and removal. Charging • The battery charges while the camera is off. • The camera charge lamp ( ) lights amber while charging is in progress.
- Page 24 Unplug the charging AC adapter when charging is complete or when it is no longer needed to power the camera. D The Charging AC Adapter If the battery cannot be charged using the charging AC adapter, for example because the battery is not compatible or the temperature of the camera is elevated, the charge lamp will flash rapidly for about 30 seconds and then turn off.
-
Page 25: Inserting The Battery
Inserting the Battery • Turn the camera off before inserting or removing the battery. • Using the battery to keep the orange battery latch pressed to one side, slide the battery into the battery chamber until the latch locks it in place. Removing the Battery To remove the battery, turn the camera off and open the battery-chamber cover. -
Page 26: Battery Level
Battery Level • The battery level is shown in the shooting display and control panel while the camera is on. Monitor Viewfinder Control panel • The battery level display changes as the battery level diminishes, from L through K , J , I , and H . When the battery level falls to H , suspend shooting and charge the battery or ready a spare battery. -
Page 27: Inserting Memory Cards
Inserting Memory Cards The camera is equipped with two memory card slots: a slot that takes one CFexpress or XQD memory card ( ) and another that takes one SD memory card ), for a total of two cards, one of each type. -
Page 28: Removing Memory Cards
Removing Memory Cards After confirming that the memory card access lamp is off, turn the camera off, open the memory card slot cover, and press the card in to eject it ( ). The card can then be removed by hand ( D Memory Cards •... - Page 29 D Memory Card High-Temperature Warning As indicated on the inside of the memory card slot cover, memory cards inserted in the camera may become hot. Do not attempt to remove memory cards if a high-temperature warning appears in the shooting display; instead, wait for the camera to cool and the warning to clear from the display.
-
Page 30: Attaching A Lens
Attaching a Lens • The camera can be used with Z mount lenses. The lens generally used in this manual for illustrative purposes is a NIKKOR Z 24–70mm f/4 S. • Be careful to prevent dust entering the camera. • Confirm that the camera is off before attaching the lens. -
Page 31: Detaching Lenses
- Rotate the lens as shown until it clicks into place ( • Remove the front lens cap before taking pictures. D F Mount Lenses • Be sure to attach the FTZ mount adapter (available separately) before using F mount lenses. •... -
Page 32: Choose A Language And Set The Clock
Choose a Language and Set the Clock The language option in the setup menu is automatically highlighted the first time menus are displayed. Choose a language and set the camera clock. Turn the camera on. Highlight [Language] in the setup menu and press 2 . The [Language] item is automatically highlighted in the setup menu the first time the G button is pressed... - Page 33 Select a language. Press 1 or 3 to highlight the desired language and press J (the languages available vary with the country or region in which the camera was originally purchased). Highlight [Time zone and date] and press 2 . Choose a time zone.
- Page 34 Turn daylight saving time on or off. • Select [Daylight saving time] in the [Time zone and date] display. • Highlight [On] (daylight saving time on) or [Off] (daylight saving time off) and press J . • Selecting [On] advances the clock one hour; to undo the effect, select [Off].
- Page 35 Exit the menus. Lightly press the shutter-release button halfway to exit to shooting mode. D The t Icon A flashing t icon in the shooting display indicates that the camera clock has been reset. The date and time recorded with new photographs will not be correct;...
-
Page 36: Basic Photography And Playback Taking Photographs ( B Mode)
Basic Photography and Playback Taking Photographs ( b Mode) Select b (auto) mode for simple “point-and-shoot” photography. D Lenses with Retractable Barrels Lenses with retractable barrels must be extended before use. Rotate the lens zoom ring as shown until the lens clicks into the extended position. - Page 37 Select photo mode by rotating the photo/ movie selector to C . Pressing the mode dial lock release on top of the camera, rotate the mode dial to b . Taking Photographs ( b Mode)
- Page 38 Ready the camera. Holding the handgrip in your right hand and cradling the camera body or lens with your left, bring your elbows in against the sides of your chest. • Framing photos in the viewfinder: Landscape (wide) Portrait (tall) orientation orientation •...
- Page 39 Frame the photograph. Position the main subject in the AF- area brackets. • If the camera detects a human face, the AF-area brackets will be replaced by a yellow border around the subject’s face indicating the focus point. If eyes are detected, the yellow focus point will instead appear over one or the other of the subject’s eyes.
- Page 40 Press the shutter-release button halfway to focus. • The focus point will be displayed in green when the camera focuses. If the camera is unable to focus, the AF-area brackets will flash. • The AF-assist illuminator may light to assist the focus operation if the subject is poorly lit.
- Page 41 Smoothly press the shutter- release button the rest of the way down to take the photograph. • You can also take a photograph by touching the monitor. Touch your subject to focus and lift your finger to release the shutter. D The Memory Card Access Lamp The memory card access lamp will light while the photograph is being recorded.
-
Page 42: Shooting Movies ( B Mode)
Shooting Movies ( b Mode) b (auto) mode can also be used for simple, “point-and-shoot” movie recording. Turn the camera on. The monitor and control panel will light. Select movie mode by rotating the photo/ movie selector to 1 . Note that optional flash units cannot be used when the camera is in movie mode. - Page 43 Press the movie-record button to start recording. • A recording indicator will be displayed in the monitor. The monitor also shows the time remaining, or in other words the approximate amount of new footage that can be recorded to the memory card. Recording indicator Time remaining •...
- Page 44 Press the movie-record button again to end recording. D The Memory Card Access Lamp The memory card access lamp will light while the movie is being recorded. Do not remove the memory card or battery. D The 0 Icon A 0 icon indicates that movies cannot be recorded. Shooting Movies ( b Mode)
- Page 45 D Recording Movies • Movie recording will end automatically if: - The maximum length is reached - Another mode is selected - The photo/movie selector is rotated to C - The lens is removed • Sounds made by the camera may be audible in footage recorded: - During autofocus - During vibration reduction - When power aperture is used...
-
Page 46: Playback
Playback Press the K button to view photos and movies recorded with the camera. Viewing Photos Photos can be viewed by following the steps below. Press the K button. • A picture will be displayed in the monitor or viewfinder. •... -
Page 47: Viewing Movies
Viewing Movies Movies are indicated by a 1 icon. Tap the a icon in the display or press the J button to start playback (a progress bar shows your approximate position in the movie). 1 icon Length a icon Current position/total length Progress bar Volume Guide... -
Page 48: Troubleshooting Before Contacting Customer Support
You may be able to resolve any issues with the camera by following the steps below. Check this list before consulting your retailer or Nikon-authorized service representative. Turn the camera off and remove the battery, then wait about a minute, re-insert the battery and turn the camera... -
Page 49: Technical Notes
Technical Notes Caring for the Camera Storage When the camera will not be used for an extended period, remove the battery. Before removing the battery, confirm that the camera is off. Do not store the camera in locations that: • are poorly ventilated or subject to humidities of over 60% •... -
Page 50: Caring For The Camera And Battery: Cautions
Caring for the Camera and Battery: Cautions Camera Care Do Not Drop ● Do not drop the camera or lens or subject them to blows. The product may malfunction if subjected to strong shocks or vibration. Keep Dry ● Keep the camera dry. Rusting of the internal mechanism caused by water inside the camera can not only be expensive to repair but can in fact cause irreparable damage. - Page 51 Lasers and Other Bright Light Sources ● Do not direct lasers or other extremely bright light sources toward the lens, as this could damage the camera’s image sensor. Cleaning ● When cleaning the camera body, use a blower to gently remove dust and lint, then wipe gently with a soft, dry cloth.
- Page 52 The Lens Contacts ● Keep the lens contacts clean. Avoid touching them with your fingers. Store in a Well-Ventilated Area ● To prevent mold or mildew, store the camera in a dry, well-ventilated area. Do not store the camera with naphtha or camphor moth balls, next to equipment that produces strong electromagnetic, or where it will be exposed to extremely high temperatures, for example near a heater or in an enclosed vehicle on a hot day.
- Page 53 Monitor/Viewfinder ● • The monitors (including viewfinder) are constructed with extremely high precision; at least 99.99% of pixels are effective, with no more than 0.01% being missing or defective. Hence while these displays may contain pixels that are always lit (white, red, blue, or green) or always off (black), this is not a malfunction.
- Page 54 D Disposing of Data Storage Devices Please note that deleting images or formatting memory cards or other data storage devices does not completely erase the original image data. Deleted files can sometimes be recovered from discarded storage devices using commercially available software, potentially resulting in the malicious use of personal image data.
-
Page 55: Battery Care
Battery Care Precautions for Use ● • If improperly handled, batteries may rupture or leak, causing the product to corrode. Observe the following precautions when handling batteries: - Turn the product off before replacing the battery. - Batteries may be hot after extended use. - Keep the battery terminals clean. - Page 56 • Do not use the battery at ambient temperatures below 0 °C (32 °F) or above 40 °C (104 °F). Failure to observe this precaution could damage the battery or impair its performance. Charge the battery indoors at ambient temperatures of 5 °C–35 °C (41 °F–95 °F). The battery will not charge if its temperature is below 0 °C (32 °F) or above 60 °C (140 °F).
- Page 57 Have Fully-Charged Spare Batteries Ready on Cold Days ● Partially-charged batteries may not function on cold days. In cold weather, charge one battery before use and keep another in a warm place, ready to be exchanged as necessary. Once warmed, a cold battery may recover some of its charge.
-
Page 58: Using The Charger
Using the Charger • Do not move the charger or touch the battery during charging; failure to observe this precaution could in very rare instances result in the charger showing that charging is complete when the battery is only partially charged. Remove and reinsert the battery to begin charging again. -
Page 59: Trademarks And Licenses
Trademarks and Licenses • CFexpress is a trademark of the CompactFlash Association in the United States and other countries. • NVM Express is a trademark of NVM Express Inc. in the United States and other countries. • XQD is a trademark of Sony Corporation. •... - Page 60 Wi-Fi Alliance. • All other trade names mentioned in this manual or the other documentation provided with your Nikon product are trademarks or registered trademarks of their respective holders. Use of the Made for Apple badge means that an accessory has been...
- Page 61 D Unicode® Character Database License (Unicode® Character Database) The software for this product uses the Unicode® Character Database License open-source software. The terms of the software license are as follows: COPYRIGHT AND PERMISSION NOTICE Copyright © 1991-2020 Unicode, Inc. All rights reserved. Distributed under the Terms of Use in https://www.unicode.org/copyright.html.
- Page 62 THE DATA FILES AND SOFTWARE ARE PROVIDED "AS IS", WITHOUT WARRANTY OF ANY KIND, EXPRESS OR IMPLIED, INCLUDING BUT NOT LIMITED TO THE WARRANTIES OF MERCHANTABILITY, FITNESS FOR A PARTICULAR PURPOSE AND NONINFRINGEMENT OF THIRD PARTY RIGHTS. IN NO EVENT SHALL THE COPYRIGHT HOLDER OR HOLDERS INCLUDED IN THIS NOTICE BE LIABLE FOR ANY CLAIM, OR ANY SPECIAL INDIRECT OR CONSEQUENTIAL DAMAGES, OR ANY DAMAGES WHATSOEVER RESULTING FROM LOSS OF USE, DATA OR PROFITS,...
- Page 63 D BSD License (NVM Express Driver) The license for the open-source software included in the camera’s NVM Express driver is as follows: ComponentName.c Copyright (c) 2013, Intel Corporation. All rights reserved. This program and the accompanying materials are licensed and made available under the terms and conditions of the BSD License which accompanies this distribution.
- Page 64 NvmExpressBlockIo.c Copyright (c) 2013 - 2018, Intel Corporation. All rights reserved. This program and the accompanying materials are licensed and made available under the terms and conditions of the BSD License which accompanies this distribution. The full text of the license may be found at http://opensource.org/licenses/bsd-license.php.
- Page 65 NvmExpressDxe.inf Copyright (c) 2013 - 2018, Intel Corporation. All rights reserved. This program and the accompanying materials are licensed and made available under the terms and conditions of the BSD License which accompanies this distribution. The full text of the license may be found at http://opensource.org/licenses/bsd-license.php.
- Page 66 NvmExpressHci.h (C) Copyright 2016 Hewlett Packard Enterprise Development LP Copyright (c) 2013 - 2015, Intel Corporation. All rights reserved. This program and the accompanying materials are licensed and made available under the terms and conditions of the BSD License which accompanies this distribution.
-
Page 67: Notices
Notices Notices for Customers in the U.S.A. ● The Battery Charger IMPORTANT SAFETY INSTRUCTIONS—SAVE THESE INSTRUCTIONS DANGER—TO REDUCE THE RISK OF FIRE OR ELECTRIC SHOCK, CAREFULLY FOLLOW THESE INSTRUCTIONS For connection to a supply not in the U.S.A., use an attachment plug adapter of the proper configuration for the power outlet if needed. - Page 68 Nikon Corporation may void the user’s authority to operate the equipment. Interface Cables Use the interface cables sold or provided by Nikon for your equipment. Using other interface cables may exceed the limits of Class B Part 15 of the FCC rules.
- Page 69 Notices for Customers in Europe ● CAUTION: RISK OF EXPLOSION IF BATTERY IS REPLACED BY AN INCORRECT TYPE. DISPOSE OF USED BATTERIES ACCORDING TO THE INSTRUCTIONS. This symbol indicates that electrical and electronic equipment is to be collected separately. The following apply only to users in European countries: •...
-
Page 70: Bluetooth And Wi-Fi (Wireless Lan)
FCC WARNING The FCC requires the user to be notified that any changes or modifications made to this device that are not expressly approved by Nikon Corporation may void the user’s authority to operate the equipment. Bluetooth and Wi-Fi (Wireless LAN) - Page 71 Consult the dealer or an experienced radio/TV technician for help. Co-location This transmitter must not be co-located or operated in conjunction with any other antenna or transmitter. Nikon Inc., 1300 Walt Whitman Road, Melville, New York 11747-3064, U.S.A. Tel.: 631-547-4200 Bluetooth and Wi-Fi (Wireless LAN)
- Page 72 FCC/ISED RF Exposure Statement The available scientific evidence does not show that any health problems are associated with using low power wireless devices. There is no proof, however, that these low power wireless devices are absolutely safe. Low power Wireless devices emit low levels of radio frequency energy (RF) in the microwave range while being used.
- Page 73 Notice for Customers in Europe and in Countries Complying with ● the Radio Equipment Directive Hereby, Nikon Corporation declares that the radio equipment type Z 6II is in compliance with Directive 2014/53/EU. The full texts of the EU declarations of conformity are available at the following internet addresses: https://imaging.nikon.com/support/pdf/DoC_N1929.pdf...
- Page 74 Notice for Customers in Singapore ● Trade Name: Model: Z 6II This device complies with radio-frequency regulations. The content of certification labels not affixed to the device is given below. Complies with IMDA Standards DA103423 Security ● Although one of the benefits of this product is that it allows others to freely connect for the wireless exchange of data anywhere within its range, the following may occur if security is not enabled: •...
- Page 75 A Certificates Bluetooth and Wi-Fi (Wireless LAN)
-
Page 77: Warranty Terms - Nikon Europe Service Warranty
Nikon Europe B.V. will, without charge for labor and parts, repair the product in the terms and conditions set as below. Nikon reserves the right (at its sole discretion) to replace or repair the product. - Page 78 • any damage resulting from modifications or adjustments which may be made to the product, without the prior written consent of Nikon, in order to comply with local or national technical standards in force in any other country than the ones for which the product was originally designed and/or manufactured.
- Page 79 Notice: An overview of all authorized Nikon Service Stations can be found online by following this Link (URL = https://www.europe-nikon.com/service/).
- Page 80 No reproduction in any form of this manual, in whole or in part (except for brief quotation in critical articles or reviews), may be made without written authorization from NIKON CORPORATION. 6MOA6711-01...
Need help?
Do you have a question about the Z 6 II and is the answer not in the manual?
Questions and answers