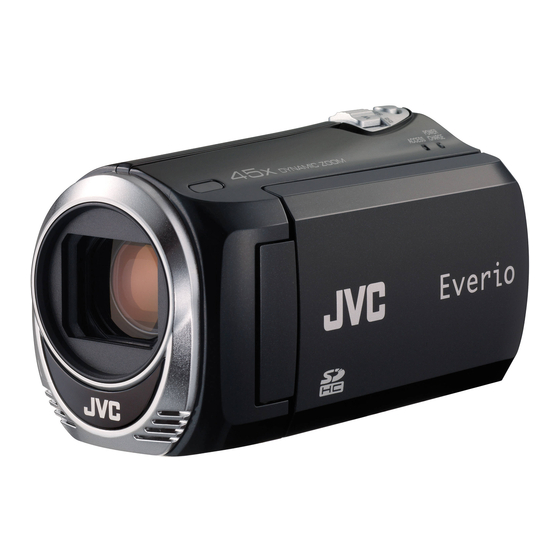
JVC Everio GZ-MS110 User Manual
Memory camera
Hide thumbs
Also See for Everio GZ-MS110:
- Detailed user manual (70 pages) ,
- Recording manual (2 pages) ,
- Detailed user manual (70 pages)
Table of Contents
Advertisement
Available languages
Available languages
MEMORY CAMERA
GZ-MS110
Basic User Guide
Dear Customers
Thank you for purchasing this JVC product.
Before use, please read the Safety Precautions and Cautions on P.2 and P.24 to ensure safe
use of this product.
This product has a "Basic User Guide" (this manual) and a "Detailed User Guide"(Web).
Detailed User Guide
.
For Future Reference:
Enter the Model No. (located on the bottom of the camera) and Serial No.
(located on the battery pack mount of the camera) below.
Model No.
Serial No.
Explains the ways of shooting in various situations and the
useful features.
■
Access the following website on your PC
http://manual.jvc.co.jp/index.html/
Advertisement
Chapters
Table of Contents

Related Manuals for JVC Everio GZ-MS110


Summary of Contents for JVC Everio GZ-MS110
- Page 1 GZ-MS110 Basic User Guide Dear Customers Thank you for purchasing this JVC product. Before use, please read the Safety Precautions and Cautions on P.2 and P.24 to ensure safe use of this product. This product has a “Basic User Guide” (this manual) and a “Detailed User Guide”(Web).
-
Page 2: Safety Precautions
– special handling may apply. See www.dtsc.ca.gov/hazardouswaste/perchlorate For more information, refer to the Detailed User Guide http://manual.jvc.co.jp/index.html/ When the equipment is installed in a cabinet or on a shelf, make sure that it has sufficient space on all sides to allow for ventilation (10 cm (3-15/16") or more on both sides, on top and at the rear). - Page 3 Make a backup of important recorded data It is recommended to copy your important recorded data to a DVD or other recording media for storage. JVC will not be responsible for any lost data. For more information, refer to the Detailed User Guide http://manual.jvc.co.jp/index.html/...
-
Page 4: Table Of Contents
Video Recording ... 12 ▶Learning About Advanced Operations Use the “Detailed User Guide” on your PC to find out more about the advanced operations. ■ Access the following address on your PC http://manual.jvc.co.jp/index.html/ Verifying the Accessories AC Adapter AP-V30U* Basic User Guide CD-ROM ●... -
Page 5: Names Of Parts And Functions
S Grip Belt ( P.7) T Tripod Mounting Hole U SD Card Slot ( P.8) V Battery Release Lever ( P.6) For more information, refer to the Detailed User Guide http://manual.jvc.co.jp/index.html/ Adjusts the shooting range.( P.12) display or menu item. ( P.13) -
Page 6: Getting Started
(Base) CAUTION Be sure to use JVC battery packs. ● If you use any other battery packs besides JVC battery packs, safety and performance cannot be guaranteed. ● Charging time: Approx. 1 h 50 m (using supplied battery pack) * The charging time is when the unit is used at 25°C (77°F). If the battery pack is charged outside the room temperature range of 10°C - 35°C (50°F - 95°F),... -
Page 7: Grip Adjustment
While pressing A, pull B and remove the strap. Press and hold ● When attaching the hand strap, insert C until it clicks into place. Adjust the length For more information, refer to the Detailed User Guide http://manual.jvc.co.jp/index.html/ Attach the belt... -
Page 8: Using The Menu
Insert a commercially available SD card before recording. Close the LCD monitor. (Base) Turn off the power of this unit before inserting or removing a card. For more information, refer to the Detailed User Guide http://manual.jvc.co.jp/index.html/ Select the desired setting and press OK. VIDEO VIDEO QUALITY ZOOM... -
Page 9: Format Sd Card
CONNECTION SETTINGS FORMAT SD CARD ③ Select “FILE” and press OK. FORMAT SD CARD FILE FILE + MANAGEMENT NO ④ Select “YES” and press OK. ⑤ After formatting, press OK. For more information, refer to the Detailed User Guide http://manual.jvc.co.jp/index.html/... -
Page 10: Clock Setting
● Use the ZOOM(SELECT) lever to select, then press OK to set. For more information, refer to the Detailed User Guide http://manual.jvc.co.jp/index.html/ Set the date and time. ● Use the +/- button to adjust the year, month, day, hour and minute. -
Page 11: To Reset The Clock
DISPLAY SETTINGS CLOCK ADJUST BASIC SETTINGS CONNECTION SETTINGS ③ Select “LANGUAGE” and press DISPLAY SETTINGS LANGUAGE DATE DISPLAY STYLE MONITOR BRIGHTNESS LCD BACKLIGHT ④ Select the desired language and press OK. For more information, refer to the Detailed User Guide http://manual.jvc.co.jp/index.html/... -
Page 12: Recording
NOTE ● The estimated recording time of the supplied battery pack is approximately 50 minutes. ( P.20) For more information, refer to the Detailed User Guide http://manual.jvc.co.jp/index.html/ Check if the recording mode is • If the mode is press the •... -
Page 13: Playback
OK. During playback Pause Forward/Reverse search Turns up the volume Turns down the volume For more information, refer to the Detailed User Guide http://manual.jvc.co.jp/index.html/ Turn up the volume Turn down the volume JAN.1.2010 10:00AM During pause Playback... -
Page 14: Playing Back On Tv
TV. NOTE ● Please contact the TV manufacturer on questions or problems with setting the TV to the correct mode. For more information, refer to the Detailed User Guide http://manual.jvc.co.jp/index.html/ Yellow White AV Cable (Provided) AC Adapter To AC Outlet... -
Page 15: Copying
Recorder or VCR Copying to PC * For details on how to create a disc using a computer, refer to the Detailed User Guide. DVD Recorder For more information, refer to the Detailed User Guide http://manual.jvc.co.jp/index.html/ Page P.16 P.16 P.17... -
Page 16: Dubbing Files By Connecting To A Dvd Recorder Or Vcr
“ON”. Alternatively, set ON-SCREEN DISPLAY in the playback menu to DISPLAY DATE ONLY. Start recording. ● Start playback on the camcorder ( P.13) and press the record button on the recorder. ● After playback is complete, stop the recording. For more information, refer to the Detailed User Guide http://manual.jvc.co.jp/index.html/... -
Page 17: Copying To Computer
Processor: Intel Core Duo CPU 1.5 GHz or higher Intel Pentium 4 CPU 1.6 GHz or higher Intel Pentium M CPU 1.4 GHz or higher Memory: At least 512 MB For more information, refer to the Detailed User Guide http://manual.jvc.co.jp/index.html/... -
Page 18: Installing The Provided Software
“Software Setup” appears after a while. ● If it doesn't appear, double-click the CD- ROM icon in “My Computer”. For more information, refer to the Detailed User Guide http://manual.jvc.co.jp/index.html/ column display icon Click “Easy Installation”. ● Follow the on-screen instructions. -
Page 19: Backing Up All Files
① Click “Safely Remove Hardware”. ② Click “Safely Remove USB Mass Storage Device”. ③ (For Windows Vista ) Click “OK”. ④ Disconnect the USB cable and close the LCD monitor. Click For more information, refer to the Detailed User Guide http://manual.jvc.co.jp/index.html/ Click... -
Page 20: Further Information
When the battery life is reached, the recording time becomes shorter even if the battery pack is fully charged. (Replace the battery pack with a new one.) For more information, refer to the Detailed User Guide http://manual.jvc.co.jp/index.html/ SDHC Card 4 GB... - Page 21 Use of this software is authorized according to the terms of the software license. (for inquires regarding this unit) When contacting the nearest JVC office or agency in your country (refer to the JVC Worldwide Service Network at http://www.jvc-victor.co.jp/english/worldmap/index-e.html) about this software, please have the following information ready.
-
Page 22: Troubleshooting
Before requesting service, consult the following chart or the "Troubleshooting" section in the Detailed User Guide. If the solutions indicated in the chart do not solve the problem, consult your nearest JVC dealer or JVC service center for instructions. Refer also to the FAQ of new products on JVC’s website. -
Page 23: Warning Indications
● If a video recording is stopped with the actual recording time displayed at “0:00:00:17” and below, the video cannot be saved. For more information, refer to the Detailed User Guide http://manual.jvc.co.jp/index.html/ P.12 Page... -
Page 24: Cautions
• To prevent damage to the LCD monitor, DO NOT ... push it strongly or apply any shocks..place the camcorder with LCD monitor on the bottom. • To prolong service life ... avoid rubbing it with coarse cloth. - Page 25 Changes or modifications not approved by JVC could void the user’s authority to operate the equipment. This equipment has been tested and found to comply with the limits for a Class B digital device, pursuant to Part 15 of the FCC Rules.
-
Page 26: Specifications
* When using the AC adapter overseas, please prepare a commercially available converter plug for the country or region of visit. ● The specifications and appearance of this product are subject to changes for further improvement without prior notice. For more information, refer to the Detailed User Guide http://manual.jvc.co.jp/index.html/... - Page 27 MEMO For more information, refer to the Detailed User Guide http://manual.jvc.co.jp/index.html/...
- Page 28 Terms A AC Adapter ... 6 AV Connection ... 14, 16 Battery Pack ... 6 C Clock Adjust ... 11 Copy (Back Up) ... 15 D Date/Time Setting ... 10 Deleting Files ... 13 Format SD Card ... 9 Language Setting ... 11 LCD Monitor ...
- Page 29 GZ-MS110 Guía básica del usuario Estimado cliente: Gracias por haber adquirido este producto JVC. Antes de su uso, lea las precauciones de seguridad y advertencias en P.2 y P.24 para garantizar un uso seguro de este producto. Este producto viene con una “Guía básica del usuario” (este manual) y una “Guía detallada del usuario”...
-
Page 30: Precauciones De Seguridad
Visite www.dtsc.ca.gov/hazardouswaste/perchlorate Para obtener más información, consulte la Guía detallada del usuario http://manual.jvc.co.jp/index.html/ Cuando el equipo se encuentra instalado en un gabinete o en un estante, asegúrese que tenga suficiente espacio en todos los lados para permitir la ventilación (10 cm o más en cada lado,... - Page 31 Realice una copia de seguridad de los datos importantes que ha grabado Se recomienda que guarde los datos importantes que haya grabado copiándolos en un DVD o cualquier otro soporte de grabación. JVC no se responsabilizará de cualquier pérdida de datos. http://manual.jvc.co.jp/index.html/...
-
Page 32: Índice
▶Funciones avanzadas Use la “Guía detallada del usuario” en su PC para obtener más información sobre las funciones avanzadas. ■ Acceda a la siguiente dirección web desde su PC http://manual.jvc.co.jp/index.html/ Comprobación de los accesorios Adaptador de CA AP-V30U* Guía básica del CD-ROM ●... -
Page 33: Nombres De Piezas Y Funciones
T Abertura para fijación del trípode U Ranura para la tarjeta SD ( P.8) V Palanca de liberación de la batería ( P.6) http://manual.jvc.co.jp/index.html/ zoom. Ajusta el rango de filmación ( P.12) : Para seleccionar una visualización de vistas en miniatura u opción de... -
Page 34: Introducción
PRECAUCIÓN Asegúrese de utilizar baterías JVC. ● Si utiliza alguna otra batería que no sea JVC, no se pueden garantizar la seguridad ni el rendimiento del producto. ● Tiempo de carga: aprox. 1 h 50 m (utilizando la batería suministrada) * El tiempo de carga aplica cuando la unidad se utiliza a 25 ºC (77 ºF). -
Page 35: Ajuste De La Correa De Mano
Mientras presiona A, deslice hacia atrás B y retire la correa. Mantenga presionado ● Al ajustar la correa de muñeca, introduzca C hasta que se oiga un clic. Para obtener más información, consulte la Guía detallada del usuario Regule la longitud http://manual.jvc.co.jp/index.html/ Ajuste la correa... -
Page 36: Uso Del Menú
Cierre el monitor LCD. (base) Apague la alimentación de esta unidad antes de introducir o extraer una tarjeta. Para obtener más información, consulte la Guía detallada del usuario http://manual.jvc.co.jp/index.html/ Seleccione el ajuste que desee y presione OK. VÍDEO CALIDAD DE VÍDEO... -
Page 37: Formato Tarjeta Sd
ZOOM(SELECT) y presione OK. VÍDEO CONFIG. PANTALLA AJUS.RELOJ CONFIG. BÁSICA CONFIG. CONEXIÓN FORMATEAR TARJETA SD ③ Seleccione “ARCHIVO” y presione OK. FORMATEAR TARJETA SD ARCHIVO ARCHIVO Y Nº GESTIÓN ④ Seleccione “SÍ” y presione OK. ⑤ Después del formateado, presione OK. http://manual.jvc.co.jp/index.html/... -
Page 38: Ajuste Del Reloj
Utilice la palanca ZOOM(SELECT) para realizar la selección. Luego presione OK para realizar el ajuste. Para obtener más información, consulte la Guía detallada del usuario http://manual.jvc.co.jp/index.html/ Ajuste la fecha y la hora. ● Utilice el botón +/- para ajustar el año, mes, día, hora y minuto. - Page 39 MENU. VÍDEO SIN VIENTO CONFIG. PANTALLA AJUS.RELOJ CONFIG. BÁSICA CONFIG. CONEXIÓN ③ Seleccione “LANGUAGE” y presione OK. CONFIG. PANTALLA LANGUAGE ESTILO INDIC. FECHA BRILLO DEL MONITOR LUZ DE FONDO MONITOR ④ Seleccione el idioma que desee y presione OK. http://manual.jvc.co.jp/index.html/...
-
Page 40: Grabación
● El tiempo de grabación estimado de la batería suministrada es de aproximadamente 50 minutos. ( P.20) Para obtener más información, consulte la Guía detallada del usuario http://manual.jvc.co.jp/index.html/ Compruebe que el modo de grabación sea • Si el modo es Manual el botón... -
Page 41: Reproducción
OK. Durante la reproducción Pausa Búsqueda hacia adelante/ hacia atrás Sube el volumen Baja el volumen http://manual.jvc.co.jp/index.html/ Suba el volumen Baje el volumen JAN.1.2010 10:00AM Durante la pausa Reproducción Regresa a la visualización de vistas en miniatura Muestra la información del... -
Page 42: Reproducción En Un Televisor
● Por favor, póngase en contacto con el fabricante del televisor en caso de preguntas o problemas al ajustar el televisor en el modo correcto. Para obtener más información, consulte la Guía detallada del usuario http://manual.jvc.co.jp/index.html/ Amarillo blanco Cable AV... -
Page 43: Copia
DVD Copia a un PC * Para obtener información sobre cómo crear un disco utilizando un ordenador, consulte la Guía detallada del usuario. Para obtener más información, consulte la Guía detallada del usuario http://manual.jvc.co.jp/index.html/ Página P.16 P.16 P.17... -
Page 44: Copia De Archivos Mediante La Conexión A Una Grabadora De Vídeo O Dvd
Inicie la reproducción en la cámara ( P.13) y presione el botón de grabación en la grabadora. ● Una vez que haya finalizado la reproducción, detenga la grabación. Para obtener más información, consulte la Guía detallada del usuario http://manual.jvc.co.jp/index.html/ Amarillo blanco Cable AV... -
Page 45: Copia Al Pc
Home Edition or Professional (solo versiones preinstaladas) Service Pack 3 Procesador: : Intel Core Duo CPU 1,5 GHz o superior Intel Pentium 4 CPU 1,6 GHz o superior Intel Pentium M CPU 1,4 GHz o superior Memoria:512 MB como mínimo http://manual.jvc.co.jp/index.html/... - Page 46 ● Si no apareciera, haga doble clic en el icono del CD-ROM en “Mi PC”. Para obtener más información, consulte la Guía detallada del usuario http://manual.jvc.co.jp/index.html/ Copia de archivos Haga clic en “Easy Installation”. ● Siga las instrucciones que aparecen en pantalla.
- Page 47 PC ① Haga clic en “extracción segura de hardware”. ② Haga clic en “Extracción segura de Dispositivo de almacenamiento masivo USB”. ③ (Para Windows Vista) Haga clic en “OK”. ④ Desconecte el cable USB y cierre el monitor LCD. http://manual.jvc.co.jp/index.html/...
-
Page 48: Más Información
Cuando termina la vida útil de la batería, el tiempo de grabación se reduce aunque las baterías estén completamente cargadas. (reemplace las baterías). Para obtener más información, consulte la Guía detallada del usuario http://manual.jvc.co.jp/index.html/ Tarjeta SDHC 4 GB 8 GB... - Page 49 El uso de este software está autorizado de acuerdo con las condiciones de la licencia de software. (para información sobre esta unidad) Cuando se ponga en contacto con la oficina o agencia JVC más cercana de su país (consulte la Red de servicios internacionales JVC en http://www.jvc-victor.co.jp/english/worldmap/index-e.html) para hacer consultas sobre este software, tenga a mano la siguiente información.
-
Page 50: Resolución De Problemas
Si las soluciones indicadas en la tabla no solucionan su problema, póngase en contacto con su distribuidor JVC o centro de servicios JVC más cercanos para obtener más información. Consulte también las preguntas frecuentes de los nuevos productos en la página web de JVC. -
Page 51: Indicaciones De Advertencia
Si el archivo se grabó con esta unidad, entonces está dañado). ● Si una grabación de vídeo se detiene en el tiempo de grabación real “0:00:00:17” o inferior, el vídeo no se puede guardar. http://manual.jvc.co.jp/index.html/ P.12 Página... -
Page 52: Advertencias
CA que no sea de la serie American National Standard C73, emplee un enchufe adaptador de CA, denominado “Siemens Plug”, como el mostrado. Consulte con su distribuidor JVC más cercano para obtener este enchufe adaptador. Enchufe adaptador Baterías La batería suministrada es... - Page 53 Los cambios o modificaciones no aprobados por JVC podrian anular la autoridad del usuario para utilizar el equipo. Este equipo ha sido examinado y cumple con los límites de dispositivos digitales Clase B, segun el Apartado 15 de la reglamentacion FCC.
-
Page 54: Especificaciones
* Si utiliza un adaptador de CA en el extranjero, utilice un enchufe adaptador comercialmente disponible para el país o región en la que se encuentre. ● Las especificaciones y el aspecto de este producto están sujetos a cambios sin previo aviso. Para obtener más información, consulte la Guía detallada del usuario http://manual.jvc.co.jp/index.html/... - Page 55 MEMO Para obtener más información, consulte la Guía detallada del usuario http://manual.jvc.co.jp/index.html/...
- Page 56 Términos A Adaptador de CA ... 6 Ajuste de la fecha/hora ... 10 Ajuste del idioma ... 11 Ajustes de menú ... 8 Batería ... 6 C Cable USB ... 19 Conexión AV ... 14, 16 Configuración del reloj ... 11 Copia (copia de seguridad) ...
Need help?
Do you have a question about the Everio GZ-MS110 and is the answer not in the manual?
Questions and answers