Table of Contents
Advertisement
Owner's Manual & Safety Instructions
Save This Manual
operating, inspection, maintenance and cleaning procedures. Write the product's serial number in the
back of the manual near the assembly diagram (or month and year of purchase if product has no number).
Keep this manual and the receipt in a safe and dry place for future reference.
Email our technical support at: productsupport@harborfreight.com
When unpacking, make sure that the product is intact
and undamaged. If any parts are missing or broken,
please call 1-888-866-5797 as soon as possible.
©
Copyright
2021 by Harbor Freight Tools
No portion of this manual or any artwork contained herein may be reproduced in
any shape or form without the express written consent of Harbor Freight Tools.
Diagrams within this manual may not be drawn proportionally. Due to continuing
improvements, actual product may differ slightly from the product described herein.
Tools required for assembly and service may not be included.
Keep this manual for the safety warnings and precautions, assembly,
Visit our website at: http://www.harborfreight.com
®
. All rights reserved.
Read this material before using this product.
Failure to do so can result in serious injury.
SAVE THIS MANUAL.
21j
Find the most
recent manual and
software updates at
HarborFreight.com
Advertisement
Table of Contents

Related Manuals for Cobra 57959


Summary of Contents for Cobra 57959
- Page 1 Owner’s Manual & Safety Instructions Save This Manual Keep this manual for the safety warnings and precautions, assembly, operating, inspection, maintenance and cleaning procedures. Write the product’s serial number in the back of the manual near the assembly diagram (or month and year of purchase if product has no number). Keep this manual and the receipt in a safe and dry place for future reference.
- Page 2 Do not alter anything else inside NVR. Service Have your NVR equipment serviced by a qualified repair person using only identical replacement parts. This will ensure that the safety of the equipment is maintained. Item 57959 For technical questions, please call 1-888-866-5797. Page A...
- Page 3 Keep cord away from heat, oil, sharp edges or moving parts. Damaged or entangled cords increase the risk of electric shock. SAVE THESE INSTRUCTIONS. Page B For technical questions, please call 1-888-866-5797. Item 57959...
- Page 4 (See Figure A.) Figure A: Outlets for 2-Prong Plug Extension Cords Note: Do not use an extension cord with the Power Adapters. Symbology Double Insulated Alternating Current Volts Amperes Item 57959 For technical questions, please call 1-888-866-5797. Page C...
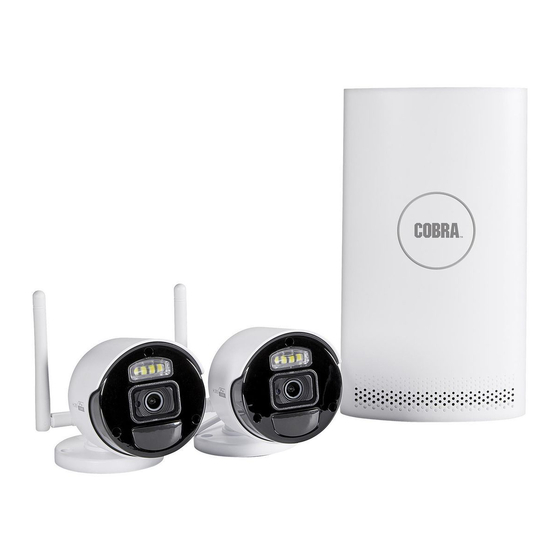
- Page 5 Record Serial Number Here: Note: If product has no serial number, record month and year of purchase instead. Note: Some parts are listed and shown for illustration purposes only, and are not available individually as replacement parts. Reference UPC 193175428790. Limited 90 Day Warranty Harbor Freight Tools Co.
-
Page 6: Table Of Contents
USER MANUAL Contents Safety Instruction .................... 3 Chapter 1 Product Overview ................ 5 Rear Panel ...................... 5 1.2 Remote Controller (For Reference Only) .............. 6 Chapter 2 WIRELESS NVR Common Operations .......... 7 2.1 Using the Supplied Mouse .................. 7 2.2 Using the Virtual Keyboard .................. 7 2.3 Password ........................ 8 Chapter 3 WIRELESS NVR Starting up .............. 9 ... - Page 7 USER MANUAL 4.5.5 IP Filter ...................... 4 3 4. 5 Device ........................ 4 4 4.5.1 Disk ........................ 4 4 4.5.2 Cloud...................... 4 6 4.6 System ........................ 4 7 4.6.1 General ...................... 4 7 4.6.2 Multi-user Management ................ 5 1 4.6.3 System Maintenance ................... 5 5 ...
-
Page 8: Safety Instruction
USER MANUAL Safety Instruction Please carefully read the following safety instruction so as to avoid personal injuries and prevent the equipment and other connection devices from being damaged. 1. Power sources (note: please use the power supply attached or specified by the manufacturer) Never operate the equipment by using unspecified power supply. - Page 9 USER MANUAL After cutting off the power supply, if the system clock cannot continue to work, please replace the standard 3V lithium battery on the main board. Warning: Turn off WIRELESS NVR before replacing the batteries, or you may be suffered from serious electric shock.
-
Page 10: Chapter 1 Product Overview
Chapter 1 Product Overview 1.1 Rear Panel Physical interface Connection HDMI port HDMI high-definition port. WAN port Router network input port/camera-connecting port Connect with USB mouse or plug in a USB flash disk for USB port 1 backup. USB port 2 Insert a USB flash disk as a redundant hard disk for recording. - Page 11 USER MANUAL Remote Controller Icon Description Numeric keys Press to display channel 1~8 Numeric keys; press 0 button to switch output 9、0 device Press to display all channels Multiple display mode Menu Press to enter or exit the Main Menu Mute Mute On/off Submenu...
-
Page 12: Chapter 2 Wireless Nvr Common Operations
USER MANUAL Chapter 2 WIRELESS NVR Common Operations 2.1 Using the Supplied Mouse Left Button of Mouse: Click once to choose an item in the menus and confirm your selection. When live viewing in split screen, double-click on the channel to view the channel in full screen mode. -
Page 13: Password
USER MANUAL 2.3 Password For the first time when you run the WIRELESS NVR, you must be required to set your own password immediately in order to protect your privacy. Please be sure to record your username and password and save them in a secure place. Choose an OSD language. -
Page 14: Chapter 3 Wireless Nvr Starting Up
USER MANUAL Chapter 3 WIRELESS NVR Starting up 3.1 Startup Wizard Startup Wizard will help to configure the system and get the WIRELESS NVR works quickly. Startup Wizard 3.1.1 Click the to proceed to the next step. Start Wizard 3.1.2 Network Configuration... - Page 15 USER MANUAL If you connect to a router allows to use DHCP, please check the box. The router will assign DHCP automatically all the network parameters for your WIRELESS NVR. Unless the network is manually addressed below parameters: Address: The IP address identifies the WIRELESS NVR in the network. It consists of four groups of numbers between 0 to 255, separated by periods.
-
Page 16: Date/Time
USER MANUAL 3.1.3 Date/Time This menu allows you to configure the Date, Time, Date Format, Time Format, Time Zone, NTP and DST Date and Time Click on the calendar icon to set the current system date. Click on the calendar icon to set the system date. -
Page 17: Disk
USER MANUAL DST stands for Daylight Savings Time. Enable it if Daylight Saving Time (DST) is observed in your region. DST: Select the amount of time to offset for DST. Time Offset: Choose to set the daylight saving time in weeks or in day. Time Mode: Set the start time and end time for daylight saving. -
Page 18: Resolution
USER MANUAL 3.1.5 Resolution Choose an output resolution that matches to your monitor. The WIRELESS NVR supports to adjust the output resolution automatically to match the best resolution of your monitor when the system is starting up. 3.1.6 Mobile If your WIRELESS NVR come with a P2P ID, you can scan the QR code with your mobile app to view the WIRELESS NVR remotely. - Page 19 USER MANUAL Summary 3.1.7 You can check the system summary information you had set in the start wizard and finish the wizard. Tick “Don't show this window next time" if you don’t want to display Start Wizard when system reboot next time. Click button to save &...
-
Page 20: Live Viewing Screen
USER MANUAL 3.2 Live Viewing Screen Alarm type and record status Camera Quick Toolbar Alarm thumbnail Task Menu Alarm type and record Status Icons This indicates that the smart alarm was triggered. This indicates that the WIRELESS NVR is currently recording. This icon appears when the camera has detected PIR. -
Page 21: Camera Quick Toolbar
USER MANUAL The analog camera is disconnected. Off -line: There is no IP camera connected. No Paired: 3.2.1 Camera Quick Toolbar In live viewing, click the left button of your mouse on a connected camera to display the Camera Quick Toolbar. - Page 22 USER MANUAL Click to start or stop manual recording and manual alarm. Check the system information, channel information, recording information and network status. 3.2.3 Shutdown Click the button from Start Menu, and then choose the action to be performed. Click button, the system will require to input the Admin password to authenticate.
-
Page 23: Chapter 4 Nvr System Setup
USER MANUAL Chapter 4 NVR System Setup Click into the setup page, you are able to configure the Channel, Record, Alarm, Network, Device & System parameters. 4.1 Channel In this section, you are allowed to configure the Wireless camera, live viewing display, pairing, IP camera’s image adjustment, MESH mode switch setting and so on. - Page 24 USER MANUAL Choose a channel to configure Give a name to the camera Date format to display for the camera Time format to display for the camera Display channel name in live viewing Adjust the Hue value for the image color Adjust the Bright value for the image color Adjust the Contrast value for the image color Adjust the Saturation value for the image color...
-
Page 25: Private Zone
USER MANUAL 4.1.1.2 WirelessChannel NA/UK/MKK depends on the region Region: Auto and Manual can be selected. Wireless Mode: Wireless channel. It can be set up only when Manual Wireless Mode is selected. Wireless Chn: 4.1.2 Private Zone This menu allows you to create privacy zone(s) if you want to partially cover some certain part of the image. -
Page 26: Motion Detection
USER MANUAL Zone: Enable or close private zone. If you enable it, the private zone can be covered, and it will Private not be displayed in live view. Area: Four private zones can be set up at most in the area map. The four areas can be moved, stretched, and click apply to save. - Page 27 USER MANUAL Switch: Enable or disable Motion Detection. Sensitivity: Set the sensitivity level. Level 1 is the lowest sensitivity level while level 8 is the highest sensitivity level. Deterrence: Turn on or turn off the associated white light warning. Setup: Click icon to enter the setup interface.
-
Page 28: Deterrence
USER MANUAL 4.1.4 Deterrence Channel: Channel name. Setup: Click icon to enter the setup interface. White light Deterrence area: Click to set up the entire screen of Select All the camera as the white light deterrence area. Click to clear the entire area. Clear All If you want to edit the size of the area, please select the frame and change its position. -
Page 29: Record
USER MANUAL Schedule: Click icon to enter the setting interface. When the schedule is marked in light blue, it means that the channel can trigger a white light deterrent alarm for the time slot. Default: Restore default setup. 4.2 Record This menu allows you to configure the recording parameters. - Page 30 USER MANUAL 4.2.1.1 Main stream Resolution: The resolution of the recorded video. Type: Channel video encode type, including 264 and 265+. Video Encode Audio: If checked, audio synchronous recording will be supported.
- Page 31 USER MANUAL 4.2.1.2 Substream Resolution: The resolution of the recorded video. Type: Channel video encode type, including 264 and 265+. Video Encode Audio: If checked, audio synchronous recording will be supported.
-
Page 32: Record
USER MANUAL Record 4.2.2 This menu allows you to configure the recording parameters. 4.2.2.1 Recording settings Switch: Enable it to allow the video to be recorded. Record Mode: Choose the recording quality. If you choose Dualstream, the system will record main Stream stream and substream at the same time;... - Page 33 USER MANUAL 4.2.2.2 Record Schedule This menu allows you to specify when the WIRELESS NVR records video and define the recording mode for each channel. The recording schedule lets you set up a schedule like, daily (hourly) by normal (continuous) recording, PIR and motion detection recording time. To set the recording mode, click on the mode radio button (Normal, PIR and Motion Detection), then drag the cursor to mark the slots.
-
Page 34: Capture
USER MANUAL 4.2.3 Capture This menu allows to configure the image capture function. 4.2.3.1 Capture Capture: Enable or disable automatic capturing on the channel. Auto Type: Select the image resolution by mainstream or substream. Stream Interval: Snapshots are captured based on normal interval. Normal Interval: Snapshots are captured based on alarm interval only when a motion is detected. - Page 35 USER MANUAL 4.2.3.2 Capture Schedule Channel: Select the channel to set its snapshot capturing parameters. Normal: When the time slot is marked green, it indicates the channel is capturing snapshots based on the Normal Interval. Motion: When the time slot is marked yellow, this indicates the channel is capturing snapshots based on Alarm Interval only when a motion is detected.
-
Page 36: Alarm
USER MANUAL 4.3 Alarm Configure the alarm parameters Motion 4.3.1 Channel: Channel name. Buzzer: The NVR can use its internal buzzer to sound an alarm. You can set the buzzer duration in seconds when motion is detected. Record: Click icon to choose which channel to be recorded when the motion detection is triggered. -
Page 37: Abnormal Alarm
USER MANUAL Upload: After the alarm is triggered, upload the alarm video to the FTP server. View more FTP Video 4.4.4 FTP. Cloud: After the alarm is triggered, upload the alarm picture to cloud storage. View more on Picture to 4.5.2 Cloud. - Page 38 USER MANUAL 4.3.3 Alarm Schedule In this menu, you can set the alarm schedule for alarm output, push notification, FTP upload, cloud upload, buzzer and other functions. Channel: Select the channel and set up its capture parameters. When the time period is marked as green, it means that the function of the channel is enabled during the time period.
-
Page 39: Network
USER MANUAL 4.4 Network Through this menu, you can configure network parameters such as DHCP. The most common type is DHCP. Your network type is probably DHCP, unless the network is manually addressed. 4.4.1General 4.4.1.1 General Configuration If you connect to a router that allows to use DHCP, please check the box. - Page 40 USER MANUAL The IPv6 address identifies the WIRELESS NVR in the network. It consists of eight IPv6 Address: groups of letters and numbers from 0 to FFFF, which separated by colon. For example, “ABCD: EF01:2345:6789:ABCD:EF01:2345:6789”. DNS1 is the primary DNS server and DNS2 is a backup DNS server. It is usually enough DNS1/DNS2: just to enter the DNS1 server address.
- Page 41 USER MANUAL 4.4.1.2 Port Configuration This is the port that you will use to log in remotely to the WIRELESS NVR (e.g. using the Web Port: Web Client). If the default port 80 is already taken by other applications, please change it. This is the port used by the NVR to send information (for example, using a mobile Client Port: application).
-
Page 42: Ddns
USER MANUAL 4.4.2 DDNS This menu is used to configure DDNS settings. DDNS provides a static address to simplify the remote connection with the NVR. To use DDNS, at first, you need to open an account on the web page of the DDNS service provider. -
Page 43: Email
USER MANUAL 4.4.3 Email This menu allows you to configure email settings. Please complete these settings if you want to receive the system notifications on your email when an alarm is triggered, HDD is full, HDD is in error state, or video loss occurs. - Page 44 USER MANUAL 4.4.3.1 Email Configuration Email: Check to enable. Encryption: Please enable it if your email server requires the SSL or TLS verification. If you are not sure, please set to Auto. Port: Enter the SMTP port of your email server. SMTP Server: Enter the SMTP server address of your email.
- Page 45 USER MANUAL 4.5.3.2 Email Schedule You need to configure the schedule to fully implement the Email notification. The color codes on email schedule have the following meanings: Green area. PIR and Motion: Red area. Exception: Blue area. Intelligent:...
-
Page 46: Ftp
USER MANUAL 4.4.4 FTP 4.4.4.1 FTP Through this menu, you can turn on the FTP function, and you can view the pictures and videos uploaded from the NVR to the FTP on the FTP server. Click to enable FTP function. FTP Enable: Enter your FTP server IP address or domain name. - Page 47 USER MANUAL 4.5.4.2 FTP Schedule The colors on the email schedule have the following meanings: Yellow area. PIR and Motion: Blue area. Intelligent:...
-
Page 48: Ip Filter
USER MANUAL 4.5.5 IP Filter The IP filtering function allows you to set a black and white list, and only the IP in the white list can connect to the device. Enable:Enable or disable the filtering function. After enabling it, you can choose to enable blacklist or whitelist. -
Page 49: Device
USER MANUAL 4. 5 Device In this section, you can configure the internal HDD and Cloud function. 4.5.1 Disk 4.5.1.1 Disk This menu allows you to check & configure the internal HDD(s). You need to format the HDD only at the first startup and if you replace a new HDD Select the HDD you want to format and then click HDD. - Page 50 USER MANUAL 4.5.1.2 S.M.A.R.T This function can be used to display technical information on the hard drive installed inside your WIRELESS NVR. You can also perform a test (there are three types available) to evaluate and detect potential drive errors. There are three types available: Self-check Type: This test verifies major components of the hard drive such as read/write heads, electronics and...
-
Page 51: Cloud
USER MANUAL 4.5.2 Cloud Your NVR can upload snapshots or videos to cloud services through Dropbox/Google Drive. Dropbox/Google Drive is a free service that allows you to easily store and share snapshots. Before enabling the cloud storage service, we recommend that you create a Dropbox account with your email username and password. -
Page 52: System
USER MANUAL 4.6 System Change system information, such as date, time and region, change password and permissions, etc. 4.6.1 General 4.6.1.1 General Configuration Enter the name for your WIRELESS NVR. The name can include both letters and Device Name: numbers. Enter the desired ID for your WIRELESS NVR. - Page 53 USER MANUAL Select the correct video format for your region. Video Format: Click the drop-down menu to select the time to exit the main menu when the wireless Menu Timeouts: NVR is idle. The system defaults to 1 minute, and you can adjust the time to 30s, 1 minute, 2 minutes, 5 minutes, 10 minutes and close lock.
- Page 54 USER MANUAL Format: Select the preferred time format. Time Zone: Select a time zone relevant to your region or city. Time NTP Settings The NTP (Network Time Protocol) function allows your WIRELESS NVR to automatically sync its clock with a time server. This gives it the ability to constantly have an accurate time setting (your WIRELESS NVR will periodically sync automatically).
- Page 55 USER MANUAL Select the month, a particular week and time when Daylight Saving starts and ends. For Week: example, 2:00 a.m. on the first Sunday of a particular month. Select the start date (click the calendar icon ), end date and time when Daylight Saving Date: starts and ends.
-
Page 56: Multi-User Management
USER MANUAL To adjust the size of the displayed Scale: screen by scale. To move the displayed screen X Offset: to left or right. To move the displayed screen Y Offset: to up or down. Click once or long press the left button of your mouse on the arrow to adjust the size and position, or you can scroll the wheel of the mouse to adjust. - Page 57 USER MANUAL The system supports the following account types: —System Administrator: The administrator has full control of the system, and can ADMIN change both administrator and user passwords and enable/disable password protection. : Users only have access to live viewing, search, playback, and other Normal User USER —...
- Page 58 USER MANUAL Select one of the user accounts that is currently disabled, click the User Edit icon Select from the “User Enable” drop-down menu to enable the user. Enable Click "User Name" to edit the user name. Click Password: enter the password to be set. Click Confirm and enter the password again to confirm.
- Page 59 USER MANUAL 1. Click the edit icon under Permission tab. 2. Set user permissions, check the box corresponding to the function. Click to check all boxes. Click to check none of the boxes. Clear User password authority setting, the administrator can choose the authority of general users according to needs.
-
Page 60: System Maintenance
USER MANUAL Playback: Check enable box "√" of "Playback" and select the channel that can be viewed, then the ordinary users have the right to playback the video of the selected channel. 3. Click to save your modification. Save 4.6.3 System Maintenance In this section, you will be able to search and view the system log, restore default settings, upgrade the system, export &... - Page 61 USER MANUAL 4.7.3.1 Log The system log shows you important system events, such as motion alarms and system warnings. You can easily create a backup file of the system log for a set time period to a USB flash drive. Log Searching and Backing Up: 1.
- Page 62 USER MANUAL 4.7.3.2 Load Default Reset the WIRELESS NVR settings to its out-of-box state. You can choose to reset all settings at once, or just settings on specific menus. Restoring default settings will not delete recordings and snapshots saved to the hard drive. Check the items you want to restore, or check to choose all items.
- Page 63 USER MANUAL 4.7.3.3 Upgrade 1. Copy the firmware file (.sw file) to your USB drive, and insert the USB flash drive into the WIRELESS NVR’s USB port. 2. Click button to choose the firmware file in your USB flash drive, then Click OK. Select File 3.
- Page 64 USER MANUAL 4.7.3.4 Parameter Management You can export the main menu settings you have configured to a USB flash drive, or import an exported setting file from USB flash drive to the WIRELESS NVR.。 Settings: Click to save the WIRELESS NVR current system settings to the USB device. You will Save be required to input the Admin password to authenticate.
- Page 65 USER MANUAL 4.7.3.5 Auto Reboot This menu allows the system to auto reboot the WIRELESS NVR regularly. It is recommended to keep this function enabled, as it maintains the operational integrity of your WIRELESS NVR. Reboot: Check to enable. Auto You can set the WIRELESS NVR to reboot by day, week or month.
- Page 66 USER MANUAL 4.7.3.6 Developer Mode Telnet: enable or disable telnet. enable or disable collect logs. Collect logs: log: click the on-off, you can export log to USB disk. Export click the on-off, you can delete log from the local disk. Delete log:...
-
Page 67: Ip Camera Maintain
USER MANUAL 4.6.4 IP Camera Maintain 4.7.4.1 Upgrade This menu allows you to upgrade the IP camera’s firmware. 1. Choose one of the IP cameras you want to upgrade firmware. 2. Click to select the update file from your USB flash drive, then click OK. Select File 3. -
Page 68: System Information
USER MANUAL 4.6.5 System Information This menu allows you to view the system information, channel information, record information & network status. 4.6.5.1 Information View system information such as device ID, device model name, IP address, MAC address, firmware version and so on. If your WIRELESS NVR supports P2P function, you will find the P2P ID & P2P QR code in the information page. -
Page 69: Chapter 5 Search, Playback & Backup
USER MANUAL Chapter 5 Search, Playback & Backup The Search function gives you the ability to search for and play previously recorded videos as well as snapshots that are stored on your WIRELESS NVR’s hard drive. You have the choice of playing video that matches your recording schedule, manual recordings or motion events only. - Page 70 USER MANUAL Play Pause Play frame by frame. Click once to play a frame of the video Stop Fast Forward, x2, x4, x8 and x16 Digital Zoom: Click to zoom in then click-and-drag on a camera image during playback to zoom in on the selected area.
-
Page 71: Search & Play Video In General
USER MANUAL Search & Play Video in General 5.1.1 This menu gives an option to search & play recording for a selected date. 1. Click the icon to search date from the calendar 2. Choose a Search Type。 3. Check Channels you would like to search, or check to search all connected channels. - Page 72 USER MANUAL 5.1.1.1 Video Clip Backup 1. Insert your USB flash drive to the WIRELESS NVR. 2. Start a video recording playback. 3. Click icon. 4. Check the channel(s) you want to make a video clip backup. 5. Move the mouse cursor to the timeline where you want to start the video clip. 6.
-
Page 73: Event Search, Playback & Backup
USER MANUAL 5.1.2 Event Search, Playback & Backup Event search lets you view a list of video recordings with the channel, start time and end time, and recording type conveniently summarized. You can also quickly back up events to a USB flash drive. To search, play &... - Page 74 USER MANUAL You can view the snapshots of the events. Thumbnails view. The events will be displayed in list. List view. You can view the details of the events. Detailed view. In the detailed view mode, you can lock the video events to keep events from being overwritten in the hard drive.
- Page 75 USER MANUAL 5.1.2.1 Event Playback Control 1. Event List, you can select the events here. 2. Click icon to save your selected event videos to USB flash drive. Click icon to play video. 3. Control the playback with buttons on You can click icon or click right Video Playback Controls.
-
Page 76: Tag
USER MANUAL 5.1.3 Tag You are allowed to view, edit, play back or delete all tags. Select the time and channel and click complete the search. Click to jump to the position marked by the tag to play back video. -
Page 77: External File
USER MANUAL 5.1.4 External File This section allows you to play the video of the external USB flash drive. Select the file on the left and the video will be played automatically. -
Page 78: Picture Search
USER MANUAL 5.1.5 Picture Search This function can be used to search, play and copy snapshots to a USB flash drive. To search, play & back up pictures: 1. Click the icon to choose the date & time you want to search. 2. - Page 79 USER MANUAL 7. You can switch the view of list form by clicking below icons which is show at the right bottom corner of the screen: view: You can view the snapshots of the events. Thumbnails view: The events will be displayed in list. List view: You can view the details of the events.
- Page 80 USER MANUAL After selecting file, you can click button to save the pictures to USB flash drive. Or click button to go into picture preview control window. 5.1.5.1 Picture Preview Control 1. Picture List, you can select the pictures here. 2.
-
Page 81: Chapter 6 Remote Access Via Web Client
USER MANUAL Chapter 6 Remote Access via Web Client Use the Web Client to remotely access your WIRELESS NVR at any time via a PC. Before you access the Web Client, you need to ensure that the network settings of the WIRELESS NVR are configured properly. -
Page 82: Web Plugin Download And Installation
USER MANUAL Web Plugin Download and Installation To access the Web Client, do the following: IE/Chrome/Firefox: 1. Launch the explorer on your PC and enter the WIRELESS NVR static IP address or DDNS domain name (Host Name) in the URL box. 2. - Page 83 USER MANUAL 4. Click Download and install the player in the Web, download the plugin and refresh the Web to view. Note: If you use Google Chrome, please use Version V41 or lower. If you use V42 to V44, you need to enable NPAPI plugins.
- Page 84 USER MANUAL 2. Download the plug-in "Surveillance Client ", locate the downloaded file and double click it. 3. Click on "Continue" --> "Install". Enter user name and password for Mac computer. Click on "Install Software" --> "Close" to finish installation. 4.
-
Page 85: Web Client Manager
USER MANUAL 6.3 Web Client Manager The web client supports to fully control the WIRELESS NVR with administrator account. Please make sure to protect your user name & password to prevent illegal login. 6.3.1 Live Interface This is the first page after you logged in to the Web Client. Here you can open or close live preview, record video to local computer manually, take snapshots of the screens, and adjust color etc. - Page 86 USER MANUAL Live view: View real-time video from the camera. Playback: View the recorded video saved in the NVR hard drive disk. Remote setting: Access function of NVR setting menu. Local Settings: Set the download location of videos and snapshots taken through the Web client, and select the "File Type"...
-
Page 87: Playback
USER MANUAL 6.3.2 Playback You can search & play recorded files stored on the HDD inside the WIRELESS NVR, and save the video on your PC. Record Search: 1. Click the icon in the upper right corner to enter the playback interface. Playback 2. - Page 88 USER MANUAL Pause a single recording. Stop playing a single channel recording. Playback frame by frame: Move forward one frame and move frame by frame through playback. It is only available when the synchronized playback option is not selected. Synchronous play: click to play the selected channel synchronously at the same time. Click one of the channels that are playing, and then click the recording icon to record the current video to your computer.
- Page 89 USER MANUAL 6.3.2.2 Picture Playback After setting up the screenshot in 4.2.3.1 Capture, you can search for the captured pictures here. You can search for up to 5000 pictures at a time, and you can modify the time interval to search as needed. Search for screenshots: 1.
-
Page 90: Remote Settings
USER MANUAL 6.3.3 Remote Settings You can configure the NVR settings remotely here. Please refer to Chapter 4 NVR System Setup more details about NVR settings. -
Page 91: Local Settings
USER MANUAL 6.3.4 Local Settings Set the download location of videos and snapshots taken through the web client, and select the "File Type" of the video file. Click to browse and select the folder where you want to save the manual recording Record Path: on your computer. -
Page 92: Chapter 7 View The Backup Video On Pc/Mac
USER MANUAL Chapter 7 View the backup video on PC/Mac This section is about playing the backup file with the powerful video player included in the CD. For Mac users, please install the application "VideoPlayer_x.x.xx_xxxx_xx_x.dmg", for example: VideoPlayer_1.0.15_2017_01_6.dmg。 For PC users, please install the application "VideoPlayer_x.x.xx_xxxx_xx_xx.exe", for example: VideoPlayer_1.0.15_2017_01_06.exe. - Page 93 USER MANUAL Video Player Control 1. Play List Add files. Delete files. Select the play mode: play a single file and stop; play all listed files in order; repeat one file, repeat all files. Filter by file name. Hide/Show Play List. Click to open file or load folder.
- Page 94 USER MANUAL Snapshots. Save a video clip to your computer. Press once to start, press again to end the video clip. Put the video player on top. Display the video window in full screen. Select the language of the player, and configure the functions of the Advanced settings menu player.
-
Page 95: Chapter 8 Remote Access Via Mobile Devices
USER MANUAL Chapter 8 Remote Access via Mobile Devices NVR supports remote access through mobile devices which is based on Android and iOS operating systems. 1) For Android device, App Store or iOS device, search for RXCamView in Google Play Store and install it. - Page 96 USER MANUAL 3) Click the icon to open the menu, select the device list "device list", and click "+" to add a device. 4) Select “Manual Add”, enter the NVR information, and add a new device. Scan the QR code:Scan the QR code to add a device.
- Page 97 USER MANUAL 5) After all settings are completed, click Save to save the information. When the device is connected, the app will switch to real-time display. 1 channel display 4 channel display 6 channel display 8 channel display 9 channel display 16 channel display NOTE: The app displays up to 16 channels in one screen interface, you can slide the screen to move to the next screen to...
-
Page 98: Chapter 9 Appendix
USER MANUAL Chapter 9 Appendix 9.1 Troubleshooting Q: What can I do if the system does not detect the HDD? A: Check if the power supply system is properly connected and data cord and power cables are securely connected, and if something wrong with the HDD interface. Or you may check if your HDD is supported by referring to the specifications or descriptions. - Page 99 USER MANUAL...
- Page 100 USER MANUAL 8. Q: Can I clear some records on HDD of WIRELESS NVR? A: In consideration of the file security, you may not clear part of records. If you want to remove all the records, you can format HDD. 9.
-
Page 101: Usage Maintenance
USER MANUAL stop recording by the prescribed methods. And another way of stopping recording is to set channel as off status in record setting. 9.2 Usage Maintenance To shut down WIRELESS NVR, please firstly shut down the system and then turn off the power.
Need help?
Do you have a question about the 57959 and is the answer not in the manual?
Questions and answers
Can you set up without a mouse or keyboard
No, a mouse is required to set up Cobra part number 57959. The setup instructions state that you must connect a mouse to the NVR base station using a USB cable to complete the setup steps.
This answer is automatically generated
If I don't have the mouse or keyboard how do I set it up my cameras
The setup process for the Cobra camera model with part number 57959 requires a mouse to operate the NVR interface. The instructions specify connecting a mouse to the NVR base station via USB to navigate the setup menus and perform tasks such as creating an admin account, adjusting settings, and accessing the camera toolbar. There is no information provided about alternative setup methods without a mouse or keyboard.
Answer: The Cobra 57959 system setup requires a mouse; setup without a mouse or keyboard is not supported.
This answer is automatically generated