
Related Manuals for La Crosse Technology 817-2410B


Summary of Contents for La Crosse Technology 817-2410B
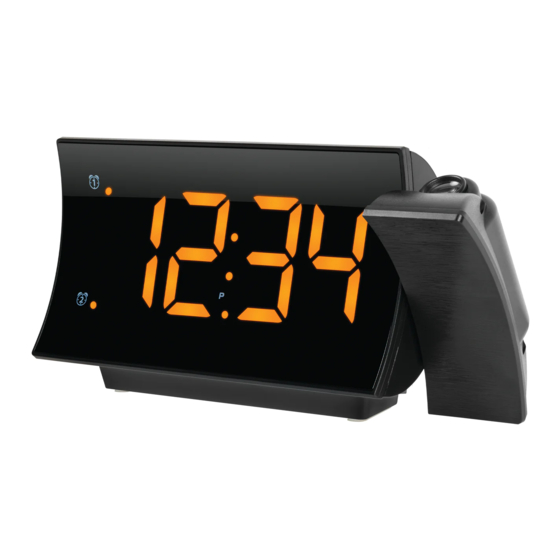
- Page 1 PROJECTION ALARM CLOCK with 1 AMP USB Charging and FM Radio SET UP GUIDE MODEL: 817-2410B...
-
Page 2: Settings Menu
Power Up Insert the 5.0 volt power adapter into an outlet, then into your clock. Optional: Insert a CR2032 battery (not included) for backup. 2. Enter the Settings Menu to set Time. Optional CR2032 (not included) 5.0 V USB Cord and power brick (included) Settings Menu 1. - Page 3 Settings Menu Settings Menu Order: • Hour • Minutes • Snooze Duration (NO5) 5-60 minutes Note: When setting the Hour, the “P” will show to indicate PM hours. FM Radio 1. Extend the antenna for best reception. 2. Press the button to listen to the radio.
- Page 4 FM Radio Auto Scan and Store Station Presets: 1. Press to listen to the radio 2. Hold to automatically scan and set up to 20 stations. Manually Store Station Presets: 1. Press the button to listen to the radio. ON will show briefly. 2.
-
Page 5: Time Alarm
Time Alarm This Projection Clock has a dual time alarm function. Use the following instructions to set your alarm times, choose your wake up sound (buzzer or radio), and alarm volume if you choose the radio option. Set Alarms: 1. Hold the button to enter the Alarm Settings. - Page 6 Time Alarm Activate/Deactivate Alarm 1 & 2: 1. Press the button to activate or deactivate Alarm 1 and/or Alarm 2. 2. The Amber LED Light next to the indicates that alarm is active. Turn Off Sounding Alarm: When alarm sounds, press the button once to stop the alarm for 24 hours when alarm is sounding.
-
Page 7: Usb Charging
Projection Projection Image Rotation: 1. Hold the button to turn Projection 180 degrees. 2. Turn the Projection Wheel on the back of the Projection Projection Arm to adjust the projected image Wheel 90 degrees. 3. Rotate the Projection Arm forward or backward to project onto the wall or ceiling. -
Page 8: Adjustable Backlight
Low setting. The High setting is not adjustable. Dimmer Wheel to adjust Low Backlight Stay in Touch Ask questions, watch setup videos, and provide feedback on our social media outlets. Follow La Crosse Technology on YouTube, Twitter, Facebook and Instagram. -
Page 9: Specifications
Warranty Info Specifications Projection Alarm Clock (817-2410B) La Crosse Technology, Ltd. provides a 1-year limited time warranty (from date of purchase) on Power Requirements: this product relating to manufacturing defects in 5V USB Power Cord (included) materials & workmanship. AS0601A-0501200USU USB... -
Page 10: Care And Maintenance
Care & Maintenance Warnings Replace the Coin Cell Battery WARNING This product contains a button battery. 1. Use a coin to turn the battery cover to the left to If swallowed, it could cause severe injury or death remove it. in just 2 hours. -
Page 11: Fcc Statement
FCC Statement This equipment has been tested and found to comply with the limits for a Class B digital device, pursuant to part 15 of the FCC Rules. These limits are designed to provide reasonable protection against harmful interference in a residential installation. This equipment generates, uses and can radiate radio frequency energy and, if not installed and used in accordance with the instructions, may cause harmful interference to radio communications.
Need help?
Do you have a question about the 817-2410B and is the answer not in the manual?
Questions and answers