Table of Contents
Advertisement
Available languages
Available languages
Quick Links
Advertisement
Table of Contents

Related Manuals for Philco TeraDry 20


Summary of Contents for Philco TeraDry 20
- Page 1 ΟΔΗΓΙΕΣ ΧΡΗΣΗΣ INSTRUCTION MANUAL Αφυγραντής TeraDry 20 17ο ΧΛΜ Ε.Ο. Αθηνών – Λαμίας, Κηφισιά, Τηλ.: 210 6203280 Website: www.philco.gr, e-mail: sales@lozos.eu, Τηλ. Service: 210-620.3838, Fax: 210-620.3279...
-
Page 2: Πριν Τη Χρήση
Αφυγραντής TeraDry 20 Παρακαλούμε κρατήστε το εγχειρίδιο αυτό για μελλοντική χρήση. Ευχαριστούμε που επιλέξατε έναν αφυγραντή PHILCO. Βεβαιωθείτε ότι έχετε διαβάσει προσεκτικά αυτό το εγχειρίδιο πριν χρησιμοποιήσετε τη συσκευή. Για οποιαδήποτε απορία, παρακαλούμε επικοινωνήστε με το εξουσιοδοτημένο κέντρο τεχνικής υποστήριξης της Serviceworld. - Page 3 1.2 Τα παρακάτω πρέπει πάντα να τηρούνται για λόγους ασφαλείας ⚫ Η συσκευή αυτή προορίζεται να χρησιμοποιηθεί από εξειδικευμένους ή εκπαιδευμένους χρήστες σε καταστήματα, σε ελαφρά βιομηχανία και αγροκτήματα, ή για οικιακή χρήση από μη εξειδικευμένα άτομα. ⚫ Αυτή η συσκευή μπορεί να χρησιμοποιηθεί από παιδιά άνω των 8 ετών και από άτομα με μειωμένες...
-
Page 4: Για Την Ασφάλειά Σας
2. Για την ασφάλειά σας Η ασφάλειά σας είναι το πιο σημαντικό για εμάς. Παρακαλούμε διαβάστε αυτό το εγχειρίδιο προσεκτικά και κατανοήστε το πλήρως πριν λειτουργήσετε τον αφυγραντή. 2.1 Προφυλάξεις κατά τη λειτουργία ΠΡΟΕΙΔΟΠΟΙΗΣΗ- για να μειώσετε τον κίνδυνο πυρκαγιάς, ηλεκτροπληξίας ή τραυματισμού ατόμων... - Page 5 ⚫ Μην καθαρίζετε τη συσκευή με χημικές ουσίες. ⚫ Βεβαιωθείτε ότι η συσκευή είναι μακριά από φωτιές, εύφλεκτες ή εκρηκτικές ύλες. ⚫ Η συσκευή πρέπει να εγκατασταθεί σύμφωνα με του εθνικούς κανονισμούς καλωδίωσης. ⚫ Μη χρησιμοποιείτε μέσα, εκτός από αυτά που προτείνει ο κατασκευαστής, για να επιταχύνετε τη...
- Page 6 2.2.3 Γενικός χώρος εργασίας Όλοι οι υπάλληλοι που κάνουν την επισκευή αλλά και όσοι άλλοι εργάζονται στην περιοχή ενημερώνονται για την φύση της εργασίας που εκτελείται. Η εργασία σε κλειστούς χώρους πρέπει να αποφεύγεται. Η γύρω περιοχή από τον χώρο εργασιών πρέπει να διαχωρίζεται. Βεβαιωθείτε ότι οι...
- Page 7 –Τα μηχανήματα εξαερισμού και οι αεραγωγοί εξαγωγης λειτουργούν κανονικά και δεν εμποδίζονται, –Αν χρησιμοποιείτε ένα έμμεσο κύκλωμα ψύξης, το δευτερεύον κύκλωμα ελέγχεται για την παρουσία ψυκτικού, – Η σήμανση στο εξοπλισμό πρέπει να είναι ορατή και ευανάγνωστη. Οι σημάνσεις που είναι δυσανάγνωστες...
-
Page 8: Επισκόπηση Προϊόντος
3. Επισκόπηση Προϊόντος... - Page 9 ✓ Ηλεκτρονικός έλεγχος ✓ Λειτουργία στεγνώματος ρούχων ✓ Αντιβακτηριδιακό φίλτρο, φίλτρο HEPA και φίλτρο άνθρακα ✓ Λειτουργεί με συνεχή αποστράγγιση ή με δοχείο νερού 4L 3.3 Προδιαγραφές Μοντέλο TeraDry 20 Δυνατότητα Αφύγρανσης 20L/Ημέρα (30℃, 80%) Τάση Ρεύματος AC220-240V/50Hz Ισχύς 380W Θόρυβος...
- Page 10 4. Εγκατάσταση 4.1 Τοποθέτηση ✓ Τοποθετήστε τη μονάδα σε μια σταθερή επίπεδη επιφάνεια σε περιοχή όπου εξασφαλίζεται χώρος τουλάχιστον 30εκ. γύρω από τη συσκευή για τη σωστή κυκλοφορία του αέρα. Μην τοποθετείτε τη συσκευή σε περιοχές όπου: ✓ Υπάρχουν κοντά πηγές θερμότητας όπως καλοριφέρ, θερμαντικά, θερμάστρες ή άλλα προϊόντα...
- Page 11 4.2 Ασφαλής λειτουργία της συσκευής • Ελέγξτε τη συσκευή μετά την αφαίρεση της συσκευασίας για τυχόν γρατζουνιές ή φθορές. • Χρησιμοποιήστε τη μονάδα σε θερμοκρασίες περιβάλλοντος από 5°C έως 35°C. • Μην τη χρησιμοποιείτε σε εξωτερικό χώρο. Αυτός ο αφυγραντής προορίζεται μόνο για εσωτερική...
-
Page 12: Πίνακας Ελέγχου
2)Πράσινο Χρώμα: Όταν η υγρασία στο χώρο είναι από 45% έως 65% 3)Κόκκινο Χρώμα: Όταν η υγρασία στο χώρο είναι πάνω από 65% 5.2 Πίνακας Ελέγχου 5.3 Ρυθμίσεις Power Σε κατάσταση αναμονής, πατήστε το πλήκτρο power για ενεργοποιηθεί η συσκευή, η ένδειξη ανάβει... - Page 13 Χρονοδιακόπτης Πιέστε το πλήκτρο του χρονοδιακόπτη για να ενεργοποιήσετε τη λειτουργία από 0 έως 12 ώρες. Το διάστημα είναι 1 ώρα. Κάθε φορά που πατάτε το πλήκτρο, η τιμή αυξάνεται κατά 1 ώρα και εμφανίζεται στην οθόνη. Για να ακυρώσετε τη λειτουργία χρονοδιακόπτη ορίστε την τιμή στο “00”. Αφού...
- Page 14 5.4 Αποστράγγιση νερού Υπάρχουν δύο τρόποι αφαίρεσης του νερού που συλλέγεται στη συσκευή. A.Χειροκίνητη αποστράγγιση: Αδειάστε το δοχείο νερού με το χέρι. B.Συνεχής αποστράγγιση: Μόνιμη σύνδεση για να αποστραγγίσετε το νερό με το σωλήνα αποστράγγισης. 5.3.1 Άδειασμα του δοχείου νερού Το...
- Page 15 2、 Αδειάστε το νερό 3、 Τοποθετήστε το δοχείο ξανά στη συσκευή III. Προειδοποίηση 1、 Μην πετάτε τους μαγνήτες και τα πλαστικά πριτσίνια στο δοχείο. Διαφορετικά ο αφυγραντής δε θα μπορέσει να ξεκινήσει ή δε θα σταματήσει αυτόματα όταν γεμίσει η δεξαμενή...
- Page 16 4、Τοποθετήστε το δοχείο στην αρχική του θέση. Διαφορετικά, η φωτεινή ένδειξη του δοχείου θα παραμείνει κόκκινη και η συσκευή δε θα μπορεί να μπει ξανά σε λειτουργία. Συνεχής Αποστράγγιση 1、 Βγάλτε τον σωλήνα PVC και ισιώστε τον 2、 Εισάγετε το ένα άκρο του σωλήνα στην έξοδο αποστράγγισης στο επάνω μέρος του δοχείου και συνδέστε...
- Page 17 Το φίλτρο απαιτεί τακτικό καθαρισμό και είναι αφαιρούμενο για εύκολο καθαρισμό. Μην λειτουργείτε τη συσκευή χωρίς το φίλτρο γιατί ο αέρας μπορεί να είναι μολυσμένος. Η συσκευή διαθέτει επίσης φίλτρα HEPA και άνθρακα τα οποία δεν πλένονται και αντικαθίστανται κάθε 6 μήνες. Απενεργοποιήστε...
-
Page 18: Επίλυση Προβλημάτων
Επίλυση Προβλημάτων Ένδειξη/Σύμπτωμα Ελέγξτε Λύση ✓ Ελέγξτε τη σύνδεση ➢ Τοποθετήστε το καλώδιο ρεύματος στην ρεύματος. πρίζα. Η μονάδα δεν ✓ Ελέγξτε αν η ένδειξη ➢ Αδειάστε το δοχείο νερού και λειτουργεί. στάθμης νερού ανάβει τοποθετήστε το ξανά. ✓ Ελέγξτε τη θερμοκρασία το ➢... - Page 19 ✓ Εμφανίζεται όταν η ➢ Είναι φυσιολογικό. Ο συμπιεστής θερμοκρασία του δωματίου σταματάει και ο ανεμιστήρας συνεχίζει να είναι κάτω από 5°C(41°F). λειτουργεί. ✓ Εμφανίζεται όταν η ➢ Είναι φυσιολογικό. Ο συμπιεστής θερμοκρασία του δωματίου σταματάει και ο ανεμιστήρας συνεχίζει να είναι...
-
Page 20: Before You Begin
Please keep this manual carefully for further reference! Thank you for selecting our dehumidifier. Be sure to read this manual carefully before using it. Any questions, please contact the professional service for help. 1. BEFORE YOU BEGIN Please read the operating instructions carefully before using your dehumidifier for the first time. -
Page 21: The Following Should Always Be Observed For Safety
Service personnel are required to carefully read the USER MANUAL and SERVICE MANUAL before operation. 1.2 THE FOLLOWING SHOULD ALWAYS BE OBSERVED FOR SAFETY ⚫ This appliance is intended to be used by expert or trained users in shops, in light industry and on farms, or for commercial use by lay persons. -
Page 22: For Your Safety
No open flames, cigarettes or other possible sources of ignition should be used inside or in ⚫ the vicinity of the units. Component parts are designed for propane and non-incentive and non-sparking. Component ⚫ parts shall only be replaced with identical repair parts. FAILURE TO ABIDE BY THIS WARNING COULD RESULT IN AN EXPLOSION, DEATH, INJURY AND PROPERTY DAMA 2. - Page 23 ⚫ Always use a power outlet that is grounded. ⚫ Unplug the power cord when cleaning or when not in use. ⚫ Do not operate with wet hands. Prevent water from spilling onto the unit. ⚫ Do not immerse or expose the unit to rain, moisture or any other liquid. ⚫...
-
Page 24: Work Procedure
⚫ Pipe-work shall be protected from physical damage and shall not be installed in an unventilated space, if that space is smaller than 4m². ⚫ Compliance with national gas regulations shall be observed. ⚫ Keep any required ventilation openings clear of obstruction. ⚫... - Page 25 2.2.3 General work area All maintenance staff and others working in the local area shall be instructed on the nature of work being carried out. Work in confined spaces shall be avoided. The area around the workspace shall be sectioned off. Ensure that the conditions within the area have been made safe by control of flammable material.
- Page 26 2.2.8 Checks to the refrigeration equipment Where electrical components are being changed, they shall be fit for the purpose and to the correct specification. At all times the manufacturer’s maintenance and service guidelines shall be followed. If in doubt consult the manufacturer’s technical department for assistance. The following checks shall be applied to installations using flammable refrigerants: –...
-
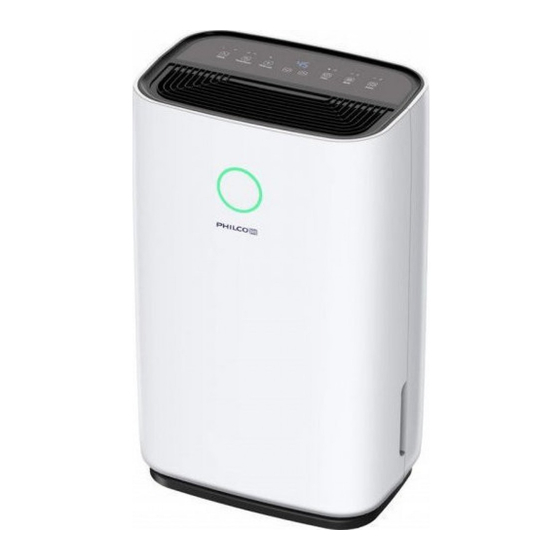
Page 27: Product Overview
3. PRODUCT OVERVIEW Control Panel Air Outlet 3 Color Digital Display Front shell Castors Top panel Handle Air Filter Back Shell Continuous drainage Water tank 口... -
Page 28: Specifications
FEATURES ✓ Powerful moisture removal (up to 20L/day dehumidification) ✓ Humidity Monitor shows current air humidity ✓ Auto mode automatically adjusts humidity levels ✓ A 24-hour timer to set the time of operation ✓ Effectively removes moisture, dust from the air ✓... -
Page 29: Installation
4. INSTALLATION 4.1 LOCATION 1. Place the unit on a firm, level surface in an area with at least 30cm of free space around it to allow for proper air circulation. 2. Never install the unit where it could be subject to: ⚫... -
Page 30: Operating The Device Safely
4.2 OPERATING THE DEVICE SAFELY ⚫ Check the device after unpacking for any damages or scratches on it. Operate this unit in an ambient temperature from 5°C to 35°C. ⚫ ⚫ Do not use in the outdoors. This dehumidifier is intended for indoor residential applications only. -
Page 31: Operation
6. OPERATION DIGITAL DISPLAY CONTROL PANEL 5.3 SETTINGS Power In the standby state, press the power button to turn on, the operation indicator lights up and the default fan speed is high, the LED shows ambient humidity. In the power-on state, press the power button to turn off, the running indicator light goes off and the compressor stops immediately, and then the fan shut down after 30 seconds delay. - Page 32 the compressor stops working and fan stops working after 30 seconds’ delay. Both fan speed and humidity can be adjusted under auto mode. ● Continuously drying mode: The machine continues to run, but the humidity can not be adjusted. ● Sleeping mode: Touch the sleep button, the button lights up and start the sleep function. Long Press and hold the sleep button 3S to reset the filter...
- Page 33 Child-lock When the machine is turned on, press the button for 3 seconds to open/close the child lock function. When the button is turned on, the indicator light of the child lock is on. The indicator light of child lock is off; After the child lock function is opened, the child lock function will be cancelled automatically as long as the shutdown or power failure occurs 5.4 DRAINAGE...
- Page 34 1、 Pull out the water tank 2、 Empty the water tank 3、 Replace the empty tank back into the unit III.Warning! 1、 Do not discard the magnets and plastic rivets in the tank. Otherwise, the dehumidifier cannot be started, or the machine will not automatically stop working when the water tank is full, and the condensed water overflow will damage the floor of the room...
- Page 35 2、 Please make sure to clean the condensed water in the tank and put the tank in the original position 3、 If the water tank is dirty, please rinse it with clean water. Avoid using detergents, steel wire balls, chemical dust removers, diesel, benzene, diluents or other solvents. Otherwise, it can damage the tank and cause leaks 4、...
-
Page 36: Maintenance
MAINTENANCE Note: before cleaning and maintaining the machine, please be sure to turn off the machine and unplug the power to avoid electric shock. CLEANING THE AIR FILTER (every two weeks) Dust collects on the filter and restricts the airflow. The restricted airflow reduces the efficiency of the system and if it becomes blocked it can cause damage to the unit. -
Page 37: Troubleshooting
TROUBLESHOOTING SYMPTOM INSPECTION SOLUTION ✓ Check the power ➢ Insert the power cord securely into the connection in securely. wall Outlet. The unit is not ✓ Check if the water level ➢ Empty the water tank and reinstall correctly. operating. indicator lights up? ✓... - Page 38 (41°F). ✓ Display when Room ➢ Normal. The compressor stops, and the fan temperature is above38℃ keeps running. (100°F). ✓ Display when Room relative ➢ Normal. The compressor stops, and the fan humidity is bellow 20%RH. keeps running. ✓ Display when Room relative ➢...
Need help?
Do you have a question about the TeraDry 20 and is the answer not in the manual?
Questions and answers