Table of Contents
Advertisement
Quick Links
Advertisement
Table of Contents

Related Manuals for Casio LK-127


Summary of Contents for Casio LK-127
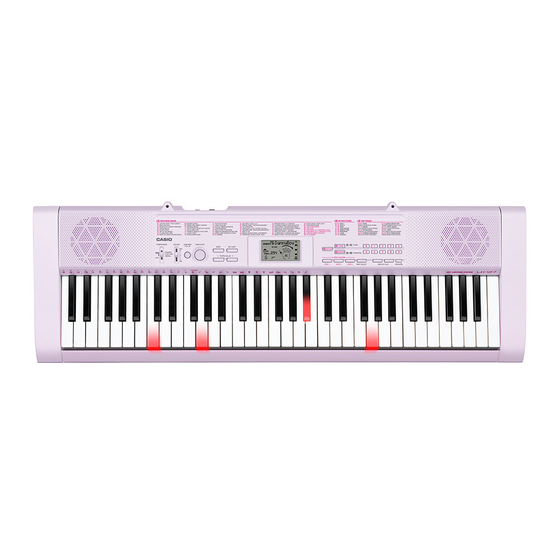
- Page 1 LK-127 MAR. 2013...
-
Page 2: Table Of Contents
LK-127 CONTENTS SPECIFICATIONS ................... 1 BLOCK AND WIRING DIAGRAM ..............2 PCB INFORMATION ..................3 CIRCUIT DESCRIPTION ................4 PRINTED CIRCUIT BOARDS ................. 5 DISASSEMBLY ....................7 DIAGNOSTIC PROGRAM ................16 EXPLODED VIEW ..................22 PARTS LIST ....................23 SCHEMATIC DIAGRAMS ................27... -
Page 3: Specifications
Auto-accompaniment Rhythm Patterns 50 presets Adjustable, (216 steps, 2 = 40 to 255), initial value; 120 Tempo Chords Two systems; CASIO CHORD, FINGERED Other Fill-in pattern, Synchro start Song Bank Tunes 100 tunes Musical Information Function Tone, Auto Accompaniment, Song Bank numbers and names;... -
Page 4: Block And Wiring Diagram
LK-127 BLOCK AND WIRING DIAGRAM KEYBOARD LED PCB KEYBOARD LED PCB KEYBOARD LED PCB (CSM446-LD5M) (CSM446-LD4M) (CSM446-LD3M) KEYBOARD PCB JE (6 pin) JF (6 pin) JG (6 pin) (M800-KYA1) CN801 (13 pin) CN505 (6 pin) CN504 (6 pin) CN504 (6 pin) -
Page 5: Pcb Information
LK-127 PCB INFORMATION M800-KYA1 M820-PSA1 M821-MDA1 M800-KYA2 CSM446-LD3M CSM446-LD4M CSM446-LD5M M821-LDA1 M821-LDA2 Parts Name PCB Name Functions MAIN PCB MPU, LCD controller, Keyboard LED controller, Reset IC, PCB UNIT/MAIN M821-MDA1 Buttons, Right speaker POWER & AMP PCB PCB UNIT/ Power supply circuit, Power amplifi er, Power switch, Volume, MX820-PSA1 POWER &... -
Page 6: Circuit Description
LK-127 CIRCUIT DESCRIPTION „ Nomenclature of Keys „ „ Key Matrix „ „ Button Matrix „ KO8S KO9S KO10S KO11S KI0S TONE STEP 1 KI1S RHYTHM STEP 2 KI2S SONG BANK STEP 3 KI3S PART SELECT SPEAK ONE KEY PLAY... -
Page 7: Printed Circuit Boards
LK-127 PRINTED CIRCUIT BOARDS MAIN PCB: M821-MDA1 POWER & AMP PCB: M820-PSA1 – 5 –... - Page 8 LK-127 KEYBOARD PCB: M800-KYA1 KEYBOARD PCB: M800-KYA2 KEYBOARD LED PCB: M821-LDA1 KEYBOARD LED PCB: M821-LDA2 – 6 –...
-
Page 9: Disassembly
LK-127 DISASSEMBLY „ About Repair „ • The photos show a prototype. The appearance of the instrument, such as color, may differ from the actual model. • To avoid damages to the instrument and floor, lay the instrument on a mattress or blanket before starting disassembling. • There are several kinds of screws. Be sure to use the correct type of screws when reassembling. It is advisable to sort the screws as shown below after removing them. • If a screw cap is attached to the screw, remove it. Be sure to reattach the screw cap when assembling. • Check how cables are wired before removing cables. Be sure to wire the cables in the same manner as they were before disassembly. • In case cables are secured with cable ties, securing bands, clips, or tapes, remove them first. - Page 10 LK-127 „ Disassembly Procedure „ A. Remove the Panel Unit A-1. Undo 11 screws on the bottom surface of the main unit A-2. When replacing the keyboard LED PCB, undo 16 screws and then remove the LOWER COVER. LOWER COVER/C...
- Page 11 LK-127 A-3. Turn over the panel unit. A-4. Unsolder two battery lead wires and two ribbon cables. Lead wire (Red) Lead wire (Black) Ribbon cable (KYA2 PCB) Ribbon cable (LDA2 PCB) A-5. Remove the panel unit. PCB UNIT/POWER & AMP PCB UNIT/MAIN –...
- Page 12 LK-127 B. Remove the PCB UNIT/MAIN B-1. Unsolder two ribbon cables. Ribbon cable (KYA2 PCB) Ribbon cable (LDA2 PCB) B-2. Unsolder two lead wires and one ribbon cable. Lead wire (White) Lead wire (Blue) Ribbon cable (PSA1 PCB) B-3. Unsolder two lead wires from the right speaker.
- Page 13 LK-127 <Notes on Assembly> • To install the MDA1 PCB, tighten the screws for the LCD part in the order shown in the right. If not tighten correctly, it may cause the LCD display errors. MDA1 PCB C. Remove the PCB UNIT/POWER & AMP C-1.
- Page 14 LK-127 C-3. Undo eight screws and then remove the PCB UNIT/POWER & AMP, two RUBBER KEY, and two CONTACT/SLIDE SWITCH. RUBBER KEY CONTACT/SLIDE SWITCH D. Remove the SPEAKER D-1. Unsolder two lead wires. D-2. Undo four screws and then remove the SPEAKER.
- Page 15 LK-127 E. KEY E-1. Undo eight screws and then remove two SIDE PANEL. SIDE PANEL/ SIDE PANEL/ LEFT RIGHT E-2. Undo 21 screws and then remove the KEY. – 13 –...
- Page 16 LK-127 F. Remove the PCB UNIT/KYA F-1. Disengage the hooks and then remove the PCB UNIT/KYA. F-2. Remove five RUBBER CONTACT. NOTE: The RUBBER CONTACT/CS differs from the others in length. RUBBER CONTACT/CB RUBBER CONTACT/CS <How to Install RUBBER CONTACT>...
- Page 17 LK-127 G. Remove the PCB UNIT/LDA, PCB UNIT/LD3, LD4, and LD5 PCB UNIT/LD3 PCB UNIT/LD4 PCB UNIT/LD5 LDA1 PCB PCB UNIT/LDA LDA2 PCB G-1. Undo 14 screws on the LDA1 and LDA2 PCB. G-2. Turn over the PCB UNIT/LDA. NOTE: Do not touch the LEDs.
-
Page 18: Diagnostic Program
LK-127 DIAGNOSTIC PROGRAM „ Preparation „ (1) Connect the AC adaptor. NOTE: The AC adaptor (AD-E95100L) is sold separately and does not come with the product. If you do not have the AC adaptor, use six AA-size dry batteries with enough capacity. - Page 19 LK-127 „ Test Items „ Pressing a test button enables the corresponding test item to be tested. Test Items Buttons Note A. Mode Switch Check B. Button Check C. ROM Version Check D. Keyboard LED Check TONE E. LCD Check STEP 1 F.
- Page 20 LK-127 „ Test Procedure „ A. Mode Switch Check A-1. Switch the mode switch and then check that the following screen appears. Mode Switch FINGERED CASIO CHORD NORMAL – 18 –...
- Page 21 LK-127 B. Button Check NOTE: You cannot cancel this check procedure mid-way. B-1. Press the “0” button to select the “Button Check”. B-2. Press the buttons in the order shown in the figure below. 08 09 10 11 12 13...
- Page 22 LK-127 D. Keyboard LED Check D-1. Press the “TONE” button to perform the “LED Check”. Automatically the keyboard LEDs are lit. D-2. Check the following points. • The confirmation tone sounds and the LEDs are lit in the order of numbers shown in the figure below.
- Page 23 LK-127 F. Auto Power OFF Check F-1. Press the “PART SELECT” button to perform the “Auto Power OFF Check”. F-2. Check that the power supply is turned OFF and no screen appears. NOTE: After checking, be sure to turn the mode switch to “OFF”.
- Page 24 1. Prices and specifications are subject to change without prior notice. 2. Refer to the latest “Parts Price Code” at “PARTS FINDER” on the Casio Service WEB site (https://www.servicecasio.com). 3. As for spare parts order and supply, refer to the “GUIDEBOOK for Spare Parts Supply”, published separately.
-
Page 25: Exploded View
LK-127 EXPLODED VIEW – 22 –... - Page 26 LK-127 1: LK-127_DI 2: LK-127_EU 3: LK-127_US Q'ty Item Code No. Parts Name Specification Remarks MAIN PCB 10368210 PCB UNIT/MAIN TK-RJM510419*001 B MDA1 10178633 WIRE/BLUE 1007TASC24100B4040 X for Speaker (+) 10366747 WIRE/WHITE 1007TASC24100W4040 X for Speaker (-) 69304870 VARIABLE RESISTOR...
- Page 27 LK-127 1: LK-127_DI 2: LK-127_EU 3: LK-127_US Q'ty Item Code No. Parts Name Specification Remarks KEYBOARD PCB 10368208 PCB UNIT/KYA TK-RJM508609*002 C KYA1/KYA2 D801-D830,D832 10301580 DIODE LM1MA142WAT1G 69261580 SPONGE/35X150 M440499-1 69268840 FABRIC TAPE/4X10 M440684-1 10368212 PCB UNIT/LDA TK-RJM510423*001 C LDA1/LDA2, for White key...
- Page 28 LK-127 1: LK-127_DI 2: LK-127_EU 3: LK-127_US Q'ty Item Code No. Parts Name Specification Remarks 10451352 RUBBER KEY/C RJM510282-009V01 10451353 RUBBER KEY/D RJM510283-003V01 10451354 RUBBER KEY/E RJM510284-003V01 10451355 RUBBER KEY/F RJM510285-002V01 10264808 SPEAKER C10J01A 10451349 PANEL RJM510265-010V01 10451337 SIDE PANEL/LEFT...
-
Page 29: Schematic Diagrams
LK-127 SCHEMATIC DIAGRAMS MAIN PCB: M821-MDA1 (to PSA1CN201) (to LDA2/CN506) (to KYA2/CN803) RIGHT SPEAKER (to PSA1/CN206) : Not used (to RIGHT SPEAKER) (to PSA1/CN207) – 27 –... - Page 30 LK-127 POWER & AMP PCB: M820-PSA1 LEFT SPEAKER BATTERY DC 9 V IN (to BATTERY) PHONES/OUTPUT (J201) (J202) (to MDA1/CN6) (to MDA1/CN7) (to LEFT SPEAKER) (to MDA1/CN3) POWER/MODE SWITCH (SW201) (to KYA2/CN803) VOLUME (SW202) : Not used – 28 –...
- Page 31 LK-127 KEYBOARD PCB: M800-KYA1/KYA2 : Not used (to KYA1/ (to MDA1/ CN801) CN1) : Not used (to KYA2/ CN802) – 29 –...
- Page 32 LK-127 KEYBOARD LED PCB: M821-LDA1 (to LD3M/JG) (to LDA2/CN503) – 30 –...
- Page 33 LK-127 KEYBOARD LED PCB: M821-LDA2 (to LDA1/CN501) (to LD4M/JF) (to LD5M/JE) (to MDA1/CN2) – 31 –...
- Page 34 LK-127 KEYBOARD LED PCB: CSM446-LD3M / LD4M / LD5M (to LDA1/CN502) (to LDA2/CN504) (to LDA2/CN505) – 32 –...
- Page 35 CASIO COMPUTER CO., LTD. CS Technical Department TOKYO, JAPAN...
Need help?
Do you have a question about the LK-127 and is the answer not in the manual?
Questions and answers