Casio LK-270 User Manual
Casio digital keyboard user's guide
Hide thumbs
Also See for LK-270:
- User manual (46 pages) ,
- Product catalog (2 pages) ,
- Appendix (2 pages)
Table of Contents
Advertisement
Quick Links
USER'S GUIDE
Please keep all information for future reference.
Safety Precautions
Before trying to use the keyboard, be sure to read the
separate "Safety Precautions".
GUÍA DEL USUARIO
Guarde toda la información para futuras consultas.
Precauciones de seguridad
Antes de intentar usar el teclado, asegúrese de leer
las "Precauciones de seguridad" separadas.
LK270ES1C
ES
Advertisement
Table of Contents

Related Manuals for Casio LK-270


Summary of Contents for Casio LK-270
- Page 1 USER’S GUIDE Please keep all information for future reference. Safety Precautions Before trying to use the keyboard, be sure to read the separate “Safety Precautions”. GUÍA DEL USUARIO Guarde toda la información para futuras consultas. Precauciones de seguridad Antes de intentar usar el teclado, asegúrese de leer las “Precauciones de seguridad”...
-
Page 2: Declaration Of Conformity
Changes or modifications not expressly approved by the party responsible for compliance could void the userís authority to operate the equipment. Declaration of Conformity Model Number: LK-270 Trade Name: CASIO COMPUTER CO., LTD. Responsible party: CASIO AMERICA, INC. Address: 570 MT. PLEASANT AVENUE, DOVER, NEW JERSEY 07801 Telephone number: 973-361-5400... - Page 3 ● Any reproduction of the contents of this manual, either in part or its entirety, is prohibited. Except for your own, personal use, any other use of the contents of this manual without the consent of CASIO is prohibited under copyright laws.
-
Page 4: Table Of Contents
Contents General Guide ... E-4 Using the 10-key Pad ( ) ...E-6 FUNCTION Button ( ) Functions ...E-6 Getting Ready to Play ... E-8 Preparing the Music Stand ...E-8 Power Supply ...E-8 Playing the Digital Keyboard ... E-9 Turning on Power and Playing ...E-9 Using Headphones ...E-10 Changing Keyboard Response to Touch Pressure (Touch Response)...E-10... - Page 5 Chord Chart ... E-70 MIDI Implementation Chart Separately Available Accessories • You can get information about accessories that are separately for this product from the CASIO catalog available from your retailer, and from the CASIO website at the following URL. http://world.casio.com/...
-
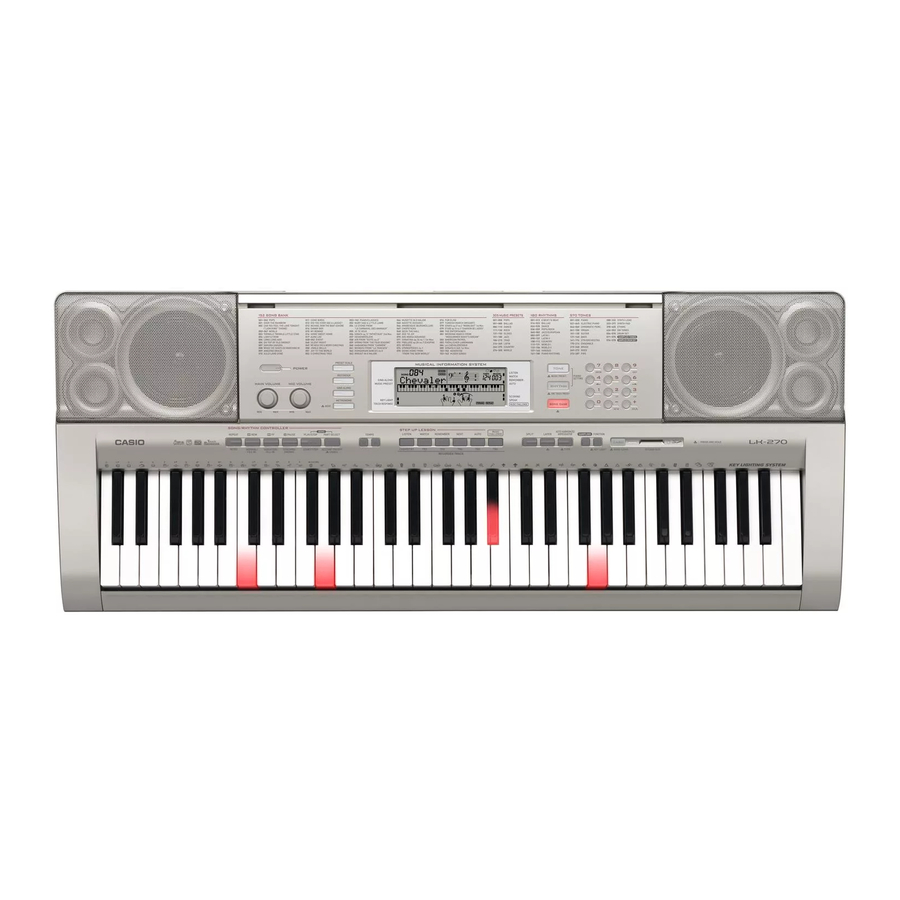
Page 6: General Guide
General Guide • In this manual, the term “Digital Keyboard” refers to the LK-270. • In this manual, buttons and other controllers are identified using the numbers shown below. 9 bk bl bm bn dr ds bt ck cl cm cn co... - Page 7 POWER button ☞E-9, 25, 45, 61 VOLUME knob ☞E-9 MIC VOLUME knob ☞E-30 PRESET SCALE button ☞E-49 RECORDER button ☞E-30, 44, 45, 46, 47, 48 SING ALONG button ☞E-30 METRONOME, BEAT button ☞E-12 REPEAT, INTRO button ☞E-28, 34, 41 REW, NORMAL/FILL-IN button ☞E-27, 32, 38, 41 FF, VARIATION/FILL-IN button ☞E-27, 32, 41...
-
Page 8: Using The 10-Key Pad ( Bs
General Guide Using the 10-key Pad ( Use the number buttons and the [–] and [+] buttons to change the settings of the parameters that appear in the upper left area of the display. Setting S t . G r P n o Number Buttons Use the number buttons to enter numbers and values. - Page 9 Function Transpose Trans. Accompaniment Volume AcompVol Song Volume Song Vol Touch Response Touch Tuning Tune Reverb Reverb Chorus Chorus Sampling SAMPLING Automatic Sampling Start AutoStrt Automatic Sampling Stop AutoStop Sampled Tone Protect (Protect) Step Up Lesson LESSON Voice Fingering Guide Speak Note Guide NoteGuid...
-
Page 10: Getting Ready To Play
Getting Ready to Play Preparing the Music Stand Power Supply Either an AC adaptor or batteries can be used to power this Digital Keyboard. Normally, use of AC adaptor power is recommended. • The AC adaptor does not come with this Digital Keyboard. Purchase it separately from your retailer. -
Page 11: Playing The Digital Keyboard
Playing the Digital Keyboard Turning on Power and Playing Press This turns on power. Try playing something on the keyboard. Use to adjust volume. Keyboard keys light. Decrease Increase • Turning off the keyboard causes most current settings to be cleared. The keyboard will revert to initial settings the next time you turn it on. -
Page 12: Using Headphones
Playing the Digital Keyboard Use the (10-key) [4] ( display “Demo2”. D e m o 2 Press the (10-key) [–] key to select the OFF setting. Using Headphones Using headphones cuts off output from the built-in speakers, which means you can practice playing even late at night without disturbing others. -
Page 13: Adjusting Display Contrast
Changing Touch Response Sensitivity Use the procedure below to control how much the volume of played notes change in accordance with playing speed. Select the setting that best matches your playing style. Press and then use the and [6] ( ) keys to display “Touch”... -
Page 14: Changing Beats Per Measure
Playing the Digital Keyboard Using the Metronome The metronome lets you play and practice along with a steady beat to help keep you on tempo. Start/Stop Press This starts the metronome. This pattern changes with each beat. Press again to stop the metronome. Changing the Beats Per Measure You can configure the metronome to use a bell sound for the first beat of each measure of the song you are playing. -
Page 15: Controlling The Keyboard Sounds
Controlling the Keyboard Sounds Select from a variety of musical instrument sounds Your Digital Keyboard lets you select tones for a wide variety of musical instrument sounds, including violin, flute, orchestra, and more. Even the same song sound takes on a different feel by changing the instrument type. -
Page 16: Layering Two Tones
Controlling the Keyboard Sounds Layering Two Tones You can use the following procedure to layer two different tones (such as piano and strings) so they sound simultaneously when you press a keyboard key. Select the first tone you want to use. Press and then use (10-key) to select the tone you... -
Page 17: Change Split Point
Pressing again to unsplit the keyboard (so it plays only the tone you selected in step 1). • Each press of toggles between split (two tones) and unsplit (one tone). Disappears • If you turn on both layer and split, layering will be applied to the right side range of the keyboard only. -
Page 18: Fine Tuning
Controlling the Keyboard Sounds Using a Pedal A pedal can be used to change notes in various ways while playing. • A pedal unit does not come with the Digital Keyboard. Purchase one separately from your retailer. See page E-3 for information about options. -
Page 19: Octave Shift
Octave Shift Octave Shift lets you raise or lower the pitch of the keyboard notes in octave units. • The octave shift setting range is –2 to +2 octaves. • When using Split (page E-14), you can individually set the left and right keyboard ranges to the pitches you want. -
Page 20: Sampling Sounds And Playing Them On The Digital Keyboard
Sampling Sounds and Playing Them on the Digital Keyboard You can sample a sound from a microphone, a portable audio player, or other device, and then play the sound with keyboard keys. For example, you could sample the bark of your dog and then use the sound in a melody. -
Page 21: Sampling And Playing A Melody Sound (Melody Sampling
Sampling and Playing a Melody Sound (Melody Sampling) Use the procedures in this section to sample a sound and play it as the melody part on the Digital Keyboard. • Up to five sampled sounds can be stored in Digital Keyboard memory as tone numbers 571 through 575. - Page 22 Sampling Sounds and Playing Them on the Digital Keyboard ■ How sampled sounds are played Pressing Middle C (C4) will play back the original sound. The keys to the left and right of C4 play the sound at different pitches. Looping a Sampled Sound You can use the following procedure to loop a sampled sound so it continues to repeat, as you play on the Digital Keyboard.
-
Page 23: Incorporating A Sampled Sound Into A Drum Set (Drum Sampling
Applying Effects to a Sampled Sound You can apply various effects to sampled sounds. Press and then use (10-key) to enter the tone number (571 to 575) to which you want to apply effects. Press to cycle thorough the available effects, described below. - Page 24 Sampling Sounds and Playing Them on the Digital Keyboard Output the sound from the external device. In the case of a microphone, output the sound in the direction of the microphone. Sampling will start automatically. S a m l i n After the sound you want to sample is finished, press l D r m 1...
-
Page 25: Other Sampling Functions
■ To change the pitch of a sampled sound While holding down the keyboard key of the sampled sound whose pitch you want to change, use the [+] keys to change the pitch. • You can change the pitch within a range of –64 to 63 semitones. - Page 26 Sampling Sounds and Playing Them on the Digital Keyboard Changing to Manual Sampling Stop Normally the Digital Keyboard will stop sampling automatically whenever it detects there is no sound input. You can use the following procedure to enable manual sampling stop, which will cause sampling to continue until you press a button to stop it.
- Page 27 Protecting Against Accidental Deletion of Sampled Sounds You can use the following procedure to protect each sampled sound against accidental deletion. Press and then use (10-key) to enter the tone number of the sampled tone you want to protect. Press and then use the and [6] ( ) keys to display “SAMPLING”...
-
Page 28: Playing Built-In Songs
Playing Built-in Songs 8 8 9 9 bk bk bl bl bm bm bn bn With this Digital Keyboard, built-in tune data is referred to as “songs”. You can listen to the built-in songs for your own enjoyment, or you can play along with them for practice. •... -
Page 29: Playing Back A Particular Song
Playing Back a Particular Song Use the procedure below to play back one of the built-in songs. You can play along on the keyboard with song playback. Start/Stop Press (10-key) to enter the number of the song you want. • See page E-69 for a complete list of available songs. Press This starts playback of the song. - Page 30 Playing Built-in Songs Repeating Playback of Specific Measures You can use the procedure in this section to repeat particular measures for practice playing along until you master it. You can specify the start measure and the end measure of the section you want to play and practice.
-
Page 31: Adjusting The Song Volume
Adjusting the Song Volume Use the following procedure to adjust the balance between the volume of what you play on the keyboard and song playback volume. Press and then use the and [6] ( ) keys to display “Song Vol” (page E-6). -
Page 32: Using The Karaoke Feature
Playing Built-in Songs Using the Karaoke Feature The karaoke feature can be used with Song Bank songs 001 through 052. It lowers the volume of the melody part so you can sing along, just like a karaoke machine. • For information about how to connect a microphone, see “Sampling Sounds and Playing Them on the Digital Keyboard”... -
Page 33: Using Built-In Songs To Master Keyboard Play
Using Built-in Songs to Master Keyboard Play 8 8 9 9 bk bk To master a song, it is best to break it up into shorter parts (phrases), master the phrases, and then put everything together. Your Digital Keyboard comes with a Step Up Lesson feature that helps you to do just that. -
Page 34: Selecting The Song, Phrase, And Part You Want To Practice
Using Built-in Songs to Master Keyboard Play Messages that Appear during Lessons The following are the messages that appear on the display during Step Lessons. Message Description <Phrase> Appears when you select a phrase, when a lesson starts, etc. • Note that certain phrases will cause “Wait” to appear instead of “Phrase”. -
Page 35: Lesson 1, 2, And
Lessons 1, 2, and 3 Now it is time to start the lessons. First, select the song and part you want to practice. Lesson 1: Listen to the song. First, listen to the example a few times to familiarize yourself with what it sounds like. -
Page 36: Lesson Settings
Using Built-in Songs to Master Keyboard Play Lesson 3: Remember what you learned as you play. Though song playback stands by waiting for you to press the correct keys as in Lesson 2, the Digital Keyboard does not provide any guidance about what note you need to play next. Remember everything you have learned up to Lesson 2 as you play. - Page 37 Press the (10-key) [–] key to select the OFF setting. Indicator disappears when voice fingering guide is turned off. Turning Off Note Guide Use the following procedure to turn off note guide, which sounds the note to be played next in Lesson 2 and Lesson 3. Press and then use the and [6] (...
-
Page 38: Using Auto Step Up Lesson
Using Built-in Songs to Master Keyboard Play Using Auto Step Up Lesson With Auto Step Up Lesson, the Digital Keyboard advances through each lesson automatically. Select the song and part you want to practice (page E-27). Press Listen to the first phrase in Lesson 1. •... -
Page 39: Music Challenge Keyboard Game
Music Challenge Keyboard Game Music Challenge is a game that measures your reaction speed as you press keys in response to keyboard keys that light and to on-screen fingering guide indications. Press This causes a keyboard key to start flashing, and starts the Music Challenge song. -
Page 40: Using Auto Accompaniment
Using Auto Accompaniment 8 8 9 9 bk bk bl bl bm bm With Auto Accompaniment, simply select an accompaniment pattern. Each time you play a chord with your left hand the appropriate accompaniment will play automatically. It’s like having a personal backup group along with you wherever you •... -
Page 41: Playing All Parts
You can select from among the following five chord input modes. • FINGERED 1 • FINGERED 2 • FINGERED 3 • CASIO CHORD • FULL RANGE CHORD Hold down until the chord input mode selection screen appears on the display. - Page 42 Unlike FINGERED 1, allows input of fraction chords with the lowest keyboard note as the bass note. ■ CASIO CHORD With CASIO CHORD, you can use simplified fingerings to play the four types of chords described below. Accompaniment keyboard E-40...
-
Page 43: Using Auto Accompaniment Effectively
Using Auto Accompaniment Effectively Auto Accompaniment Pattern Variations Use the following procedures to play intro and ending patterns, to play fill-in patterns, and to play variations of basic Auto Accompaniment patterns. ■ Auto Accompaniment Variation Each Auto Accompaniment pattern has a basic “normal pattern”... -
Page 44: Changing Auto Accompaniment Speed (Tempo)
Using Auto Accompaniment ■ Using Synchro Start Use the following procedure to configure the Digital Keyboard to start Auto Accompaniment play as soon as you press a keyboard key. Press This enters accompaniment start standby. Flashes Play a chord on the keyboard. This will start full part accompaniment (normal). -
Page 45: Using Auto Harmonize
Using Auto Harmonize Auto Harmonize automatically adds harmony to notes you play with your right hand, which adds rich depth to the melody of your performances. You can select from among 12 types of Auto Harmonize to suit the type of music you are playing. •... -
Page 46: Recording Your Keyboard Play
Recording Your Keyboard Play The recorder feature lets you record your keyboard play. Recording and Playing Back Keyboard Play Use the following procedure to record everything you play on the keyboard. Press Press Lights Press again. This will enter record stnadby. Flashes Flashes E-44... -
Page 47: Using Tracks To Record And Mix Parts
Press twice to exit the recorder mode. Disappears • The flashing on the screen shown in step 3 becomes faster when remaining recorder memory capacity becomes less than 100 notes. • Total recorder memory capacity is approximately 12,000 notes. Recording will stop automatically when there is no more unused recorder memory remaining. - Page 48 Recording Your Keyboard Play To record to Tracks 1 through 6 Record the first part to Track 1. To record to Track 1, perform steps 1 through 4 under “Recording and Playing Back Keyboard Play” (page E-44). Lights Lights Press This will enter record standby.
-
Page 49: Recording Two Or More Songs, And Selecting One For Playback
Recording Two or More Songs, and Selecting One for Playback You can record up to five songs (numbered 1 through 5) in memory. After that, you can select a specific song for playback. Press Press A song number will appear in the upper left corner of the display for a few seconds. -
Page 50: Saving Recorded Data On An External Device
Recording Your Keyboard Play Press to cycle through the parts in the sequence shown below. Right-hand Recording Left-hand Recording Both-hand Recording Example: Left-hand part recording Flashes • Configure tone and tempo settings at this time as well. Press to start built-in song playback and recorder recording. -
Page 51: Other Useful Digital Keyboard Functions
Other Useful Digital Keyboard Functions Changing the Scale of the Keyboard You can use the following procedure to select from among 17 preset scales, including the standard Equal Temperament. Scale name Equal Temperament Pure Major Pure Minor Pythagorean Kirnberger 3 Werckmeister Mean-Tone Rast... -
Page 52: Using Music Preset
Other Useful Digital Keyboard Functions Using Music Preset Selecting a Music Preset instantly changes the Digital Keyboard to a preset setup (tone, rhythm, tempo, etc.) for play of songs of various genres/categories. The press of a button sets up the Digital Keyboard so those songs sound exactly the way you thought they should. -
Page 53: Deleting User Song Data
Type Type Name number 013-030 Rising 031-048 Down Falling Repeat pattern alternating 049-066 U/D A between rising and falling (Type A) Repeat pattern alternating 067-084 U/D B between rising and falling (Type B) Random arrangement of 085-102 Random notes of the pressed keys Press to turn on Arpeggiator. -
Page 54: Deleting All Data In Digital Keyboard Memory
Other Useful Digital Keyboard Functions Deleting All Data in Digital Keyboard Memory Use the following procedure when you want to delete sampled sounds, user songs and all other data, except for recorded songs, currently in Digital Keyboard memory. • Performing this procedure also will delete protected sampled sound data (page E-25). -
Page 55: Sd Memory Card And Card Slot Precautions
Using a Memory Card Your Digital Keyboard’s SD memory card slot makes it possible for you to store record memory and other data on a commercially available SD memory card. ● Supported SD Memory Cards Your Digital Keyboard supports the use of memory cards up to 2 GB. -
Page 56: Inserting And Removing An Sd Memory Card
Using a Memory Card Inserting and Removing an SD Memory Card • Note that the SD memory card must be oriented correctly when you insert it into the SD memory card slot. Trying to force the memory card into the slot can damage the card and the slot. -
Page 57: Saving Digital Keyboard Data To An Sd Memory Card
Saving Digital Keyboard Data to an SD Memory Card Use the following procedure to save Digital Keyboard data to an SD memory card. On the Digital Keyboard, select the data you want to save as described below. To save this type Do this of data Sampled sound... -
Page 58: Loading Data From An Sd Memory Card Into Digital Keyboard Memory
Using a Memory Card ■ SD Memory Card Data (File) Storage Locations The above procedure stores Digital Keyboard data in a folder named “MUSICDAT” on the SD memory card. • The “MUSICDAT” folder is created automatically when you format the SD memory card on the Digital Keyboard (page E-54). -
Page 59: Deleting Data From An Sd Memory Card
Deleting Data from an SD Memory Card Use the following procedure to delete data saved on an SD memory card. On the Digital Keyboard, select the data you want to delete as described below. To delete this Do this type of data Sampled sound Select the tone number of the sampled sound. -
Page 60: Connecting External Devices
Connecting External Devices Connecting a Computer You can connect the Digital Keyboard to a computer and exchange MIDI data between them. You can send play data from the Digital Keyboard to music software running on your computer, or you can send MIDI data from your computer to the Digital Keyboard for playback. -
Page 61: Midi Settings
Configure the music software settings to select one of the following as the MIDI device. CASIO USB-MIDI : (For Windows Vista, Mac OS X) USB Audio Device : (For Windows XP) • For information about how to select the MIDI device, see the user documentation that comes with the music software you are using. -
Page 62: Local Control
Connecting External Devices ■ Turning Off the Navigate Channel Sound and Playing the Part on the Keyboard You can turn off the sound on one or both of the navigate channels and play the cancelled part on the keyboard yourself. Press to select the channel setting you want to turn off. -
Page 63: Storing And Loading Digital Keyboard Memory Data
You cannot save recorded song data to a computer as a standard MIDI file (SMF format). Downloading Data Manager Go to the CASIO WORLDWIDE site at the following URL. http://world.casio.com/ At the site, select a geographic area or country. -
Page 64: Connecting To Audio Equipment
Connecting External Devices Connecting to Audio Equipment This Digital Keyboard can be connected to commercially available stereo, amplifier, or recording equipment, to a portable audio player or other equipment. Outputting Keyboard Notes to Audio Equipment Connection requires commercially available connecting cords, supplied by you. -
Page 65: Reference
Reference Troubleshooting Symptom Included Accessories I can’t find something that should be here. Power Requirements Power will not turned on. The Digital Keyboard outputs a loud sound and then suddenly powers down. The Digital Keyboard suddenly powers down after a few minutes. - Page 66 Reference Symptom The metronome does not sound. Notes keep sounding, without stopping. Some notes are cut off while they are playing. The volume or tone setting I made has changed. Output volume does not change even though is change my keyboard touch. In certain keyboard ranges, the volume and tone quality sound are slightly different from those in other keyboard ranges.
-
Page 67: Specifications
Specifications Model LK-270 Keyboard 61 standard-size keys Touch Response 2 types, Off Key Light System Up to 10 keys can be lit at the same time Maximum Polyphony 48 notes (24 for certain tones) Tones Built-in Tones Sampling Tones Up to 8 (Melody Sampling: 5, Drum Sampling: 3)*... - Page 68 Reference Inputs/Outputs USB port Sustain/Assignable jack Phones/Output jack Audio In jack Mic In jack Power Jack Power Supply Batteries Battery Life AC Adaptor Auto Power Off Speakers Output Power Consumption Dimensions Weight • Design and specifications are subject to change without notice. * This data is stored in a shared memory area with a total capacity of approximately 320Kbytes (1Kbyte = 1,024bytes).
-
Page 69: Operating Precautions
Operating Precautions Be sure to read and observe the following operating precautions. ■ Location Avoid the following locations for this product. • Areas exposed to direct sunlight and high humidity • Areas subjected to temperature extremes • Near a radio, TV, video deck, or tuner The above devices will not cause malfunction of the product, but interference from the product can cause audio or video interference of a nearby device. -
Page 70: Error Messages
Reference Error Messages Display Message Err CardFull There is not enough room available on the SD memory card. Err Card R/W The SD memory card is damaged. Err Convert There is not enough unused memory available to save recorded song data to an SD memory card as an SMF 0 format file. -
Page 71: Song List
Song List SONG BANK LK-270’s Song Name Song No. POPS OVER THE RAINBOW CAN YOU FEEL THE LOVE TONIGHT (“LION KING” THEME) WORLD TWINKLE TWINKLE LITTLE STAR LIGHTLY ROW LONG LONG AGO ON TOP OF OLD SMOKEY SAKURA SAKURA WHEN THE SAINTS GO MARCHING IN... - Page 72 Reference E-70...
- Page 75 This recycle mark indicates that the packaging conforms to the environmental protection legislation in Germany. Esta marca de reciclaje indica que el empaquetado se ajusta a la legislación de protección ambiental en Alemania. MA0811-C Printed in China LK270ES1C...
Need help?
Do you have a question about the LK-270 and is the answer not in the manual?
Questions and answers