Table of Contents
Advertisement
Quick Links
Youshiko YC8091
MSF Radio Control ( UK Version ) Instruction Manual
One step easy set up:
Just put the batteries in the clock and wait for clock to self set
automatically by MSF Radio control system, within few minutes
to few hours or maximum by or between 01:00 am to 05:00 am,
depending on the signal or location in UK. (After this you never
have to do anything, Automatic time change for Spring &
Autumn and automatic time checks).
Keep the clock around 2.5 meter away from TV / Computer /
Wi-Fi Hub/ Mobile phones Etc to avoid interference, As
interference can block the radio control signal.
Features:
MSF Radio control time function
Perpetual Calendar Up to Year 2099
Time in 12/24 hour format.
Two Daily Alarm Function (Can set alarm repetition: workday and rest day)
Automatic snooze function (OFF or 5~60min)
Temperature alternatively in °C or °F
Temperature measurement ranges: -9.9°C (14°F) ~ 50°C (122°F)
Humidity measurable range: 20%RH ~ 95%RH
Low battery prompt
Power Supply:
Batteries : 4 x LR6 AA
( Not included )
Advertisement
Table of Contents

Subscribe to Our Youtube Channel
Related Manuals for Youshiko YC8091


Summary of Contents for Youshiko YC8091
- Page 1 Youshiko YC8091 MSF Radio Control ( UK Version ) Instruction Manual One step easy set up: Just put the batteries in the clock and wait for clock to self set automatically by MSF Radio control system, within few minutes to few hours or maximum by or between 01:00 am to 05:00 am, depending on the signal or location in UK.
- Page 2 Appearance: SNOOZE...
- Page 3 to set the correct month. Press “ ” button to confirm your setting, the Date display starts to flash, now use “ ” and “ ” buttons to set the correct date. Press “ ” to confirm your setting and to end the setting procedures, enter the clock mode. F.Y.I.: ...
- Page 4 “ ” buttons to set the minute of snooze you need. Press “ ” button to confirm your setting and to end the setting procedure. F.Y.I.: After 20 seconds without pressing any button the clock switches automatically from setting mode to Normal clock mode.
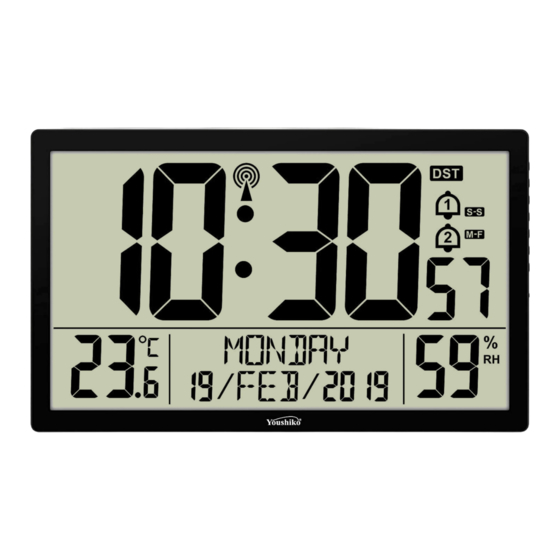
- Page 5 Part A-Positive LCD A1: Radio Controlled icon A2: Hours and minutes of Time A3: DST Icon A4: Alarm1 turn on icon A5: Alarm2 icon A6: Week A7: Temperature A8: Date A9: Humidity A10: Year A11: Month Part B – Buttons and Framework B1: “SNOOZE”...
- Page 6 Initial operation: Open the clock battery compartment cover Insert 2 x AA batteries observing polarity [ “+” and “-” marks] When you insert the batteries, all the icon on the LCD display will briefly light up for 3 seconds, and you will hear a beep tone, At the same time into work mode Reception of the Radio signal: ...
- Page 7 Consideration of duty according to the battery law, Old batteries don’t belong to domestic waste because they could cause damages of health and environment. End-user are committed by law to bring back needed batteries to distributors and other collecting points. All enquires email: service@youshiko.co.uk...
Need help?
Do you have a question about the YC8091 and is the answer not in the manual?
Questions and answers