Advertisement
PORTABLE AIR
CONDITIONER
---------------------------------------------------------
EN USER INSTRUCTION & OPERATION MANUAL
ES MANUAL DE INSTRUCCIONES Y OPERACIONES PARA EL USUARIO
DE BENUTZERANLEITUNG & BETRIEBSANLEITUNG
FR MANUEL D'UTILISATION ET D'UTILISATION
IT ISTRUZIONI PER L'USO E MANUALE OPERATIVO
BTU
8000
WEIGHT
23KG
TIMER
24 HOURS
HOSE
1.5M
EN
Advertisement
Table of Contents

Related Manuals for netta 103440


Summary of Contents for netta 103440
- Page 1 PORTABLE AIR CONDITIONER 8000 WEIGHT 23KG TIMER 24 HOURS HOSE 1.5M --------------------------------------------------------- EN USER INSTRUCTION & OPERATION MANUAL ES MANUAL DE INSTRUCCIONES Y OPERACIONES PARA EL USUARIO DE BENUTZERANLEITUNG & BETRIEBSANLEITUNG FR MANUEL D'UTILISATION ET D'UTILISATION IT ISTRUZIONI PER L'USO E MANUALE OPERATIVO...
- Page 2 Thank you for purchasing this NETTA product. Please read the user manual carefully before operating this appliance. We will update our instruction manuals if necessary. For the most up-to-date user manual, please visit our official website: www.nettadirect.com. You can download a copy of up-to-date user manuals at any time in electronic format.
- Page 3 SAFETY & WARNINGS... REGULAR CHECKUPS INTENDED USE Check cables every time before NETTA Design is for domestic and indoor use plugging into a socket, make sure only. This product is not intended for use by power cables are not burst or...
- Page 4 RISK OF PERSONAL INJURY • DO NOT use the appliance other than for the intended use. • Do not wrap the device in a cloth or other material to suppress noise. This will hinder the proper ventilation of the device. This could ignite a fire and cause burns.
-
Page 6: Control Panel Operation
Exhaust Pipe Assembly Window Sealing Plate Assembly CONTROL PANEL OPERATION ① Power Key ② Cooling Key ③ Dehumidify key ④ Fan Key ⑤ Low Wind Key ⑥ High Wind Key ⑦ Display window ⑧ Sleep Mode Key ⑨ Down Key ⑩... - Page 7 CONTROL PANEL OPERATION When the machine is powered on for the first time, the buzzer will have a beep and then the machine will go into standby status. ① Power Key: Press the key to turn on and turn off the machine. ②...
-
Page 8: Operating The Product
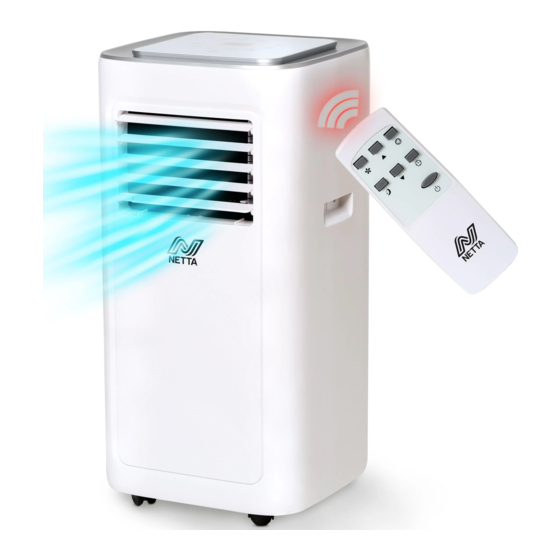
OPERATING THE PRODUCT IMPORTANT: Press the ‘UP’ and ‘DOWN’ keys at the same time to control the temperature. USING THE REMOTE: 1. Power: Press the key to turn on or turn off the machine. 2. Timer: press the key to set timing. -
Page 9: Installation And Adjustment
INSTALLATION AND ADJUSTMENT Installation Warning! Before using this Portable Air Conditioning unit, keep it upright for at least two hours. The air conditioner can easily be moved around the room. When moving, ensure that the unit stays upright and on a flat surface. Do not install and use the unit in the bathroom or other humid areas. - Page 10 2. Installation of Window Sealing Plate Components a) Half open the window and mount the window sealing plate assembly to the window. It can be fitted horizontally or vertically (Fig. 2 and Fig. 3).] b) Pull the various components of the window sealing plate assembly open, adjust their opening distance to bring both ends of the assembly into contact with the window frame and fix various components of the assembly...
- Page 11 3. Install the Body a) Move the machine (with installed pipes and fittings) in front of the Window, ensuring you leave a distance of at least 50cm between the body and walls or other objects. (Fig. 4). Figure 4 b) Elongate the exhaust pipe and snap the flat end of the exhaust pipe joints into the hole of the window sealing plate assembly (Fig.
-
Page 12: Drainage Instructions
DRAINAGE INSTRUCTIONS This machine has two drainage modes: manual and continuous drainage. 1. Manual Drainage a) When the machine stops (when the water tank is full), turn off the power and unplug the plug. b) Place your water container below the side water outlet behind the body. c) Unscrew the drainage cover and unplug the water plug, the water will automatically flow into the water container. - Page 13 DRAINAGE INSTRUCTIONS This machine has two drainage modes: manual and continuous drainage. 2. Continuous Drainage (optional) – only applicable to dehumidifying mode. a) Unscrew the drainage cover and unplug the water plug. b) Set the drainage pipe into the water outlet. c) Connect the drainage pipe to the bucket.
- Page 14 CLEANING AND MAINTANENCE Before cleaning and maintenance, turn off the machine and unplug it. 1. Cleaning the surface Clean with surface of the machine with a damp cloth. Do not use chemicals as this will damage the machine. 2. Clean the filter screen To prevent the filter screen from getting clogged with dust, resulting in reduced effectiveness of the machine, ensure you clean the filter screen at least once every two weeks.
- Page 15 STORAGE 1. Unscrew the drainage cover, unplug the water plug, and drain the water (from the water pan) into your water container. Tilting the machine can help drain it. 2. Turn on the machine, set it to low-wind mode and maintain this setting until the drainage pipe becomes dry.
-
Page 16: Troubleshooting
TROUBLESHOOTING PROBLEM REASON SOLUTIONS There is no electricity Turn it on after The Air connecting it to a socket Conditioning with electricity. The overflow indicator shows ‘FL’ does not Discharge the water The ambient temperature is too work inside. high or low. Use the unit between The room temperature is lower temperatures 7-35 ℃... -
Page 17: Disposal Of Product
You can also find this code on the back of this User Manual. For our Repair Service, please contact our customer support with email on support@nettadirect.com they will provide with more details of repair service with NETTA. DISPOSAL OF PRODUCT IMPORTANT INFORMATION FOR CORRECT DISPOSAL OF THE PRODUCT IN ACCORDANCE WITH EC DIRECTIVE 2002/96/EC. -
Page 18: Your Warranty
YOUR WARRANTY If you purchased with NETTADIRECT, or one of our authorised resellers, you will automatically enrol your warranty for 1 (ONE) year. You do not need to register again for your warranty. All warranties will be carry out our terms and conditions include warranty conditions you will find out from our website at www.nettadirect.com. - Page 19 COPYRIGHTS NETTA and its logo including images and contents in this manual and website is copyrighted. All intellectual property rights belong to NETTA owner CONSUMABLE DIRECT LIMITED. ANY UNAUTHORISED USE, MODIFICATION or DISTRIBUTION of the NETTA logo, website image, and its contents (from website, manuals) will violate worldwide copyright, trademark and associated laws.
Need help?
Do you have a question about the 103440 and is the answer not in the manual?
Questions and answers
Can I use it without the pipe?
Yes, the Netta 103440 can be used without the pipe by using the manual drainage mode, which involves collecting water in the internal tank and emptying it manually when full.
This answer is automatically generated