Sage The Smoking Gun BSM600 Manual
Hide thumbs
Also See for The Smoking Gun BSM600:
- User manual ,
- Quick manual (40 pages) ,
- Instruction book (12 pages)

Related Manuals for Sage The Smoking Gun BSM600


Summary of Contents for Sage The Smoking Gun BSM600
- Page 1 Smoking Gun ™ BSM600/SSM600 QUICK GUIDE KURZANLEITUNG GUIDE RAPIDE SNELSTARTGIDS GUIDA RAPIDA GUÍA RÁPIDA MANUAL RÁPIDO...
-
Page 2: Table Of Contents
™ is properly assembled SAFETY FIRST before use. Follow the instructions provided in this book. ® At Sage we are very safety • Do not leave the product conscious. We design and unattended when in use. manufacture consumer • Do not touch hot surfaces. - Page 3 USE a kitchen torch or other performed at an authorised heat device as the excessive ® Sage Service Centre. heat may damage the unit. • Do not attempt to burn anything • Do not point the Smoking other than small wood chips, ™...
- Page 4 • Batteries can contain flammable The symbol shown substances. If handled indicates that this appliance improperly, batteries may should not be disposed of leak, heat up, ignite, or in normal household waste. exploded, which could damage It should be taken to a local the device and your health.
-
Page 5: Components
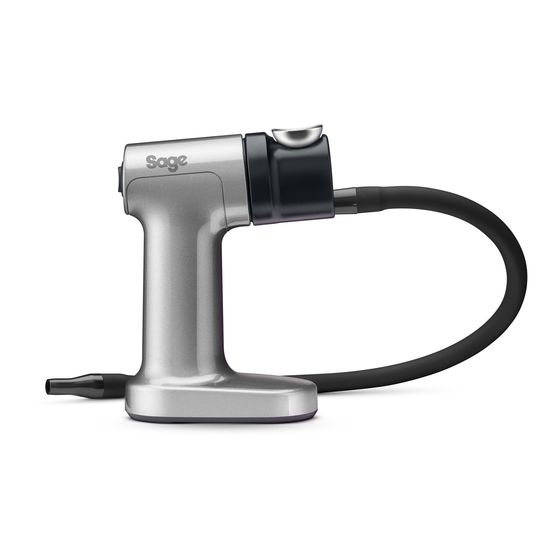
Components A. On / off switch E. Silicone hose B. Removable burn chamber F. Robust housing C. Removable mesh filter G. Battery operated D. Die-cast barrel Rating Information (4x1.5V AA Batteries) -
Page 6: Assembly
Assembly Functions 1. Place the mesh filter in the top of the burn BEFORE FIRST USE chamber and press down with a finger to Wipe the burn chamber and mesh filter with seat it into the bottom of the burn chamber. a damp cloth. -
Page 7: Tips
6. Allow the unit to cool completely after burning has completed. Care & Cleaning 7. When cooled completely the burn chamber can be removed by pulling it free of the barrel. 1. Before cleaning, make sure the unit is NOTE completely cooled down and power switch is positioned to off position. ... -
Page 8: Troubleshooting
Troubleshooting POSSIBLE PROBLEM EASY SOLUTION Fan not starting. • Check orientation of batteries. • Switch not turned to High or Low speed. • Replace batteries. No smoke generated. • Ensure mesh filter is not blocked. • Ensure the hose is not blocked. •... -
Page 9: Guarantee
Guarantee 2 YEAR LIMITED GUARANTEE Sage Appliances guarantees this product for domestic use in specified territories for 2 years from the date of purchase against defects caused by faulty workmanship and materials. During this guarantee period Sage Appliances will repair, replace, or refund any defective product (at the sole discretion of Sage Appliances). - Page 10 Note...
- Page 11 Smoking Gun ™ KURZANLEITUNG...
- Page 12 SICHERHEIT GEHT • Smoking Gun ™ in sicherem Abstand von Kanten auf eine stabile, hitzebeständige, ® Wir bei Sage sind sehr ebene, saubere und sicherheitsbewusst. trockene Fläche stellen. Beim Design und bei der • Keinen Teil der Smoking Herstellung unserer Geräte ™...
- Page 13 • Alle Wartungsarbeiten außer • Produkt sauber halten. Reinigung nur von autorisierten Die Reinigungs- und Pflegeanweisungen in dieser ® -Kundendienststellen Sage vornehmen lassen. Broschüre befolgen. • Nicht versuchen, in der • Kinder nicht mit dem Gerät Brennkammer andere Dinge spielen lassen. als kleine Räucherchips, •...
- Page 14 • Die Röhre und die Brennkammer • Smoking Gun ™ nicht in der Smoking Gun ™ werden Bereichen verwenden, in denen beim Gebrauch sehr heiß. Rauch einen Rauchmelder oder Gerät vollständig abkühlen Löschanlagen aktivieren könnte. lassen, ehe Sie die Röhre •...
- Page 15 • Batterien von Kindern fern Dieses Symbol zeigt, dass halten. Verschlucken kann das Produkt nicht im lebensgefährlich sein. Bei normalen Hausmüll Verschlucken einer Batterie entsorgt werden sollte. Es sollte stattdessen bei einem sofort ärztliche Hilfe in entsprechenden kommunalen Anspruch nehmen. Wertstoffhof oder Fachhändler ...
- Page 16 Bestandteile A. Ein / Aus Schaltertaste E. Silikonschlauch B. Abnehmbare Räucherkammer F. Robustes Gehäuse C. Abnehmbares Filtersieb G. Batteriebetrieben D. Druckguss-Zylinder Leistungsangaben (4x1.5V AA Batterien)
- Page 17 Montage Funktionen 1. Legen Sie das Filtersieb oben in die VOR DEM ERSTEN GEBRAUCH Räucherkammer ein und drücken Sie es mit Wischen Sie die Räucherkammer und das einem Finger nach unten, bis es in den Boden Filtersieb mit einem feuchten Tusch ab. der Räucherkammer eingesetzt ist.
- Page 18 Pflege & 4. Sobald der Rauch sichtbar aus dem Schlauch kommt, drücken Sie die Schaltertaste nach oben, um den Ventilator langsam weiter laufen Reinigung zu lassen. (wird durch 1 Linie “-“ dargestellt). Lassen Sie die Holzschnitzel schwelen und lenken Sie den Rauch dorthin, wo Sie ihn 1.
- Page 19 Fehlerbehebung MÖGLICHES EINFACHE LÖSUNG PROBLEM Der Ventilator startet • Überprüfen Sie, ob die Batterien richtig eingesetzt sind. nicht. • Die Schaltertaste ist nicht auf hohe oder niedrige Geschwindigkeit gedrückt. • Tauschen Sie die Batterien. Es wird kein Rauch • Stellen Sie sicher, dass das Filtersieb nicht verstopft ist. erzeugt.
- Page 20 Garantie 2 JAHRE BESCHRÄNKTE GARANTIE Sage Appliances gibt auf dieses Produkt für den häuslichen Gebrauch in bestimmten Gebieten eine Garantie über 2 Jahre ab Kaufdatum für Mängel, die durch fehlerhafte Verarbeitung und Materialien verursacht wurden. Während dieser Garantiezeit wird Sage Appliances jedes fehlerhafte Produkt reparieren, ersetzen oder das Geld zurückerstatten (nach eigenem...
- Page 21 Smoking Gun ™ GUIDE RAPIDE...
- Page 22 à gaz chaud. LA SÉCURITÉ • Tenez l'appareil à distance EN PREMIER des murs, rideaux et autres matériaux sensibles à la Chez Sage ® , la sécurité est chaleur ou à la vapeur. Distance une priorité. Nous concevons minimale de 20 cm.
- Page 23 • Faites preuve de précaution • Tout entretien autre que le lorsque vous faites chauffer nettoyage doit être réalisé par les matériaux fumants ; une ® un centre de services Sage inflammation incorrecte des agréé. matériaux inflammables • N'essayez pas de brûler autre peut entraîner des risques chose que des petits copeaux d'explosion ou d'incendie.
- Page 24 torche ou un autre dispositif • Gardez les piles hors de de chauffage, car une chaleur portée des enfants. En cas excessive pourrait endommager d'ingestion, elles peuvent mettre l'appareil. leur vie en danger. Si des piles ont été ingérées, consultez • Ne dirigez pas the Smoking immédiatement un médecin.
- Page 25 Composants A. Interrupteur marche/arrêt E. Tuyau en silicone B. Chambre de combustion amovible F. Structure résistante C. Filtre à mailles amovible G. Fonctionne sur piles D. Canon moulé Informations nominales (4 piles AA 1,5 V)
- Page 26 Assemblage Fonctions 1. Placez le filtre à mailles dans le haut de la AVANT LA PREMIÈRE UTILISATION chambre de combustion et appuyez avec Essuyez la chambre de combustion et le filtre un doigt pour le faire descendre. à mailles avec un chiffon humide. 2. Placez la chambre de combustion dans le canon. Poussez vers le bas jusqu'à ce que le FONCTIONNEMENT ressort autour de la chambre de combustion émette un clic.
- Page 27 4. Une fois que de la fumée sort de l'extrémité Entretien du tuyau, appuyez sur le haut de l'interrupteur pour régler le ventilateur sur la vitesse faible (représentée par une ligne –). Laissez les et nettoyage copeaux de bois brûler lentement et dirigez la fumée vers la zone requise.
- Page 28 Dépannage PROBLÈME POSSIBLE SOLUTION FACILE • Vérifiez le sens des piles. Le ventilateur ne démarre pas. • L'interrupteur n'est pas réglé sur la vitesse élevée ou basse. • Remplacez les piles. • Assurez-vous que le filtre à mailles n'est pas obstrué. Aucune fumée n'est générée. • Assurez-vous que le tuyau n'est pas obstrué. •...
- Page 29 Garantie GARANTIE LIMITÉE 2 ANS Sage Appliances garantit ce produit pour un usage domestique sur les territoires spécifiés pendant 2 ans à compter de la date d’achat, contre les défauts de fabrication et de matériaux. Au cours de cette période de garantie, Sage Appliances s’engage à réparer, remplacer ou rembourser tout produit défectueux (à...
- Page 30 Déclaration à l'intention du consommateur SAGE FRANCE - GARANTIE LIMITÉE Article L. 217-4 du Code de la consommation : Sage Appliances garantit ce produit pour un usage domestique sur les territoires spécifiés pendant 2 « Le vendeur livre un bien conforme au contrat et ans à compter de la date d’achat initiale du produit répond des défauts de conformité...
- Page 31 Smoking Gun ™ SNELSTARTGIDS...
- Page 32 VEILIGHEID • Houd het rookapparaat uit de VOOROP buurt van muren, gordijnen en andere hitte- of stoomgevoelige ® Bij Sage gaan we zeer materialen. Minimaal 20 cm veiligheidsbewust te afstand. werk. Bij het ontwerpen • Controleer vóór gebruik altijd of...
- Page 33 • Ga voorzichtig te werk bij het • Onderhoud anders dan reiniging ontsteken van het rookmateriaal; moet worden uitgevoerd door onjuiste ontsteking van ® een geautoriseerd Sage ontvlambare materialen kan servicecentrum. tot ontploffing of brandgevaar • Probeer niets anders te leiden. verbranden dan kleine •...
- Page 34 • Richt de Smoking Gun ™ niet op ze worden ingeslikt. Roep een persoon of een ontvlambaar onmiddellijk medische hulp in voorwerp. als er een batterij is ingeslikt. • Vermijd het gebruik van de • Gooi batterijen niet in het vuur, ™...
- Page 35 Onderdelen A. Aan-uitschakelaar E. Siliconenslang B. Verwijderbaar brandcompartiment F. Robuuste behuizing C. Verwijderbaar gaasfilter G. Werkt op batterijen D. Gegoten schacht Classificatiegegevens (4 x 1,5 V AA-batterijen)
- Page 36 Montage Functies 1. Plaats het gaasfilter in de bovenkant van het VOOR HET EERSTE GEBRUIK brandcompartiment en druk het met een Veeg het brandcompartiment en gaasfilter met een vinger omlaag om het in de bodem van het vochtige doek af. brandcompartiment te plaatsen. 2. Plaats het brandcompartiment in de schacht. BEDIENING Duw omlaag totdat de veer rond het brandcompartiment een klein klikgevoel geeft.
- Page 37 5. Wanneer voldoende rook is gegenereerd of Onderhoud houtsnippers zijn gedoofd, zet u de schakelaar terug in de middelste stand om de ventilator uit te schakelen (aangegeven door een cirkel O). en reiniging 6. Laat het apparaat volledig afkoelen nadat het branden is voltooid.
- Page 38 • Zet de ventilator op Hoge snelheid om de brandsnelheid te verhogen. Garantie BEPERKTE GARANTIE VAN 2 JAAR Sage Appliances biedt een garantie op dit product voor huishoudelijk gebruik in genoemde gebieden gedurende 2 jaar vanaf de datum van aankoop tegen defecten veroorzaakt door gebrekkige afwerking en materialen.
- Page 39 Smoking Gun ™ GUIDA RAPIDA...
- Page 40 LA SICUREZZA lontana da pareti, tende e altri PRIMA DI TUTTO materiali sensibili al calore o al vapore. Distanza minima: 20 cm. ® In Sage abbiamo molto a • Prima dell'uso, verificare sempre cuore la sicurezza. Creiamo ™ che the Smoking Gun e commercializziamo montata correttamente.
- Page 41 • Qualsiasi operazione di infiammabili può causare manutenzione diversa dalla esplosioni o incendi. pulizia deve essere eseguita • Usare sempre un fiammifero o ® da un centro assistenza Sage autorizzato. un accendino per appiccare la fiamma in the Smoking Gun ™ • Bruciare solo piccoli trucioli di NON UTILIZZARE bruciatori...
- Page 42 • Evitare di utilizzare the Smoking • Non gettare le batterie ™ in luoghi in cui il fumo nel fuoco, non causare potrebbe attivare rilevatori di il cortocircuito delle batterie fumo o sistemi antincendio. e non smontarle. • Non utilizzare mai the •...
-
Page 43: Componenti
Componenti A. Interruttore ON / OFF E. Tubo in silicone B. Camera di combustione rimovibile F. Involucro robusto C. Filtro a maglie rimovibile G. Funzionamento a batterie D. Tamburo in metallo pressofuso Informazioni sui valori nominali (4 batterie AA da 1,5 V) -
Page 44: Montaggio
Funzioni Montaggio 1. Posizionare il filtro a maglie sulla camera PREPARAZIONE AL PRIMO UTILIZZO di combustione e spingere verso il basso con Pulire la camera di combustione e il filtro a maglie un dito per fissarlo sul fondo di quest'ultima. con un panno umido. 2. Posizionare la camera di combustione nel tamburo. Spingere verso il basso finché la FUNZIONAMENTO molla attorno alla camera di combustione non produce un lieve scatto. 1. -
Page 45: Suggerimenti
6. Lasciare che l'unità si raffreddi completamente Manutenzione al termine dell'operazione. 7. Una volta raffreddata completamente, la e pulizia camera di combustione può essere rimossa liberandola dal tamburo. 1. Prima di eseguire la pulizia, assicurarsi che NOTA l'apparecchio si sia completamente raffreddato e che l'interruttore di alimentazione sia Capovolgere la camera di combustione e batterla impostato sulla posizione OFF. -
Page 46: Risoluzione Dei Problemi
La garanzia copre eventuali malfunzionamenti causati da difetti di fabbricazione o dei materiali. Durante il periodo coperto dalla garanzia, Sage Appliances sarà tenuta a riparare, sostituire o rimborsare l’importo corrispondente ai prodotti difettosi (a sola discrezione di Sage Appliances). Tutti i diritti di garanzia previsti dalla legislazione... - Page 47 Smoking Gun ™ GUÍA RÁPIDA...
-
Page 48: Sage
SEGURIDAD microondas, ni en un quemador a gas o eléctrico. ANTE TODO • Mantén la pistola para ahumar ® En Sage nos preocupa alejada de las paredes, cortinas mucho la seguridad. y otros materiales sensibles Para el diseño al calor o al vapor. Distancia mínima de 20 cm. - Page 49 Centro o un incendio. de servicio autorizado de Sage ® • Usa siempre usa una cerilla • No intentes quemar nada que o un encendedor para encender no sean pequeñas astillas...
- Page 50 • No apuntes the Smoking Gun ™ • No tires las pilas al fuego, a ninguna persona u objeto no las cortocircuites y no las inflamable. desmontes. ™ • Evita usar the Smoking Gun • No desmontes, abras ni tritures en áreas donde el humo pueda las pilas o baterías secundarias.
- Page 51 Componentes A. Interruptor de encendido/apagado E. Manguera de silicona B. Cámara de combustión extraíble F. Carcasa robusta C. Filtro de malla extraíble G. Funciona con pilas D. Cañón de metal moldeado a presión Datos técnicos (4 x pilas AA de 1,5 V)
- Page 52 Ensamblaje Funciones 1. Coloca el filtro de malla en la parte superior ANTES DEL PRIMER USO de la cámara de combustión y pulsa hacia Limpia la cámara de combustión y el filtro de malla abajo con un dedo para encajarlo en la parte con un paño húmedo. inferior de la cámara de combustión. 2. Coloca la cámara de combustión en el cañón. FUNCIONAMIENTO Empuja hacia abajo hasta que el resorte 1.
- Page 53 5. Cuando se haya generado suficiente humo Cuidado o se hayan extinguido las astillas de madera, vuelve a colocar el interruptor en la posición y limpieza central para apagar el ventilador (designado por un círculo O). 6. Permite que la unidad se enfríe completamente 1. Antes de limpiar, asegúrate de que la unidad después de que se haya completado esté...
- Page 54 • Gira el ventilador a alta velocidad para aumentar la velocidad de combustión. Garantía GARANTÍA LIMITADA DE 2 AÑOS La garantía de Sage Appliances cubre este producto para uso doméstico en territorios específicos durante 2 años a partir de la fecha de compra contra fallos causados por mano de obra y materiales defectuosos.
- Page 55 Smoking Gun ™ BSM600/SSM600 MANUAL RÁPIDO...
- Page 56 • Está disponível uma versão transferível deste documento Índice em sageappliances.com • Remova qualquer material de embalagem e etiquetas A Sage ® recomenda a segurança promocionais antes de utilizar como máxima prioridade o dispositivo de cura com fumo Componentes Smoking Gun ™...
- Page 57 • Use sempre um fósforo ou assistência autorizado pela isqueiro para acender os ® Sage materiais no dispositivo de cura • Só deve queimar aparas de com fumo Smoking Gun ™ ; NÃO madeira pequenas, serradura USE um maçarico de cozinha...
- Page 58 • Não aponte o dispositivo de • Mantenha as pilhas afastadas cura com fumo Smoking das crianças. As pilhas podem ™ a pessoas ou objetos ser potencialmente fatais inflamáveis. se forem engolidas. Procure assistência médica imediata • Evite utilizar o dispositivo de na eventualidade da ingestão cura com fumo Smoking Gun ™...
- Page 59 Componentes A. Interruptor On/Off (Ativar/Desativar) E. Mangueira de silicone B. Câmara de combustão extraível F. Invólucro robusto C. Filtro de rede extraível G. Operado com pilhas D. Tambor forjado Informação de classificação (4 pilhas AA de 1,5V)
- Page 60 Montagem Funções 1. Coloque o filtro de rede na parte superior da ANTES DA PRIMEIRA UTILIZAÇÃO câmara de combustão e empurre-o para baixo Limpe a câmara de combustão e o filtro de rede com um dedo para ele assentar no fundo com um pano humedecido. da câmara de combustão. 2. Coloque a câmara de combustão no tambor. FUNCIONAMENTO Empurre para baixo até que a mola em torno 1. ...
- Page 61 4. Quando vir fumo a sair pela extremidade da Cuidados mangueira, pressione a parte superior do interruptor para manter a ventoinha a funcionar a baixa velocidade (designado por 1 linha –). e limpeza Permita que as aparas de madeira ardam sem chama e encaminhe o fumo para onde for 1. ...
- Page 62 Resolução de problemas POSSÍVEL PROBLEMA SOLUÇÃO FÁCIL • Verifique a orientação das pilhas. A ventoinha não arranca. • O interruptor não está ativado na posição de Alta ou Baixa velocidade. • Substitua as pilhas. • Certifique-se de que o filtro da rede não está obstruído. Não é gerado fumo. • Certifique-se de que a mangueira não está obstruída. • Ao utilizar um recipiente, certifique-se de que existe uma saída para exaustão do ar.
- Page 63 Garantia GARANTIA LIMITADA DE 2 ANOS A Sage Appliances fornece uma garantia para este produto para uso doméstico nos territórios especificados de 2 anos a partir da data de compra contra avarias provocadas por defeitos na mão-de-obra e de materiais. Durante este período da garantia, a Sage Appliances irá reparar, substituir ou reembolsar qualquer produto defeituoso (sob o critério exclusivo ...
- Page 64 Netherlands Sweden Österreich: 0800 80 2551 0800 020 1741 0200 123 797 Luxembourg Denmark Sage Appliances France SAS 0800 880 72 080 820 827 Siège social: 66 avenue des Champs Elysées – 75008 Paris 879 449 866 RCS Paris Switzerland...
Need help?
Do you have a question about the The Smoking Gun BSM600 and is the answer not in the manual?
Questions and answers