MicroBoards Technology GX-2 Installation Quick Reference Manual
Hide thumbs
Also See for GX-2:
- User manual (23 pages) ,
- Installation quick reference manual (2 pages) ,
- Installation quick reference manual (2 pages)
Advertisement
Table of Contents
- 1 GX-2 Disc Publisher Installation
- 2 Windows Vista, XP, and 2000 Driver Installation
- 3 Surething CD Labeler Installation
- 4 Zulu2 CD/DVD Mastering Software Installation
- 5 Installation Troubleshooting Guide
- 6 GX-2 Disc Publisher Configuration
- 7 Printer Alignment
- 8 GX-2 Disc Publisher Controller Configuration
- Download this manual
For a more in-depth look at the installation process, please refer
to the Installation section of the User's Manual.
Be sure your computer meets the Minimum System
Requirements as stated in the User's Manual and that
you have read these instructions and the Manual prior
to contacting Microboards Technical Support with
installation or configuration questions!
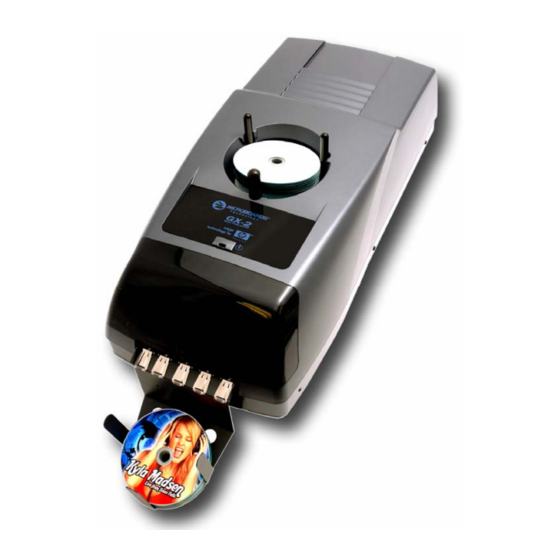
GX-2 Disc Publisher Installation:
Do NOT connect your GX-2 Disc Publisher to
your computer until you are told to do so!!
1. Unpack the GX-2 Disc Publisher and place it in the
selected workspace. This space should have enough
vertical space to allow for easy loading of media into
the input hopper and have enough room to the left of
the GX-2 Disc Publisher to allow access to the reject tray.
2. Insert the GX-2 Disc Publisher Installation disk into the CD/DVD ROM drive on
your computer. The installer should open automatically.
If the installer does not automatically open, click the Start button and select
Run from the Start menu. Click the Browse button and go to the CD/DVD drive,
highlight Setup.exe, click the Open button, then click OK.
Please follow all directions on each window before clicking the Next button.
3. You will first be guided through the hardware setup. Do not click the Next
button until you have completed each step.
4. After the physical hardware setup is complete, you will be instructed to connect
the GX-2 Disc Publisher to the computer. Once this occurs, Windows will find
your new hardware and run through the driver installation process. There will be
three components that need to be installed.
GX-2 Disc Publisher Installation
Quick Reference Guide
5.
Windows Vista:
Drivers for Vista are pre-installed when the GX-2 Installer is
run. By pre-installing the drivers, your PC will install the hardware without
intervention once the USB connection is made.
Windows
XP: Do not allow the
Search the Internet option to attempt
to find the drivers for you. Select
the option to Install from a list or
specific location and click Next.
Check the Search Removable Media
box and click Next.
Windows
2000: Select the option
to Search for a suitable driver, and
click Next. Check the CD-ROM
Drives Box and click Next. Click
the Next button again when you are
notified that the driver has been
found.
6. Once the drivers for this component have been installed, click the Finish button.
7.
Steps 5 and 6 will be performed once for each component of the hardware
installation. The components are: USB Serial Converter, USB Serial Port,
Microboards GX Series, Microboards GX Series (DOT4), and Microboards
Series (STORE). Order of the installation may vary. If the Microsoft Digital
Signature screen appears, click the Yes or Continue Anyway button at the
bottom of the screen.
SureThing CD Labeler will be installed next.
8. SureThing CD Labeler Installation
All print images must be created using SureThing CD Labeler.
A.
Read the Software License and Warranty information and click the I Accept
button to continue the installation of SureThing.
B.
Click the Next button at the
Welcome screen.
C.
To install to the default
directory, click Next on the
Select Destination Directory
screen. If you wish to install
to a different location, select
that location before clicking
Next.
D.
Select the option to add a desktop shortcut and the location in which the
Start Menu shortcut will be created, or make no changes to select the default
locations. Click Next when the locations are suitable.
E.
Click Start on the next screen to install the application.
F.
Click Finish once the installation is complete. You will also have the
opportunity to register the software on-line.
for Windows Vista, XP, and 2000
The Zulu2 CD/DVD Mastering Software will be installed next.
9. Zulu2 CD/DVD Mastering Software Installation:
A.
Click the Next button to begin the Zulu2 installation process.
B.
After the installation process completes, click Finish
the check
from the Reboot Computer box . The computer will need to be
rebooted for the software to operate correctly.
The printer will need to be aligned and the robotics configured prior
to burning and printing disks. Please see the GX-2 Disc Publisher
Configuration Quick Reference Guide on the other side of this page,
or refer to the appropriate sections of the User's Manual.
Installation Troubleshooting Guide:
Hardware not installing on
1. Turn on power to GX-2 Disc Publisher (back panel)
PC
2. Reseat USB connection
3. Installation CD in drive?
Printer not responding
1. Ink cartridge installed correctly?
2. Turn on power to Printer (front panel). Firmly press
Drive not appearing in
1. PC needs to be rebooted
Windows Explorer
2. Mapped drive conflict: Disconnect GX-2 Disc
In order to guarantee quality results from the GX-2 Disc Publisher,
ONLY MICROBOARDS GX-300HC
COLOR INK CARTRIDGE CAN BE USED!
As is true with all printers, the quality of ink cartridge and the quality of the ink
within the cartridge will affect your output. To ensure quality results, the GX-2
Disc Publisher will not operate with any other color ink cartridge in place.
The use of refilled ink cartridges will void your warranty!
without removing
the power button and wait several seconds for the
printer power LED to come on.
Publisher and reboot PC. Disconnect Network
drives and remap to letters near end of alphabet.
Reconnect GX-2 Disc Publisher.
Advertisement
Table of Contents

Related Manuals for MicroBoards Technology GX-2


Summary of Contents for MicroBoards Technology GX-2
- Page 1 2. Insert the GX-2 Disc Publisher Installation disk into the CD/DVD ROM drive on your computer. The installer should open automatically. 6. Once the drivers for this component have been installed, click the Finish button.
- Page 2 7. Start the Zulu2 application. Select Print Only from the Robotics menu. Select software installation prior to configuring the GX-2 provided with the GX-2 Disc Publisher, located on the back of the unit below the a pre-designed full-coverage SureThing disc image.
Need help?
Do you have a question about the GX-2 and is the answer not in the manual?
Questions and answers